Table of Contents
Advertisement
Quick Links
Advertisement
Table of Contents

Related Manuals for Hybrid HMN 285


Summary of Contents for Hybrid HMN 285
- Page 1 User Manual Please read the instructions carefully before use...
-
Page 2: Safety Instructions
Safety Instructions Please read the instructions carefully which include important information about the installation, usage and maintenance. WARNING Please keep this User Guide for future consultation. If you sell the unit to another user, be sure that they also receive this instruction manual. Important: Damages caused by the disregard of this user manual are not subject to warranty. -
Page 3: Installation
The unit’s surface temperature may reach up to 85℃. DO NOT touch the housing bare-handed during its operation. Allow about 15 minutes for cooling the unit down before replacing bulb or maintenance as it could be very hot. Avoid any flammable liquids, water or metal objects entering the unit. If this ... - Page 4 The unit is fully operational in three different mounting positions, hanging upside- down from a ceiling or set on a flat level surface. To avoid internal damage to the unit, never mount the unit on its side as illustrated above. Be sure this fixture is kept at least 0.5m away from any flammable materials (decoration etc.).
-
Page 5: Technical Specifications
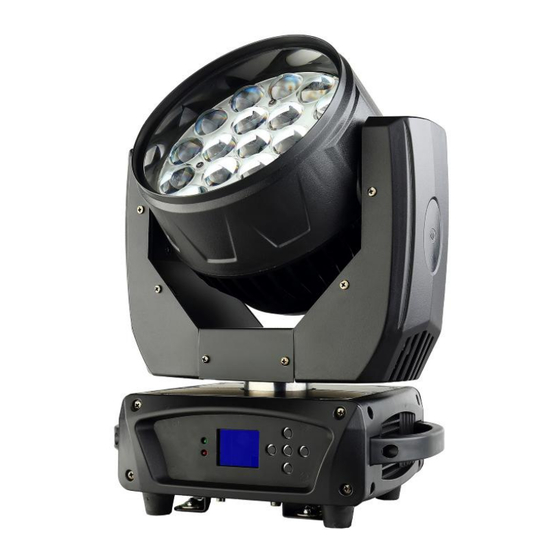
Technical Specifications Power supply - AC 100~240V 50/60Hz Power Consumption - 200W Light Source - 19 X 15w RGBW 4in1 LEDs Movement - Pan: 540° - Tilt: 270° - Pan/Tilt moving speed adjustable. Dimmer - Blackout, 0~100% smooth dimming and strobe effect. Zoom - Motorized linear zoom system Protocols... - Page 6 Turn on the unit, press the MENU button to go into menu mode and press the UP/DOWN button until the required function is shown on the monitor. Select the function by the ENTER button. Use the UP/DOWN button to choose the submenu, press the ENTER button to store and automatically return to the last menu.
- Page 7 Reset Reset Reset Sys Info Software : 1.00 Software Version Hardware: 1.00 Hardware Version Driver: 1.00 Driver Version Default Connection...
-
Page 8: Address Setting
ATTENTION Termination reduces signal errors and can avoid signal transmission problems and interference. It is always advisable to connect a DMX terminal (Resistance 120 ohm 1/4W between pin2 (DMX-) and pin3 (DMX+) of the last fixture). 1. At the last unit, the DMX cable has to be terminated with a terminator. Solder a 120-ohm 1/4W resistor between pin 2(DMX-) and pin 3(DMX+) into a 3-pin XLR-plug and plug it in the DMX-output of the last unit. -
Page 9: Dmx 512 Configuration
button to adjust the address from 001 to 512. Press the ENTER button to store. Press the MENU button back to the last menu or idling let the unit idle one minute to exit menu mode. Please refer to the following table to address your DMX512 channel for the first 4 units. Unit 1 Unit 2 Unit 3... - Page 10 Beam dimmer 0 100% intensity 0 - 255 Zoom Wide narrow 0 - 255 Pan 0° - 540° 0 - 255 Pan fine Pan fine adjustment (Least Significant Byte) 0 - 255 Tilt Tilt 0° - 270° 0 - 255 Tilt fine Tilt fine adjustment (Least Significant Byte) 0 - 255...
- Page 11 Open Random Color Fast Medium Slow Open Beam red Red 0 - 100% 0 - 255 Beam green Green 0 - 100% 0 - 255 Beam blue Blue 0 - 100% 0 - 255 Beam white White 0 - 100% 0 - 255 Note: if Color Calib is set to On, this channel has no effect –...
- Page 12 Aura color wheel effect 0 - 9 Open. RGB mixing enabled 10 - 14 LEE 790 - Moroccan pink 15 - 19 LEE 157 - Pink 20 - 24 LEE 332 - Special rose pink 25 - 29 LEE 328 - Follies pink 30 - 34 LEE 345 - Fuchsia pink 35 - 39...
-
Page 13: Troubleshooting
Troubleshooting The following are a few common problems that may occur during operation. Here are some suggestions for easy troubleshooting: A. The unit does not work, It has no light and the fan does not work 1. Check if it is connected to power and the main fuse. 2. - Page 14 Clean the external optics at least every 20 days. Clean the internal optics at least every 30/60 days.
Need help?
Do you have a question about the HMN 285 and is the answer not in the manual?
Questions and answers