Table of Contents
Advertisement
Quick Links
Advertisement
Table of Contents

Subscribe to Our Youtube Channel
Related Manuals for HT iDM70


Summary of Contents for HT iDM70
- Page 1 ENGLISH User manual Copyright HT ITALIA 2013 Release EN 1.00 - 02/12/2013...
-
Page 2: Table Of Contents
Table of contents PRECAUTION AND SAFETY MEASURES………………….2 PREPARATION FOR USE……………………………………. 4 2.1. Initial checks ................4 2.2. Instrument power supply ............. 4 2.3. Storage ..................4 INSTRUMENT DESCRIPTION……………………………….. 5 ... -
Page 3: Precaution And Safety Measures
1. PRECAUTION AND SAFETY MEASURES The instrument has been designed in compliance with directives relevant electronic measuring instruments. For your safety and in order to prevent damaging the instrument, please carefully follow the procedures described in this manual and read all notes preceded by the symbol with the utmost attention. - Page 4 In this manual, and on the instrument, the following symbols are used: Warning: observe the instructions given in this manual; improper use could damage the instrument or its components. Warning: always prevent the laser from radiating to your eyes, in order to prevent any injury.
-
Page 5: Preparation For Use
2. PREPARATION FOR USE 2.1. Initial checks Before shipping, the instrument has been checked from an electric as well as mechanical point of view. All possible precautions have been taken so that it is delivered undamaged. However, we recommend generally checking the instrument in order to detect possible damage suffered during transport. -
Page 6: Instrument Description
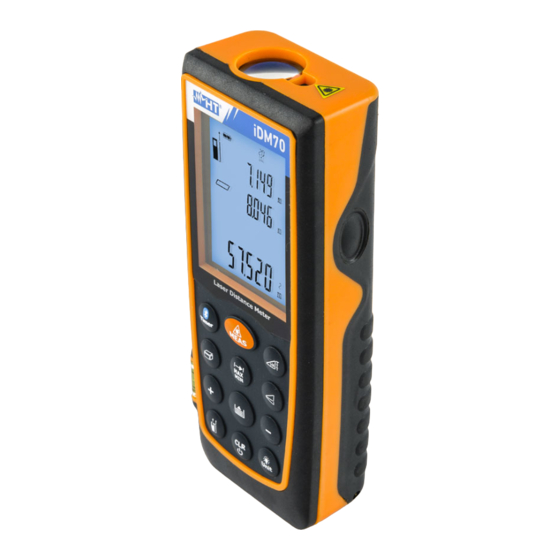
3. INSTRUMENT DESCRIPTION 3.1. Description of the controls Fig. 1: Instrument description Caption Description ON/MEAS key Timer/Bluetooth key single/continuous distance measurement Area/Volume key Air bubble level Key for saving measurement results “+” key OFF/CLR key Reference setting key Tilt/Dimension key Key for indirect distance measurement “-”... -
Page 7: Display Description
3.2. Display description Fig. 2: Description of the symbols at display Caption Description Active laser Front/rear reference Tripod reference Instrument level + stand reference area, volume measurement indirect measures/tilt Distance measurement with dimensions Battery charge level Distance measurement... -
Page 8: General Description Of The Instrument
3.3. General description of the instrument iDM70 has the following functions: Direct measurement of distances expressed in m/in/ft and ft+in Measurement of area and volume Indirect 2- and 3-point distance measurement (Pitagora) Distance measurement in continuous mode ... -
Page 9: Operating Instructions
4. OPERATING INSTRUCTIONS 4.1. Initial operations and settings Press the key to switch on the instrument and the laser pointer. Press and hold the key to switch off the instrument. Press the key to clear (CLR) the last datum shown on the display. - Page 10 Tripod (see Fig. 2 – Pos. 4) Press and hold the key for 2s. Measurement is carried out from the hole where the tripod is inserted Instrument + stand level The instrument is provided with a stand which can be opened to comfortably rest the unit on horizontal surfaces Fig.
-
Page 11: Distance Measurement
4.3. Distance measurement 1. With the instrument in stand-by, press the or the side MEAS key to activate the laser pointer 2. Use the laser pointer to precisely determine the measuring point, keeping the instrument perpendicular as possible with respect to the surface of the object to be measured 3. -
Page 12: Additions / Subtractions Of Measures
Fig. some applications continuous measurement are indicated Fig. 6: Applications of continuous measurement 4.5. Additions / subtractions of measures When measuring distance, it is possible to use the following functions: Function The subsequent measure is added to the previous one. The result of the sum is shown on the resulting display. -
Page 13: Area Measurement
4.6. Area measurement This measurement allows calculating the area of surfaces expressed in m , in or ft 1. With the instrument in stand-by, press the or the side MEAS key to select the desired type of reference (see § 4.2) 2. -
Page 14: Volume Measurement
4.7. Volume measurement This measurement allows calculating the volume of solids expressed in m , in or ft 1. With the instrument in stand-by, press the to select the desired type of reference (see § 4.2) 2. Press the key twice to enter the Area/Volume measuring section. -
Page 15: Indirect 2-Point Measurement
4.8. Indirect 2-point measurement Indirect measurement allows precisely evaluating a distance between two points on a vertical wall (height) exploiting mathematical principle Pythagorean theorem. For accurate measures we recommend using a tripod. 1. With the instrument in stand-by, press the to select the desired type of reference (see §... -
Page 16: Indirect 3-Point Measurement
4.9. Indirect 3-point measurement The instrument performs indirect 3-point measurement in two different modes, described below. Mode “ ” 1. With the instrument in stand-by, press the to select the desired type of reference (see § 4.2) 2. Press the key twice to enter the indirect 3-point measuring section. - Page 17 Mode “ ” 1. With the instrument in stand-by, press the key to select the desired type of reference (see § 4.2) 2. Press the key three times to enter the indirect 3- point measuring section. The symbol “...
-
Page 18: Measurement Of Tilt And Distance
4.10. Measurement of tilt and distance This measurement allows for an evaluation of the tilt with respect to the horizontal by means of an internal sensor and of the distance between two points through trigonometric calculation. For accurate measures we recommend using a tripod 1. -
Page 19: Distance Measurement With Thresholds
4.12. Distance measurement with thresholds The instrument measures distance continuously by fixing two thresholds (a) and (b) in order to precisely define the position of objects along a radial line 1. With the instrument in stand-by, press the key to select the type of reference (see §... -
Page 20: Distance Measurement With Timer
4.13. Distance measurement with timer The instrument allows measuring distances with timer setting (max. 60s). 1. With the instrument in stand-by, press the key to select the type of reference (see § 4.2) 2. Press the key to enter the Timer mode with a... -
Page 21: Measuring Conditions
5. MEASURING CONDITIONS Measuring range The instrument's measuring range is 70m. At night, under poor visibility conditions or if the surface to be measured is in shadow, the measuring range can be reduced. To prevent this, carry out measurements during the day or use luminous plates when the object to be measured has poor reflecting properties. -
Page 22: Error Messages On The Display
7. ERROR MESSAGES ON THE DISPLAY Code Description Solution Press and repeat Calculation error procedure Weak signal reflection, Carry out measurement measuring time appropriate long, distance > 70m or surface <5cm Carry out measurement Too intense reflection of less... -
Page 23: Technical Specifications
2x1.5V type AA LR06 Duration: up to 8000 measurements 0°C 40°C Operating temperature: -10° 60°C Storage temperature: Auto power off: 30s (laser), 3min (iDM70) Size (LxWxH): 135 x 53 x 30mm Weight (batteries 160g included): Mechanical protection: IP54 Bluetooth: 3.0 EDR, range 10m... -
Page 24: Service
10. SERVICE 10.1. Warranty conditions This instrument is warranted against any material or manufacturing defect, in compliance with the general sales conditions. During the warranty period, the manufacturer reserves the right to repair or replace the product. Should the instrument be returned to the After-sales Service or to a Dealer, transport will be at the Customers charge.
Need help?
Do you have a question about the iDM70 and is the answer not in the manual?
Questions and answers