Optopol SOCT Copernicus REVO Installation And Upgrade Manual
Hide thumbs
Also See for SOCT Copernicus REVO:
- User manual (374 pages) ,
- User manual (132 pages) ,
- Service manual (194 pages)
Table of Contents
Advertisement
Quick Links
Advertisement
Table of Contents

Related Manuals for Optopol SOCT Copernicus REVO


Summary of Contents for Optopol SOCT Copernicus REVO
- Page 1 Manufacturer: OPTOPOL Technology Sp. z o.o. ul. Żabia 42 42-400 Zawiercie POLAND www.optopol.com info@optopol.com.pl REVO NX / SOCT Copernicus REVO Installation/upgrade manual Ver. 2.0 rev. E This manual is dedicated for authorized personnel only.
- Page 2 Date of review: July 2017 For Technical Service and support contact Optopol Technology Sp. z o.o. Service Department. service@optopol.com.pl or Tel. +48 32 67 09 173 ext. 230 Before contact request make sure that you followed below manual step by step.
-
Page 3: Table Of Contents
Table of Contents Introduction ............................4 Proper steps selection! Must read! ....................4 Minimum computer system requirements .................. 5 1.1.1 Capture station ........................5 1.1.2 Review station ........................5 Computer preparation ......................... 6 Connecting USB 3.0 communication cable .................. 6 Motherboard drivers installation .................... -
Page 4: Introduction
1 Introduction This manual describes procedure of software and drivers installation on SOCT Revo and Revo NX devices. The installation procedure is divided into four steps : Computer preparation (PC motherboard drivers installation, Intel drivers) Operating System configuration Drivers installation or upgrade on Device PC Software installation/upgrade and setup 1.1 Proper steps selection! Must read! Before starting to operate SOCT application it is necessary to prepare the operating system, install SOCT... -
Page 5: Minimum Computer System Requirements
Minimum computer system requirements 1.1.1 Capture station Processor Intel® Core™ i7 3.0 GHz or higher No of cores: 4 physical cores min. 16 GB, 32 GB recommended Operating system Windows 7 Professional 64-bit, Windows 10 PRO 64bit , Minimum 500 GB CD/DVD Recordable Graphic card... -
Page 6: Computer Preparation
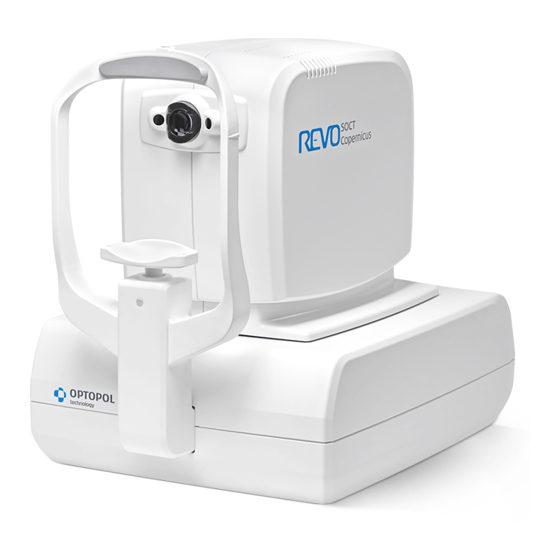
See image below. All sockets and plugs are different so it is not possible to connect plugs improperly. The figure below shows the rear panel view of SOCT Copernicus REVO. Fuses socket USB 3.0 Type B... -
Page 7: Motherboard Drivers Installation
2.2 Motherboard drivers installation 1. Install all required drives provided by PC manufacturer. Note that in some cases default drivers installed by OS Windows do not support USB 3.0 bridge host to allow Full speed USB 3.0 transmission. In this case update necessary drivers manually(use Pc producer website and look for drivers update) 2. -
Page 8: Os Windows 7 Configuration
3 OS Windows 7 configuration To effect the procedure of preparation of operating system you need a user account with Admin rights. 3.1 Screen resolution 1. The SOCT application requires a Full HD screen resolution of 1920 x 1024 pixels. 2. -
Page 9: Configure Power Balance Plan And Screen Saver
3.2 Configure Power balance plan and screen saver 1. SOCT Copernicus REVO device and application require modified power plan settings. Set the screen saver, power options on the computer as shown in the table. Below, you will find detailed instructions. - Page 10 4. In section ‘Screen saver’ select ‘(None)’ item, Uncheck check box ‘On resume, display logon screen’. Then click on ‘Change power settings’. 5. On a ‘Balanced’ recommended power plan, click ‘Change plan settings’ 6. Click on ‘Change advanced power settings’...
- Page 11 7. Click on [Hard disk] → [Turn off hard disk after] → select “Never”. 8. Then, click on [Sleep] → [Sleep after] → select “Never”, [Allow hybrid sleep] → select “Off”, [Hibernate after] → select “Never”. 9. Then, click on [Display] → [Turn off the display after] → select „Never”.
- Page 12 10. To apply modified power plan, click on [OK] button. 11. In a ‘Turn off the display’ field select “Never” and in ‘Put the computer to sleep’ select ‘Never’. Click on [Save changes] button to close the window.
-
Page 13: Windows Update
3.3 Windows Update To run SOCT Copernicus REVO application properly it is required to install the newest Microsoft Windows updates. After finishing updating the Windows it is required to switch off automatic updates. NOTE: Before Windows Update process starts, network connection should be established. - Page 14 4. System starts checking for updates. It may take a few minutes. 5. At the end, system displays information about number of available updates. To start installation, click on [Install updates] button. 6. System starts downloading updates. The process starts automatically and may take several minutes.
- Page 15 9. Repeat steps from 3 to 8 until information ‘There are no updates available for your computer’ appears. 10. Install also optional updates especially if they are referring to USB ports communication.
-
Page 16: Disable Automatic Windows Updates
3.3.2 Disable automatic Windows updates. 1. After installing updates it is required to switch off Automatic Updates. Click on Start → Control Panel → System and Security → Windows Update → Change settings. at Form ‘Important updates’ list select ‘Never check for updates (not recommended)’ item and click on [OK] button. -
Page 17: Uninstall Windows 10 Update Reminder Number Kb3035583
2. Uncheck check boxes ‘Windows Update’, ‘Check for updates’ and ‘Virus protection’. To continue, click on [OK] button. 3.3.4 Uninstall Windows 10 update reminder number KB3035583 In case Device and software will be used on Windows 10 below point is not applicable. For safety reasons it is recommended to remove tool Windows 10 upgrade reminder. -
Page 18: Antivirus Protection
7. On the list of available updates to install find package number KB3035583. Click right mouse button, then from submenu select ‘Hide update’. Click [OK] to close this window. 3.4 Antivirus protection It is recommended to use Antivirus protection. IMPORTAINT NOTE: Each antivirus protection software has to have exceptions for SOCT installation folder and all SOCT software components. - Page 19 3. Click on [I Accept] button to confirm the License Terms. 4. Select ‘I do not want to join the program at this time’ radio button, then click [ Next > ] button. 5. Select check box ‘Scan my computer for potential threats after getting the latest updates’, then click on [Finish] button.
- Page 20 6. Click on [Yes] button in User Account Control window. 7. Update process starts automatically. It can take a few minutes. 8. After update process, the scanning of your computer starts automatically. It can take a few minutes.
-
Page 21: Configure Date Format
9. At the end of scanning process, window with status appears: ‘Scan completed’. Close this window using [ X ] button. 10. After closing the Microsoft Security Essentials window, the Internet Explorer window appears. Just close this window by pressing [ X ] button. 3.5 Configure Date format If required you can customize date format display in SOCT application to your local requirements: e.g. - Page 22 2. On Customize format-> Date tab page, in field ‘short date’ enter using keyboard required data format of the date: e.g. dd-MM-yyyy. 3. To confirm changes, click on [Apply], then click on [OK] button. 4. To confirm changes, in Region and languages window, click on [Apply] button, then [OK] button.
-
Page 23: Soct Drivers Installation
4 SOCT drivers installation Note: During SOCT drivers installation process, SOCT Copernicus REVO device should be connected to the computer via USB 3.0 slot and turned on. 1. After plugging USB cable into the computer wait a while until system recognizes all new SOCT devices. - Page 24 4. Check both check boxes DFx 21AUC03 , then click on [Next >] button. 5. In ‘Windows Security’ click on [Install] button to start the drivers installation process. 6. Wait until Installation process is done. 7. To finish the installation process click on [Finish] button.
-
Page 25: E2V Camera
4.1.2 e2v camera In case of installing SOCT software version 7.1.0 or higher it is obligatory to perform OCT camera firmware upgrade. In order to do so use camera firmware updater software or contact service division. 1. To Start installation of eye preview cameras, plug the Flashdrive REVO provided with the device. 2. - Page 26 8. To finish installation process, click on [Finish] button. 9. After drivers installation process, in the Device Manager there are visible two Imaging Source cameras and Camera OCT USB3 camera.
- Page 27 Two OptoCam-1 cameras b) One AVIIVA SM2USB3 OCT camera c) One SOCT Copernicus REVO device. Note: After successful driver installation when you change the USB port at the PC, the system will automatically start installation of the drivers. Wait until system finishes the process to start SOCT application.
-
Page 28: Software Installation On Windows 7, 10
5 Software installation on Windows 7, 10... NOTE: SOCT software is compatible with Windows 10 OS only from software version 7.1.0. and higher. 1. Before installing software please perform Windows UPDATE. Make sure that Intel updates are installed( INTEL 14.35.1.69 and 10.1.2.80 available in optional updates in Windows UPDATE center) SOCT REVO sn. - Page 29 6. Confirm license agreement.
- Page 30 7. Select installation folder. Make sure that there is enough free space in selected location. Suggested location is: C:\\Program files\Optopol\..To change installation folder press [Browse] button. To start installation process, click [Next] button. In case of software update select update option and press Next to continue. All results and settings will remain unchanged.
- Page 31 9. Agree to VC++ license agreement. Mark checkbox in left bottom corner and press Install/Zainstaluj. In case you will be asked to restart the PC press restart later.
- Page 32 10. After installation process is completed press close and restart the PC. 11. Start the software and continue its configuration.
-
Page 33: Soct Copernicus Software Configuration
6 SOCT Copernicus software configuration. 1. Start the SOCT software, a login screen will appear. DO NOT ENTER ANY Login or Password just press[LOGIN] button to start user wizzard. 2. Follow instructions displayed on the screen and adjust the software settings to your preferences. - Page 34 Create new local database- in case database will be located on curently used PC connected to SOCT device. Select database file storage location and examination results storage. When folder has different location than databse file press “Select below " and Select button to indicate folder directory.
- Page 35 Create new remote database- used to create server located database with a use of server software(firebird). Provide Address of the server software- host name or IP address. Enter server software login and password. For more details see chapter 7 of this manual.
- Page 36 Connect to existing remote database- Can be used on SOCT device Pc and also viewing station software. In that case this software as a viewing station connects to external- network location containing server application(firebird) with database file. 4. After selecting connection type select [Next] and create new user account. Enter login, real name, password twice and press[ Next].
- Page 37 6. Configuration is complete. 7. Use your Login and Password to start the software. In case any settings should be changed enter Login and Password and press [Setup] while startup screen is displayed. NOTE: Be sure to remember login and password as it is obligatory to enter it every time the software is started.
-
Page 38: Networking
7 Networking In order to configure remote viewing stations, a database storage engine should be installed. We have two options: firebird(preferable compatible from version 7.1.0), mySql. First configure database server then install SOCT software. SOCT REVO software should also be installed on PC where database server is located. This software should be configured as local new remote database. -
Page 39: Firebird Engine Installation
3. Turn off Windows firewall for home and network connections. 4. If needed particular firewall/antivirus software exceptions can be created for: Firebird/MySql server application SOCT software on server PC location. 7.1 Firebird engine installation. 1. Download firebird Installer server from https://sourceforge.net/projects/firebird/files/firebird- win64/3.0.1-Release/Firebird-3.0.1.32609_0_x64.exe/download... - Page 40 2. Install firebird on your PC. Use default settings.
- Page 41 3. Read and to continue accept the agreement. 4. Press [Next].
- Page 42 5. Select installation location. Leave default. 6. Press [Next].
- Page 43 7. Press [Next] 8. Press [Next] 9. Create database system administrator password. Suggested:”soct”. Press [Next]...
- Page 44 10. Press [Install] 11. Press [Next]...
- Page 45 12. After installation –What Next is not necessarily. Press [Finish]...
- Page 46 13. Find folder C:\Program Files\Firebird\Firebird_3_0 and edit It’s settings. Properties> security>add all control rights. Add locations that should have the access to database or enter Everyone option.
- Page 47 14. Go to sharing options and share this folder to all users with read/write rights.
- Page 48 17. Install SOCT REVO software but don’t start the software yet. Later see chapter 8.3 18. Copy “fbclient.dll” file from C:\Program Files\Firebird\Firebird_3_0 and paste it to soct software installation directory on server and viewing stations: SOCT installation folder: C:\Program Files\Optopol\SOCT x.x.x.
- Page 49 19. Configure database software after starting it according to chapter 8.3...
-
Page 50: Mysql Database Engine Installation
7.2 MySQL Database engine installation 1. Download MySQL Installer server from http://dev.mysql.com/downloads/mysql/ 2. Run MySQL server community installer file. Verified the License Agreement. If you accept conditions select the custom installation. - Page 51 3. Select to install MySQL server x.x.x – X64 MySQL Workbech x.x.x – X64 4. On the Check requirement tab system verify all required libraries. As in this case shows missing Microsoft Visual C++ 2013 Runtime 64 bits in not installed. Find on Microsoft webpage all missing components, download them and install.
- Page 52 5. If still any components is missing system display below warning. If there is not warning continuous normally. 6. Click next to start installation process 7. Specify Type and networking details if required or use default settings and click [Next] details.
- Page 53 8. Setup Root password on the server. It is important to type appropriate password. Do not forget it(suggested “soct”). 9. Press [Add User] to create MySQL User Account with admin rights(suggested password “soct”) 10. Type the username, set DB Admin rights (role) and select [In this case “soct”]...
- Page 54 11. In standard system on Windows Service windows click [Next] with selecting Standard System Account 12. In standard setting press [Next] on the Plugins and extension tab...
- Page 55 13. Press [Execute] to apply configuration. 14. Click Next when configuration is complete.
- Page 56 15. Run MySQL Workbench. Widnows Start\MySQL\MySQL Workbench x.x.x Click the Local instance MySQL 16. Connect to the server. Type Root password. In this manual password was set in point 8(soct). 17. Create schema. Press right mouse button on schemas list. Select Create scheme… The name of schema has to be ‘soct’...
- Page 57 18. Confirm schema by pressing Apply 19. Press finish to Apply SQL script...
- Page 58 21. In this step select proper Rights and click [Apply]. 22. Copy ‘libmysql.dll’ from folder where MySQL is installed C:\Program files\MySQL to folder where SOCT is installed e.g. C:\Program files\Optopol\SOCT 7.0.0. It necessary that used files comes from current MySQL release.
-
Page 59: Soct Application Settings For Networking
7.3 SOCT application settings for networking For efficient work it is required 1Gb/s transfer speed and the cable connection. Note: Wifi is not enough efficient to transfer Angio exams. NOTE: If existing database is being changed to NETWORKING - remote type. All exams should be exported and imported again after changing settings. - Page 60 3. Configure local server settings. In case when database is stored on the PC type “localhost” as Address. In the ‘Select examination storage location’ path please enter path where examination data is stored. The path must to be in networking standard e.g. \\revoserver\SOCT_data or ip address \\172.16.254.1\SOCT_data.
- Page 61 Create user account if you haven’t created it previously.
- Page 62 6. In case of using Wizard system asks Select device you want to use. On capture station mark SOCT Copernicus Revo on review station leave unmarked.
-
Page 63: Setting On The Viewing Station
1. Before starting the software on the viewing station PC, make sure you copy “fbclient.dll” file from (C:\Program Files\Firebird\Firebird_3_0) located on SERVER PC to SOCT installation folder on Viewing Station PC(C:\Program Files\Optopol\SOCT x.x.x) In Case of using MySql server copy ‘libmysql.dll’ file from (C:\Program files\MySQL) located on... - Page 64 3. Type name of the computer in the network group or IP address. Enter login and password for MySQL database. 4. On capture station mark SOCT Copernicus Revo on review station leave unmarked. 5. Start the software and log in as desired user created on main server software or add more users...
-
Page 65: Troubleshooting
8 Troubleshooting Q1. The SOCT application is connected with the device but I get error messages when I open the Acquire tab or during work in Acquire tab. A1. If Fast Speed USB 3.0 Connection is not available in the system, Aviva camera is not able to work in required mode. - Page 66 (x.x.x_Install&update.zip\x.x.x Install & update\Other\DeviceUpgrade) available on Optopol FTP server or on USB flash provided together with the device. DOES NOT concern Revo nx devices. NOTE!!: Before starting upgrade procedure it is mandatory to perform Windows UPDATE after all windows updates are installed disable updates as instructed in chapter 3.3...
- Page 67 9. If you start firmware upgrade process, just wait until its finished. If progress bar doesn’t start showing any progress by 30 seconds, check if Windows installed drivers for STM32 bootloader. If not, you can install those drivers from stm32bootloader drivers.zip file(Other/Device Upgrade/stm32bootloader).
- Page 69 13. Proper upgrade process finishes with information: “Now restart SOCT device by turning off power switch, unplug USB 3.0 cable.”(from SOCT device not PC), wait minimum 5 seconds and connect the USB cable back(make sure screws are tight) and turn on the device. Turn the SOCT off and unplug and plub back the USB 3.0 cable.
Need help?
Do you have a question about the SOCT Copernicus REVO and is the answer not in the manual?
Questions and answers