
Related Manuals for Optopol SOCT Copernicus


Summary of Contents for Optopol SOCT Copernicus
- Page 1 Manufacturer: OPTOPOL Technology S.A. ul. Żabia 42 42-400 Zawiercie POLAND www.optopol.com info@optopol.com.pl SOCT Copernicus User Manual Software Version 4.3.x User Manual Rev. C 0197 248002...
-
Page 2: Table Of Contents
ONTROL PANEL FUNCTIONS 8.3 F ............................37 UNDUS CAMERA IMAGE 8.4 I ............................41 MAGE PANEL CONTROL 8.5 E ..........................42 DIT RECOGNITION OF LAYERS 8.6. R ........................... 43 ETINA THICKNESS MEASUREMENT SOCT Copernicus User Manual Version 4.3.x rev. C... - Page 3 12.3.1 Retina Numerical ............................ 84 12.3.2 Retina Graphical ............................. 85 12.3.3 Glaucoma Symmetry Analysis ......................... 86 12.4 EXAMINATIONS CORRELATION ........................87 ANTERIOR ANALYSIS ............................88 13.1 C ............................89 ORNEA ANALYSIS TAB SOCT Copernicus User Manual Version 4.3.x rev. C...
- Page 4 2.3 C IRIS ........................112 OPERNICUS ERVER INSTALLATION 2.4 M ............................. 115 ODULE CONFIGURATION 2.5 FAQ ................................. 117 APPENDIX B ................................121 ..............................121 ARK POSITIONING APPENDIX C ................................122 ..............................122 INFORMATION SOCT Copernicus User Manual Version 4.3.x rev. C...
-
Page 5: Description Of The Device
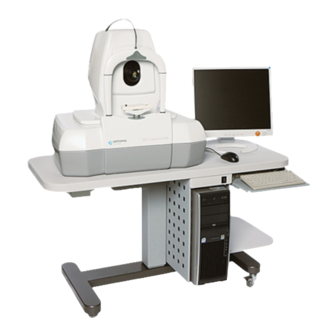
SOCT Copernicus uses Spectral domain Optical Coherence Tomography method to obtain 3- dimensional cross-section images of the retina. SOCT Copernicus is an optical coherence tomography system indicated for the in vivo imaging and measurement of the retina, retina nerve fiber layer, and optic nerve head as an aid in the diagnosis and management of posterior segment diseases The device produces a light beam, which is focused on the human retina. -
Page 6: Symbol Information
Sign conformity with essential requirements – The Medical Device Directive 93/42/EEC Class 1 Laser Device Caution: Federal law restricts this device to sale by or on the order of a physician or practitioner SOCT Copernicus User Manual Version 4.3.x rev. C... -
Page 7: Recommended System Requirements
CD/DVD writer Video card: OpenGL support, ATI Radeon 4850 512 MB or faster 1024 X 768 resolution Communication: 1 available USB port Extension slots: 2 available PCI slots 1 available PCI Express (x16) SOCT Copernicus User Manual Version 4.3.x rev. C... -
Page 8: Unpacking And Installation
3.1 Unpacking SOCT Copernicus This section describes how to unpack the device shipped from a factory. The SOCT Copernicus is shipped in a special box, which protects it from mechanical damages during transport. The box has got four latches shown in detail in pictures below. - Page 9 Figures below show how to unpack SOCT Copernicus from this box. Now shift SOCT Copernicus to the left and then lift it up. Put the SOCT on the flat stable table. After unpacking, one should check the whole set for any mechanical damages, cables damages, etc.
-
Page 10: Connecting Cables
3.2 Connecting cables To connect the SOCT Copernicus to a computer, you need five cables shipped with the device: Copernicus Camera link cable – connected to SOCT (not detachable), RS232 cable Video/synchro cable connected with one plug,... - Page 11 Figure below shows rear panel view of SOCT Copernicus. Power switch Power connector Video / Synchro Fuses socket Camera link cable RS232 RS232, video and synchro cables are merged together as shown below. First connect all signal cables described above and after that check the connections once again. In the next step connect power supply cables.
-
Page 12: Device Connection
The SOCT Copernicus is connected to the PC using RS232 and Video/Synchro cables. The SOCT Copernicus must be directly plugged into the mains with protective earth. Connect the PC, printer and monitor into the multiple portable socket-outlet, which is directly connected to the Separating Transformer. -
Page 13: Factory Default Calibration And Configuration
The SOCT Copernicus system complies with all requirements of the directive 93/42/EEC (MDD - Medical Devices Directive). The SOCT Copernicus is type B applied parts (chin rest support and forehead support ) and class I protection against electric shock. Usually SOCT Copernicus is a part of larger Medical System, which consists of many other medical and non- medical devices. - Page 14 SOCT Copernicus device providing even more safe solution. No user serviceable parts are inside SOCT Copernicus device. Light source is included inside the device. Removing the covers can be done only by authorized personnel.
-
Page 15: Soct Copernicus Software
4. SOCT Copernicus SOFTWARE 4.1 Running SOCT Copernicus application After the Windows operating system is started and initialized, it is possible to run SOCT Copernicus application. Click “Start” button and go to SOCT group. Click SOCT icon and the application will be loaded and activated. -
Page 16: Main Window
5. MAIN WINDOW The patient tab will appear on the main window after the SOCT Copernicus HR application is started. Patient tab enables the user to easily manage patients’ database: add new patients to the database, delete patients from the database, edit patients’... -
Page 17: Registering New Patients
If computer notices that the patient being entered is already registered in the database, a warning message will appear. If computer realizes, that the name of currently entered patient is already in database but the date of birth is different, it will display a warning message. SOCT Copernicus User Manual Version 4.3.x rev. C... -
Page 18: Editing Patient's Personal Data
List of all patient’s Fundus image examinations Thumbnail of scanned image Click to delete selected Click to Export selected Click to Import examination examination examination examination examination examination Click to start analysing examinations SOCT Copernicus User Manual Version 4.3.x rev. C... -
Page 19: Filter
2. Press the right mouse button on and press [Cut examination] 3. Select patient on the list where you wish to move examination 4. Press the right mouse button and choose [Paste examination]. SOCT Copernicus User Manual Version 4.3.x rev. C... -
Page 20: Export Examination/S
5.8 Export examination/s The SOCT Copernicus offers the ability to export examinations data. Thanks to the option patients can receive CD disc with reports, movies, tomograms in format which can be easily reviewed by another specialist. 5.8.1. Burn examinations on CD/DVD Burning/Saving steps 1. -
Page 21: Examination Window
Enhancement preview Improves live fundus preview. Color mask Toggles live OCT image in gray-scale or color. Lines on the vertical and horizontal window indicate proper position of tomograms. SOCT Copernicus User Manual Version 4.3.x rev. C... -
Page 22: Device Movement Controls
NOTE! ALWAYS CHOOSE THE REFRACTION POWER EXPERIMENTALLY CHECKING THE REFRACTION POWER ABOVE AND UNDER INITIAL VALUE IN ORDER TO OBTAIN THE BEST SATURATION OF SCANS. Clicking refraction value resets value to 0.00D SOCT Copernicus User Manual Version 4.3.x rev. C... -
Page 23: Joystick Control
Use scroll mouse button to move the head back and forth. Drag the tomogram and move to desired position. Adjust tomograms on the vertical and horizontal window. Press [Start] button on the screen or on the joystick when you want to start measurement. SOCT Copernicus User Manual Version 4.3.x rev. C... -
Page 24: Selection Of Scanning Pattern Mode
B-scans in highest resolution, Circle scanning program. This program enables a single B-scan in high resolution around the disc. This way of scan is used to measure the RNFL thickness around the optic disc. SOCT Copernicus User Manual Version 4.3.x rev. C... -
Page 25: Customizing Scan Parameters
Computer calculates the total number of A-scans and the examination time. After the changes have been made, user can press [OK] button to transfer new scan parameters to SOCT Copernicus or [Save as a default] new parameters. NOTE. Scan patterns in scan mode have different settings. -
Page 26: Viewfinder" Mode
NOTE: In case when system is not able to keep proper position of retina (e.g. patient is shaking) operator has to switch off tracking and make exams manually. SOCT Copernicus User Manual Version 4.3.x rev. C... -
Page 27: Tomogram Positioning
Move the tomogram to desired position. It is possible to move tomogram also when it is reversed. Horizontal scan Vertical scan Click to turn on/off color mask Move tomogram by joystick to desired position SOCT Copernicus User Manual Version 4.3.x rev. C... -
Page 28: Scan Positioning
Click the examination you want to repeat. Use filter to find desired examination more easily. DRAFT/PRE-RELEASE/CONFIDENTIAL SOCT Copernicus User Manual Version 4.3.x rev. C... -
Page 29: Conducting Examination
9) After examination is over, computer will move the scanning head away from patient and transfer the captured image into database. SOCT Copernicus User Manual Version 4.3.x rev. C... -
Page 30: Disc Area Examination
Operator is able to save own settings as a default program e.g. in order to: reduce time of examination, obtain more detailed reconstruction of the retina. SOCT Copernicus User Manual Version 4.3.x rev. C... -
Page 31: Anterior Measurement 1
Corneal analysis is an optional feature that may not be activated on all instruments. If you do not have this feature and want to purchase it, contact Optopol’s distributor. SOCT Copernicus User Manual Version 4.3.x rev. C... -
Page 32: External Fixation
With the external fixation method, the patient uses the second eye to fixate on a external target light. The SOCT Copernicus is equipped with an external fixation target arm. It is attached at the top of the forehead support. Its position it is set manually for central or disc fixation. When you select external fixation target, instruct the patient to look at the green blinking target light at the end of the external fixation arm. -
Page 33: Tips For Examination
On the picture above shows scan upside down, patient’s eye is too far from the device’s head. Move the device forward. You can get a proper examination by moving the machine head forward. SOCT Copernicus User Manual Version 4.3.x rev. C... - Page 34 It is possible to cancel tomogram calculation. Canceling will stop calculations. Current examination will not be saved to the database. Click this button to cancel calculation. SOCT Copernicus User Manual Version 4.3.x rev. C...
-
Page 35: Results Review Window
Threshold control panel Imaging and Analysis tools Click to start printout manager Cyst Analysis Menu Diagnosis Tomogram Selection Attachments tab RNFL thickness plot Retina RPE deformation thickness plot /thickness tab Information panel SOCT Copernicus User Manual Version 4.3.x rev. C... -
Page 36: Control Panel Functions
When examination with 3D scan profile has been taken, fundus preview can be used to select scan. Click on arbitrary point in fundus preview field to select B-scan. Selected scan will be indicated with green line. SOCT Copernicus User Manual Version 4.3.x rev. C... -
Page 37: Fundus Camera Image
Attached image can be imported from BMP, JPG, TIFF, PNG image file. In order to add fundus picture, open required examination and click ‘Menu’ button at ‘Result review’ window. Then select ‘Import Fundus camera image’ item. Click ‘Menu’ button Select: ‘Import Fundus camera image’ item. SOCT Copernicus User Manual Version 4.3.x rev. C... - Page 38 Shape of mouse pointer will be changed into double end arrow. Press and hold left mouse button then move mouse, (holding down left mouse button all the time). Release mouse button at the destined point. SOCT Copernicus User Manual Version 4.3.x rev. C...
- Page 39 Shape of mouse pointer will be changed into cross arrows. Press and hold left mouse button then move mouse, (holding down left mouse button all the time). Release mouse button at the desired point. SOCT Copernicus User Manual Version 4.3.x rev. C...
- Page 40 In order to zoom both images: fundus reconstruction and fundus camera image use Zoom control slider. It is possible to change transparency of fundus reconstruction image. Use ‘Transparency control slider’. All changes on ‘Fundus camera image’ tab will be saved automatically when closing ‘Result review’ window. SOCT Copernicus User Manual Version 4.3.x rev. C...
-
Page 41: Image Panel Control
Change brightness level on tomogram Contrast: Change contrast level on tomogram Default: Restore contrast and brightness settings Auto Contrast: Displays tomogram with that same level of brightness and contrast for every exam. SOCT Copernicus User Manual Version 4.3.x rev. C... -
Page 42: Edit Recognition Of Layers
Correction can be used for fovea and disc analysis. It is enabled only after analysis is done. [Reanalyze] function is used to recover default recognition of layers. It is helpful in reanalysis of examinations taken with previous software versions. SOCT Copernicus User Manual Version 4.3.x rev. C... -
Page 43: Retina Thickness Measurement
Green line: Junction of IS and OS layer. Sky-blue: Inner boundary of RPE Dark blue line: Outer boundary of the RPE layer (Brusch membrane)/Choroid White line: parabolic fit for end of RPE layer SOCT Copernicus User Manual Version 4.3.x rev. C... -
Page 44: Distance Measurement
There are no limitations in number for markers you can add. You can easily hide the layer with distance markers by means of unmark Measurements checkbox. Distance measurement tool SOCT Copernicus User Manual Version 4.3.x rev. C... -
Page 45: Cysts Analysis
8.8 Cysts analysis SOCT Copernicus software has the possibility of analyzing the cysts and their volume. In order to proceed with the analysis of the cyst, scroll the tomograms from up to down, finding the first tomogram where you can already detect the first part of the cyst, and enabling the cyst edit mode. -
Page 46: Mark And Edit A New Cyst
Place mouse pointer over the cyst and click right button. The edit popup menu will appear - then choose 'Manual'. In manual mode shape of cyst can be changed by replacing points. SOCT Copernicus User Manual Version 4.3.x rev. C... - Page 47 After editing cysts, close window by clicking 'Close' button. NOTE: In a tomogram>info tab there is a list of tomograms on which cysts are marked. When you click number of scan on the list, a selected tomogram will be shown. SOCT Copernicus User Manual Version 4.3.x rev. C...
-
Page 48: Editing Marked Cysts
It is possible to stop recognition by [Stop] button. After cysts recognition the check box Cyst in the 3D window will be enabled. The software enables to calculate volume of recognized cysts. SOCT Copernicus User Manual Version 4.3.x rev. C... -
Page 49: Retina Analysis Charts
2 out of 20 normal eyes (10%) will fall above or below green. Disclaimer: Optopol is not offering and does not offer advice or instruction in the diagnostic interpretation of OCT images. It is the clinician’s responsibility to make diagnostic interpretations of OCT scans. -
Page 50: Rpe Charts
Cyst information Optopol provides SOCT QI (Quality Index) to enable the user to make judgments about the technical quality of scans. The Scan Quality Index QI interpretation is as follows: Images with QI values below 4 (shown in red) – re-examination is recommended. -
Page 51: Attachments Tab
‘Save’ button and the selected file will be saved on a hard drive in specified directory. When user clicks [Show attachment] button, selected file will be opened using windows registered default application for this file type. SOCT Copernicus User Manual Version 4.3.x rev. C... -
Page 52: Diagnosis Tab
In ‘Description’ field user can place examination description. Patient group Any remarks can be entered here 8.15 Tomogram Selection Window This tab enables faster preview of sequence of tomograms. Click to show selected tomogram SOCT Copernicus User Manual Version 4.3.x rev. C... -
Page 53: Printout Manager
8.16 Printout Manager The SOCT Copernicus enables you to edit printout of examination results, thanks to a print out manager, which enables the user to choose freely what to add in the print out. And how to organize it in the space of the Print out. Operator can prepare printout in four different ways: Quick printout –... -
Page 54: Quick Printout
This operation can take few seconds. [Add Header Image] - The SOCT Copernicus enables you to customize your analysis printouts with a clinic name and logo (or other graphic). Once selected, this element will appear in the top of all printouts. -
Page 55: Customized Printout
8.16.3 Customized printout The SOCT Copernicus enables to customize printouts. It is possible to create and save operator templates. To save the template type the name of new template and press [Save Template] to save any changes. Next time when you are printing the results, you can use your own layout. Quick Print template can be modified by operator. - Page 56 In case when map on the printout contains tomogram, it is possible to remove black noise above and below the tissue. Move cursor over tomogram – a slider above tomogram appears. Move that slider to desired degree to remove noise above retina. SOCT Copernicus User Manual Version 4.3.x rev. C...
-
Page 57: Add To Print Manager Method
NOTE: When you start printout for the first time, you should see printout window with four objects added - objects are located automatically. The SOCT Copernicus software stores last setting before closing printout window. NOTE: Setting will not be stored when you use [Generate report] button. -
Page 58: Export To Iris
Flip Tomograms – This function flips a chosen single B-scan. This function is enabled only for the B-Scans which have been taken with the anterior chamber adapter. SOCT Copernicus User Manual Version 4.3.x rev. C... -
Page 59: Three Dimensional Visualization
To finish click [Stop] button, which appear instead of play. [Add to printout] – enables to add current view to printout [Picture size slider] – enlarges and reduces size of 3D reconstruction. SOCT Copernicus User Manual Version 4.3.x rev. C... - Page 60 Click one of six balls color (clicked ball changes from grey to red) and then user can slice tomograms by moving ball along the red line. Use scroll button to slice tomograms. SOCT Copernicus User Manual Version 4.3.x rev. C...
-
Page 61: Displaying And Highlighting Selected Retina Layers
With ‘Highlight’ checkboxes it is possible to choose, which retina layer is highlighted e.g. on the right image vitreous body highlight option is marked. With ‘Visible’ checkbox it is possible to choose, which retina layers are shown or hidden. SOCT Copernicus User Manual Version 4.3.x rev. C... -
Page 62: Peeling Layers
Advanced 3D enables peeling the retina layers. Marked layers will be peeled during move of red ball over tomograms. Operator can separately peel each layer. Easiest way to restore view is to use [Reset] button SOCT Copernicus User Manual Version 4.3.x rev. C... -
Page 63: Tuning Of The Picture
A-scans that will not be displayed on the screen. Images obtained by setting different minimal transparency thresholds for vitreous bodies: Example of reconstruction with different retina threshold level. SOCT Copernicus User Manual Version 4.3.x rev. C... -
Page 64: Display Options
When a surface map is shown, the checkbox in the display option “Convex map” is enabled, and the user can flatten the map. Click, hold and move to change position of the map SOCT Copernicus User Manual Version 4.3.x rev. C... - Page 65 Display options offer the user to change the view of scene where reconstruction is presented. There is also function which enables to display a fundus camera photo if it is added to examination. SOCT Copernicus User Manual Version 4.3.x rev. C...
-
Page 66: Standard 3D
‘Fundus’ and ‘RPE’ unchecked - full tomograms are displayed as 3D image ‘Fundus’ checked - show reconstruction of surface of retina fundus ‘RPE’ checked - retina reconstruction, cut off the choroid tissue. Fundus reconstruction display: a) Fundus checked SOCT Copernicus User Manual Version 4.3.x rev. C... - Page 67 Fundus/RPE unchecked c) RPE checked SOCT Copernicus User Manual Version 4.3.x rev. C...
-
Page 68: Segmentation
It is possible to display only RNFL , RPE, RNFL-RPE layers. Fundus reconstruction and maps can be placed on the surface of layers. a) RNFL displayed-with RNFL thickness map by default b) RNFL-RPE displayed - without map by default SOCT Copernicus User Manual Version 4.3.x rev. C... -
Page 69: Display Options
RPE displayed - with RPE deformation map by default 9.2.2 Display options B-Scan alignment enables to diminish effects of eye movement. Color or Black/White displaying SOCT Copernicus User Manual Version 4.3.x rev. C... -
Page 70: Surface Mapping
3D visualization. Five options are available: - Fundus mask - Without mask - Retina thickness map - RNFL thickness map - RPE deformation map In example above RPE deformation mask is used. SOCT Copernicus User Manual Version 4.3.x rev. C... -
Page 71: Preview
User can slice in more than one directions. b) Use slider to zoom in and zoom out model. c) Rotation Click left mouse button and move mouse to rotate model. (holding down left mouse button all the time) SOCT Copernicus User Manual Version 4.3.x rev. C... -
Page 72: Macula Analysis
Click and hold left mouse button on a white dot at “Retina thickness map” and move pointer to desired position. To move center left click and move mouse SOCT Copernicus User Manual Version 4.3.x rev. C... - Page 73 1/3/6 [mm] zones selected 0.6/2.22/3.45 [mm] zones selected Larger map display Thickness under cursor Smaller map display (left click on the map) Choose from the list value which will be displayed in each zone. SOCT Copernicus User Manual Version 4.3.x rev. C...
- Page 74 NOTE: Only correct point of the fovea gives solid results. Normative database was made on the 7x7mm scan area with macula in the centre. Description of normative database see in chapter 8.10. Colors inditicate correlation with NDB SOCT Copernicus User Manual Version 4.3.x rev. C...
-
Page 75: Glaucoma Analysis
On the fundus reconstruction press right mouse button and choose from popup list “Turn on norm” to display Normal map. Darker color identifies normative range area. SOCT Copernicus User Manual Version 4.3.x rev. C... -
Page 76: Tomogram Preview
RNFL graph. Dimensions of ring (diameter and thickness) are shown below the map. It is possible to manually change the dimensions of the ring. Thickness of selected point Click and drag to change ring dimensions Rings dimensions SOCT Copernicus User Manual Version 4.3.x rev. C... -
Page 77: Onh (Optical Nerve Head) Data
DDLS stage. Disclaimer: OPTOPOL Technology is not offering and does not offer advice, instruction in the diagnosis and interpretation of SOCT Copernicus images. It is the clinician’s responsibility to make diagnosis and interpretation of OCT scans. SOCT Copernicus User Manual Version 4.3.x rev. C... -
Page 78: Control Buttons
[Apply] button is used. If operator decides to draw disc contour more accurately (with non elliptic shape) it's possible to add more disc points manually by clicking on the image Second way is to redraw existing shape. SOCT Copernicus User Manual Version 4.3.x rev. C... - Page 79 Disclaimer: OPTOPOL Technology is not offering and does not offer advice, instruction in the diagnosis and interpretation of SOCT Copernicus images. It is the clinician’s responsibility to make diagnosis and interpretation of OCT scans. SOCT Copernicus User Manual Version 4.3.x rev. C...
-
Page 80: Comparison Module
See chapter 12.4. Examinations list shows detailed list of patient's examinations available to compare. Note: Pay attention when you evaluate the tomograms on the Quick Printout if scanned widths were different between examinations. SOCT Copernicus User Manual Version 4.3.x rev. C... -
Page 81: Follow Up
In the zone maps it is possible to display mean value, maximum, minimum and volume of each sector. Significance of Difference from Thickness maps of Zone maps Difference baseline selected examinations from baseline SOCT Copernicus User Manual Version 4.3.x rev. C... -
Page 82: Retina Numerical Comparison
It is possible to export results of the numerical tab to text file. In order to export data press right mouse button on the consolidated plot and choose export option. SOCT Copernicus User Manual Version 4.3.x rev. C... -
Page 83: Glaucoma Numerical Analysis
Difference from Trend plot of regression for RNFL data table selected exams. baseline Baseline and TSNIT graph of all three follow-up selected exams exam Deviation from Norm map ONH progression DDLS follow up SOCT Copernicus User Manual Version 4.3.x rev. C... -
Page 84: Symmetry Analysis
Sectors show either average, maximum, minimum retinal thickness (in microns) or volume (in mm3 ) in each area. From Map Sector Dimension checklist choose circle diameters 0,6/ 2.22/ 3.45 mm or 1/ 3/ 6mm SOCT Copernicus User Manual Version 4.3.x rev. C... -
Page 85: Retina Graphical
Sectors Map shows either average, maximum, minimum retinal thickness (in microns) or volume (in mm3 ) in each area. From Map Sector Dimension checklist choose circle diameters 0,6 /2.22 / 3.45 mm or 1 /3 /6mm SOCT Copernicus User Manual Version 4.3.x rev. C... -
Page 86: Glaucoma Symmetry Analysis
Deviation from the Normal Map Normal Map Left eye thickness graph with normative data Right eye thickness graph with normative data Left and right eye thickness DDLS calculation graph for symmetry comparison SOCT Copernicus User Manual Version 4.3.x rev. C... -
Page 87: Examinations Correlation
In case where automatic correlation is not possible system displays message “Manual correlation needed”. Press [Manual correlation] button to correlate exams manually. Place the factors on any characteristic points of retina (e.g. characteristic retina blood vessels) on each reconstruction. SOCT Copernicus User Manual Version 4.3.x rev. C... -
Page 88: Anterior Analysis
ANTERIOR ANALYSIS The SOCT Copernicus was originally designed for retinal imaging. To obtain corneal and anterior segments images Anterior Chamber Adapter was developed. The adapter Lens is placed in front of objective lens to focus OCT beam on the anterior segment. -
Page 89: Cornea Analysis Tab
(Correction) and corrected IOP value (Adjusted IOP) for examined Eye. Calculation formula is predefined. Pachymetry map Sector map Eye preview, Click to change tomogram Values in zones Display mode Complete IOP When layers detection has failed, modify boundary layers manually. SOCT Copernicus User Manual Version 4.3.x rev. C... -
Page 90: Angle Measurement Tool
Another point has to be located on Iris. AOD750: Angle Opening Distance of 750 micron TISA: Trabecular Iris Segment Area Only when cornea/sclera tissue is parallel to the scanning window the AOD and TISA measurements are accurate. SOCT Copernicus User Manual Version 4.3.x rev. C... -
Page 91: Setup Window
Include HDD backup files - if this option is marked, the CD/DVD backup will not contain files which were previously archived using HDD backup. Warning ! Make sure there is enough free space on HDD before performing backup process SOCT Copernicus User Manual Version 4.3.x rev. C... -
Page 92: Recover
If this option is not marked only examinations not found in database will be recovered and all existing will stay unchanged. Now user should click ‘Recover’ button. SOCT Copernicus User Manual Version 4.3.x rev. C... -
Page 93: Database Setup
External Database Client – The computer is working as viewing station. The examination are downloaded to local computer from the server. Iris Copernicus Server application should be install on server. See in more details in Appendix A SOCT Copernicus User Manual Version 4.3.x rev. C... -
Page 94: Parameters
– ‘Skin’ this options allow user to customize layout of the software. ‘Unlock anterior’ – type code to unlock anterior chamber options. Anterior chamber is optional and can be purchased separately. SOCT Copernicus User Manual Version 4.3.x rev. C... -
Page 95: User Accounts
Using the user registration dialog, the user with admin rights can create (register) user name, password and privileges to users. It is not possible creating new users on Client computers. Users can then search for patient records by association with registered staff. SOCT Copernicus User Manual Version 4.3.x rev. C... -
Page 96: Joystick Configuration
14.6 Joystick configuration To control SOCT Copernicus device 3-axis joystick controller can be used. The joystick has several buttons whose functions can be fully customized using joystick setup window. By pressing any of joystick buttons, the BTx button will turn green indicating the number of button being pressed. -
Page 97: Maintenance And Cleaning Procedure
Periodically one has to check if there are no mechanical damages to the device, damages to any of the cables and fuses. d) Dust Prevention: When not using the SOCT Copernicus, make sure the cloth dust cover is placed over the unit. -
Page 98: Software Maintenance Activities
3. Installed antivirus software should be updated at least once a week. 4. For OPTOPOL's software upgrades and patches OPTOPOL will inform users through its distributors. 15.3 Hard Disk Defragmentation Defragmentation of the OCT computer hard disk becomes necessary when you delete, analyze old scans regularly. -
Page 99: Blown Fuses Exchange
The fuses are located in power supply socket at the back of the device. In order to replace the fuses, unplug the power supply cable, press the small plastic lever and pull the fuses casing. Fuse Mains socket SOCT Copernicus User Manual Version 4.3.x rev. C... -
Page 100: Environmental Conditions
After usage period is over, contact your distributor for utilization instructions. Maximum lifetime of device – 10 years since date of manufacture. DIMENSION AND WEIGHT Instrument Dimensions: 520 x 630 x 675 mm Weight: 35 kg SOCT Copernicus User Manual Version 4.3.x rev. C... -
Page 101: Faq - Frequently Asked Questions
Move the device’s measurement head closer to patient. The retina cross section image will go down on the window and then up again in a straight orientation SOCT Copernicus User Manual Version 4.3.x rev. C... - Page 102 The synchronization cable or adapter cable is not connected or connected improperly. Make sure the adapter cable (flat VHDCI connector) is properly connected to frame grabber card. Make BNC connector is connected to synchro input (T0 input) SOCT Copernicus User Manual Version 4.3.x rev. C...
-
Page 103: Appendix A Configuration Of Network Connection
It means there is not possible to edit, review, perform, remove, analyze, import, export patients on more than one computer at that same time. Users accounts can be create only on the Server. There is no possibility to use the exam SOCT Copernicus User Manual Version 4.3.x rev. C... -
Page 104: Soct Server Configuration Procedure
1.1 SOCT Server configuration procedure 1) Turn on computer and start SOCT Copernicus software, 2) Click Setup, 3) Confirm by clicking Yes. 4) In Setup go to Database panel. 5) Check the checkbox Network connections 6) Choose radio button SOCT Server (see image above) 7) Go to Parameters panel. -
Page 105: Sharing Soct Database Folder On Windows Xp
2. Click right mouse button on directory and choose Sharing and Security…. 10) Go to Sharing panel and check Share this folder on the Network and Allow network users to change my files. 11) Now the server computer is fully configured. SOCT Copernicus User Manual Version 4.3.x rev. C... -
Page 106: Sharing Soct Database Folder On Windows 7
SOCT folder (by default D:\SOCT). Right click on it select Properties 3) Select “Sharing” tab and open Advance settings. 4) Select “Share this folder” checkbox. If needed enter the name which will appear in the network. SOCT Copernicus User Manual Version 4.3.x rev. C... -
Page 107: Client Computer Configuration Procedure
1.2 Client computer configuration procedure In order to configure database client you need to install SOCT Copernicus Software on each computer you want to use as client. SOCT Copernicus Software you can find on installation disc. To install it run setup.exe. - Page 108 The next time you start the software, the system will connect to remote database. The example above shows the client configuration on the network where the server c omputer is named “Copernicus” and shared SOCT database folder is named “SOCT”. SOCT Copernicus User Manual Version 4.3.x rev. C...
-
Page 109: Iris Server Network
[Upload to server] button start uploading new examinations on the server. Red color of the button shows that on the computer there are new examinations which are not on the server. Progress bar shows status of uploading. Operator can stop the process anytime. SOCT Copernicus User Manual Version 4.3.x rev. C... -
Page 110: Download From Server
Note: Filter searches whole string only. Activate Filter by pressing [Apply]. To reset filter settings press [Clear filter]. Press [Synchronize] button to download all selected examinations. Operator can cancel the process anytime. SOCT Copernicus User Manual Version 4.3.x rev. C... -
Page 111: Client Computer Configuration Procedure
2) Click Setup and confirm by clicking Yes. 3) In Setup window go to Parameters panel. 4) Check OFF LINE mode to work on computer without SOCT Copernicus. 5) In Setup window go to Database panel. 6) Check the checkbox Network connections 7) Mark “External database client”... -
Page 112: Copernicus Iris Server Configuration
The Copernicus Server IRIS cooperates with SOCT application. It allows synchronizing the content of data base between local computers with SOCT application and the server. The Copernicus Server IRIS is compatible with SOCT Copernicus v.4.2 or higher. 2.2.2 Requirements Hardware requirements: ... - Page 113 Welcome window. To proceed click [Next]. Step 3 Read the license and accept it. Otherwise, the installation will be aborted. Step 4 Indicate the folder where you want to install the application. SOCT Copernicus User Manual Version 4.3.x rev. C...
- Page 114 You will have to confirm the replacement of existing database. Replacing database will delete all data stored in it. SOCT Copernicus User Manual Version 4.3.x rev. C...
-
Page 115: Module Configuration
Press [Install] button to begin installing the package. 2.4 Module configuration To launch Copernicus Server IRIS program go to Start → All programs → medi.com →Copernicus Server IRIS → Copernicus Server. Window presented below will appear. SOCT Copernicus User Manual Version 4.3.x rev. C... - Page 116 Entered settings will be saved after clicking [OK] button. After configuring the module you can run it. In order to do so, choose Copernicus server module, right-click on it and choose Run. SOCT Copernicus User Manual Version 4.3.x rev. C...
-
Page 117: Faq
Module’s state will change to „Running”. Copernicus server module is ready to work and waiting for information from SOCT Copernicus. To perform a successful communication it is also necessary to configure the SOCT Copernicus application 2.5 FAQ Problem with running several Firebird Instances per Server Machine Sometimes it may happen that after the installation of IRIS Copernicus Server other applications using Firebird Service may stop working. - Page 118 Starting Firebird as an Application You can also start the Firebird server as an application: fbserver -a will start Firebird as an application, showing an icon in the taskbar notification area. You can right- SOCT Copernicus User Manual Version 4.3.x rev. C...
- Page 119 You can use the instreg.exe tool from Firebird's bin subfolder to install the correct path to this Registry Key: instreg i[nstall] will install the Registry Key, and instreg r[emove] will uninstall it. SOCT Copernicus User Manual Version 4.3.x rev. C...
- Page 120 So if you want to have complete messages you should call instreg i before using these tools. Windows Vista and Windows 7 settings UAC has to be set on lowest level UAC. The Windows Firewall has to be switch off. SOCT Copernicus User Manual Version 4.3.x rev. C...
-
Page 121: Park Positioning
Park positioning 1. Open Park positioning program Start/All programs/SOCT/SOCT_Park 2. Wait until scanning head finish park procedure. 3. Put the protector handle in to the hole and screw clockwise. Screw it until resistance. SOCT Copernicus User Manual Version 4.3.x rev. C... -
Page 122: Emc Information
Guidance and manufacturer’s declaration – electromagnetic emissions The SOCT Copernicus is intended for use in the electromagnetic environment specified below. The customer or the user of the SOCT Copernicus should assure that it is used in such an environment. Emission test... - Page 123 Guidance and manufacturer’s declaration – electromagnetic immunity The SOCT Copernicus is intended for use in the electromagnetic environment specified below. The customer or the user of the SOCT Copernicus should assure that it is used in such an environment. IMMUNITY test...
- Page 124 Guidance and manufacturer’s declaration – electromagnetic immunity The SOCT Copernicus is intended for use in the electromagnetic environment specified below. The customer or the user of the SOCT Copernicus should assure that it is used in such an environment. IMMUNITY test...
- Page 125 Recommended separation distance between portable and mobile RF communications equipment and the SOCT Copernicus The SOCT Copernicus is intended for use in the electromagnetic environment in which radiated RF disturbances are controlled. The customer or the user of the SOCT Copernicus can help prevent...
Need help?
Do you have a question about the SOCT Copernicus and is the answer not in the manual?
Questions and answers