
Related Manuals for Optopol SOCT Copernicus


Summary of Contents for Optopol SOCT Copernicus
- Page 1 Manufacturer: OPTOPOL Technology Sp. Z o.o. ul. Żabia 42 42-400 Zawiercie POLAND www.optopol.com service@optopol.com.pl SOCT Copernicus Service Manual FOR DISTRIBUTORS USE ONLY Rev. 2.6 30.01.2014 0197...
-
Page 2: Table Of Contents
ONTENTS Introduction ......................... 5 Contact to Optopol Technology Sp. z o.o................5 Warnings and Cautions ......................6 Safety Standards ........................7 Device Overview ........................9 Technical Data ........................9 Environmental Conditions ....................10 Unpacking and Installation ....................11 Unpacking SOCT Copernicus ....................11 Connecting cables........................ - Page 3 14.8 Setting fixation point to the centre of the cross ..............155 14.9 Checking and adjusting the polarization ................. 164 14.10. Checking, adjusting and exchange of scanners ..............169 14.10.1 Exchanging of scanner Y ..................... 171 SOCT Copernicus / SPOCT - Service Manual...
- Page 4 14.16. Checking the stability of the spectrometer ................206 14.17. Eliminating the improper Cross lines shape ................. 208 15. FAQ ............................ 209 16. Spare parts list ........................222 17. Service tools ........................234 SOCT Copernicus / SPOCT - Service Manual...
-
Page 5: Introduction
For online support use a program: TeamViewer (Optopol Technology Service Department will provide distributors with Customer module). In case the distributor decides to send back the device to Optopol Technology Sp. z o.o. , RMA form has to be filled and sent to service@optopol.com.pl... -
Page 6: Warnings And Cautions
3. Warnings and Cautions Optopol Technology is not responsible for the safety and reliability of this instrument when: Assembly, disassembly, repair or modification is made by unauthorized dealers or persons. Instrument is not used in accordance with its User’s Manual. -
Page 7: Safety Standards
The SOCT Copernicus is Type B, Class I protection. Usually SOCT Copernicus is a part of larger Medical System, which consists of many other medical and non- medical devices. Medical system in general and all its components have to fulfil requirements of IEC-60601 norm. - Page 8 Warning ! Ignoring safety rules can lead to accidents. 1) If SOCT Copernicus and the whole Medical System have been installed by the Manufacturer, the Manufacturer guarantees the proper installation and compliance with MDD 93/42 EEC rules. It is customers’ responsibility to prepare the site.
-
Page 9: Device Overview
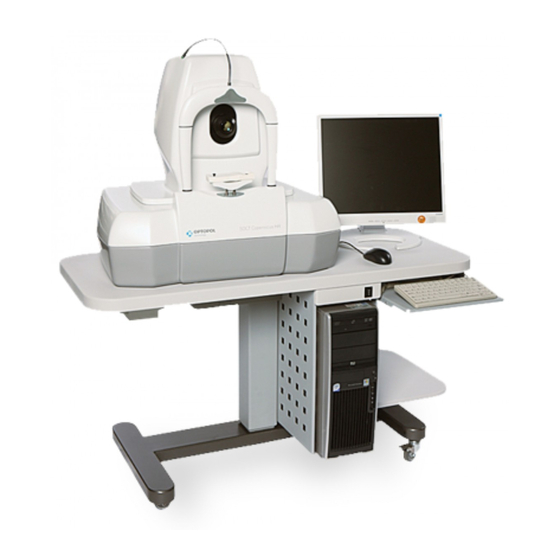
5. Device Overview SOCT Copernicus uses spectral domain optical coherence tomography method to obtain 3-dimensional cross-section images of a human retina. The device produces a laser beam, which is focused on a human retina. The light that reflects from internal structures of the retina is then interferometrically analyzed by the device. -
Page 10: Environmental Conditions
Maximum operating temperature is 104 ºF (40 ºC) is allowed. Transport/storage: Temperature: +0 º - +55 º C Humidity: 20% - 90% Atmospheric pressure: 600 hPa - 1200 hPa SOCT Copernicus / SPOCT - Service Manual... -
Page 11: Unpacking And Installation
6. The power supply cables and computer accessories. 8.1 Unpacking SOCT Copernicus This section describes ho to unpack the device shipped from a factory. The SOCT Copernicus is shipped in a special box, which protects it from mechanical damages during transport. Figures below show how to unpack SOCT from this box. - Page 12 There are only two removable clamps at a side. First remove screws from the clamps and then remove metal holders. This operation is shown in a figure below. Now shift SOCT Copernicus to the left and then lift it up. Put the SOCT on the flat stable table.
-
Page 13: Connecting Cables
8.2 Connecting cables To connect the SOCT Copernicus to a computer, you need five cables shipped with the device: 1. Camera link cable – connected to Copernicus (not detachable). 2. RS232 cable. 3. Video/synchro cable connected with one plug. Video (to PC) - Page 14 Picture on the next page shows how to connect all cables to the computer. Power supply connector Keyboard and mouse PS/2 RS232 Monitor USB (printer, joystick, keyboard and mouse with USB plug) BNC splitter Camera link Video input SOCT Copernicus / SPOCT - Service Manual...
-
Page 15: Device Connection
The SOCT must be directly plugged into the mains. Connect the PC, printer and monitor into the multiple portable socket-outlet, which is directly connected to the Separating Transformer. The transformer reduces power emission loss from the PC. The Separating Transformer is connected directly to the mains. SOCT Copernicus / SPOCT - Service Manual... -
Page 16: Pc Installation
9. PC installation 9.1 System requirements (Starting on day 22.09.2010) In order to prepare computer for use with SOCT Copernicus you need: PC computer with operating system installed. Minimum system requirements: Processor: Intel® Xeon W3520 2.66 8MB/1066 QC CPU RAM: HP 4 GB (2x2GB) DDR3 –... -
Page 17: Ni Frame Grabber Card And Winfast Card Installation
2. Plug in the NI Frame Grabber into the PCI slot #2 then secure the card using a screw. Plug the WinFast Video card into the PCI slot #1 then secure the card using a screw. Close the PC cover. SOCT Copernicus / SPOCT - Service Manual... -
Page 18: Drivers Installation
9.3 Drivers installation 9.3.1 NI Vision Acquisition Software installation Turn the computer on. Insert a CD disc with SOCT Copernicus software to the CD-ROM. Open the CD and find the NI software files. Disc:\NI Vision Acquisition\VISIONACQ_CD1. Double click on the setup.exe. - Page 19 Next>>. 5. Select features to be installed. Extend the icon NI-IMAQdx 3.1.2 and select “Do not install this feature”. Extend the icon NI-IMAQ I/O 2.1 and select “Do not install this feature”. SOCT Copernicus / SPOCT - Service Manual...
- Page 20 Extend NI-IMAQ 4.0 and LabVIEW Support. Extend the icon LabVIEW 7.1 Support and select “Install this feature to a local drive”. Extend LabVIEW Real-Time 7.1 Support. SOCT Copernicus / SPOCT - Service Manual...
- Page 21 Extend the icon LabVIEW Real-Time 7.1 Support and select “Install this feature to a local drive”. 6. Press Next>>. 7. Select “I accept the License Agreement(s)” then press Next>>. SOCT Copernicus / SPOCT - Service Manual...
- Page 22 8. Press Next>>. 9. The software is being installed now. 10. If installation is interrupted and you are asked to indicate the Disc 2. Press the browse icon “….”. SOCT Copernicus / SPOCT - Service Manual...
- Page 23 Find Disc 2 and press Select. Press Finish. Computer has to be restarted now, press Restart. SOCT Copernicus / SPOCT - Service Manual...
- Page 24 After restart Hardware Wizard window will be opened then select No, not this time and press Next>>. Select Install the software automatically (Recommended) then press Next>>. Press Finish, installation complete. SOCT Copernicus / SPOCT - Service Manual...
- Page 25 Windows desktop. Extend My System, Devices and Interfaces, NI-IMAQ Devices, img0: IMAQ PCI-1428. Click right mouse button at channel 0. Extend Camera, Atmel and select ATMEL AVIIVA SM2 CL 201x_rev2. SOCT Copernicus / SPOCT - Service Manual...
- Page 26 Close the application. SOCT Copernicus / SPOCT - Service Manual...
-
Page 27: Usb Hub Drivers Installation
9.3.2 USB HUB drivers installation Open the Device Manager. Start Control Panel System Properties Hardware Device Manager. Double click on USB Serial Port. Press Reinstall Driver… Select No, not this time then press Next>>. SOCT Copernicus / SPOCT - Service Manual... - Page 28 Select Install the software automatically (Recommended) then press Next>>. Press Finish. SOCT Copernicus / SPOCT - Service Manual...
-
Page 29: Winfast Tv Card Drivers Installation
9.3.3 WinFast TV Card drivers installation Open a Device Manager. Start Control Panel System Properties Hardware Device Manager. Double click on Multimedia Controller. Press Reinstall Driver… SOCT Copernicus / SPOCT - Service Manual... - Page 30 Select No, not this time then press Next>>. Select Install the software automatically (Recommended) then press Next>>. Press Finish. SOCT Copernicus / SPOCT - Service Manual...
- Page 31 Follow the same procedure with Multimedia Video Controller. SOCT Copernicus / SPOCT - Service Manual...
-
Page 32: Microsoft Visual C++ Redistributable Installation
9.3.4 Microsoft Visual C++ Redistributable installation Insert a CD with SOCT Copernicus software to the CD-ROM. Open the disc and double click on the vcredist_x86_vc2008.exe. 3. Press Next>>. Select I have read and accept the license terms then press Install >>. - Page 33 Wait till then press Finish. SOCT Copernicus / SPOCT - Service Manual...
-
Page 34: Soct Software Installation
9.4 SOCT Software installation. Insert a CD with SOCT Copernicus software to the CD-ROM. Open the CD and double click on the setup.exe. Choose language and press Press Next>>. SOCT Copernicus / SPOCT - Service Manual... - Page 35 Select destination location (Recommended location is D/SOCT). If you would like to select a different folder click Browse. Then press Next>>. Select start menu folder then press Next>>. Select Create a desktop icon then press Next>>. SOCT Copernicus / SPOCT - Service Manual...
- Page 36 Press Install. The software is installing now. Press SOCT Copernicus / SPOCT - Service Manual...
- Page 37 Press Yes. Installation complete press Finish. 4. Connect the PC to SOCT run the software, perform test examinations, make sure the system is working properly. SOCT Copernicus / SPOCT - Service Manual...
-
Page 38: Troubleshooting
Backward and forward SOCT head perform movement backward forward movement? Can body perform left and Left and right movement right movement? Up and down movement Can body perform up and down movement? End of examination SOCT Copernicus / SPOCT - Service Manual... -
Page 39: Electronic Troubleshooting
2.3. The device is positioning itself to Device just after switching on is the base position. positioning itself. During this operations establishing connection with SOCT is impossible. In that case wait about 30 seconds repeat establishing connection. SOCT Copernicus / SPOCT - Service Manual... - Page 40 Check the power supply board like in chapter 13.3. 4.2b.Fault of Power supply on SLED Check the voltage on power supply connector. In case when voltage is diode (EXALOS) faulty check the Power supply board 150-522 (chapter13.3.) SOCT Copernicus / SPOCT - Service Manual...
- Page 41 S1 switch – than replace SLED diode. 4.5. Scanners do not work properly. Device has protection in case of defect of the scanners. SLED diode cannot turn on if the scanners are broken. See point SOCT Copernicus / SPOCT - Service Manual...
- Page 42 J2 pins 2, 3. If there is no obstacle In front of lens voltage between those pins should be 5V. Afterwards place obstacle 20-30mm in front of lens. If voltage drops 0,5V – exchange board 150-542. *- SPOCT only SOCT Copernicus / SPOCT - Service Manual...
-
Page 43: Optical Troubleshooting
(Setting fixation point to the center of the cross) Still wrong Problem check the polarization adjustment solved Still wrong Problem reference lane adjustments solved Still wrong Problem Back to the Optopol solved SOCT Copernicus / SPOCT - Service Manual... - Page 44 BAD IMAGE QUALITY (Doubled, tripled, lots of noise) Check the spectrometer’s adjustments Still wrong Problem solved Swap setup.ini file Check polarization Problem solved adjustments Problem Back to the Optopol solved SOCT Copernicus / SPOCT - Service Manual...
- Page 45 TOO HIGH SPECTRUM IN SKANTEST PROGRAM Check and adjust output power on the objective lane Still wrong Reference line filter adjustments Problem solved SOCT Copernicus / SPOCT - Service Manual...
- Page 46 Still wrong Problem Adjusting output power on objective lane solved Still wrong Check the peak shape with Problem solved crossed spectrometer Good shape Bad shape Reference line filter Adjusting the spectrometer adjustments SOCT Copernicus / SPOCT - Service Manual...
-
Page 47: Opening And Closing The Device
COMPONENTS. If you move a position of optics probably you will have to send back the unit to the Optopol for calibration. Especially do not touch the optic fibre (Red arrows). 4. Run a program scantest_lt.exe, set down position of the chinrest. Set position of head: maximum to top, maximum to back and in a middle between left and right. - Page 48 5. Take out the chinrest from bolts. 6. Unscrew the rear screws from a head cover. 7. Unscrew the front screws from the head cover. SOCT Copernicus / SPOCT - Service Manual...
- Page 49 8. Gently remove the head cover. Lift it to the maximum position. 9. Use a thumb to stabilize the lens cover. 10. Mark the position of the bold in relation to the main body. You can use a pencil, marker or paint. SOCT Copernicus / SPOCT - Service Manual...
- Page 50 12. Remove the screws from a front bolt. See red arrows. 13. Remove the metal bolt. Hold the bolt and the frame at one side. On the opposite side shift bold (yellow arrow) and remove the bolt from the frame. SOCT Copernicus / SPOCT - Service Manual...
- Page 51 14. Turn on the SOCT and use scantest_lt to set a position of head to bottom. Screw out 3 screws from rear bolt. 15. Take out the metal bold from the frame. See point 13. 16. Take out the metal frame. SOCT Copernicus / SPOCT - Service Manual...
- Page 52 DO NOT INCREASE THE NUMBER OF ROTATIONS. IT CAN LEAD TO BRAKING OFF THE SCREW LATCHES. REMOVE SCREWS EVENLY. 19. Shift the SOCT to the opposite side of the table and repeat step 16. SOCT Copernicus / SPOCT - Service Manual...
- Page 53 23. Lift the cover and unplug the external fixation connector. Do not try to do it alone. Ask someone to assist you. In newest versions, connector comes out with head rest, and there is no danger of breaking it. SOCT Copernicus / SPOCT - Service Manual...
- Page 54 Lift the cover for half of height of the head. DO NOT TOUCH the optic fibre. Rotate the cover on the height where you have enought space for rotation. Green arrow identificate wright place. SOCT Copernicus / SPOCT - Service Manual...
- Page 55 Rotate the cover 90 degree and take it off. This section contains a description of procedures of different modules replacement in case of damage. It is supplied with pictures for convenience. SOCT Copernicus / SPOCT - Service Manual...
-
Page 56: Closing The Cover
4. BE CAREFUL WHEN BEING CLOSE TO THE SOCT. DO NOT REPLACE POSITION OF OPTIC COMPONENTS. If you move a position of optics probably you will have to send back the unit to Optopol for calibration. Especially do not touch the optic fibre (Red arrows). SOCT Copernicus / SPOCT - Service Manual... - Page 57 Rotate the cover 90 degree. Rotate cover on the height where you have enought space for the rotation. Green arrow identificates the wright place. DON NOT TOUCH THE OPTIC FIBRE AND SCANNER’S CABLES. SOCT Copernicus / SPOCT - Service Manual...
- Page 58 Lower the cover. DON NOT TOUCH THE OPTIC FIBRE AND SCANNER’S CABLES. 6. Screw the ground cable into the forehead frame. 1.Spring washer 2. Connector 3. Washer 4. Screw Put the fixation cable inside the pipe. SOCT Copernicus / SPOCT - Service Manual...
- Page 59 9. Ensure that the screws of the cover are above sleeves. 10. Shift the SOCT to the edge of a table. Ask someone to assist you. One person screws in the screws, second holds the SOCT. SOCT Copernicus / SPOCT - Service Manual...
- Page 60 Important!: Screws on the back of the unit shouldn’t be tighten strongly. It can cause in problems with the left-right movement! 14. Mount the metal frame. Three holes have to be in the front, notch has to be on the top. SOCT Copernicus / SPOCT - Service Manual...
- Page 61 17. Turn on the device. Move the position of head maximum to the top. Turn off the device. Prepare screws and washer. DO NOT DROP THE SCREWS INTO THE SOCT. Magnetic holder is really helpful in case of dropped screw. SOCT Copernicus / SPOCT - Service Manual...
- Page 62 Change the position of the head in order to make access to screws easier. Turn the device off. 20. Place the position of the frame parallel to the cover. Check that distance is aligned in every corner to the same height. SOCT Copernicus / SPOCT - Service Manual...
- Page 63 23. Push the lens gently. In newest models equipped with servomechanisms, we sugest to move refraction maximum to the back position in the scantest program, Although there is possibility to move it by hand, but special attention must be given to this activity. SOCT Copernicus / SPOCT - Service Manual...
- Page 64 (Maximum to the top, maximum to the back and in the middle between left and right). Install the head cover. 25. Use a thumb to stabilize the lens cover. 26. Screw in the middle screw. SOCT Copernicus / SPOCT - Service Manual...
- Page 65 28. Screw in both left and right front screws. 29. Screw in the back screws. 30. Turn on the device. Check the lens movements (change the refraction value). In case that the movment is blocked change the position of the frame. SOCT Copernicus / SPOCT - Service Manual...
-
Page 66: Movement Modules
2. For units produced before 09.2008 continue with manual below, for units produced on date from 09.2008, go to the following link: (See: Chinrest module after 09.2008). 3. Read entire manual first before you start opening the SOCT. 4. Watch for optic fibres. DO NOT DAMAGE IT. SOCT Copernicus / SPOCT - Service Manual... - Page 67 6. Detach the fixation connector. In newest series of SOCT pull out the cable from the frame. 7. Mark the position of the chinrest module on both side. Thanks to it will be easier refit the module. SOCT Copernicus / SPOCT - Service Manual...
- Page 68 9. Carefully remove the whole chinrest module. Continue disassembling on a soft surface. 10. Undo four small screws. 11. Lift the engine module and put on a new motor belt. SOCT Copernicus / SPOCT - Service Manual...
- Page 69 12. Proceed further. Picture was taken from opposite side to previous picture. 13. Continue putting the belt around the engine’s metal cover. Picture was taken from opposite side to previous picture. 14. Install the motor belt on the two circles. SOCT Copernicus / SPOCT - Service Manual...
- Page 70 15. Tighten four screws. 16. Paint the screws. 17. Refit the chinrest module on the proper position. PAY ATTENTION FOR THE OPTIC FIBRES. SOCT Copernicus / SPOCT - Service Manual...
- Page 71 18. Tighten fours screws. Do not forget about the watchers. 19. Connect the cable to the motor. If needed solder the cables. 20. Refit the plastic tightening band. SOCT Copernicus / SPOCT - Service Manual...
- Page 72 21. In the first series refit fixation connector. Use a glue. In latest versions pass the fixation cable onto the tube mounted on the frame. 22. Check the movement. 23. Familiarize with “Close the cover” manual. SOCT Copernicus / SPOCT - Service Manual...
-
Page 73: Chinrest Modules Produced After 09.2008
12.2 Chinrest modules produced after 09.2008 1. Open the SOCT cover (See: Opening cover), 2. Mark chinrest position with marker, 3. Disconnect power supply cables from connector and engine 4. Unscrew chinrest from base plate SOCT Copernicus / SPOCT - Service Manual... - Page 74 6. Mark engine position using marker. 7. Unscrew engine from the base plate and lift it until plastic wheel reaches slide. 8. Use tape to demobilize unit (according to protect microswitches from being destroyed) SOCT Copernicus / SPOCT - Service Manual...
- Page 75 9. Take out engine module with screw 10. Assembly new rubber band to the engine unit: 11. Reassembly chinrest following steps 3-8 in opposite order. 12. Close the cover (See: Closing the cover). SOCT Copernicus / SPOCT - Service Manual...
-
Page 76: Backward And Forward Movement
Always replace used screws and pads with a new ones!!! 2. Read the entire manual first before you start opening the SOCT. 3. Mark the position of the metal holder. 4. Observe the long screw carefully. DO NOT DAMAGE OR SKEW IT. SOCT Copernicus / SPOCT - Service Manual... - Page 77 5. Localize the cable linking connector for the cables from the electric motor. 6. Remove all motor’s cables from the cable linking link connector. Rotate CCW four screws and use a tweezers to pull the cables out. 7. Remove the plastic tightening band. SOCT Copernicus / SPOCT - Service Manual...
- Page 78 8. Undo two screws. 9. Move back the motor holder and using tweezers start to move the motor belt to right position. 10. Move the cable under the motor belt. SOCT Copernicus / SPOCT - Service Manual...
- Page 79 11. Continue moving the belt to the right position. Be careful not to cut the belt. 12. Continue the movement. SOCT Copernicus / SPOCT - Service Manual...
- Page 80 14. Take the new screws, put the washers on them. Fit the new screws but not too tight. 15. Put the holder on its proper position (your marks indentify the position) and tighten the screws securely. SOCT Copernicus / SPOCT - Service Manual...
- Page 81 16. Install a new plastic tightening band. 17. Tighten securely and cut off the ending. 18. Check if the movement is smooth. 19. Familiarize with “Close the cover” manual. 20. Close the cover. SOCT Copernicus / SPOCT - Service Manual...
-
Page 82: Left And Right Movement
2. Localize the cable linking connector for cables from electric motor. This connector may be in different location depending on the series. In later series connectors are under mains socket. Newest series Early series SOCT Copernicus / SPOCT - Service Manual... - Page 83 3. Unscrew three screws. 4. Gently shift the motor. 5. Watch for the long screw, DO NOT DAMAGE OR SKEW IT. SOCT Copernicus / SPOCT - Service Manual...
- Page 84 7. Remove the motor’s cable from the cable linking link connector. Rotate CCW both screws and use a tweezers to pull out the cables. 8. Lift the electric motor and install a new motor belt. SOCT Copernicus / SPOCT - Service Manual...
- Page 85 9. Place the motor belt on two motor’s wheels. 10. Install motor’s cable to the connector. 11. Put the motor holder into the holes, on that same position where they were before. SOCT Copernicus / SPOCT - Service Manual...
- Page 86 12. Put washer under the screws and screw them on. 12. Check if the movement is smooth. 13. Familiarize with “Close the cover” manual. 14. Close the cover. SOCT Copernicus / SPOCT - Service Manual...
-
Page 87: Up And Down Movement
- magnetic holder, tweezers - Philips-head screwdriver -Set of a new screws and pads Always replace used screws and pads with a new ones!!! 2. Prepare two pairs of tweezers, hexagonal (Allen) key size 2.5, belt. SOCT Copernicus / SPOCT - Service Manual... - Page 88 (red arrows). 4. Holding in the place part which is moving up and down. When you unscrew the two screws . This part is connected to spring so pay attention not to release it. SOCT Copernicus / SPOCT - Service Manual...
- Page 89 6. First install the belt on the big circle (1),then on the small electro-motor circle(2). Do not drop the belt during lifting to the correct position. The yellow path shows the way. 7. Mount back the two screws (see point 4). SOCT Copernicus / SPOCT - Service Manual...
-
Page 90: Replacing Up And Down Movement Microswitches
7. Move unit to the maximum left, back and down position, using skantest program. Use flashlight to look into protection handle hole. Make sure that vertical axis of protection handle pipe and upper plate blocking hole lay in the same lane. SOCT Copernicus / SPOCT - Service Manual... - Page 91 Up movement range from that value should be: 13mm (-0/+2). Down movement range: 13mm (- 0/+2). Make sure, that parking (base) positions are also properly set. 9. Seal the plastic and metal screws. 10. Close the cover (See: Closing the cover). SOCT Copernicus / SPOCT - Service Manual...
-
Page 92: Electronic Boards
ADUC842 servo motor RAM Scanning Motors programme X, Y, Z, Chinrest Fundus CCD linear Scanner prev. CCD camera Control camera Camera link Video Analog frame grabber frame grabber joystick Pic.1. Scheme of connections SOCT Copernicus / SPOCT - Service Manual... - Page 93 Pic.2. Block scheme SOCT Copernicus / SPOCT - Service Manual...
-
Page 94: Necessary Tools For Replacing Electronics Components
6. Philips-head screwdriver. 7. Flat-head screwdriver 8. Programming plug 9. Multimeter 10. Spare screws and pads Always replace used screws and pads with new ones!!! Pic. 3: Necessary tools for replacing electronics components. SOCT Copernicus / SPOCT - Service Manual... -
Page 95: Replacing Power Supply Board (150-521 - Superlum Diode); 150-522 (Exalos Diode)
9V DC(8,9-9,1) SUPERLUM(150- 521) CPU board power supply 5V DC (4,9-5,1) Scanner’s power supply ±24V DC (±23 to ±26) Spectrometer power supply 12V DC (11,5-12,5) Servomechanisms and extreme detectors power 12V DC (11,5-12,5) supply SOCT Copernicus / SPOCT - Service Manual... - Page 96 4A, 24V (+24V Scanners power supply) 4A, 12V (+12V Servomechanism and extreme detectors power supply) 4A, 5V (+5V SLED EXALOS power supply) 4A, 9V (+9V SUPERLUM power supply) 2A, 5V (CPU power supply) Pic. 6. Diode’s description. SOCT Copernicus / SPOCT - Service Manual...
- Page 97 5. Undo screws from the base. 6.Undo the ground cable. 7. Replace the board from the holders. 8. Remove all connectors. 9. Undo screws holding the fan. SOCT Copernicus / SPOCT - Service Manual...
- Page 98 The scheme with codes is shown below. 13. Refit the holder and redo screws to the base. 14. Put a new washer on the screw. Refit the ground cable to the board. SOCT Copernicus / SPOCT - Service Manual...
-
Page 99: Cpu (150-505) And Control Movement Board (150-515)
13.4. CPU (150-505) and Control movement board (150-515) Pic.7 1. Open the cover.(See opening the cover). 2. Move the head of the SOCT to the maximum right position. 3. Undo the upper screw. 4. Unplug all sockets. SOCT Copernicus / SPOCT - Service Manual... - Page 100 5. Remove CPU board. 6. Undo upper right screw. 7. Slacken down the screw. SOCT Copernicus / SPOCT - Service Manual...
- Page 101 12. Redo holder screws. 13. Connect all plugs. On every plug is a sticker with code. On the board are describe socket. Connect them in proper order. Not used Pic. 8: Motor module 150-515 SOCT Copernicus / SPOCT - Service Manual...
- Page 102 15. Plug in the ISP connector. 16. Refit the CPU board. 17. Connect all plugs. On every plug there is a sticker with a code. Sockets on the board are described. Connect them in a proper order. SOCT Copernicus / SPOCT - Service Manual...
- Page 103 Scanner’s status X9 & X10 on 150-530 Diode steering X 13 on 150-530 Communication with PC RS232 on the rear panel Transoptors X1 on 150-530 X scanner control Y scanner control ISP Prog Programming plug 18. Redo upper screws. SOCT Copernicus / SPOCT - Service Manual...
-
Page 104: Replacing Of Servomechanism Driver 150-536
13.5. Replacing of servomechanism driver 150-536 1. Remove all the plugs from the sockets. 2. Undo the screws which hold the board. SOCT Copernicus / SPOCT - Service Manual... -
Page 105: Replacing Of Drivers Of Spectrometer's Servomechanisms (150-536)
13.6. Replacing of drivers of spectrometer’s servomechanisms (150- 536) Pic 10: Servomechanism driver 150-536 1. Remove the power supply plug from the camera. 2. Use a Flat head screwdriver to undo the screws from the data cable. SOCT Copernicus / SPOCT - Service Manual... - Page 106 3. Remove all plugs from the controller. 4. Undo two screws which are holding the board. If extreme detectors interrupt taking the controller board out – manually rotate(see the green arrows) to increase the gap between the upper screws SOCT Copernicus / SPOCT - Service Manual...
- Page 107 Rys. 11: Servo driver 150-536 SOCT Copernicus / SPOCT - Service Manual...
-
Page 108: Checking The Sled Diode Exalos
5. There is also possibility to check if there is outgoing signal from diode on the objective lane, by using piece of paper and camera. Place piece of paper opposite to the lens and look on it using camera. You should be able to notice the beam. SOCT Copernicus / SPOCT - Service Manual... - Page 109 9. Signal is controlled by low level (in high level has about 5V). Check the voltage on the plug when device is ON and in measurement mode. It is easier when you look in to objective lens when background illumination is OFF (Slider above chinrest buttons in measurement tab). SOCT Copernicus / SPOCT - Service Manual...
-
Page 110: Checking And Adjusting The Superlum Diode
And green LED diode will shine. 2. To set diode’s functioning values unplug diode’s power supply cable. 3. Plug the 10 pin connector to the slot X14 on the transitional board (150-530) or measure without connector. SOCT Copernicus / SPOCT - Service Manual... - Page 111 Max current – 1,5 [V] Current Limit 0,998-0,999 [V] Termistor Max current - 3 Diode output current 6. To change values in order to set them as shown in the table above use flat screwdriver. SOCT Copernicus / SPOCT - Service Manual...
- Page 112 Current Limit Termistor Not described Diode output current If diode’s pilot parameters are set to the values shown in the table, you can turn off the unit and plug diode’s power supply plug back. SOCT Copernicus / SPOCT - Service Manual...
-
Page 113: Replacing Fuses On The Rear Panel
13.9. Replacing fuses on the rear panel 1. Turn off the SOCT. 2. Unplug the Power supply cord. 3. Remove the fuse’s socket. SOCT Copernicus / SPOCT - Service Manual... - Page 114 4. Replace the fuses. 5. Plug the fuse’s socket back on its place. SOCT Copernicus / SPOCT - Service Manual...
-
Page 115: Rear Panel
13.10. Rear panel Correct the connection of cabling on the rear panel All connectors pushed to the slots. RS232 cable screwed to the panel. SOCT Copernicus / SPOCT - Service Manual... -
Page 116: Programming The Cpu
13.11. Programming the CPU Before you start the programming procedure contact Optopol technology service department. Prepare the following information: serial number of the device taken from the scantest, or SOCT software patient tab(all numbers). Request programming files, it will be prepared and sent to you via e-mail. - Page 117 4. Plug programming jumper to empty socket or connect PIN7 with PIN8 via resistor [1k Ohm]. 5. Turn the device on. 6. Run program aduc842prog.exe. Set speed of transmission of COM port on 9600. Choose proper COM port. SOCT Copernicus / SPOCT - Service Manual...
- Page 118 7. Open COM port. Press „Otwórz”. Software will detect microcontroller ADUC842. 8. Delete the microcontroler’s firmware. Press „Kasuj program i dane”. Repeat that step 4 times. SOCT Copernicus / SPOCT - Service Manual...
- Page 119 9. Load firmware. Press „Laduj program” and choose prepared by Optopol .hex file. Software has to display message which inform about success of programming. “Programowanie zakończone sukcesem” . Then start the processor, accept proper work and close the program ”Koniec pracy”.
- Page 120 10. Turn OFF SOCT. 11. Remove programing plug or resistor. 12. Connect synchro-video cabel. SOCT Copernicus / SPOCT - Service Manual...
-
Page 121: Replacing Of Transitional Board (150-530)
13.12. Replacing of Transitional board (150-530) Transitional board – graph of elements. Transitional board – description of connection. SOCT Copernicus / SPOCT - Service Manual... - Page 122 4. Remove all the plugs from the Transitional board. Use flat screwdriver to pries the longest plug. Pull the plug from both sides. 5. Cut the plastic stripes which fix cables to the Transitional board. SOCT Copernicus / SPOCT - Service Manual...
- Page 123 6. Undo 4 screws which mount the scanners and transitional boards to base. Push the key firmly and then undo them. Use long hexagonal tool size 2. SOCT Copernicus / SPOCT - Service Manual...
- Page 124 7. It might be necessary to remove paint from the thread of screws. Use drop of solvent to facilitate undo screws. 8. Lift whole module (Scanners controller + transitional board). Hold the nut when you undo screw. 9. Replace the Transitional board. 10. Put the plastic stripe on the board. SOCT Copernicus / SPOCT - Service Manual...
- Page 125 11. Stick the board on the screws. 12. Put nuts on the screws and redo them. 13. Reconnect the plugs X5, X6, X7, X8, X9, X10, X16, X21A, X21B . SOCT Copernicus / SPOCT - Service Manual...
- Page 126 14. Reconnect plugs X4, X3. Tighten the plastic stripe. 15. Reconnect rest of the plugs. 16. Redo the plastic belts. 17. Redo the screw. SOCT Copernicus / SPOCT - Service Manual...
-
Page 127: Xy Scanner Cables Exchange
Before exchange any cable you should separate cable bunch. 1. Used tools: Cutters Tweezers 2. Cut all plastic band clips on cable bunch which clipping cable you want to exchange. To help yourself to remove band clips you can use tweezers. SOCT Copernicus / SPOCT - Service Manual... - Page 128 Please note that all cables can not be twisted during the exchange. SOCT Copernicus / SPOCT - Service Manual...
-
Page 129: Scanner Cable Exchange
X – scanner is the smaller scanner. On the pictures below it is marked by red arrow. X – scanner cable is marked by green arrow. 1. Disconnect the cable from the scanner as shown below. 2. Look at the controllers of scanners. (photo below) SOCT Copernicus / SPOCT - Service Manual... - Page 130 3. Disconnect the blue connector. Be careful not to break the pins (red arrows). 4. Unplug the black connector with two white cables. Remember, don't pull the cables. 5. Disconnect the white connector marked “X”. SOCT Copernicus / SPOCT - Service Manual...
- Page 131 6. Carefully remove the cable from the device and insert the new one. 7. Connect the connectors from the new X – scanner cable to the controller (firstly the smaller one, then the larger one). 8. Connect the white connector to the controller. SOCT Copernicus / SPOCT - Service Manual...
- Page 132 11. Connect the X – scanner cable to the scanner REMEMBER! !!! All of the connectors must be precisely and completely connected. !!! During the connection you have take notice to not twist the cable. SOCT Copernicus / SPOCT - Service Manual...
-
Page 133: Y - Scanner Cable Exchange
Y – scanner is the bigger scanner. On the picture below it is marked by red arrow. Y – scanner cable is marked by green arrow. 1. Disconnect the Y – scanner cable from the scanner as shown below. SOCT Copernicus / SPOCT - Service Manual... - Page 134 3. Disconnect the connectors as shown below. 4. Remove cable from the device and change to the new one. 5. Put new cable into the device. 6. Connect the connectors from Y – scanner cable to the controller. SOCT Copernicus / SPOCT - Service Manual...
- Page 135 X – scanner cable and Y – scanner cable look the same, but it can not be used interchangeably. Cables are always marked (X or Y) and can be used only to the scanner for which it was intended. SOCT Copernicus / SPOCT - Service Manual...
-
Page 136: Connection Of Cable Bunch After Exchange X - Scanner Or Y - Scanner Cable
Plastic band clips (15 stucks), size 2,5x100 mm or similar 2. Connect the cables using the plastic band clips. Firstly connect the bunch near the controllers and go to the direction of scanners. SOCT Copernicus / SPOCT - Service Manual... - Page 137 3. Make sure that the cables are not twisted. 4. Protruding parts of the band clips you can cut off by the cutters. SOCT Copernicus / SPOCT - Service Manual...
-
Page 138: Optics
DON’T DO ANY OPERATIONS UNTIL SOCT WARMS UP 5. Save spectrum again like (see point 3) 6. Remove guarantee seals from two plugs at the left side of SOCT. Left side view of the SOCT. 7. Unscrew two plugs. SOCT Copernicus / SPOCT - Service Manual... - Page 139 Please use only bottom screws marked with a red arrow. Pictures on the next page shows the view inside holes. Screw 1 Don’t move it. Screw 2 Left hole view Screw 3 Don’t move it. Screw 4 Right hole view SOCT Copernicus / SPOCT - Service Manual...
- Page 140 If spectrum is too height rotate screw 4 CW or CCW to get proper height If spectrum is too height rotate screw 2 CW or CCW to get proper height. k. If spectrum is OK stop procedure else start with point a. SOCT Copernicus / SPOCT - Service Manual...
- Page 141 11. Click Quit button in SKANTEST_lt program. 12. Install protection plugs (see 7). If you will get spectrum like in point 9 of this instruction you can be sure that spectrometer is properly adjusted. SOCT Copernicus / SPOCT - Service Manual...
-
Page 142: Autospectrometer
3. Manual mode. Operator can calibrate the spectrometer semi manually. Arrows identify the screws. Rules of alignment are that same like in handy adjusted system. Details see in chapter 10.1 . SOCT Copernicus / SPOCT - Service Manual... -
Page 143: No Signal In Skantest Program
2. If you have results like below go to point 3.5. 3. If peak is moved on right or left it is not incorrect. It is important that the spectrum width cannot exceed 80. SOCT Copernicus / SPOCT - Service Manual... - Page 144 ( see: Regulation of filter on reference lane). 6. If the power from objective lane is correct, lower peak high using filter on reference lane ( see: Regulation of filter on reference lane). SOCT Copernicus / SPOCT - Service Manual...
-
Page 145: Defocusing Of Spectrometer (Too Wide Peak)
( make turnover of 180 ) and then turn the screw from the left side in the same way. Turn alternately until you will get the highest peak ( always turn each of screw of 180 SOCT Copernicus / SPOCT - Service Manual... - Page 146 , then turn the screw from the left side ( also 180 ). Do it alternately until the peak will be the highest. 5. Using commands Full calibrate spectrometer. The picture below shows window’s program after inclusion of function Full. SOCT Copernicus / SPOCT - Service Manual...
- Page 147 ( see: Regulation of filter on reference line). If you have the correct spectrum, turn off program skantest, turn on program Copernicus and perform control scan. SOCT Copernicus / SPOCT - Service Manual...
-
Page 148: Too Low Spectrum On Skantest
If the height of spectrum does not fit in the correct range arrange it using filter of reference line Regulation of filter on reference line). If spectrum’s height achieved correct value turn off program skantest. Turn on program Copernicus and perform control scan. SOCT Copernicus / SPOCT - Service Manual... - Page 149 7. If the quality of scan is correct finish service activities. 8. If the quality is incorrect return to the program scantest. 9. Perform points from chapter 14.4 of this instructions. SOCT Copernicus / SPOCT - Service Manual...
-
Page 150: Too High Spectrum On Skantest
2. Measure the power from the objective lane (see: Checking and adjusting power on objective lane). When the power is incorrect arrange it to the normal value. 3. Perform steps from 3 to 9 from chapter 14.5 of this instruction. SOCT Copernicus / SPOCT - Service Manual... -
Page 151: Checking And Adjusting Power On Objective Lane
1,5; 2. Prepare the power meter. Set wavelength at 840nm. Head of Power meter The head of Power meter install on objective lens of SPOCT Copernicus and turn up screw. Run scantest program. SOCT Copernicus / SPOCT - Service Manual... - Page 152 Mark scan+Mov and then SLED. Check value of power on the power meter. (Correct value is 745-770μW) . if the power is set correctly you can finish measurement. SOCT Copernicus / SPOCT - Service Manual...
- Page 153 If the power value is incorrect . On the back side of SOCT in left down corner is small tap. Remove it. You see three screw from attenuator. Use a hexagonal tool size 1.5 to rotate first screw about 45 degree, all time you control value on power meter. SOCT Copernicus / SPOCT - Service Manual...
- Page 154 13. Turn off tap, remove head of power meter from objective lens of SPOCT Copernicus, turn off program skantest, turn on program Copernicus and do control scan. 14. If spectrum is incorrect ( for example: too high or too low) (see: Manual Spectrometer Auto spectrometer). SOCT Copernicus / SPOCT - Service Manual...
-
Page 155: Setting Fixation Point To The Centre Of The Cross
Tools needed to do activities shown in this instruction: web camera; program skantest; viewfinder mounted on objective lens; hexagonal key 2. 1. Run skantest program. 2. Mark scan+Mov and then SLED. When you switch on SLED, don’t look into objective lens!!! SOCT Copernicus / SPOCT - Service Manual... - Page 156 3. Mark Scanner Ctrl lap. 4. If you moved scroll scanner X or scanner Y press Center button . SOCT Copernicus / SPOCT - Service Manual...
- Page 157 5. Select Cross in menu ‘Program control’ and press a button Upload. 6. Press Run button. You will hear how scanners work. Now you can look at objective lens. SOCT Copernicus / SPOCT - Service Manual...
- Page 158 8. Look into objective lens. You will see red cross and green fixation point. If the setup is correct, fixation point is in the centre cross. If the setup is correct don’t read this instruction, if is incorrect go to the next point. 9. Install webcam (we use TRUST WB-3200G). SOCT Copernicus / SPOCT - Service Manual...
- Page 159 10. Press button Stop in bookmark Scanner ctrl in program skantest and the next press button Center at scroll scanner X and scanner Y. 11. Set up viewfinder on objective lens. SOCT Copernicus / SPOCT - Service Manual...
- Page 160 13. If the beam does not fall in the centre, continue with following steps. If beam is in centre position, and fixation still isn’t in the centre of the cross perform operations described in point 14. Remove upper part of the cover (see: Opening cover). Dichroic mirror SOCT Copernicus / SPOCT - Service Manual...
- Page 161 17. After setting the beam in the centre of the cross, remove viewfinder. 18. Check if fixation point is in the centre of the cross. If not follow further instructions. If fixation is in good position, proceed to the point SOCT Copernicus / SPOCT - Service Manual...
- Page 162 Notice that pads can be squeezed by tightening the screws in order to achieve little more of regulation range. 24. Attach mirror back to the unit and set the fixation to the proper point. SOCT Copernicus / SPOCT - Service Manual...
- Page 163 27. Look into the Copernicus lens and check if the fixation is in the centre of scanning cross. 28. Turn off the Skantest application and mount back the cover (see: Closing cover). 29. Run SPOCT Copernicus software and perform the trial scan on human eye. SOCT Copernicus / SPOCT - Service Manual...
-
Page 164: Checking And Adjusting The Polarization
Tools needed to do activities shown in this instruction: program skantest; artificial eye; spanner size 1. Open the SPOCT cover (read correct instruction ). 2. Run skantest program. 3. Mark scan+Mov and then SLED. SOCT Copernicus / SPOCT - Service Manual... - Page 165 4. adjust height spectrum at 1000 level (read the instruction: Regulation of filter on reference line). 5. Install artificial eye on objective lens. 6. Cover the signal from reference line. SOCT Copernicus / SPOCT - Service Manual...
- Page 166 7. Rotate screws artificial eye set the band-height on highest value. During rotating observe the spectrum. SOCT Copernicus / SPOCT - Service Manual...
- Page 167 8. Rotate screw 1 set the band-height on 1000 value. 9. Uncover signal from reference lane. 10. In program skantest obtain interference pattern. SOCT Copernicus / SPOCT - Service Manual...
- Page 168 13. Set the band height on 3000-3700 level. 14. Turn tap off, remove head of power meter from objective SPOCT Copernicus, turn off program skantest, turn program Copernicus on and do control scan. 15. Close the cover (see: Closing cover). SOCT Copernicus / SPOCT - Service Manual...
-
Page 169: Checking, Adjusting And Exchange Of Scanners
5. Turn off scantest program. 6. Open the cover (see: Opening cover). 7. Check Visual or scanners are unbroken. If the scanners are unbroken then go to point 4. The picture below shows not damaged scanners. SOCT Copernicus / SPOCT - Service Manual... - Page 170 8. The pictures below shows broken scanner Y. SOCT Copernicus / SPOCT - Service Manual...
-
Page 171: Exchanging Of Scanner Y
14.10.1 Exchanging of scanner Y 1. If scanner Y is broken, disconnect it’s plug. 2. Undo the screw. SOCT Copernicus / SPOCT - Service Manual... - Page 172 3. Extract the scanner. 4. Look for broken mirror. 5. Detach rest of broken mirror from holder . 6. Install new mirror. Mirror holder screws SOCT Copernicus / SPOCT - Service Manual...
- Page 173 7. Install scanner in scanner holder. 8. Install viewfinder on objective lens. 9. Install webcam. SOCT Copernicus / SPOCT - Service Manual...
- Page 174 11. Turn device on and the next switch on program skantest. 12. Referring to the camera image set the beam position in centre by rotating Y scanner. Rotation of Y scanner causes in horizontal movement of the beam. SOCT Copernicus / SPOCT - Service Manual...
-
Page 175: Exchange Scanner X
14. Switch off program skantest and check collision between scanners. 15. Close the SPOCT head (see: Closing cover). 14.10.2 Exchange scanner X 1. If scanner X is broken down, it disconnect him plug- in. 2. Unscrew bolt . SOCT Copernicus / SPOCT - Service Manual... - Page 176 3. Extract scanner. SOCT Copernicus / SPOCT - Service Manual...
- Page 177 4. Looking for broken down mirror. 5. Unscrew rest broken down mirror. 6. Install new mirror. Mirror holder screws SOCT Copernicus / SPOCT - Service Manual...
- Page 178 11. Switch on device and program skantest. 12. Referring to the camera image set the beam position in centre by rotating X scanner. Rotation of X scanner causes in horizontal movement of the beam. SOCT Copernicus / SPOCT - Service Manual...
- Page 179 13. Screw Bolt. 14. Switch off program skantest and check collision between scanners. 15. Close SPOCT head. SOCT Copernicus / SPOCT - Service Manual...
-
Page 180: Correcting Scanner Setup
7. Check if you can see beam on the viewfinder. 8. If beam is moved left or right follow the steps described in points 4.8-4.13. If beam is moved up or down follow all next steps. 9. Loosen the scanner X screw. SOCT Copernicus / SPOCT - Service Manual... - Page 181 11. Set beam in centre position and tighten the screw. 12. Check if there is no collision between scanners. 13. Close the cover (don’t follow this step if you have to adjust Y scanner too)(see: Closing cover). SOCT Copernicus / SPOCT - Service Manual...
- Page 182 14. Loosen the scanner Y screw . 15. Rotate the scanner all time monitoring view on the webcam. 16. Set beam in centre position and tighten the screw. SOCT Copernicus / SPOCT - Service Manual...
- Page 183 17. Check if there is no collision between scanners. 18. Close the cover (see: Closing cover). SOCT Copernicus / SPOCT - Service Manual...
-
Page 184: Cleaning Optics
- check in cleanness of lens and different glass components in refraction and objective path and spectrometer - check the transparency of optical units, are visible some splinter of glass or crack in structure of glass SOCT Copernicus / SPOCT - Service Manual... - Page 185 - dust we - remove blowing surfaces air from converter alternatively using brush with soft natural hair. !!!!! Unusually caution should keep during cleaning mirror surfaces of scanners. We execute this only brush, very gently so in order to does not break off mirrors !!!!!!!! SOCT Copernicus / SPOCT - Service Manual...
- Page 186 5. In case that optical elements are not only covered with dust, but fat traces are visible and unable to be removed with brush, than use isopropyl-alcohol and one-time disposal tissues designed for cleaning optical elements. One-time disposal tissues recommended by Optopol Technology Sp. z o.o Take out the tissue Fold tissue several times...
- Page 187 Clean in sequence: scanner Y first, Then scanner X. Same steps should be performed why cleaning optics above the scanners. SOCT Copernicus / SPOCT - Service Manual...
- Page 188 6. Cleaning the fibre optics. Collimator on objective lane Fiber cleaner 7. Close SPOCT cover (see: Closing cover). SOCT Copernicus / SPOCT - Service Manual...
-
Page 189: Regulation Of Filter On Reference Lane
Tools needed to do activities shown in this instruction: webcam; program skantest;; two spanners size 5,5 1. Open the cover (see: Opening cover). 2. Prepare optic cleaning set, two spanners size 5.5. 3. Red arrow indetificate the filter 4. Run Skantest program. SOCT Copernicus / SPOCT - Service Manual... - Page 190 5. Switch on Scan+Mov and SLED. 6. Switch on overlap SLED. SOCT Copernicus / SPOCT - Service Manual...
- Page 191 Range of every correction is about 1-2mm on spanner. After every small movement check the graph. Set the band-height on 3000-3700 value. 9. Ensure that filter is clear. Close the plastic cover. 10. Close the cover (see: Closing cover). SOCT Copernicus / SPOCT - Service Manual...
-
Page 192: Checking Of Sled Output Power, Checking Attenuator
-scantest program; - Power meter ; - set of new screws and pads 1. Open the cover (see: Opening cover) 2. Equip power meter with detector for measuring output power from optic fibre. SOCT Copernicus / SPOCT - Service Manual... - Page 193 3. Unscrew diode’s connector and attach detector of power meter. 4. Run Skantest program. SOCT Copernicus / SPOCT - Service Manual...
- Page 194 8. If Power is correct, reconnect dumper’s plug. 9. If output Power on diode is correct, but there is no Signal on the exit of reference and sample lane, unplug diode’s fibre connector. SOCT Copernicus / SPOCT - Service Manual...
- Page 195 10. Unscrew beam splitter connector. 11. Attach diode and beam splitter connectors to the optical fibre connector FC/APC. SOCT Copernicus / SPOCT - Service Manual...
- Page 196 If there is no signal on one or both courses it appears that beam splitter is broken. Unit should be sent back to the Optopol. 13. Exchange the dumper. To exchange attenuator unscrew two screws shown on the image.
-
Page 197: Crossing The Spectrometer
DON’T DO ANY OPERATIONS UNTIL SOCT WARMS UP 5. Save spectrum again like (see point 3) 6. Remove guarantee seals from two plugs at the left side of SOCT. Left side view of SOCT. 7. Unscrew two plugs. SOCT Copernicus / SPOCT - Service Manual... - Page 198 Please use only bottom screws marked red arrow. Pictures on the next page show view inside holes. Screw 1 Don’t move it. Screw 2 Left hole view Screw 3 Don’t move it. Screw 4 Right hole view SOCT Copernicus / SPOCT - Service Manual...
- Page 199 Turning screws will cause CCD camera move up and down on its trolley. Left screw adjusts height of left side of the trolley, and right screw adjusts height of right side of the trolley. Picture below shows optimal trolley position according to beam position Trolley Beam Scews SOCT Copernicus / SPOCT - Service Manual...
- Page 200 Beam out of camera detection range (too low) Changing trolley position by turning screws causes change of camera position and angle. SOCT Copernicus / SPOCT - Service Manual...
- Page 201 Below scheme shows step-by-step adjusting of spectrometer. SOCT Copernicus / SPOCT - Service Manual...
- Page 202 SOCT Copernicus / SPOCT - Service Manual...
-
Page 203: Automatic Crossing Of Spectrometer
Up_Dn or Dn_Up. To Change camera trolley position and cross spectrometer. To change the position of trolley you can also use spectrometer manual control for left and right screw. To see (adjusting spectrometer step-by-step). Manual spectrometer adjustment for Left and right screw SOCT Copernicus / SPOCT - Service Manual... - Page 204 2. If peak is moved on right or left it is not incorrect. It is important that the spectrum width cannot exceed 80. SOCT Copernicus / SPOCT - Service Manual...
-
Page 205: Focusing The Spectrometer
5. Width should be less than 80. 6. After setting the width, check if with on spectrometer crossed to the other side also don’t exceeds 80 and values on both sides are almost the same. SOCT Copernicus / SPOCT - Service Manual... -
Page 206: Checking The Stability Of The Spectrometer
6. If in time of test spectrum drops more than 10% check if spectrometer isn’t tight assembled with plastic covers. 7. If so, then loosen little bit screws holding plastic cover and remove mounting tape if exists, so spectrometer covers can move loosely on it. SOCT Copernicus / SPOCT - Service Manual... - Page 207 8. Check if CL cable isn’t twisted, squeezed or damaged. 9. If so then unscrew CL cable from camera, and straighten cable to level the tensions and reassembly CL cable and perform Spectrometer stability test again. SOCT Copernicus / SPOCT - Service Manual...
-
Page 208: Eliminating The Improper Cross Lines Shape
7. All time while adjusting the potentiometers look into the objective lane. 8. If adjusting the X board didn’t help try to adjust the same potentiometer on the Y board. SOCT Copernicus / SPOCT - Service Manual... -
Page 209: Faq
Use joystick to move the device’s measurement head closer to patient. The retina cross section image will go down on the window and then up again in a straight orientation. SOCT Copernicus / SPOCT - Service Manual... - Page 210 There are live retina cross section images visible, but the image quality if very poor. Most common reason for this problem is the improper refraction compensation setting. Once you have the retina image visible, try adjusting Refraction compensation setting to obtain best image. SOCT Copernicus / SPOCT - Service Manual...
- Page 211 The synchronization cable or adapter cable is not connected or connected improperly. Make sure the adapter cable (flat VHDCI connector) is properly connected to frame grabber card. Make BNC connector is connected to synchro input (T0 input). SOCT Copernicus / SPOCT - Service Manual...
- Page 212 A11: See A10 Q12: Unit functioning in skantest program is proper, but in SOCT Copernicus software there is no tomogram. A12: Symptom indicates that there is problem with software or synchro cable. Check or reinstall software or replace cable and perform tests.
- Page 213 Q18: Scan’s saturation is low. A18: Wrong outgoing power, spectrum is not pulled by the program, bad polarization. Check outgoing power, spectrum height, polarization. SOCT Copernicus / SPOCT - Service Manual...
- Page 214 If so: exchange scanners. Q21: While performing scans, it’s able to notice that on height about 700 scan is almost invisible. A21: Perform spectrometer stability test, check CL cables. Bad scan Good scan SOCT Copernicus / SPOCT - Service Manual...
- Page 215 Clean connectors. Q25: Vertical line appears on tomogram on height about 400. A25: Line usually comes from AVIVA camera. By adjusting AVIVA camera angle, try to eliminate line. Check if spectrometer works properly. SOCT Copernicus / SPOCT - Service Manual...
- Page 216 Crossed scanner wires – check if scanner cables are placed properly. Unregulated filters on the scanners boards – regulate the filter by gray potentiometer on the scanners board Broken scanner controller or engine – exchange scanners. SOCT Copernicus / SPOCT - Service Manual...
- Page 217 While normal movement of the SOCT head scanners change their status to error status. A32: Check correctness of the attachment scanners engines connectors, check correctness of voltage in the main grid, check PSB board 150-520. SOCT Copernicus / SPOCT - Service Manual...
- Page 218 (after cable connection device must be restarted). -No voltage on AVIIVA camera (after cable connection device must be restarted). Q36: Connection with SOCT error. Please Reconnect. A36: -No voltage on AVIIVA camera (during work). -CL cable disconnected (during work). SOCT Copernicus / SPOCT - Service Manual...
- Page 219 A37: -NI driver is not installed. Q38: Unnatural shape of the spectrum. A38: -Wrong camera selected in NI drivers . Q39: Calibration fail. Please run scantest_lt. A39: -NI driver is not installed. SOCT Copernicus / SPOCT - Service Manual...
- Page 220 The serial read did not complete with the specified timeout period. A41: -Wrong camera selected in NI drivers. Q42: The serial read did not complete with the specified timeout period. A42: -Wrong camera selected in NI drivers. SOCT Copernicus / SPOCT - Service Manual...
- Page 221 Q42: Scanning beam has irregular shape. Dots on the cross. A42: -Wrong conection SOCT Copernicus / SPOCT - Service Manual...
-
Page 222: Spare Parts List
Video frame grabber and 3D accelerator A001 1. 4 fully installed and configured, Keyboard, Mouse, Mouse pad Camera Link Frame Grabber A004 card 6. 7 PCI-1428 Video frame A005 7. 8 Grabber card SOCT Copernicus / SPOCT - Service Manual... - Page 223 Joystick A006 Graphic card with A007 3D accelerator 10. 1 BNC adapter cable B001 RS232 and Video/synchron 11. 1 B002 cable 1,8m long Power supply cable 12. 1 B003 3m long SOCT Copernicus / SPOCT - Service Manual...
- Page 224 B004 Type depend from Separation B005 Transformer Power Supply 230V or 115V Transport C001 protection handle 16. 1 Chinrest adapter C002 Single use chinrest 1 set – 100 labels 17. 1 C003 labels SOCT Copernicus / SPOCT - Service Manual...
- Page 225 Chinrest pin C004 19. 1 Dust cover C005 SOCT (SPOCT) 20. 1 Transportation D001 box (full) SOCT (SPOCT) transportation box 21. 1 D002 (top cover only) SOCT (SPOCT) Transportation 22. 1 D003 (base only) SOCT Copernicus / SPOCT - Service Manual...
- Page 226 CPU module 25. 2 E002 (150-505) Depends on device configuration Movement control 26. 2 module For devices with E003 extreme detectors (150-515) or without extreme detectors Type depend from serial number SLED diode E004 SOCT Copernicus / SPOCT - Service Manual...
- Page 227 E005 (150-530) Spectrometer movement module 29. 2 E006 (150-536) Refraction and camera servo 30. 2 E007 control module (150-535) Depend from serial 31. 2 Chinrest module E008 number 32. 2 Forehead frame E009 SOCT Copernicus / SPOCT - Service Manual...
- Page 228 Depend from serial Left – Right number movement Motor for Up – Down/ Depend from serial 36. 3 E013 number Back – Forth/ movement Motor for Depend from serial 37. 3 E014 number chinrest module SOCT Copernicus / SPOCT - Service Manual...
- Page 229 E016 (Scanners + cables + Controllers ) Scanner set X 40. 3 (Scanner + Cable + E017X Controller ) Scanner set Y (Scanner + Cable + E017Y Controller ) Scanner X cable E018X SOCT Copernicus / SPOCT - Service Manual...
- Page 230 Scanner X mirror E019 Scanner Y mirror E020 Micro switches Set includes 2 E021 with screws detectors and 4 screws Micro switches Set includes 2 with screws for E022 detectors and 4 chinrest screws SOCT Copernicus / SPOCT - Service Manual...
- Page 231 Preview camera E023 Spectrometer E024 servomechanism module Scanners E025 converter board Shulter filter E026 Depend device serial Main lens F001 number SOCT Copernicus / SPOCT - Service Manual...
- Page 232 Belt type depends on the serial number of the device. F006w Spare motor belt w – white for old for chinrest type of chinrest F006b b – black for new type of chinrest SOCT Copernicus / SPOCT - Service Manual...
- Page 233 100 nuts) frame to main frame Set (10 screws and 20 nuts) Screws to fix F010 ground line to the headrest Up to date part pricelist can be downloaded from OPTOPOL ftp server http://dane.optopol.com/ SOCT Copernicus / SPOCT - Service Manual...
-
Page 234: Service Tools
Small hexagonal set Size: 2, 1.5, 1.3, 0.9, 0.7 Hexagonal set Size: 1.5, 2, 2.5, 3, 4, 5, 6, 8, 10 Sparks Size: 2 x 5.5 Calibrating sight (viewfinder) USB digital camera on support SOCT Copernicus / SPOCT - Service Manual... - Page 235 Optic fibre adapter + lens adapter for set PM120 Infra-red detector Cleaning set: Cloth, air pump with brush, disposal cleaning paper, Grease Kluber Lubrication Kluberpaste UH1 84-201 100ml Grease Kluber Lubrication Klubersynth RA-3502 100ml SOCT Copernicus / SPOCT - Service Manual...
- Page 236 Smar ŁT-43 100ml Tool for replace main lens Optic fiber connector cleaner CLETOP-S Programming jumper 10 x Usable scanner regulation hexagonal key Up to date part pricelist can be downloaded from OPTOPOL ftp server http://dane.optopol.com/ SOCT Copernicus / SPOCT - Service Manual...
Need help?
Do you have a question about the SOCT Copernicus and is the answer not in the manual?
Questions and answers