Advertisement
Quick Links
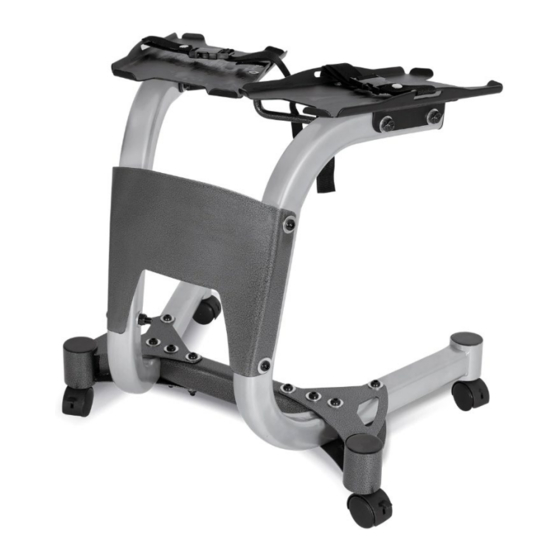
Dumbbell Stand
Product may vary slightly from the item pictured due to model upgrades.
Read all instructions carefully before using this product.
Retain this owner's manual for future reference.
NOTE:
This manual should not be used to guide your purchasing decision. Your product, and the contents inside its carton, may vary
from what is listed in this manual. This manual may also be subject to updates or changes. Updated manuals are available
through our website at
www.lifespanfitness.com.au
V1 Adjustable
USER MANUAL
Advertisement

Related Manuals for Cortex V1


Summary of Contents for Cortex V1
- Page 1 V1 Adjustable Dumbbell Stand USER MANUAL Product may vary slightly from the item pictured due to model upgrades. Read all instructions carefully before using this product. Retain this owner’s manual for future reference. NOTE: This manual should not be used to guide your purchasing decision. Your product, and the contents inside its carton, may vary from what is listed in this manual.
-
Page 2: Table Of Contents
TABLE OF CONTENTS Important Safety Instructions ....... 03 II. Exploded Diagram ..........04 III. -
Page 3: Important Safety Instructions
I. IMPORTANT SAFETY INSTRUCTIONS WARNING: Read all instructions before using this machine. Please keep this manual with you at all times. • It is important to read this entire manual before assembling and using the equipment. Safe and effective use can only be achieved if the equipment is assembled, maintained and used properly. PLEASE NOTE: It is your responsibility to ensure that all users of the equipment are informed of all warnings and precautions. -
Page 4: Exploded Diagram
II. EXPLODED DIAGRAM EXPLODED DIAGRAM |... -
Page 5: Parts List
III. PARTS LIST Tools Required Part No. Description 7/32" Allen Wrench (included) Tube, Bottom Cross Brace Assembly, Rear Left Stabiliser Assembly, Rear Right Stabiliser Assembly, Stand Leg You will also need: Weldment, Left Dumbbell Platform 9/16: Socket Weldment, Right Dumbbell Platform 9/16"... -
Page 6: Assembly Instructions
IV. ASSEMBLY INSTRUCTIONS STEP 1 1. Attach the Rear Left Stabiliser (#2) to the Stand Leg (#4) using bolts (#12, #11, #10). NOTE: Do not tighten bolts. STEP 2 1. Attach the Rear Right Stabiliser (#3) to the Stand Leg (#4) using bolts (#12, #11, #10). - Page 7 STEP 3 1. Attach the Bottom Cross Brace (#1) to the Rear Left Stabiliser (#2) and Rear Right Stabiliser (#3) using the bolts shown. Make sure that the narrower edge of the Cross Brace (#1) is closer to the Stand Leg (#4) uprights.
- Page 8 STEP 4 1. Install the Centre Plate (#17) to both Stand Legs (#4) using the bolts shown. NOTE: Make sure that the Centre Plate edges are on the outer sides of the legs, and that the logo of the plate is right side up. 2.
- Page 9 STEP 5 1. Secure the Left Dumbbell Platform (#5) to Left Stand Leg (#4) using the bolts shown. NOTE: Make sure the screw holes in the Platform are toward the centre of the stand. ASSEMBLY INSTRUCTIONS |...
- Page 10 STEP 6 1. Secure the Right Dumbbell Platform (#6) to Right Stand Leg (#4) using the bolts shown. NOTE: Make sure the screw holes in the Platform are toward the centre of the stand. | ASSEMBLY INSTRUCTIONS...
- Page 11 STEP 7 1. Attach the Towel bar (#7) to the Left Dumbbell Platform (#5) and the Right Dumbbell Platform (#6) using hardware shown. Hand tighten screws in a cross pattern, to ensure even fit. NOTE: Tighten all screws securely. ASSEMBLY INSTRUCTIONS |...
- Page 12 STEP 8 1. Attach either Foot Pegs (#8) or Caster Wheels (#15) to the Rear Left Stabiliser (#3), and both Stand Legs (#4). 2. Attach the Hold Down Straps (#9) to the Left Dumbbell Platfrom (#5) and the Right Dumbbell Platform (#6) as shown.
-
Page 13: Exercise Guide
V. EXERCISE GUIDE PLEASE NOTE: Before beginning any exercise program, consult your physician. This is important especially if you are over the age of 45 or individuals with pre-existing health problems. The pulse sensors are not medical devices. Various factors, including the user’s movement, may affect the accuracy of heart rate readings. - Page 14 COOL DOWN Finish each workout with a light jog or walk for at least 1 minute. Then complete 5 to 10 minutes of stretching to cool down. This will increase the flexibility of your muscles and will help prevent post- exercise problems.
-
Page 15: Warranty
VI. WARRANTY AUSTRALIAN CONSUMER LAW Many of our products come with a guarantee or warranty from the manufacturer. In addition, they come with guarantees that cannot be excluded under the Australian Consumer Law. You are entitled to a replacement or refund for a major failure and compensation for any other reasonably foreseeable loss or damage. - Page 16 WWW.L IF ESPAN F ITNE S S . COM . A U...
Need help?
Do you have a question about the V1 and is the answer not in the manual?
Questions and answers