
Related Manuals for Argos Home Scandinavia 6423801


Summary of Contents for Argos Home Scandinavia 6423801
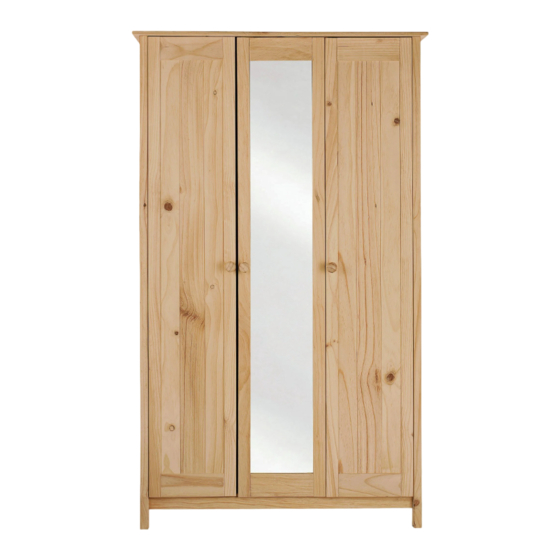
- Page 1 Scandinavia 3 door robe w. mirror 530mm 1070mm 1799mm Page 1 of 21 Scandinavia 3 door robe w. mirror...
- Page 2 Please sort out all parts before you begin to assemble the item. This to make sure you always use the correct part. Fittings contained in the Box. 12 pcs. Cam - ø15 x 12mm 4 pcs. 12 pcs. Bolt - ø6,5 x 24/11mm Dowel - ø8 x 30mm 40 pcs.
- Page 3 Wooden parts contained in the box. Door, right Door w. mirror 1 pcs. 1 pcs. 1 pcs. 1070 x 530mm Door, left 1 pcs. Plinth 2 pcs. 960 x 45mm Bottom 1 pcs. 960 x 480mm Support Rail 1 pcs. 640 x 90mm Side, right Side, left...
- Page 4 A Guide to Wall Mounting & Fixings IMPORTANT: When drilling into walls always check that there are no hidden wires or pipes etc. Make sure that the screws and wall plugs being used are suitable for supporting your unit. Consult a qualified tradesperson if you are unsure. HINTS: 1) General Rule Always use a larger screw and wall plug if you are not sure.
- Page 5 Key diagram. Function of cam & bolt. Step 1: Step 2: Step 3: Step 4: Fix the Bolt to the Push the wooden Panel Place the Cam into the Tighten: Turn the Cam to wooden Panel. with the attached Bolt onto Hole, arrow pointing the Right.
-
Page 6: Fig. 2.1
1. Mounting the cross plates to the sides. Fig. 1.1 Fix the cross plates "P" to the sides "5" and "6" using screws "E" into the holes 12 Pcs. indicated. It is important that the cross plates is placed exactly as shown. Long end The short end of the cross plates must... -
Page 7: Fig. 4.1
3. Mounting the bolts to the sides. Screw the bolts "B" into the holes indicated on the sides "5" and "6". Side, left NO Bolt here Side, right 5 Pcs. 4. Mounting the cross plates to the divider. Fix the cross plates "P" to the divider "7"... - Page 8 5a. Mounting the hanging rail cup to the divider. Fix the hanging rail cup Fig. 5a.1 "L" onto the left hand side of the divider "7" using screws "D" into 2 Pcs. the pre-drilled holes. See fig. 5a.1 1 Pcs. Divider 5b.
- Page 9 7. Adding the dowels to the support rail. Knock the dowels "C" into the holes indicated on the support rail "4". 4 Pcs. Support Rail 8. Adding the miniblocks to the plinths. Fig. 8.1 Knock the miniblocks "Q" into the holes 4 Pcs.
-
Page 10: Fig. 11.1
11. Mounting the magnets to the top. Fix the magnets "H" to the top "1" using screws 6 Pcs. "D" into the pre-drilled holes. Front edge 3 Pcs. It is important that the magnetic part points towards the front edge of the top. - Page 11 14. Adding the side to the plinths and the support rail. Press the side "5" onto the plinths "2" and the support rail "4". 3 Pcs. See page 4 "Function of the cam & bolt". Side, left Place the cams "A" into the holes indicated, arrows pointing towards the side / bolt.
- Page 12 16. Assembling the top to the sides. Lower the top "1" onto the sides "5" and "6" and the divider "7". See page 4 "Function of the cam & bolt". Place the cams "A" into the holes indicated, arrows pointing towards the top / bolt.
-
Page 13: Table Of Contents
17. Adding the back to the carcass. Place the back "11" into Fig. 17.4 the rabbet of the top "1" Fig. 17.1 and the side "6". Ensure there is NO GAP between the side and the Rabbet = Back back, NOR between the top and the back. - Page 14 18. Adding the back and the joining strip to the carcass. Place the joining strip fig. 18.2 "S" onto the back. See fig. 18.1 Fig. 18.1 Place the back into the rabbet of the top "1" and the side "5". Ensure there is NO GAP between the side and the back, NOR between the...
- Page 15 19. Mounting the cup hinges to the doors. Lower the cup hinges "N" into the holes indicated on the doors "8", "9" and "10". Door, right Fix the hinges using screws "D". Fig. 19.1 Door, left 18 Pcs. Fig. 19.1 Door w.
- Page 16 20. Mounting the doors to the carcass. When placing the doors, the magnet catches MUST point upwards. Step 1 Fig. 20.2 Place the adjustment hole of the cup hinge at Cross plate the level of the fixing screw. Push the cup hinge towards the cross Fig.
- Page 17 21. Mounting the knobs & adding the hanging rails. Lower the hanging rails Fig. 21.1 "O" and "R" into the hanging rail cups "L". Hanging rail Hanging rail Fix the knobs "K" to the doors using Fig. 21.2 screws "F". 3 Pcs.
- Page 18 22a. Adjusting the doors from side to side. MAKE SURE THE Fig. 22a.1 WARDROBE IS PLACED ON A PLANE SURFACE BEFORE YOU BEGIN Adjusting ADJUSTING THE HINGES. screw Step 1 Loosen the fixing screw. Step 2 To adjust the door away from the side (towards the other door / the centre) - turn the adjusting screw...
- Page 19 22b. Adjusting the doors forwards or backwards. Step 1 Loosen the fixing screw. Step 2 Push the cup hinges / the Fig. 22b.1 door back OR forth to adjust. The doors should level with the front edge of the sides. Step 3 Tighten the fixing screws of ALL of the cross...
- Page 20 22c. Adjusting the doors up or down. Step 1 Loosen the two screws "E"/"D" of each cross plate, BUT ONLY as much as it will allow the Fig. 22a.1 cross plate to move up and down. Step 2 "E"/"D" Adjust the cross plate / the door.
- Page 21 Dear Customer This unit complies with BS 7449: (1991). Manufacturer (or supplier): Argos MK9 2NW Model No. : 6423801 Scandinavia 3 door robe w. mirror Date: 10-10-2007 Keep these instructions for further use. This unit contains film backed glass of a nominal thickness of 4 mm. If a glass component is chipped or broken replace with glass of the type described on this label.
- Page 39 A Guide to - Wall Mounting & Fixings Important: When drilling into walls always Important note: check that there are no hidden wires or pipes etc. If plastic wall plugs Make sure that the screws and wall plugs being used are are supplied with suitable for supporting your unit.
- Page 40 Dear Customer Dear Customer Please note that the product you have purchased is a natural living timber. Just like nature itself, wood varies in shape and colour. Knots, vein patterns, resin pockets and colour differences contribute to giving the piece of furniture its beauty and form - a natural part of solid wood.
Need help?
Do you have a question about the Scandinavia 6423801 and is the answer not in the manual?
Questions and answers