Advertisement
Quick Links
Advertisement

Subscribe to Our Youtube Channel
Related Manuals for Argos Home Scandinavia 642/3753


Summary of Contents for Argos Home Scandinavia 642/3753
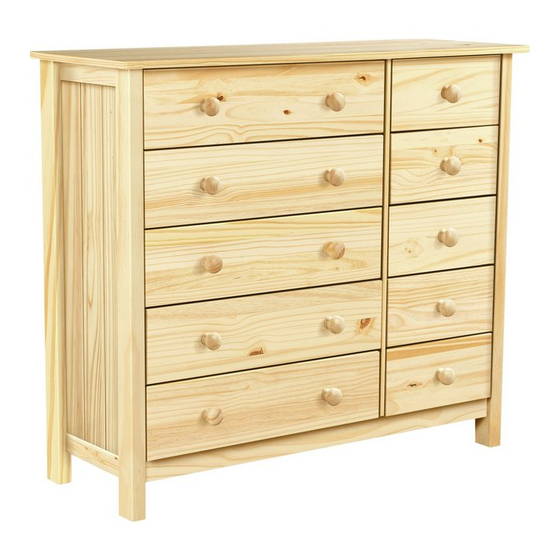
- Page 1 Scandinavia 5+5 drw. chest 400mm 1052mm 933mm Page 1 of 17 Scandinavia 5+5 drw. chest...
- Page 2 Please sort out all parts before you begin to assemble the item. This to make sure you always use the correct part. Fittings contained in the box. 12 pcs. Cam - ø15 x 12mm 52 pcs. Bolt - ø6,5 x 24/11mm 40 pcs.
- Page 3 Wooden parts contained in the box. Back 960 x 400mm 2 pcs. Drawer front, large 5 pcs. 606 x 157mm Side, right 1 pcs. Side, left Drawer front, small 1 pcs. 5 pcs. 1052 x 400mm 314 x 157mm 1 pcs. Drawer back, large 5 pcs.
- Page 4 A Guide to Wall Mounting & Fixings IMPORTANT: When drilling into walls always check that there are no hidden wires or pipes etc. Make sure that the screws and wall plugs being used are suitable for supporting your unit. Consult a qualified tradesperson if you are unsure. HINTS: 1) General Rule Always use a larger screw and wall plug if you are not sure.
-
Page 5: Key Diagram
Key diagram. Function of cam & bolt. Step 1: Step 3: Step 4: Step 2: Fix the bolt to the Push the wooden panel Place the cam into the Tighten: Turn the cam to wooden panel. with the attached bolt onto hole, arrow pointing the right. - Page 6 1. Inserting the dowels to the plinths. Knock the dowels "F" into the holes indicated on both the plinths "4". 2 pcs. 4 pcs. 2. Mounting the bolts to the plinths. Screw the bolts "C" into the hole indicated on both the plinths "4".
- Page 7 4. Mounting the plastic runners to the sides. Fix the plastic runners "H" to the sides "1" and "2", using screws "D". 10 pcs 10 pcs The dowel should be pointing towards the sides. Start fixing the ends of the plastic runners to the sides as shown in fig.
- Page 8 5. Adding the plinths to the right hand side. Press the plinths "4" Fig. 5.1 onto the side "2". 2 pcs. See page 4 "Function of the cam & bolt". Place the cams "A" into the holes indicated, Side, right arrows pointing towards the side / bolt.
- Page 9 7. Inserting the dowels to the divider. Knock the dowels "F" into the holes indicated on the divider "5". 2 pcs. Divider 8. Mounting the plastic runners to the divider - part 1. Fix the plastic runners "K" to the left hand 5 pcs.
- Page 10 9. Mounting the plastic runners to the divider - part 2. Turn around the divider. 5 pcs. 5 pcs. Fix the plastic runners "K" to the right hand side. First use the two holes in the plastic runners placed second from the ends.
- Page 11 11. Assembling the top to the divider. Press the divider "5" Fig. 11.1 onto the top "3". See page 4 "Function of the cam & bolt". Place the cams "A" into the holes indicated, arrows pointing towards the top / bolts. Tighten: Turn the cams to the right.
- Page 12 13. Nailing the back to the top. Place the back into the rabbet of the top "3" and the side "2". See fig. 13.1 Ensure that there is NO GAP between the right hand side "3" and the back "6" , NOR between the top and the back.
- Page 13 15. Adding the lower back and the joining strip. Place the joining strip "L" in between the upper and lower backs "6". See fig. 15.1 Fasten the back with nails "G" along the sides. Use the nail Joining Strip guide "M" . See page 11, fig.
- Page 14 18. Mounting the bolts to the drawer front. Screw the bolts "C" into the holes indicated on the drawer front "7". 20 pcs. 5 pcs. 19. Adding the drawer front to the drawer frame. Press the drawer front "7" Fig. 19.1 onto the drawer sides "11"...
- Page 15 21. Mounting the drawer sides to the drawer back. Fix the drawer sides "11" and "12" to the 5 pcs. drawer back "10" using screws "E". 5 pcs. The grooves of the drawer sides and back should be turned exactly as shown. See fig.
- Page 16 24. Adding the drawer front to the drawer frame. Press the drawer front "8" onto the drawer sides "11" and "12". 20 pcs. Place the cams "B" into the holes indicated, arrows pointing towards the bolts. 5 pcs. Tighten: Turn the cam to the right.
-
Page 17: Dear Customer
Dear Customer. Please note that the product you have purchased is a natural living timber. Just like nature itself, wood varies in shape and colour. Knots, vein patterns, resin pockets and colour differences contribute to giving the piece of furniture its beauty and form - a natural part of solid wood. - Page 18 Scandinavia 5+5 DRW. CHEST 400mm 1052mm 933mm 5+5 drw. chest Page 1 of 18...
- Page 19 Please sort out all parts before you begin to assemble the item. This to make sure you always use the correct part.
-
Page 21: A Guide To - Wall Mounting & Fixings
A Guide to - Wall Mounting & Fixings Important: When drilling into walls always Important note: check that there are no hidden wires or pipes etc. If plastic wall plugs Make sure that the screws and wall plugs being used are are supplied with your suitable for supporting your unit. - Page 22 Key diagram. Function of cam & bolt. Step 1: Step 3: Step 4: Step 2: Fix the bolt to the Push the wooden panel Place the cam into the Tighten: Turn the cam to wooden panel. with the attached bolt onto hole, arrow pointing the right.
- Page 23 1. Inserting the dowels to the plinths. Knock the dowels "F" into the holes indicated on both the plinths "4". 2 pcs. 4 pcs. 2. Mounting the bolts to the plinths. Screw the bolts "C" into the hole indicated on both the plinths "4".
- Page 30 15. Adding the lower back and the joining strip. Place the joining strip "L" in between the upper and lower backs "6". See fig. 15.1 Fasten the back with nails "G" along the sides. Use the nail Joining Strip guide "M" . See page 11, fig.
- Page 32 21. Mounting the drawer sides to the drawer back. Fix the drawer sides "11" and "12" to the 5 pcs. drawer back "10" using screws "E". 5 pcs. The grooves of the drawer sides and back should be turned exactly as shown. See fig.
- Page 35 Dear Customer. Please note that the product you have purchased is a natural living timber. Just like nature itself, wood varies in shape and colour. Knots, vein patterns, resin pockets and colour differences contribute to giving the piece of furniture its beauty and form - a natural part of solid wood.
- Page 52 A Guide to - Wall Mounting & Fixings Important: When drilling into walls always Important note: check that there are no hidden wires or pipes etc. If plastic wall plugs Make sure that the screws and wall plugs being used are are supplied with suitable for supporting your unit.
- Page 53 Dear Customer Dear Customer Please note that the product you have purchased is a natural living timber. Just like nature itself, wood varies in shape and colour. Knots, vein patterns, resin pockets and colour differences contribute to giving the piece of furniture its beauty and form - a natural part of solid wood.
Need help?
Do you have a question about the Scandinavia 642/3753 and is the answer not in the manual?
Questions and answers