Advertisement
Quick Links
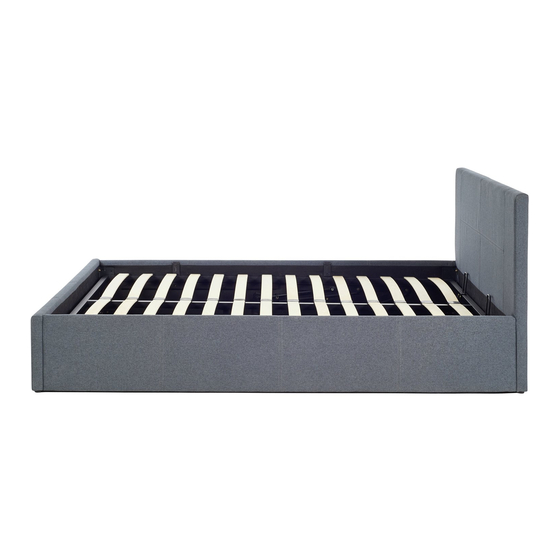
4',4'6 and 5' Lavendon End Opening Ottoman Bed
Assembly Instructions
hygena
Dimensions (4')
Length - 203cm
Width - 130cm
Height - 82cm
Important
Please read these instructions fully before starting assembly
If you need help or have damaged or missing parts, call the Customer Helpline: 0345 6400 800
Please keep for future reference
Dimensions
(4'6)
Length - 203cm
Width - 145cm
Height - 82cm
Dimensions
(5')
Length - 213cm
Width - 160cm
Height - 82cm
3979286
4129626
4183040
5723681
5744866
5747588
7118225
7118294
7232936
7238105
7343997
7345328
7392395
7396951
7420937
Issue 1 - 03/05/17
Advertisement

Related Manuals for Argos Home Hygena 4129626


Summary of Contents for Argos Home Hygena 4129626
- Page 1 4',4'6 and 5' Lavendon End Opening Ottoman Bed Assembly Instructions Please keep for future reference 3979286 4129626 hygena 4183040 5723681 5744866 5747588 7118225 7118294 7232936 7238105 7343997 7345328 7392395 7396951 7420937 Dimensions (4') Dimensions Dimensions (4'6) (5') Length - 203cm Length - 213cm Length - 203cm Width - 130cm...
- Page 2 Safety and Care Advice Assemble the item as close We do not Check you have all the recommend the components and tools listed on to its final position (in the same use of power pages 2, 3 and 4. room) as possible. drill/drivers for Remove all fittings from the Assemble on a soft level...
- Page 3 0345 6400 800 INSIDE INSIDE FRONT INSIDE Hinge Mechanism (x 1 pair) NOTE: PISTON ATTACHED Fabric base x 1 Ottoman end frame (Footboard) x 1 Ottoman end frame (Headboard) x 1 NOTE: EXTRA HOLES...
- Page 4 0345 6400 800 Ottoman frame (Sides) x 2 Bentwood slats x28(4'-598*9*53mm) (4'/4'6-1822*30mm)(5'-1922*30mm) Bentwood slats x28(4'6-675*9*53mm) Bentwood slats x30(5'-750*9*53mm) Ottoman frame centre support x 1 Double slat caps x 14 (4'-55mm) (4'/4'6-1822*30mm)(5'-1922*30mm) Double slat caps x 14 (4'6-55mm) Double slat caps x 15 (5'-55mm) Stretcher x 1 Mattress support Single slat caps x 28 (4'-55mm)
- Page 5 Components - Fittings 0345 6400 800 45mm M8 Bolt x 8 25mm M8 Bolt x 20 30mm M8 Bolt x 18 45mm M4 Wood screw x 16 17mm Flat washer x 46 Nut x 6 12mm Spring washer x 20 30mm M4 Wood screw x 4 5mm Allen key x 1 Box spanner x 1...
- Page 6 Assembly Instructions Preparing headboard and footboard a: With help, carefully place headboard footboard flat onto the floor with the fixing holes facing up as shown. Note: Ensure the floor is suitably clean to protect the headboard and footboard from damage. Loosely insert bolts fixings into...
- Page 7 Assembly Instructions Attaching side rails With help, raise headboard into the standing position. Hang the metal brackets on the end of the side rails , over the bolts in the headboard Holes at headboard Note: Ensure the holes on the inside of each side rail are located at the headboard end as shown.
- Page 8 Assembly Instructions Attaching cover With help, carefully turn the frame onto its side. Warning: The frame is heavy. Lift with care. Attach fabric base the underside of the frame using the velcro strips on all 4 sides. Attaching feet Assemble feet to the underside of the headboard and footboard...
- Page 9 Assembly Instructions Attaching folding hinges With help, carefully return the frame to the standing position. Secure hinges side rails using fixings as shown. Note: Ensure the hinges are fitted the correct way around as shown. Preparing ottoman frame Assemble support legs to the underside of ottoman centre support using fixings...
- Page 10 Assembly Instructions Assembling ottoman frame a: Loosely assemble ottoman frame components 10 11 together as shown. Note: The two support legs should be positioned closer to the headboard as shown. Ottoman end frame extra holes as shown. This is the headboard end. Note: Secure the assembly using fixings Shown upside down...
- Page 11 Assembly Instructions Aligning ottoman frame Ensure hinges folded flat as shown. Warning: Keep hands clear of the folding areas at all times. With help, lift the assembled ottoman frame into position, ensuring the mattress support brackets are correctly located at the headboard end.
- Page 12 Assembly Instructions Connecting pistons Warning: Two people will be required! With the ottoman frame fully supported in the raised position, connect Nut pre-assembled the loose end of the pistons to hinges , using the nuts that are pre-assembled onto the hinges.
- Page 13 Assembly Instructions Attaching slats a: Assemble single slat caps onto one end of bentwood slats b: Fit bentwood slats into the ottoman frame (sides) , by locating single slat caps into the holes. c: Fit bentwood slats into both sides of double slat caps , before pushing caps...
Need help?
Do you have a question about the Hygena 4129626 and is the answer not in the manual?
Questions and answers