Table of Contents
Advertisement
Quick Links
Advertisement
Table of Contents

Related Manuals for NovaStar MX Series


Summary of Contents for NovaStar MX Series
- Page 1 MX40 Pro LED Display Controller User Manual...
- Page 2 MX40 Pro LED Display Controller User Manual Change History Document Version Release Date Description V1.0.0 2022-07-09 First release www.novastar.tech...
-
Page 3: Table Of Contents
7.7 View the Firmware Version ..............................23 7.8 Reset to Factory Settings ..............................24 8 Basic System Settings ................................25 8.1 Set Language ..................................25 8.2 Set Session Timeout ................................25 8.3 View Service Information ..............................25 9 Specifications ..................................... 26 www.novastar.tech... -
Page 4: Overview
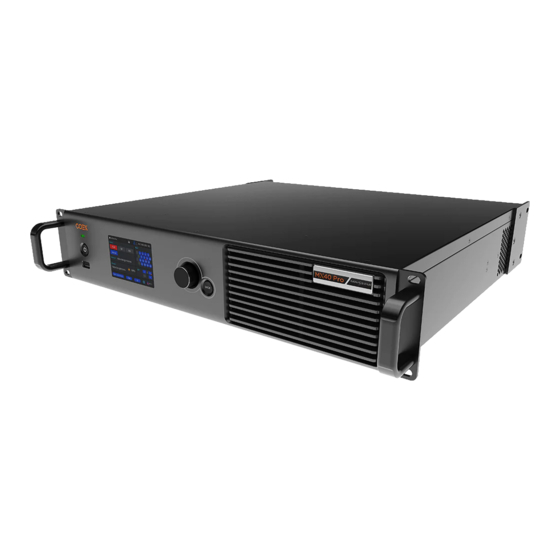
The MX40 Pro is a flagship all-in-one LED display controller with 20 Ethernet ports in the brand-new control system COEX series of Xi’an NovaStar Tech Co., Ltd. (hereinafter referred to as NovaStar). This controller integrates video processing and video control into one box and offers rich video input connectors (HDMI 2.0, DP 1.2 and 12G-SDI), 20x Ethernet output ports and 4x 10G optical ports. -
Page 5: Appearance
Press the knob to confirm the operation. Hold down the knob and BACK button simultaneously for 5s or longer to lock or unlock the buttons. BACK Go back to the previous menu or cancel the current operation. 2.2 Rear Panel www.novastar.tech... - Page 6 HDCP HDCP 2.2 compliant, backwards compatible Interlaced Not supported signal inputs HDMI 2.0-3 IN Resolutions Max resolution: 4096×2160@60Hz or 8192×1080@60Hz Min resolution: 800×600@60Hz Max width: 8192 pixels (8192×1080@60Hz) width/height Max height: 7680 pixels (1080×7680@60Hz) Frame rates 23.98/24/25/29.97/30/47.95/48/50/59.94/60/71.93/72/75/100/119.88/ 120/143.86/144/240 Hz www.novastar.tech...
- Page 7 OPT 3 is the copy channel of OPT 1. OPT 2 transmits the data of Ethernet ports 11 to 20. OPT 4 is the copy channel of OPT 2. HDMI 2.0-1 LOOP HDMI loop through HDMI 2.0-2 LOOP www.novastar.tech...
- Page 8 LOOP: Loop the sync signal. For standard Genlock signal generators, up to 20 MX40 Pro devices can be cascaded. An auxiliary connector that connects to the central control device (RS232) (Reserved) Power 100-240V~, An AC power input connector and switch 50/60Hz, 1.5A www.novastar.tech...
-
Page 9: Applications
MX40 Pro LED Display Controller User Manual Applications The MX40 Pro has two typical application scenarios as shown below. In those application examples, the LED screen size is 4096×2160. Application 1: Synchronous Mosaic Application 2: Long-Distance Transmission via OPT Ports www.novastar.tech... -
Page 10: Ui Introduction
Hold down the knob and BACK button simultaneously for 5s or longer to lock or unlock the buttons. The connection status of the Ethernet ports Blue: Connected Gray: Disconnected 192.168.0.10 The device IP address For related operations, please refer to 7.3 Set an IP Address. www.novastar.tech... - Page 11 HDMI2 and HDMI3 only). The 3D function status The icon displayed: The 3D function is turned on. The icon not displayed: The 3D function is turned off. For related operations, please refer to 6.4.3 Enable 3D Function. www.novastar.tech...
-
Page 12: Main Menu
On the home screen, press the knob to enter the main menu screen. When the device working mode is All-In-One Controller, the main menu is shown in Figure 4-2. When the device working mode is Send-Only Controller, the Layer Settings menu is not displayed. Figure 4-2 Main menu www.novastar.tech... -
Page 13: Initial Screen Configuration
On the main menu screen, choose Input Settings > Select Input to select a video source. Figure 5-1 Select input source Perform the corresponding operations for the input source according to the input source type. For the SDI sources, please skip this step. External input sources (HDMI1, HDMI2, HDMI3, DP) www.novastar.tech... -
Page 14: Load Cabinet Config File
After the configuration file is successfully saved, a message appears on the menu screen. 5.1.3 Configure the Screen Quickly Set the screen configuration parameters to quickly complete the cabinet connection, so that the LED screen can display the input source image normally. www.novastar.tech... -
Page 15: Free Screen Configuration Via Vmp
The VMP software can be used to configure either the regular screens or complex screens, and supports free wiring of the cabinets, plus the ability of calculating the used loading capacity according to the cabinets that are actually loaded. For the details of performing the free screen configuration, please refer to VMP Vision Management Platform User Manual. www.novastar.tech... -
Page 16: Display Effect Adjustment
A lower frame rate may result in image flickering, while a higher frame rate helps stabilize the display image. On the main menu screen, choose Input Settings > input source > EDID. The input source is HDMI1, HDMI2, HDMI3 or DP. www.novastar.tech... -
Page 17: Adjust Color (Hdmi1, Hdmi2, Hdmi3, Dp, Sdi)
6.2.4 Set HDR (HDMI1, HDMI2 and HDMI3 only) Set the parameters used during the process of parsing HDR video sources. On the main menu screen, choose Input Settings > input source > HDR. The input source is HDMI1, HDMI2 or HDMI3. www.novastar.tech... -
Page 18: Set Internal Input Sources
When the relevant parameters of the image are displayed, set the parameters according to your actual needs; otherwise, please skip this step. Press the BACK button to go back to the upper-level menu and select Resolution. Set Mode to Custom or Standard, and then set the resolution, frame rate and bit depth. www.novastar.tech... -
Page 19: Set Output Parameters
Figure 6-9 Save to RV card Select Yes in the displayed dialog box. After the brightness value is successfully saved, a message appears on the menu screen. 6.4.2 Adjust Gamma and Color Temperature Adjust and save the Gamma and color temperature. www.novastar.tech... -
Page 20: Enable 3D Function
6.4.3 Enable 3D Function Turn on the 3D function and set the related parameters. On the main menu screen, choose Advanced Functions > 3D. Figure 6-12 3D Turn on the 3D function by toggling on this switch Set the related parameters. www.novastar.tech... -
Page 21: Set Low Latency
This setting ensures that the switching between left and right eye images of the 3D glasses is in sync with the switching between the left and right eye images on the display. This parameter applies to both the NovaStar and third-party emitters. 6.4.4 Set Low Latency Turn on the low latency function to reduce the delay at the controller, or increase the latency when the device is used with high-latency equipment. -
Page 22: Set Sync Source
Select Canvas Size to enable the value editing status. Rotate the knob to change the value and press the knob to confirm the value. Select a layer and set the related parameters. Status: Turn on or off the layer. Input Source: Select an input source. www.novastar.tech... - Page 23 Crop: Turn on or off input crop and set the crop size and position. Border: Turn on or off layer border and set the border thickness and color. If necessary, select other layers and set the related parameters. www.novastar.tech...
-
Page 24: Device Management
A prompt will be displayed after the operation is successful. 7.3 Set an IP Address Manually set a static IP address for the device or set up the device to automatically obtain an IP address. On the main menu screen, choose Communication Settings > Network Settings. www.novastar.tech... -
Page 25: Enable Mapping
Enable the Mapping function by toggling on this switch 7.5 Control Display Status Set the display loaded by the controller to a black screen or frozen status. On the main menu screen, choose Display Control. Figure 7-5 Display control www.novastar.tech... -
Page 26: Diagnostics
A prompt will be displayed after the operation is successful. 7.7 View the Firmware Version View the current firmware program version of the device. On the main menu screen, select System Settings. View the current firmware program version next to Firmware Version. www.novastar.tech... -
Page 27: Reset To Factory Settings
The device restarts automatically while the data is being reset. Reset all the data (This action cannot be undone.) Reset all the data to factory settings. Select Reset All. Select Yes in the displayed dialog box. The device restarts automatically while the data is being reset. www.novastar.tech... -
Page 28: Basic System Settings
Select 30s, 1min or 5min from the drop-down options as required. 8.3 View Service Information View the service information of NovaStar, allowing users to ask questions and give feedback. On the main menu screen, choose System Settings > About Us. -
Page 29: Specifications
1x Certificate of Approval IP Rating IP20 Please prevent the product from water intrusion and do not wet or wash the product. The amount of power consumption may vary depending on various factors such as product settings, usage, and environment. www.novastar.tech...
Need help?
Do you have a question about the MX Series and is the answer not in the manual?
Questions and answers