Table of Contents
Advertisement
Quick Links
Advertisement
Table of Contents

Related Manuals for NovaStar MX40 Pro


Summary of Contents for NovaStar MX40 Pro
- Page 1 MX40 Pro LED Display Controller User Manual...
- Page 2 MX40 Pro LED Display Controller User Manual Change History Document Version Release Date Description Updated the application diagrams. V1.0_02 2021-09-25 Updated the LCD home screen diagram. V1.0_01 2021-09-01 First release www.novastar.tech...
-
Page 3: Table Of Contents
MX40 Pro LED Display Controller User Manual Contents Change History ....................................i Contents ......................................ii 1 Overview ...................................... 1 2 Appearance ....................................2 2.1 Front Panel .................................... 2 2.2 Rear Panel .................................... 2 3 Applications ....................................5 4 Home Screen ....................................6 5 Screen Configuration ................................... -
Page 4: Overview
MX40 Pro LED Display Controller User Manual Overview NovaStar's flagship 4K LED display controller, the MX40 Pro, offers rich video input connectors (HDMI 2.0, DP 1.2 and 12G-SDI) and 20 Ethernet output ports. It can work with the brand-new VMP screen configuration software to provide users with the ultimate experience. -
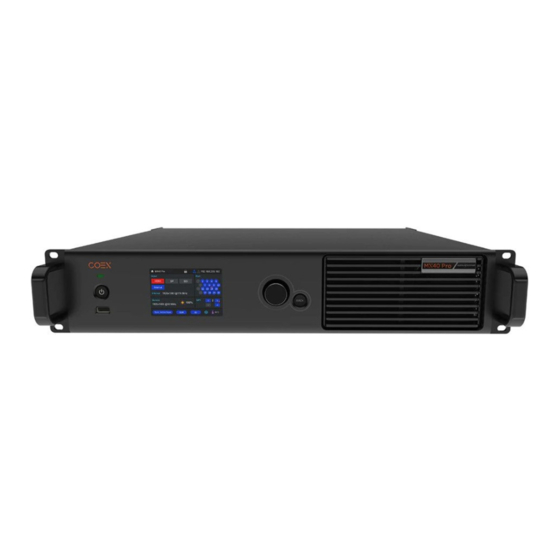
Page 5: Appearance
MX40 Pro LED Display Controller User Manual Appearance 2.1 Front Panel Name Description Running Indicator Flashing red: Standby Solid red first and solid blue at last: The device is being powered on. Solid green: The device is running normally. - Page 6 MX40 Pro LED Display Controller User Manual 23.98/24/25/29.97/30/47.95/48/50/59.94/60/71.93/72/75/100/119.88/120/143.86/1 44/150/179.82/180/191.81/192/200/215.78 /216/239.76/240 Hz Support the HDR function. Support EDID management. Support HDCP 2.2, backwards compatible with HDCP 1.4/1.3. Support 48kHz dual channel audio transmission. (Reserved) Do NOT support interlaced signal input.
- Page 7 IN: Accept the sync signal. LOOP: Loop the sync signal. For standard Genlock signal generators, up to 10 MX40 Pro devices can be cascaded. An auxiliary connector that can be connected to the central control device (RS232) or 3D synchronizer (Reserved)
-
Page 8: Applications
MX40 Pro LED Display Controller User Manual Applications The MX40 Pro has two typical application scenarios as shown below. In those application examples, the LED screen size is 4096×2160 and the fiber converter used is NovaStar's CVT10. Application 1: Synchronous Mosaic Application 2: Long-Distance Transmission via OPT Ports www.novastar.tech... -
Page 9: Home Screen
MX40 Pro LED Display Controller User Manual Home Screen After the device is powered on, the home screen is displayed as follows. On the home screen, press the knob to enter the main menu screen. Figure 4-1 Home screen The home screen is shown in... - Page 10 MX40 Pro LED Display Controller User Manual Classification Content Description Internal The resolution and frame rate of the currently available input 1920*1080@60.00Hz source If multiple input sources are accessed and available, the resolution and frame rate of each input source will be displayed one by one.
-
Page 11: Screen Configuration
MX40 Pro LED Display Controller User Manual Screen Configuration If the LED screen, cabinets, data flow and cabinets loaded by Ethernet ports can meet the following requirements, you can configure the screen via the device front panel menu; otherwise, screen configuration in VMP will be your ideal choice. -
Page 12: Optional) Send Cabinet Config File
MX40 Pro LED Display Controller User Manual After the settings are done, click Apply. Internal sources Choose Internal Source > Image, and then select a static picture or a motion picture. When the relevant parameters of the image are displayed, set the parameters according to your actual needs;... -
Page 13: Free Screen Configuration Via Vmp
MX40 Pro LED Display Controller User Manual Figure 5-3 Quick configuration Select Yes in the displayed dialog box. Set the following parameters as required. Figure 5-4 Screen configuration parameters Cabinet Row Qty: Set the quantity of cabinet rows. ... -
Page 14: Display Effect Adjustment
MX40 Pro LED Display Controller User Manual Display Effect Adjustment 6.1 Set External Input Source Parameters 6.1.1 View Input Source Information View the attribute values of the input source, including the resolution, frame rate, bit depth, color gamut, etc. On the main menu screen, choose Input Settings > Select Input to select an external video source (HDMI1, HDMI2, DP or SDI). -
Page 15: Adjust Color
MX40 Pro LED Display Controller User Manual Figure 6-4 EDID parameters Custom: Set the resolution manually. Standard: Select the desired resolution from the drop-down options. After the settings are done, click Apply. 6.1.3 Adjust Color Set the input source override parameter and adjust the color. The override parameter will be used in the calculation of color adjustment. -
Page 16: Set Hdr (Hdmi1 And Hdmi2 Only)
MX40 Pro LED Display Controller User Manual 6.1.4 Set HDR (HDMI1 and HDMI2 only) Set the parameters used during the process of parsing HDR video sources. On the main menu screen, choose Input Settings > input source > HDR. The input source is HDMI1 or HDMI2. -
Page 17: Set Internal Input Sources
MX40 Pro LED Display Controller User Manual Figure 6-9 Input backup Turn on the backup function by toggling on this switch Select Primary Input and then select a video source (HDMI1, HDMI2, DP or SDI) from the drop-down options. Select Backup Input and then select another video source from the drop-down options. -
Page 18: Set Output Parameters
MX40 Pro LED Display Controller User Manual 6.3 Set Output Parameters 6.3.1 Adjust Screen Brightness Adjust and save the screen brightness. On the main menu screen, select Screen Brightness and then the brightness value becomes editable. Figure 6-12 Screen brightness Rotate the knob to adjust the brightness to the target value, and then press the knob to confirm. -
Page 19: Enable 3D Function
MX40 Pro LED Display Controller User Manual Adjust the color temperature value. Select Color Temperature and then the value becomes editable. Rotate the knob to adjust the temperature to the target value, and then press the knob to confirm. If you want to restore the parameters to the defaults, select Reset. -
Page 20: Set Bit Depth
MX40 Pro LED Display Controller User Manual On the main menu screen, choose Advanced Functions > Output Settings. Figure 6-17 Low latency Perform any of the following operations as required. Enable low latency Set the Low Latency switch to to enable the low latency function. - Page 21 MX40 Pro LED Display Controller User Manual Current Input: Sync with the frame rate of the current input source. Genlock: Sync with the frame rate of the Genlock signal. Internal: Sync with the frame rate of the controller's internal clock.
-
Page 22: Device Management
MX40 Pro LED Display Controller User Manual Device Management 7.1 Set a Backup Device Specify a backup device for the current device so that the backup device can take over the master device when it fails. On the main menu screen, choose Advanced Functions > Device Backup. -
Page 23: Control Display Status
MX40 Pro LED Display Controller User Manual Figure 7-3 Mapping Enable the Mapping function by toggling on this switch 7.4 Control Display Status Set the display loaded by the controller to a black screen or frozen status. On the main menu screen, choose Display Control. -
Page 24: View The Firmware Version
MX40 Pro LED Display Controller User Manual Export the diagnostic result to a USB drive Insert the USB drive to the USB port on the front panel of the device. Select Export to USB Drive. A prompt will be displayed after the operation is successful. -
Page 25: Basic System Settings
Select 30s, 1min or 5min from the drop-down options as required. 8.3 View Service Information View the service information of NovaStar, allowing users to ask questions and give feedback. On the main menu screen, choose System Settings > About Us. -
Page 26: Specifications
MX40 Pro LED Display Controller User Manual Specifications Electrical Power input 100-240V~, 50/60Hz, 2A Specifications Maximum power consumption Operating –20º C to +60º C Temperature Environment Humidity 0% RH to 80% RH, non-condensing Storage –30º C to +80º C Temperature...
Need help?
Do you have a question about the MX40 Pro and is the answer not in the manual?
Questions and answers