Table of Contents
Advertisement
Quick Links
Advertisement
Table of Contents

Related Manuals for NovaStar MX6000 Pro


Summary of Contents for NovaStar MX6000 Pro
- Page 1 MX6000 Pro LED Display Controller User Manual...
- Page 2 Added MX_1×ST 2110 (25G), MX_2×ST 2110 (25G), MX_1×DP 1.4 V1.4.0 2024-04-26 + 1×HDMI 2.1 input cards, and MX_1×40G_Fiber output card V1.1.1 2023-10-13 Updated input cards information V1.1.0 2023-09-28 Added MX_2xHDMI 2.1 and MX_4x12G-SDI input cards V1.0.1 2023-09-08 Added accessory information V1.0.0 2023-08-03 First release www.novastar.tech...
-
Page 3: Table Of Contents
5 VMP Operations..................................26 6 Specifications ..................................... 26 7 Video Source Specifications ..............................27 8 Ethernet Port Load Capacity ..............................31 8.1 1G Solution (4x10G Fiber Output Card) ..........................31 8.2 5G Solution (1x40G Fiber Output Card) ..........................32 www.novastar.tech... -
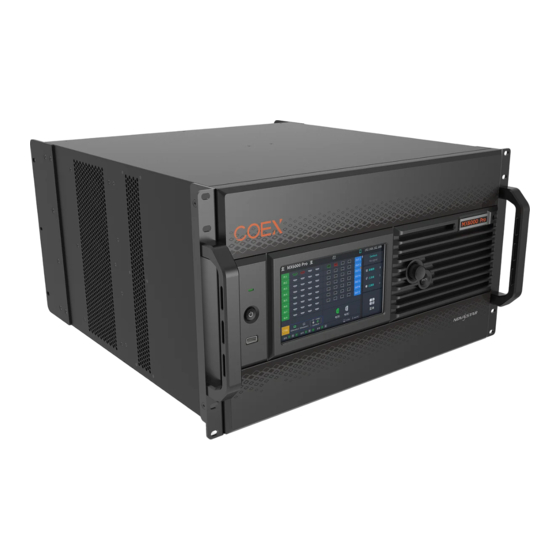
Page 4: Introduction
141 million pixels, making it ideal for large-screen configurations. The MX6000 Pro offers a wide range of options with up to 8 different input cards supporting 8K, 4K, and VoIP. For output, it supports two types of output cards: 4x 10G fiber and 1x 40G fiber. These cards can be configured flexibly to accommodate either 1G or 5G bandwidth for the control system, catering to different requirements. -
Page 5: Appearance
Press the knob to confirm the operation. Hold down the knob and BACK button simultaneously for 5s or longer to lock or unlock the buttons and screen. BACK Go back to the previous menu or cancel the current operation. www.novastar.tech... -
Page 6: Rear Panel
Min resolution: 800×600@60Hz Max width: 8192 pixels (8192×1080@60Hz) width/height Max height: 7680 pixels (1080×7680@60Hz) (Forced) Frame rate 23.98 / 24 / 25 / 29.97 / 30 / 47.95 / 48 / 50 / 59.94 / 60 / 71.93 / www.novastar.tech... - Page 7 Support custom input resolutions. HDCP HDCP 2.3 compliant, backwards compatible with HDCP 2.2/HDCP 1.4/HDCP 1.3. Interlaced Not supported signal inputs Cables Recommend using the UGREEN HDMI 2.1 cable. Cables up to 5 meters are supported. MX_4xDP 1.2 input card Type Description www.novastar.tech...
- Page 8 Support custom input resolutions. HDCP Support HDCP 2.3, backwards compatible with HDCP 2.2/HDCP 1.4/HDCP 1.3. Interlaced Not supported. signal inputs Cables Recommend using the UGREEN DP 1.4 cable. Cables up to 5 meters are supported. MX_4x12G-SDI input card www.novastar.tech...
- Page 9 Frame rates 23.98 / 24 / 25 / 29.97 / 30 / 47.95 / 48 / 50 / 59.94 / 60 / 71.93 / 72 / 75 / 100 / 119.88 / 120 / 143.86 / 144 / 240 Hz www.novastar.tech...
- Page 10 IPv4 DHCP and static IP Multicast IGMPv3, IGMPv2 protocol 25 GbE IEEE 802.3cc (25GBASE-LR) Ethernet 25 GbE IEEE 802.3by (25GBASE-SR) Optical The ST 2110 card does not come with an optical transceiver by transceiver default. Users need to purchase one separately. www.novastar.tech...
- Page 11 Users need to purchase one separately. Only supports SFP28 (25GBASE-LR/SR/CR). It is recommended to purchase the Accelink 25GBASE-LR 10km module. Cables OS1/OS2 optical fiber cables are recommended. Transmission mode: single-mode duplex Diameter: 9/125μm www.novastar.tech...
- Page 12 When using a 5G Ethernet port to drive the LED screen, it can achieve its maximum load capacity only when the load width is 192 pixels or more. If the load width is less than that, the load capacity will be reduced accordingly, calculated as (192 - load width) × load height. www.novastar.tech...
- Page 13 LOOP: Loop the sync signal The Genlock input signal supports a frame rate range from 23.98 Hz to 60 Hz. For standard Genlock signal generators, up to 20 MX6000 Pro can be cascaded. An auxiliary connector that connects to the central control device (RS232).
-
Page 14: Applications
You can install different output cards on the same controller, but output cards with different models cannot be used to load the same screen. 3.2 1G Solution (4x10G Fiber Output Card) This diagram is an example of four input cards and one 4x10G fiber output card installed on an MX6000 Pro. The actual application may vary. www.novastar.tech... -
Page 15: Solution (1X40G Fiber Output Card)
MX6000 LED Display Controller User Manual 3.3 5G Solution (1x40G Fiber Output Card) This diagram is an example of four input cards and one 1x40G fiber output card installed on an MX6000 Pro. The actual application may vary. www.novastar.tech... -
Page 16: Front Screen Panel
Table 4-1 Home screen descriptions Area Content Description Top line MX6000 Pro The device name. The name can be changed in VMP software. The device button and touchscreen lock status. When the icon is displayed: The buttons are locked. - Page 17 Green: The temperature is normal. Yellow: Temperature alarm. The temperature has exceeded the threshold range. Red: Temperature alarm. The temperature has exceeded the threshold range significantly. Right Genlock The sync signal currently used. side Screens The number of screens with load. www.novastar.tech...
-
Page 18: Main Menu
Configure network parameters and third party protocol. Set LCD screen timeout and brightness, set system language and temperature scale, check firmware information, and restore factory settings. Perform device diagnostics, view and export logs, and check device status. www.novastar.tech... -
Page 19: Screen
Figure 4-5 Set screen status Select Blackout or Freeze and then press the knob to toggle on or off the switch. : Enabled. The screen display will turn black or freeze, but the playback will not be interrupted. www.novastar.tech... -
Page 20: Input
Select Resolution, Frame Rate, and Bit Depth in sequence and set a value for each in the pop-up dialog box. After the settings are done, click Apply. 4.3.2 Check Input Source Information Select Input from the main menu to access the input source list. Select an input source to access the Information tab. www.novastar.tech... -
Page 21: Set Edid
Select an input source to open the parameter settings. Navigate to the EDID tab. Figure 4-8 EDID Select Resolution and Frame Rate in sequence and set a value for each in the pop-up dialog box. After the settings are done, click Apply. www.novastar.tech... -
Page 22: Set Hdr
Max CLL Override: Enable or disable Max CLL override. Max CLL: The max content light level. 4.4 Communication 4.4.1 Network Select Communication > Network from the main menu to access the network settings interface. www.novastar.tech... -
Page 23: Protocol
4.4.2 Protocol Select Communication > Protocol from the main menu to access the SNMP settings interface. Figure 4-11 Protocol Toggle on or off SNMP. : Enable SNMP. : Disable SNMP. Note: Refer to SNMP Instructions for more details. www.novastar.tech... -
Page 24: Settings
Select Auto Lock LCD and set a value in the pop-up dialog box. Select LCD Brightness and adjust the value. 4.5.2 Setting Language Select Settings from the main menu to access the system settings interface. Select 语言/Language to open the sub-interface. Figure 4-13 Language settings Select 中文 or English. www.novastar.tech... -
Page 25: Set Temperature Scale
Select Controller, Input Card, and Output Card to check the related information. 4.5.5 Factory Reset Select Settings from the main menu to access the system settings interface. Select Factory Reset and then select Keep user data or Reset All from the pop-up dialog box. Finally, select OK. www.novastar.tech... -
Page 26: Maintenance
When the device is powered on, it automatically conducts a diagnostic process: Normal startup: All functions of the MX6000 Pro are available for use. Abnormal startup: Depending on the displayed error message, you can choose to export the diagnostic results or continue to operate in a limited functionality state. -
Page 27: View And Export Logs
Figure 4-18 Device log Select Export to export the logs into a USB drive. 4.6.3 Check Device Status Select Maintain from the main menu to access the settings interface. Navigate to the Status tab to check the device status. www.novastar.tech... - Page 28 MX6000 LED Display Controller User Manual Figure 4-19 Check device status www.novastar.tech...
-
Page 29: Vmp Operations
MX6000 LED Display Controller User Manual VMP Operations Users can only perform some basic operations on the MX6000 Pro LCD screen. To perform more operations such as project management, input source configuration, screen configuration, screen calibration, color processing, screen adjustment, screen monitoring, preset management, and screen maintenance, please install Vision Management Platform (VMP) on the control PC and refer to the Vision Management Platform User Manual. -
Page 30: Video Source Specifications
4:4:4 12bit 24/25 YCbCr (Forced) 10bit 8bit 24/25/30 YCbCr 4:2:2 8/10/12bit 7680×4320 RGB / 4:4:4 12bit 24/25 YCbCr (Forced) 10bit 8bit 24/25/30 YCbCr 4:2:2 8/10/12bit 5120×2880 RGB / 4:4:4 12bit 24/25/30/48/50/60 YCbCr (Forced) 10bit 8bit 24/25/30/48/50/60/72/75 YCbCr 4:2:2 8/10/12bit www.novastar.tech... - Page 31 (75Hz needs to be forced) YCbCr 4:2:2 8/10/12bit 2560×1440 RGB / 4:4:4 12bit 24/25/30/48/50/60/75/100 YCbCr 10bit 24/25/30/48/50/60/75/100/120 8bit 24/25/30/48/50/60/75/100/120/144 (144 Hz needs to be forced) YCbCr 4:2:2 8/10/12bit 1920×1080 RGB / 4:4:4 12bit 24/25/30/48/50/60/75/100/120/144 YCbCr (144 Hz needs to be forced) 10bit www.novastar.tech...
- Page 32 YCbCr (144 Hz needs to be forced) 10bit 8bit 24/25/30/48/50/60/75/100/120/144/24 YCbCr 4:2:2 8/10/12bit (144Hz and above need to be forced) 1920×1080 RGB / 4:4:4 12bit YCbCr 10bit 24/25/30/48/50/60/75/100/120/144/24 0 (240 Hz needs to be forced) 8bit YCbCr 4:2:2 8/10/12bit www.novastar.tech...
- Page 33 Note: The table above only displays a selection of common resolutions and integer frame rates. Decimal frame rates are also supported, allowing for automatic frame rate adaptation from the highest frame rate of each resolution down to 23.98/29.97/47.95/59.94/71.93/119.88/143.86 Hz. www.novastar.tech...
-
Page 34: Ethernet Port Load Capacity
8bit: Load capacity × 24 × Frame rate < 1000 × 1000 × 1000 × 0.95 10bit: Load capacity × 48 × Frame rate < 1000 × 1000 × 1000 × 0.95 12bit: Load capacity × 48 × Frame rate < 1000 × 1000 × 1000 × 0.95 www.novastar.tech... -
Page 35: Solution (1X40G Fiber Output Card)
8bit: Load capacity × 24 × Frame rate < 5G × 0.85 10bit: Load capacity × 30 × Frame rate < 5G × 0.85 12bit: Load capacity × 36 × Frame rate < 5G × 0.85 www.novastar.tech... - Page 36 When using a 5G Ethernet port to drive the LED screen, it can achieve its maximum load capacity only when the load width is 192 pixels or more. If the load width is less than that, the load capacity will be reduced accordingly, calculated as (192 - load width) × load height. www.novastar.tech...
Need help?
Do you have a question about the MX6000 Pro and is the answer not in the manual?
Questions and answers