Table of Contents
Advertisement
Quick Links
Advertisement
Table of Contents

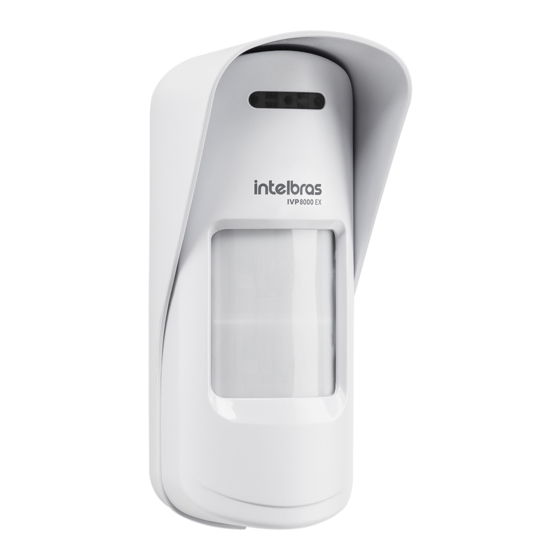
Summary of Contents for Intelbras IVP 8000 EX
- Page 1 User guide IVP 8000 EX...
- Page 2 Congratulations, you have just purchased a product with Intelbras quality and security. The IVP 8000 EX sensor has dust, water protection¹ white light immunity, making it perfect for the harshest environments, and can be installed indoors, semi-open or outdoors. Its lens is specially built for long life, containing materials resistant to sunlight.
- Page 3 The sensor is compatible with AMT 8000 control panel versions 1.2.1 or higher. » LGPD - General Law for the Protection of Personal Data: Intelbras does not access, transfer, capture, or perform any other type of treatment of personal data from this product.
- Page 4 » It is important to note that the Pet function is designed for low-growing animals weighing up to 30kg. If the animal is on top of a bench, for example, the Pet function can be canceled. Obs.: before starting the installation, it is necessary to define the height at which the sensor will be positioned, which can vary from 2 to 2.2 m.
-
Page 5: Table Of Contents
4. Sensor opening 5. Registering the IVP 8000 EX sensor 5.1. Deleting the sensor register ..............7 6. -
Page 6: Technical Specifications
1. Technical specifications Operating voltage 3 Vdc Operating current 20 µA Frequency band 915 MHz to 928 MHz Modulation DSSS BPSK 40 Kbps Maximum transmission power 11 dBm Battery LITHIUM CR123A 3 V Angle of detection 110° Detection range 12 m Method of detection Double PIR Animal immunity... -
Page 7: Sensor Opening
5. Registering the IVP 8000 EX sensor To register the IVP 8000 EX sensor code in the AMT 8000 alarm center follow the procedure below: 1. Insert the battery of LITHIUM 3 Vcc - CR 123 A. The sensor will flash the blue LED for a few seconds (stabilization time),... -
Page 8: Identifying The Best Place For Installation
6. Identifying the best place for installation The IVP 8000 EX sensor has communication signal level indications with the AMT 8000 center, this will help you choose the best installation location. Follow the procedure: 1. Once properly registered, take the sensor to the environment you wish to protect;... -
Page 9: Configuring The Ivp 8000 Ex Sensor
8. Configuring the IVP 8000 EX sensor The sensor settings can be adjusted in two ways, below we present the step by step of each one. 8.1. Configuring the sensor through the keyboard Using the keyboard of the AMT 8000 alarm center, go into the programming mode with the installer password, then type... - Page 10 2. After that, select sensors; Settings General > Zones > Passwords > Communication > Event codes > IP monitoring > Ethernet/Wi-Fi > GPRS > Programed activation/deactivation > Sensors > Once you have done this, select the sensor you wish to configure, for example: Sensor 1 Sensors Sensor 1...
-
Page 11: Battery
9. Battery Use only quality batteries with the correct sizing for the device, and with the typical use of the device, the battery life forecast is 3 to 5 years and can be influenced by the number of triggering, weather conditions and configuration mode. The battery model should be CR123A 3 V, being used one (1) battery per sensor. -
Page 12: Product
11.3. Product Mounted support Components Axis Cover Ring Base Connector Screw 3.5 x 9.5 mm 11.4. Features » Built in UV-protected material; » Easy installation; » Wide application scenario; » Discreet and robust. -
Page 13: Installation
11.5. Installation » Insert the shaft into the cover (part 1 and part 2); » Pass the ring through the previous set (piece 3); » Insert the nut into the connector (key 5 and 6); Installation using the articulator » Attach the support to the sensor base according to the image below, observe the existing hole in the base, then insert the shaft through the hole, performing the rotating movement clockwise until you feel that it is stuck. - Page 14 » If the sensor is installed on a flat surface, use the four innermost holes in the base for mounting. If the sensor is used on a 90° corner, use the four outermost holes on the base; Wall mounted Mounted in the corner of the wall Passage for the screw Passage for the screw »...
- Page 15 Installation without using the articulator » For installation directly on the wall, or in the corner of the wall, remove the plate and break the seals indicated for the holes in the rear fixing cover. Attention! Garanta que a pelagem esteja de acordo com o tamanho da ação, pois uma furação pode ser acionada para o interior do produto.
-
Page 16: Warranty Term
7. Intelbras is not responsible for the installation of this product and also for any attempts of fraud and/or sabotage on its products. Keep software and application updates, if any, up to date, as well as network protections necessary to pro¬tect against hackers. - Page 17 Customer Service: 0800 7042767 Where to buy? Who installs it? 0800 7245115 Produced by: Intelbras S/A – Indústria de Telecomunicação Eletrônica Brasileira Rodovia BR 459, km 124, nº 1325 – Distrito Industrial – Santa Rita do Sapucaí/MG – 37540-000 01.22 CNPJ 82.901.000/0016-03 –...


Need help?
Do you have a question about the IVP 8000 EX and is the answer not in the manual?
Questions and answers