Table of Contents
Advertisement
Advertisement
Table of Contents

Related Manuals for laguna Fusion 3


Summary of Contents for laguna Fusion 3
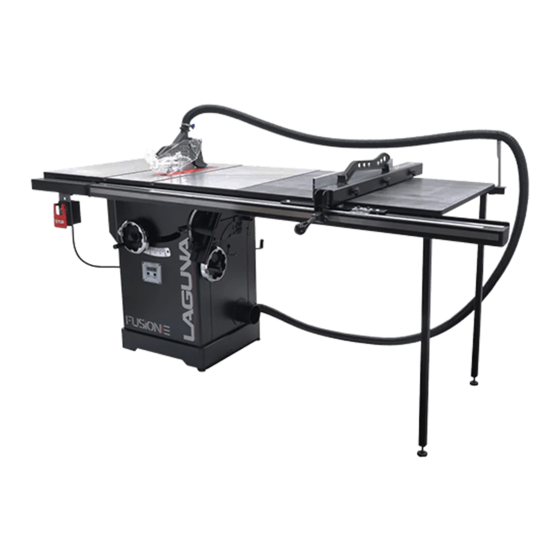
- Page 1 OWNERS’S MANUAL Fusion 3 Table Saw 36” & 52” Fence LagunaTools.com...
- Page 2 Thank you for investing in a jointer by Laguna Tools. This jointer is one of a family of unique machines proudly offered by Laguna Tools. Every Laguna machine is engineered for years of dependable service. Please feel free to contact Laguna Tools if you have a question or suggestion.
-
Page 3: Table Of Contents
Fusion 3 Table Saw Table of Contents Safety ..................4 Electrical Saftey ............... 9 Safety (FRENCH) ..............13 Setup ..................16 Inventory List ..............17 Unboxing ................ 21 Front Rail ................ 24 Rear Rail ................. 28 Right Extension Table ............. 32 Rear Extension Table ............ -
Page 4: Safety
Fusion 3 Table Saw \ Safety \ Safety Read and understand all warnings and operation instructions before using any tool or equipment. Always follow basic safety precautions to reduce the risk of personal injury. Improper operation, maintenance or modification of tools or equipment could result in serious injury and property damage. - Page 5 Fusion 3 Table Saw \ Safety \ Important Safety Instructions Read and understand all warnings and operating instructions before using this equipment. Failure to follow all instructions listed below, may result in electric shock, fire, and/or serious personal injury or property damage.
- Page 6 Fusion 3 Table Saw \ Safety \ Guarding Related Warnings a) Keep guards in place. Guards must be in working order and be properly mounted. A guard that is loose, damaged, or is not functioning correctly must be repaired or replaced.
- Page 7 Fusion 3 Table Saw \ Safety \ k) Do not remove pieces of cut-off material while the saw is running. The material may become trapped between the fence or inside the saw blade guard and the saw blade pulling your fingers into the saw blade. Turn the saw off and wait until the saw blade stops before removing material.
- Page 8 Fusion 3 Table Saw \ Safety \ Table Saw Operating Procedure Warnings 1. Turn off the table saw and disconnect the power cord when removing the table insert, changing the saw blade or making adjustments to the riving knife, anti-kickback device or saw blade guard, and when the machine is left unattended.
-
Page 9: Electrical Saftey
Fusion 3 Table Saw \ Electrical Safety \ Electrical Safety Power Connections A separate electrical circuit should be used for your machines. This circuit should not be less than the wiring listed below and should be protected with an appropriate circuit breaker based on the total running and start-up amperage's (listed below). - Page 10 Fusion 3 Table Saw \ Electrical Safety \ If this information is different than what is stated on the Motor Specification Plate - omit this information. It is possible that the documentation is outdated to a machine change - such as a different motor.
- Page 11 Fusion 3 Table Saw \ Electrical Safety \ Grounding Methods This machine must be grounded while in use to protect the operator from electric shock. In all cases, make certain that the receptacle in question is properly grounded. If you are not sure, have a qualified electrician check the receptacle.
- Page 12 Fusion 3 Table Saw \ Electrical Safety \ Extension Cords Use proper extension cords. Make sure your extension cord is in good condition and is a 3-wire extension cord which has a 3-prong grounding type plug and matching receptacle which will accept the machine’s plug. When using an extension cord, be sure to use one heavy enough to carry the current of the machine.
-
Page 13: Safety (French)
Fusion 3 Table Saw \ Safety (FRENCH) \ Safety (FRENCH) AVERTISSEMENT! Pour votre propre sécurité, lisez le manuel d'instructions avant d'utiliser la scie à table. (a) DANGER - Ne placez jamais vos mains à proximité ou en ligne avec la lame de scie. - Page 14 Fusion 3 Table Saw \ Safety (FRENCH) \ Lors d'un sciage en long, toujours appliquer la force d'alimentation de la pièce entre le guide et la lame. Utiliser un poussoir lorsque la distance entre le guide et la lame est inférieure à 150 mm et utiliser un bloc-poussoir lorsque cette distance est inférieure à...
- Page 15 Fusion 3 Table Saw \ Safety (FRENCH) \ Ne jamais couper plusieurs pièces empilées verticalement ou horizontalement. La lame pourrait attraper plusieurs pièces et provoquer un recul. Lors d'un redémarrage d'une scie avec une lame de scie dans la pièce, centrer la lame dans le trait de scie de sorte que les dents ne pénètrent pas dans le matériau.
-
Page 16: Setup
Fusion 3 Table Saw \ Setup \ Setup Expand any section above to view help sections created. If you are reading this manual or viewing an electronic PDF version, You may want to check out our interactive manual available here: https://lagunatools.com/classic/tablesaws/f3/manual... -
Page 17: Inventory List
NOTICE! All shipping damage must be noted upon delivery and signed by the owner and the delivery driver. If you find any damaged items in your package, you must contact Laguna Tools to file a complaint. In order to return damaged goods under the limited warranty to Laguna Tools, Inc., you MUST have the original packaging. - Page 18 Fusion 3 Table Saw \ Setup \ Inventory List Description PACKAGING Left Side Front Rail Boxed w/ Fence Assembly Front Rail Assembly Boxed Individually Rear Rail Assembly Boxed with Steel Rail Control Switch Attached to table Dust Collector Hose Boxed Individually Hardware Inventory Listed below are all the hardware required for assembly of the Fusion F3 table saws.
- Page 19 Fusion 3 Table Saw \ Setup \ Inventory List Ref. Description Installation Lock Washers (8mm) Multiple Hex Cap Bolt (51mm) Rear Extension Table Legs, Rear Extension table use with Nylon Lock Nuts(H) Nylon Lock Nuts (16mm) Rear Extension Table Legs,...
- Page 20 Fusion 3 Table Saw \ Setup \ Inventory List Accessory Hardware & Tools NOTICE! The hardware and tools listed below come individually wrapped in plastic bags. General Tools: dual-sided wrench and Allen wrenches. Band clamp with hex bolt, flat washer, and hex nut.
-
Page 21: Unboxing
Fusion 3 Table Saw \ Setup \ Unboxing Unboxing Your Fusion F3 table saw was carefully packaged for safe transport. The table saw should arrive attached to a wooden pallet and covered by a wooden crate housing the table saw and its accessories. When unpacking your machine, separate all enclosed materials to ensure that there are no damages to the parts you’ve received. - Page 22 Fusion 3 Table Saw \ Setup \ Unboxing Shipped Carton Bolt Locations Screwing out skid bolts You will need TWO OR MORE people to assist in completing step two. 2) With another person, lift the wooden crate off the wooden pallet. The table saw and individually boxed accessories will be located beneath.
- Page 23 Fusion 3 Table Saw \ Setup \ Unboxing NOTICE! The table saw will arrive secured to the wooden pallet. 1) Using the 13mm socket wrench provided or a standard wrench, loosen the bolts attaching the table saw to the pallet’s metal L brackets.
-
Page 24: Front Rail
Fusion 3 Table Saw \ Setup \ Front Rail Front Rail The Fusion F3 table saw’s front rail assembly houses the front rail and guide ruler. In conjunction with the rear rail, the front rail allows the fence to move fluidly across the table. The front rail assembly is made up of the left and right front rail brackets, the front rail, and the control switch. - Page 25 Fusion 3 Table Saw \ Setup \ Front Rail Hardware Hex Cap Bolt (30mm) Left Side Front Rail Assembly, use with hex nuts(F), lock 2 of 2 F3 Table washers (E) Left Side Front Rail Assembly, Lock Washers (8mm) 2 of 8...
- Page 26 Fusion 3 Table Saw \ Setup \ Front Rail Front View Rear View Attaching the Right Front Rail to the Table: 1. Align the front bracket’s through holes with the through holes on the front of the table. NOTICE! The front rail bracket has three through-holes which should align with the last three through-holes on the front of the table located on the far right as shown.
- Page 27 Fusion 3 Table Saw \ Setup \ Front Rail Middle counter-sunk through holes (empty): Attaching the Left Front Rail to the Table: 1. Align the left front rail’s bolt holes with the bolt holes on the front of the table saw.
-
Page 28: Rear Rail
Fusion 3 Table Saw \ Setup \ Rear Rail Rear Rail The Fusion F3 table saw’s rear rail assembly supports both the fence and the rear extension table attachment. In conjunction with the front rail, the rear rail allows the fence to move fluidly across the table. The rear rail assembly is made up of the left and right rear rail bracket, the dust collector hose support bracket, the rear rail bracket. - Page 29 Fusion 3 Table Saw \ Setup \ Rear Rail Hardware Lock Washers (8mm) Rear Rail Assembly, F3 Table 3 of 8 From left to right: Right Rear Rail Bracket, Left Rear Rail Bracket, Rear Rail Bracket (centered). Attaching the Rear Extension Leg and Dust Collector Hose Support Bracket to the...
- Page 30 Fusion 3 Table Saw \ Setup \ Rear Rail Top View: Front View: Rear View: Hose support and Leg properly Installed: Attaching the Right Rear Rail Bracket to the Table: 1. Align the right rear rail bracket’s bolt holes with the bolt holes located on the back of the table as shown below: 2.
- Page 31 Fusion 3 Table Saw \ Setup \ Rear Rail NOTICE! After completing step two, there should be two through holes in the middle of the front rail bracket which have not been used yet. These should be empty as they will be used later to mount the right extension table (shown above as red...
-
Page 32: Right Extension Table
Fusion 3 Table Saw \ Setup \ Right Extension Table Right Extension Table The Fusion F3 table saw’s right extension table supports both the fence and the work piece. In conjunction with the front rail, the right extension table allows the fence to move fluidly across the table to adjust to the width of the wood piece being cut. - Page 33 Fusion 3 Table Saw \ Setup \ Right Extension Table Hardware Mounting the Table Extension: 1. Thread two counter sunk bolts through the two available through holes on the front rail bracket. 2. Thread two socket head cap screws through the available bolt holes on the right ear rail bracket.
-
Page 34: Rear Extension Table
Fusion 3 Table Saw \ Setup \ Rear Extension Table Rear Extension Table The Fusion F3 table saw’s rear extension table supports both the fence and the work piece. In conjunction with the rear rail, the rear extension table provides an extra support table for the length of the wood piece being cut. - Page 35 Fusion 3 Table Saw \ Setup \ Rear Extension Table 4. Thread the 51 mm hex bolts through the metal L-bracket. 5. Thread nylon lock nuts on to the back of the hex bolts. Tighten with a wrench or a 17 mm socket wrench (optional).
- Page 36 Fusion 3 Table Saw \ Setup \ Rear Extension Table Pre-installation Aligning the bracket Bolt into thread holes: © 2020 Laguna Tools...
-
Page 37: Front Rail Pt. 2 & Control Switch
Fusion 3 Table Saw \ Setup \ Front Rail Pt. 2 & Control Switch Front Rail Pt. 2 & Control Switch The Fusion F3 table saw’s front rail houses the control switch and front rail/guide ruler. The control switch allows the user to quickly turn the machine on/off before and after making cuts. - Page 38 Fusion 3 Table Saw \ Setup \ Front Rail Pt. 2 & Control Switch 2. Thread the 2 longer hex cap screw and flat washer through the control switch’s bolt holes. 3. Tighten the bolts using either the general wrench or a 13 mm socket wrench to secure the control switch to the left front rail bracket.
- Page 39 Fusion 3 Table Saw \ Setup \ Front Rail Pt. 2 & Control Switch Pre-Installation Attaching the left front rail body to the left front rail using the shorter hex bolts and flat washers. Mounting the Front Rail (with Guide Ruler): 1.
- Page 40 Fusion 3 Table Saw \ Setup \ Front Rail Pt. 2 & Control Switch Fence fitted over the front guide rail Detailed view Front of rail showing counter sunk screws Properly Installed Fence: © 2020 Laguna Tools...
-
Page 41: Accessory Installation
Fusion 3 Table Saw \ Setup \ Accessory Installation Accessory Installation The Fusion F3 table saw’s supports several accessories which help the machine to run smoothly and function properly. The accessories which come with your table saw are: a dust collector hose, a set of fence hooks, and a tool caddy (located underneath the table). - Page 42 Fusion 3 Table Saw \ Setup \ Accessory Installation Attaching hose to blade guard assembly: Attaching hose to dust port: Attaching the Fence Hooks to the Table: 1. Locate the fence hook bolt holes on the back of the table saw (located underneath the rear extension table).
- Page 43 Fusion 3 Table Saw \ Setup \ Accessory Installation From Top Down: A. Arbor Wrench, B. Miter Gauge, C. Riving Knife, D. Blade Guard Hook, E. Dust Hose Wrapping Hook. Your F3 Table Saw is now properly assembled. © 2020 Laguna Tools...
- Page 44 Fusion 3 Table Saw \ Maintenance \ Adjustments Calibrating and adjusting the Tilt mechanism MAINTENANCE & ADJUSTMENTS ADJUSTING THE 45° & 90° BEVEL STOPS 1. Disconnect the machine from the power source. 2. Raise the blade to its highest position and lift the blade guard.
- Page 45 Fusion 3 Table Saw \ Troubleshooting \ Fig. B Fig. C BLADE TILT /BEVEL ADJUSTMENT The blade tilt (bevel) adjustment control by worm gear box assembly C, handwheel D is located on the side of the saw, Figs. D & E.
- Page 46 Fusion 3 Table Saw \ Maintenance \ ALIGNING TABLE PARALLEL TO BLADE STEP 1: Loosen 4 bolts as shown. STEP 2: Adjust table parallel to T-Slot (miter slot), by pivoting table. Use a ruler to measure from blade to T-Slot at the front and rear of blade.
- Page 47 Fusion 3 Table Saw \ Troubleshooting \ ADJUSTING 90º STOP © 2020 Laguna Tools...
- Page 48 Fusion 3 Table Saw \ Maintenance \ ADJUSTING 45º STOP © 2020 Laguna Tools...
-
Page 49: Maintenance
Fusion 3 Table Saw \ Troubleshooting \ Maintenance Unplug Machine prior to any maintenance work. Allays unplug the machine when changing the blade, guards, or any maintenance. General Keep your machine clean. At the end of each day, clean the machine. Wood contains moisture, and if sawdust or wood chips are not removed, they will cause rust. - Page 50 Fusion 3 Table Saw \ Maintenance \ DRO POWER CONNECTION TEST/CHECK If DRO does not power up or is inconsistent, please check the following: © 2020 Laguna Tools...
- Page 51 Fusion 3 Table Saw \ Troubleshooting \ © 2020 Laguna Tools...
-
Page 52: Troubleshooting
Fusion 3 Table Saw \ Maintenance \ Troubleshooting Behavior Possible Causes Solutions Machine will not 1. Start capacitor at fault. 1. Test/replace if faulty. start or 2. Motor connection wired wrong. 2. Correct motor wiring connections. continues to trip 3. Wiring at fault. -
Page 54: Specifications
Fusion 3 Table Saw \ Specifications \ Specifications FUSION F1 FUSION F2 FUSION F3 FUSION F3 52 Maximum Blade Diameter 10" (254 mm) 10" (254 mm) 10" (254 mm) 10" (254 mm) Max Rip Right of Blade 30” (762mm) 36” (914 mm) 36”... - Page 55 Fusion 3 Table Saw \ Specifications \ Blade Changing Tool Quick-Release Blade Guard Cast Iron Table & Wings Cabinet Mounted Arbor Included and Spreader Integrated Tool Storage Riving Knife Included European Hi-Lo Fence Cast Iron Table & Wings Premium Handles...
- Page 56 Fusion 3 Table Saw \ Specifications \ Riving Knife/Spreader 3/32" (2.28 mm) 3/32" (2.28 mm) 3/32" (2.28 mm) 3/32" (2.28 mm) Thickness Required Blade Body >3.0mm >3.0mm >3.0mm >3.0mm Thickness Required Blade Kerf <2.0mm <2.0mm <2.0mm <2.0mm Thickness FUSION F1...
- Page 57 Fusion 3 Table Saw \ Specifications \ Trunnions Cast Alloy Cast Alloy Cast Iron Cast Iron Body Assembly Pre-Formed Steel Pre-Formed Steel 14 Ga. Steel 14 Ga. Steel Fence Assembly Aluminum Extruded Body Aluminum Extruded Body Steel Body Steel Body...
- Page 58 Fusion 3 Table Saw \ Specifications \ Weight, Gross 214 Lbs (97 Kg) 359 lbs. (163 Kg) 482 lbs. (219 Kg) 482 lbs. (219 Kg) Length 42-3/8" (1075 mm) 49-1/4" (1250 mm) 57" (1450 mm) 51-1/8" (1300 mm) Width 26-3/4" (680 mm) 29-7/8"...
- Page 59 Fusion 3 Table Saw \ Specifications \ FUSION F1 FUSION F2 FUSION F3 FUSION F3 52 OTHER SPECIFICATIONS Country of Origin Taiwan Taiwan Taiwan Taiwan Warranty 1 Year 1 Year 1 Year 1 Year Approximate Assembly & 1 Hour 1 Hour...
-
Page 60: Wiring Diagram
Fusion 3 Table Saw \ Wiring Diagram \ Wiring Diagram Switch Plate © 2020 Laguna Tools... -
Page 61: Replacement Parts Diagram
Fusion 3 Table Saw \ Replacement Parts Diagram \ Replacement Parts Diagram Cabinet © 2020 Laguna Tools... - Page 62 Fusion 3 Table Saw \ Replacement Parts Diagram \ Internal © 2020 Laguna Tools...
- Page 63 Fusion 3 Table Saw \ Replacement Parts Diagram \ Blade Guard & Miter Gauge © 2020 Laguna Tools...
- Page 64 Fusion 3 Table Saw \ Replacement Parts Diagram \ 36" Rails, Fence, Guard & Outfeed Table © 2020 Laguna Tools...
- Page 65 Fusion 3 Table Saw \ Replacement Parts Diagram \ 52" Rails, Fence, Guard & Outfeed Table © 2020 Laguna Tools...
- Page 66 Fusion 3 Table Saw \ Replacement Parts Table \ Parts List Part No. Description Specifications 925199-000 Fence Assembly L\H (800mm) .2 310587-909 Adaptor 800mm .3 000002-308 Hex Screw M6-1.0x45 .4 171993-904 Bracket .5 250602-621 Frictional Plate .7 251456-620 Pointer (L\H) .8 001101-205...
- Page 67 Fusion 3 Table Saw \ Replacement Parts Table \ Key Part No. Description Specifications .1 251246-000 Right Cover .2 290073-905 Shoulder Shaft .3 251247-000 Left Cover .4 043317-000 O-Ring P006 .5 924884-000 Blade Guard support Assembly .5.1 924885-000 Support (L) .5.2...
- Page 68 Fusion 3 Table Saw \ Replacement Parts Table \ Key Part No. Description Specifications .10 130380-903 Washer .11 000403-209 Flat Head Phillip Screw M6-1.0x8 .12 000303-202 Pan Head Screw M5-0.8x8 .13 006002-009 Flat Washer 5.2-10x1.0 .14 251305-620 Pointer .15 924563-000 Adjusting Wheel Assembly .16 280272-000...
- Page 69 Fusion 3 Table Saw \ Replacement Parts Table \ Part No. Description Specifications 110073-000 Bracket for Riving Knife 174396-904 Riving Knife 001902-710 SET Lock Screw M6-1.0x8 000804-106 Round Head Screw M5-0.8x16 361251-905 361250-901 Fixing Knob 110071-000 Lock Handle 390017-000 Sawblade...
- Page 70 Fusion 3 Table Saw \ Replacement Parts Table \ Part No. Description Specifications 006007-114 Flat Washer 6.4x16x1.6 361245-901 Lead Screw 010007-000 Retaining Ring STW-16 012002-003 4x4x8 174324-000 Washer 031011-001 Bearing 51100 090324-000 #N/A 381474-000 Bevel Gear 006001-025 Flat Washer 6.4x16x1.0...
- Page 71 Fusion 3 Table Saw \ Replacement Parts Table \ Part No. Description Specifications 360709-901 Worm Shaft 001902-109 SET Lock Screw M6-1.0x6 012002-006 4x4x16 130126-903 Lock Ring 006006-120 Flat Washer 20x10.2±0.1x2±0.1 006004-167 Flat Washer 13x28x0.8 000104-108 Cap Screw M8-1.25x25 361428-901 Shaft...
- Page 72 Fusion 3 Table Saw \ Replacement Parts Table \ Part No. Description Specifications 924916-000 Front Rail Assembly 36" 924917-000 Front Rail Bracket 36" 924783-000 Rear Rail (L) 3 924768-000 Front Rail (L) 4 924772-000 Front Rail Bracket (L) 6 924773-000...
- Page 73 Fusion 3 Table Saw \ Replacement Parts Table \ Part No. Description Specifications 52" Rail. Right Table. Rear 924971-000 52" Table Assembly 924924-000 Rear Rail 52" 924920-000 Front Rail Assembly 52" 924921-000 Front Rail Bracket 52" 924783-000 Rear Rail (L)
- Page 74 Fusion 3 Table Saw \ Replacement Parts Table \ Part No. Description Specifications 049201-102 Hex Screw w/Flat Washer M8-1.25x12/(13Bx5.5H) 006305-100 Spring Washer 8.2x15.4 001803-103 CAP Screw w/ Spring Washer M8-1.25Px25/8.2x13.7 006001-049 Flat Washer 8.5-16x2.0 008006-100 Hex Nut M8-1.25 (13Bx6.5H) 000003-105 Hex Screw M8-1.25x25...
- Page 75 Fusion 3 Table Saw \ Replacement Parts Table \ Part No. Description Specifications 174711-000 Fix Plate 174772-000 Plate 190A 924854-000 Over Head Guards Assembly 36" 042620-015 Dust Hose 1.5 / 2700mm (I.D.) 174887-904 Brace Hardware Bag for 36" Over- 850913-000...
- Page 76 Fusion 3 Table Saw \ Replacement Parts Table \ © 2020 Laguna Tools...
-
Page 78: Warranty
What Is Covered? (unless with consent by Laguna Tools®), modification to Any part, determined by Laguna Tools®, to have a defect the product, or use with an accessory that was not will be repaired or replaced (and shipped), without charge. It designed for the product. - Page 79 Note all damages on the carrier’s shipping documents. Note any missing or broken packaging on the carriers shipping documents. All product shortage claims must be made to Laguna Tools within 2 SERIAL NUMBER days from the shipping date; otherwise claim cannot be honored.
- Page 80 Note all damages on the carrier’s shipping documents. Note any missing or broken packaging on the carriers shipping documents. All product shortage claims must be made to Laguna Tools within 2 SERIAL NUMBER days from the shipping date; otherwise claim cannot be honored.
- Page 81 Minnesota: 5250 West 74th St, Edina, MN 55439, U.S.A Phone: +1-949-474-1200 LAGUNA EUROPE Walker Rd, Bardon Hill, Coalville LE67 1TU, United Kingdom. Phone: +44-1530-516921 DAKE CORPORATION 724 Robbins Road, Grand Haven, MI 49417, United States +1-800-937-3253 © 2020 Laguna Tools 071422...
Need help?
Do you have a question about the Fusion 3 and is the answer not in the manual?
Questions and answers