Table of Contents
Advertisement
Quick Links
18BX
Bandsaw
Operating Instructions
Producer:
Laguna Tools Inc
744 Refuge Way, Suite 200
Grand Prairie, Texas 75050
USA
Phone: +1 800-234-1976
Website: www.lagunatools.com
Distributor:
IGM nástroje a stroje s.r.o.
Ke Kopanině 560, 252 67, Tuchoměřice
Czech Republic, EU
Phone: +420 220 950 910
PDF ONLINE
E-mail: sales@igmtools.com
www.igmtools.info
Website: www.igmtools.com
2022-02-23
151-18BX LAGUNA Bandsaw Manual EN v1.12 A4ob
Advertisement
Table of Contents

Related Manuals for laguna 18BX


Summary of Contents for laguna 18BX
- Page 1 Phone: +1 800-234-1976 Website: www.lagunatools.com Distributor: IGM nástroje a stroje s.r.o. Ke Kopanině 560, 252 67, Tuchoměřice Czech Republic, EU Phone: +420 220 950 910 PDF ONLINE E-mail: sales@igmtools.com www.igmtools.info Website: www.igmtools.com 2022-02-23 151-18BX LAGUNA Bandsaw Manual EN v1.12 A4ob...
-
Page 2: Ec Declaration Of Conformity
EN 61000-4-4: 2012 Electrical fast transient/burst requirements (EFT/Burst) EN 61000-4-6: 2014 Immunity to conducted disturbances, induced by radio-frequency fields (CS) Responsible for the documentation: Head Product Management, Laguna Tools Inc. Name : Torben Helshoj Responsibility Authorized Signature Date : Oct. - Page 3 Dear Woodworker, Thank you for your purchase and welcome to the Laguna Tools group of discerning woodworkers. We understand that you have a choice of where to purchase your machines and appreciate the confidence you have in the Laguna Tools brand.
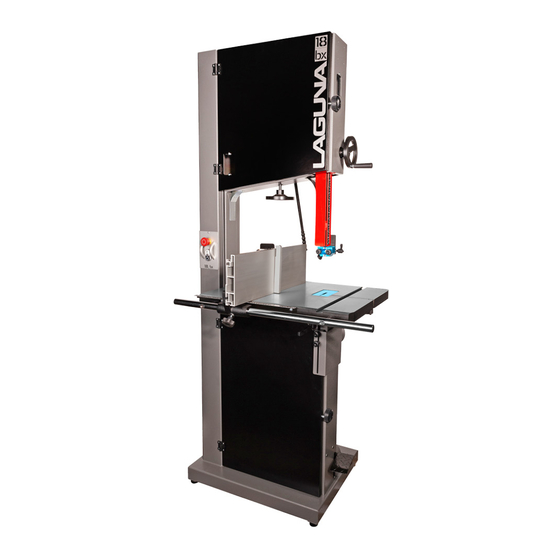
- Page 4 The bandsaw does not have many parts. The supports the adjustable fence, which is used for 14. Optional mobility kit major parts are discussed in this manual. If you parallel cuts. There is a nut and bolt that joins The optional mobility kit is fitted to the base of are not familiar with the bandsaw, take the time both sides of the table and stops the table from the bandsaw and consists of two fixed wheels...
-
Page 5: General Safety
19. Guards EN ISO 4871 The figure quoted is emission levels • Use recommended accessories. Consult the When running, the blade can be very dangerous, and are not necessarily safe working levels. Whilst owner’s manual for recommended accessories. and the amount of blade that is exposed must be there is a correlation between the emission and The use of improper accessories may cause risk of kept to a minimum. - Page 6 Location of warning signs 5.3 What you will receive with the bandsaw • Ruler and table assembly aids (Pictures 8a, 8b). 7. Table Tilt Locks Pic. 8a, 8b 8. Ceramic guides and locks 1. Fence 9. Bladeinsert lock 2. Fence Bar 10.
-
Page 7: Assembly And Setup
6. Assembly and set up 5.4 Locating your bandsaw 6.1 Assembling the rubber feet Before you remove your bandsaw from the pallet, select the area where you will use your machine. Method 1. There are no hard-and-fast rules for its location, Fit the rubber feet to the bandsaw prior to but below are a few guidelines. - Page 8 6.6 Fitting the table insert and Fence Stopper The machine is supplied with a removable table insert that is held in position with a screw. The table insert is removed when blades are removed or fitted to the machine. The insert is made of soft aluminium so that if the blade wanders and contacts the insert, there is less chance of damaging the blade.
-
Page 9: Testing The Bandsaw
6.7 Fitting the optional light Clamp screw Emergency stop button Throat plate Fixing screws and cable clips Table split clamp screw Start / Stop buttons 7.1 Before starting the bandsaw Read and understand the instruction manual before operating the saw. 1. - Page 10 Note. Tensioning the blade is covered later in the manual. 2. Refit the plastic blanking block. Note: The blade must be fully tensioned for final tracking. Note: Never track the blade with the saw running. Note. There is a window on the side of the bandsaw that Blade tension indicator allows the blade on the upper flywheel to be...
- Page 11 Back guide clamp screw the life of your guide. 5. The Laguna guide system can be used with 1/8” to 1-1/4”blades. 6. The Laguna guide system uses ceramic to support and guide the blade. This has many advantages (very poor conductor of heat, very resistant to wear, etc.).
-
Page 12: Using The Bandsaw
Resaw king adjustments, and it is better to do several small blade from Laguna. The blade has many of adjustments until you become skilled at the advantages such as superior surface finish to procedure. - Page 13 The smaller the removed by the blade and the greater the stone. As the machine is supplied with Laguna set, the smaller the saw cut and the larger the horse power that is needed because the blade ceramic guides, this is not imperative because radius that can be cut;...
- Page 14 forward off the front of the wheels. Therefore, only one very tight cut, it may be best to use a Step 2 be careful not to put too much pressure on the turning hole, a relief cut, successive passes or stone.
- Page 15 Step 1 Step 2 Step 4 Step 2 Done Step 3 Method 3 The steering wheel method. Start with the blade Step 3 in front of you, as if you‘re holding a Step 4 steering wheel with your hands at the 9 o‘clock and 3 o‘clock positions.
-
Page 16: Maintenance
9. Maintenance Rust Drive belt adjusting bolt The bandsaw is made from steel and cast iron. All non-painted surfaces will rust if not All tools and machines require regular protected. It is recommended that the table be maintenance, and the bandsaw is no exception. This section details the general maintenance protected by coating with wax if the machine is not in constant use. -
Page 17: Troubleshooting
Adjusting the table square to the bandsaw 6. If additional adjustment is required repeat blade). Change blade for a blade with the blade above steps. correct set. Note. The machine is set in the factory and no 5. Oil or dirt on the drive belt. Clean or replace Lock nut adjustment should be required but during the drive belts. - Page 18 IGM nástroje a stroje s.r.o., Ke Kopanině 560, Tuchoměřice, 252 67, Czech Republic, EU +420 220 950 910, www.igmtools.com © 2022 IGM nástroje a stroje s.r.o.
Need help?
Do you have a question about the 18BX and is the answer not in the manual?
Questions and answers