
Related Manuals for SMC Networks CRB 10 Series


Summary of Contents for SMC Networks CRB 10 Series
- Page 1 Doc. No.CRBB-OM00004 Model name ROTARY ACTUATOR With vertical auto switch unit With angle adjustment unit With vertical auto switch unit and angle adjustment unit Part number / Series 10 to 40- 10 to 40- 10 to 40-...
- Page 2 INDEX Safety Instructions Front matter Product Description How to Order CRB10 to 40 Rotary actuators / Unit combination illustration Internal Construction and Description of Individual Parts Construction: Vertical auto switch unit Construction: Angle adjustment unit / Vertical auto switch unit and Angle adjustment unit Adjustment method 3.1 Vertical auto switch unit Operating Range and Hysteresis...
-
Page 3: Safety Instructions
Safety Instructions These safety instructions are intended to prevent hazardous situations and/ or equipment damage. These instructions indicate the level of potential hazard with the labels of “Caution,” “Warning” or “Danger”. They are all important notes for safety and must be followed in addition to International Standards (ISO/ IEC) *1) Japan Industrial Standards (JIS) and other safety regulations. - Page 4 Warning 1. The compatibility of the product is the responsibility of the person who designs the equipment or decides its specifications. Since the product specified here is used under various operating conditions, its compatibility with specific equipment must be decided by the person who designs the equipment or decides its specifications based on necessary analysis and test results.
- Page 5 Limited warranty and Disclaimer / Compliance Requirements The product used is subject to the following “Limited warranty and Disclaimer” and “Compliance Requirements”. Read and accept them before using the product. Limited warranty and Disclaimer 1. The warranty period of the product is 1 year in service or 1.5 years after the product is delivered, whichever is first.
-
Page 6: Product Description
1. Product Description This operation manual is intended to be used for the compact rotary actuator vane type CRB series with vertical auto switch unit and angle adjustment unit. How to Order With vertical auto switch unit CRB W 30 -90-M9B L B-A ①... - Page 7 Applicable auto swiches...
- Page 8 CRB10 to 40 Rotary actuators / Unit combination illustration Part number for vertical auto switch unit Rotary actuator with vertical Part number for angle adjustment unit Excluding auto switch Part number for joint unit Size For D-M9 D-M9 CRBW---A Size Size CRBW---AM P611070-1M...
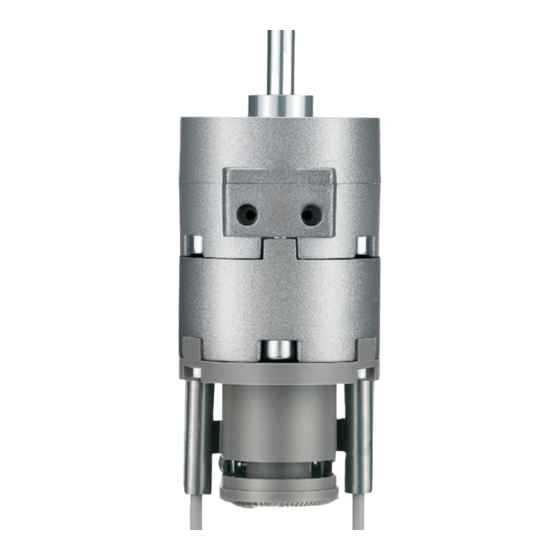
- Page 9 2. Internal Construction and Description of Individual Parts Construction: Vertical auto switch unit Size 10,15 Size 20,30,40 D-M9 Other auto switches Component Parts Description Material Note Cover (A) Resin Cover (B) Resin Magnet lever Resin Holding block Aluminum alloy Holding block (B) Aluminum alloy Not included in the Switch block (A)
- Page 10 Construction: Angle adjustment unit / Vertical auto switch unit and Angle adjustment unit With v With angle adjustment unit ertical auto switch unit and angle adjustment unit Size 10,15,20,30,40 Size 10,15 Size 20,30,40 Component Parts Description Material Note Stopper ring Aluminum alloy Stopper lever Chrome molybdenum steel...
-
Page 11: Adjustment Method
3. Adjustment method 3.1 Vertical auto switch unit Operating Range and Hysteresis Operating range: θ m The range is between the position where the auto switch turns ON as the magnet inside the auto switch unit moves rotationally and the position where the auto switch turns OFF as the magnet moves rotationally in the same direction. - Page 12 Auto Switch Mounting D-M9□ External view and descriptions of auto switch unit For sizes 10, 15 For sizes 20 to 40 1. Auto switch mounting 1. Auto switch mounting Insert the auto switch into Insert the auto switch into the groove of the the groove of the switch holder.
- Page 13 For sizes 10, 15 : D-S/T99(V)□, S9P(V), 97/93A, 90/90A External view and descriptions of auto switch unit Solid state auto switch Reed auto switch <Applicable auto switch> <Applicable auto switch> 3-wire type……D-S99(V)□, S9P(V)□ D-97/93A (With indicator light) 2-wire type……D-T99(V)□ D-90/90A (Without indicator light) 1.
- Page 14 External view and descriptions of auto switch unit Mounting Procedure <Applicable auto switch> Solid state auto switch Reed auto switch D-S79, S7P D-R73, R73C D-T79, T79C D-R80, R80C 1. Auto switch mounting Loosen the cross recessed round head screw (2), and insert the arm of the auto switch.
- Page 15 Auto Switch Adjustment Rotation range of the output shaft with single flat (key for size 40 only) and auto switch mounting position. Solid-lined curves indicate the rotation range of the output shaft with single flat (key). When the single flat (key) is pointing to the END ①...
- Page 16 3.2 Angle adjustment unit Rotating angle with angle adjustment unit ● Drawings below are viewed from the long shaft side. ● The position of the chamfered portion illustrates the conditions of actuators when B port is pressurized. ● Operate within the adjustment range. Size: 10, 15 Size: 20, 30, 40...
- Page 17 Rotating Angle Adjustment Method ● The rotating angle can be adjusted by moving the stopper blocks (A) and (B) shown in Fig. 1. ● Fig. 1 shows the default position of the angle adjustment unit. ● Fig. 1 shows size 20. ...
- Page 18 4. Assembly / Disassembly procedure ertical auto switch unit With v Size: 10, 15 Cross recessed round head screw 2 For D-M9 18 Switch holder 2 For D-M9 Cross recessed round head screw 2 3pcs. for size 15 Cross recessed round head screw Cross recessed round head screw 14 Holding block (B) 13 Switch block (B)
- Page 19 Size: 20, 30 Cross recessed round head screw 15 Switch holder Cross recessed round head screw Cross recessed round head screw Cross recessed round head screw 11 Switch block Cross recessed round head screw 9 Cover (B) 8 Cover (A) 7 Holding block 6 Magnet 5 Hexagon socket set screw...
- Page 20 Size: 40 Cross recessed round head screw 15 Switch holder 14 Rubber cap Cross recessed round head screw Cross recessed round head screw Cross recessed round head screw 10 Switch block 9 Cover (B) 8 Cover (A) 7 Holding block 6 Magnet 5 Hexagon socket set screw 4 Magnet lever...
- Page 21 4.2 With angle adjustment unit No gap Fig. 1 Fig. 2 11 Cap 10 Hexagon socket head cap screw 3 2pcs. for size 10 9 Rubber bumper 8 Hexagon socket head cap screw 7 Lever retainer 6 Stopper lever 5 Hexagon socket head cap screw 2 4pcs.
- Page 22 ertical auto switch unit and angle adjustment unit With v Size: 10 Cross recessed round head screw 27 Switch holder Cross recessed round head screw 25 Hexagon socket set screw Cross recessed round head screw Cross recessed round head screw Cross recessed round head screw 21 Holding block (B) ○...
- Page 23 Size: 15 Cross recessed round head screw 27 Switch holder Cross recessed round head screw 25 Hexagon socket set screw Cross recessed round head screw Cross recessed round head screw Cross recessed round head screw ○ 21 Holding block (B) ○...
- Page 24 Size: 20, 30 Cross recessed round head screw 25 Switch holder 24 Hexagon socket set screw ○ Cross recessed round head screw Cross recessed round head screw ○ ○ Cross recessed round head screw Cross recessed round head screw 19 Magnet 18 Magnet lever 1 Including No.1 17 Holding block...
- Page 25 Size: 40 Cross recessed round head screw 26 Switch holder 25 Rubber cap ○ 24 Hexagon socket set screw ○ Cross recessed round head screw ○ Cross recessed round head screw Cross recessed round head screw 20 Magnet 19 Magnet lever 1 Including No.20 18 Holding block 17 Switch block (B)
- Page 26 5. Various units 5.1 Switch block unit A switch block unit can be ordered when adding auto switches or when the switch block is broken. The solid state auto switch (D-S9*/T99) for sizes 10 and 15 has a built-in switch in the block. It requires only two parts for mounting (see P211070-13).
- Page 27 Size 20, 30 Common to right-hand and left-hand (Reed auto switch D-M9) Unit part number: P811030-8M Cross recessed M3×6L round head screw Holding block Switch holder Description Note Size 10, 15, 40 Common to right-hand and left-hand (Reed auto switch D-M9) Unit part number: P811010-8M Cross recessed...
- Page 28 5.2 Vertical auto switch unit Part number for auto switch unit (An auto switch will not be included.) Part number for unit Part number for unit (For solid state auto switch and Size (For reed auto switch D-M9) reed auto switch D-S*/T*) P611070-1 P611070-1M P611090-1...
- Page 29 Size 15 Mounting for auto switch unit and auto switch Mounting for auto switch unit and auto switch (Reed switch) (solid state switch D-S9*/T99) Follow the procedure below in numerical order starting from 1 to Follow the procedure below in numerical order starting from 1 to attach the auto switch unit.
- Page 30 Size 10, 15, 20, 30, 40 Mounting for auto switch unit and auto switch (Solid state switch D-M9) Follow the procedure below in numerical order starting from 1 to attach the auto switch unit. (Note1. Auto switch of (4) is not included when ordering only a unit.) (Note2.
- Page 31 5.3 Angle adjustment unit Part number for angle adjustment unit Size Unit part number P811010-3 P811020-3 P811030-3 P811040-3 P811050-3 Each unit can be additionally mounted to the rotary actuator. Mounting of angle adjustment unit Size 10 Size 15, 20, 30 Follow the procedure below (in order of part number) for assembling Follow the procedure below (in order of part number) for assembling the the angle adjustment unit.
- Page 32 Size 40 Follow the procedure below (in order of part number) for assembling the angle adjustment unit. Note 1. Each screw shall be tightened at a torque of approx. 4.0 to 6.0Nm 3. Hexagon socket head cap screw (3pcs) 6. Cap 4.
- Page 33 5.4 Joint Unit for Combining Switch Unit and Angle Adjustment Unit Joint unit is necessary for changing the rotary actuator with switch or angle adjustment function to the rotary actuator with switch degree adjusting type. Size 10 Size 15 P211070-10 P211090-10 Stainless Hexagon socket set...
- Page 34 Size 40 P211010-10 Hexagon socket set M4×4L screw Cross recessed M5×12L round head screw Joint Chromated Description Material Note How to mount joint unit Size 10 Size 15, 20, 30, 40 Follow the procedure below for assembling the auto switch (including Follow the procedure below for assembling the auto switch (including the unit).
-
Page 35: Handling Notes
6. Handling notes 6.1 Cautions for handling of the vertical auto switch unit (1) Be sure to connect a load to the switch before turning the power supply on. (2) Do not let objects drop onto or dent the product or subject it to strong impact when handling. (3) Do not use the product in the presence of a strong magnetic field. - Page 36 Cautions for handling of the vertical auto switch unit Use the actuator within the allowable kinetic energy, otherwise there is a risk of deviation of the set rotation time, or breakage of parts. Table 1 Moment of inertia Size Allowable kinetic energy (J) 0.00015 0.00025 0.0004...
- Page 37 Revision history 4-14-1, Sotokanda, Chiyoda-ku, Tokyo 101-0021 JAPAN Tel: + 81 3 5207 8249 Fax: +81 3 5298 5362 https://www.smcworld.com Note: Specifications are subject to change without prior notice and any obligation on the part of the manufacturer. © 2021 SMC Corporation All Rights Reserved...
Need help?
Do you have a question about the CRB 10 Series and is the answer not in the manual?
Questions and answers