Table of Contents
Advertisement
Quick Links
Advertisement
Table of Contents

Related Manuals for infaco A3MV2-48V


Summary of Contents for infaco A3MV2-48V
- Page 1 A3MV2 -48V tying machine other languages Original user guide -...
-
Page 3: Table Of Contents
Contents Precautions before use Protection of the environment Box contents General product view Specifications User guide RECHARGING THE BATTERY Servicing and maintenance OPERATING PROBLEMS SAFETY INSTRUCTIONS GUARANTEE CONDITIONS Servicing Tying method Technical information Declaration of conformity (CE) -
Page 4: Precautions Before Use
Power tools must not be disposed of with household refuse. > The device, accessories and packaging must be taken to a recycling centre. > Ask the approved INFACO dealer for up-to-date information on the eco- compatible elimination of waste. Box contents Tying machine A3MV2-12v... -
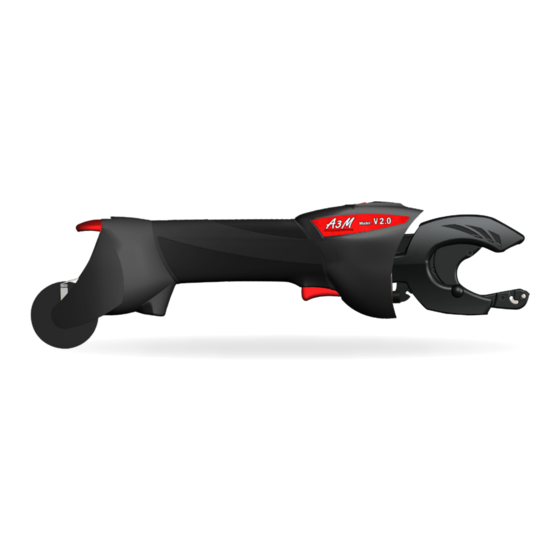
Page 5: General Product View
General product view Adjustment wheel of the Lever number of turns Tying head Reel of wire Switch 48V supply cable Specifications A3MV2 - 48 V Rated power supply Weight of the machine alone 650 g Battery autonomy 12 500 attachments Charging time 1h30 Opening diameter... -
Page 6: User Guide
Battery: Before using the equipment for the first time and/or following wintering, fully charge the battery (see charging procedure on page 13). The F3015 Lithium battery MUST be recharged using the INFACO Lithium charger (Ref.:841C1/841C2). It is prohibited to use a different charger as this may lead to a serious electrical accident. - Page 7 Switching on The tying head should be in the working position before switching on. Connect the battery to the machine supply cable. The machine is switched on. • Short pressure on the switch will control only the wire cutting function. •...
- Page 8 Loading the reel The wire needs to be prepared to make it easier to feed through the machine. Cut the end to obtain a wire with Smoothe the wire for at least 40 cm. no bends in it. Clip the reel on to the machine Clip the lever upwards.
- Page 9 Insert the wire into hole. If you come up against an obstacle during insertion, move the wire gently backwards and forwards and/or press once or twice the control switch to pivot the tying head and to keep the wire moving through the machine. Keep on feeding the wire through until it emerges from the tying head.
- Page 10 Removing the reel • Reel with remaining wire Clip lever upwards to allow the wire free Pull the reel to unclip it from the machine. movement through the passage. • Empty reel Pull directly on the reel to unclip it from the machine.
-
Page 11: Use
Making a tie Hold the end of the branch and the trellising wire firmly in your free hand and bring the A3MV2 closer. Position the tying head just before the last node on the branch. Firmly place the branch + the trellising wire inside the tying head. - Page 12 Tightening the knot Position 1 = tight knot. Position 2 = loose knot. Pull the machine back approximately 1 to Pull the machine back approximately 3 to 2 cm, then press the control switch. 4 cm, then press the control switch. Adjusting the number of turns To vary the number of turns, move the wheel to the right or left Adjustments vary from 3 to 6 turns.
-
Page 13: Recharging The Battery
RECHARGING THE BATTERY The battery has sufficient autonomy to complete between 12 500 ties. If you are thinking of doing more than 8000 ties a day, we advise you to either recharge the battery for at least an hour during your lunch break to achieve extra autonomy of approximately 10 000 ties. - Page 14 Charging the battery It is strictly forbidden to charge the batteries when the temperature in the room is below 0°C or higher than 40°C. When charging, the battery must not be covered and not be close to a heat source. 1.
- Page 15 Charging a second battery A second battery can be placed on the charger: 1. Place the battery on channel 2 of the charger. 2. If the battery on channel 1 is char- ging, the battery on channel 2 swit- ches to a waiting charge status: Channel 1: Green LED flashes quickly throughout the charge.
- Page 16 Storing the battery / Putting the battery to Sleep Mode or Winter Mode To keep your batteries in good condition (at the end of every pruning season or when not used for more than 1 month) the following process must be applied (this process can take up to 10 hours per battery): 1.
- Page 17 Do not store the battery without carrying out the Sleep / Winter mode process. Do not store batteries that are out of service, return them to your approved INFACO dealer. Do not store batteries when they are connected to the charger or to a tool.
-
Page 18: Servicing And Maintenance
Servicing and maintenance Daily maintenance Lubricate at least twice a day : in the morning before you start work at midday Lubricate at the points shown below: The following tasks should be carried out with the machine disconnected. • Lubricate to restrict wear Spray the end of the head on the blade Spray the end of the head on the wire- side. - Page 19 • Lubricate to make your work easier Spray the point of contact between the reel and the cheeks Spray directly on to the wire on the reel, once or twice per reel, to help the wire to slide more easily as it moves round the reel.
-
Page 20: Operating Problems
OPERATING PROBLEMS These tasks should be carried out with the machine disconnected. The loop no longer forms during the tying operation A piece of wire may be stuck in the wire pincher To release it, press pin in the circular orifice with your fingernail or using the supplied pliers. - Page 21 The wire is jammed Try first of all to take hold of the wire at the back of the machine and push it forwards. • If the wire emerges switch the machine back on. Press control switch to carry out a short cut, then resume tying operations. •...
- Page 22 The machine no longer operates, the tying head is stuck Push rod , which hits against ring when the wire is cut, sometimes goes out of its trajectory and become stuck on the outer edge of ring. The arm often remains locked and can’t open completely. Do not try to force arm open as you may damage the mechanism.
- Page 23 At the end of the reel, some wire is stuck in the tying head Use key (provided in the case) to loosen screw by approximately 4 or Pivot tying head 90° to gain access 5 turns. to screw. To avoid the risk of losing screw, we recommend that you do not unscrew it 90°...
- Page 24 Before you put the head back on, we recommend lubricating the shaft with guide pin. Put the tying head back on, positioning guide pin opposite its housing. Then tighten screw to complete the operation. Guide pin Repeat the steps in reverse order. The operation is finished.
-
Page 25: Safety Instructions
This machine does not cause vibrations or jerks. Do not leave the machine on the ground and do not leave it exposed to bad weather. If the supply cable on your charger is damaged, have it changed by the INFACO factory or an approved A3M retaile. -
Page 26: Guarantee Conditions
If the guarantee card has not been returned at the time of the guarantee request, the ex- works departure date will be used to determine the guarantee period. INFACO may not be held liable for any machines sold by distributors more than a year after they have left the factory. -
Page 27: Servicing
Servicing We offer a servicing package for an inclusive fee at the end of each season. You may choose to extend your guarantee over the first 2 seasons. N.B. to take advantage of the guarantee extension over the first 2 seasons: you must opt for the servicing package from the end of the first season (servicing carried out between April and late July). - Page 28 Branch unwound with lifting wire: Number of ties: minimum 2 For short branches, 2 x 0.50 ties at the Ø wire: 0,50 end of the branch. For long branches, it is essential to place 1 x 0.50 tie loosely at the start of the branch (to allow the branch to grow) and 1 x 0.50 tie attached tightly at the end of the branch.
- Page 29 Comments > ..........additional part To validate the warranty, REGISTER IMMEDIATELY ONLINE ON: www.infaco.com, , your warranty declaration or send this form filled out IN BLOCK CAPITALS AS SOON AS THE TOOL IS PURCHASED. Surname > ............. First name > ..........
- Page 30 Dealer Serial number to be kept by the dealer for the INFACO customer file INFACO:...
-
Page 31: Technical Information
Ref > A3MV2-48V Technical information or After-sales INFACO S.A.S. Bois de Roziès 81140 CAHUZAC-SUR VERE France Phone: (+33) 05 63 33 91 49 - Fax: (+33) 05 63 33 95 57 Email: contact@infaco.fr Technical videos available on the website: www.infaco.com... -
Page 34: Declaration Of Conformity (Ce)
“Carregadores elétricos” (diretiva 2004/108/CEE) e regulamentações nacionais que os transpõem. • The person authorized to compile the technical file within the company INFACO is Mr. Gregory ALVAREZ. Die für die Erstellung der technischen Unterlagen bei INFACO berechtigte Person ist ALVAREZ Grégory. - Page 36 . i n f a c o . c o m EN - User guide - Tying machine A3MV2-48V NOT_A3MV248V_EN_05_22...
Need help?
Do you have a question about the A3MV2-48V and is the answer not in the manual?
Questions and answers