
Related Manuals for Apera Instruments EC950


Summary of Contents for Apera Instruments EC950
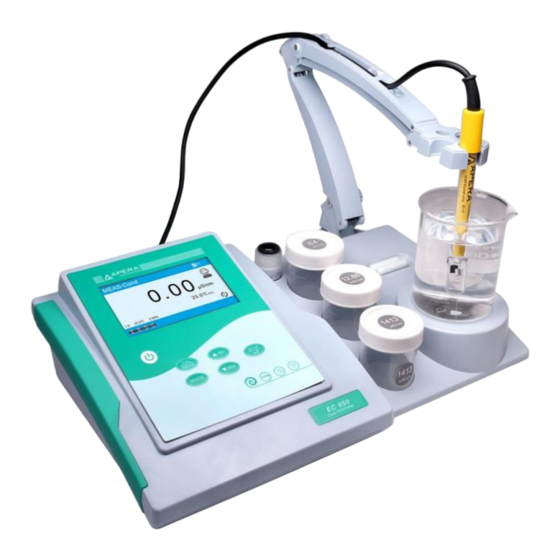
- Page 1 EC950 Benchtop Conductivity Meter Instruction Manual PH950 Benchtop pH Meter EC950 Benchtop Cond. Meter PC950 Benchtop pH/Cond. Meter APERA INSTRUMENTS (Europe) GmbH www.aperainst.de...
-
Page 2: Table Of Contents
Table of Contents Introduction ........................... - 1 - Measurement parameter ....................- 1 - Basic features ........................- 1 - pH measurement features ....................- 1 - Conductivity measurement features ................... - 1 - Meter Kits ............................. - 2 - Specifications .......................... - Page 3 Operation ......................... - 25 - Specification ........................- 26 - Notes ..........................- 26 - 10. USB communication ........................- 26 - Install Software ........................ - 26 - Software Interface ......................- 27 - Operation Keys of PC-Link....................- 27 - 11.
-
Page 4: Introduction
1. INTRODUCTION Thank you for purchasing our EC950 Benchtop Conductivity Meter. Before using this meter, please read the operation manual carefully to help use and maintain it correctly. Measurement parameter Measurement parameter PH950 EC950 PC950 pH/mV √ √ Cond./TDS/Salinity √... -
Page 5: Meter Kits
2. METER KITS Description Quantity PH950 EC950 PC950 PH950 pH meter √ EC950 conductivity meter √ PC950 pH/conductivity meter √ 606 multi-function stirrers (includes flexible √ √ √ electrode holder) LabSen211 glass pH combination electrode √ √ MP500 temperature probe √... -
Page 6: Specifications
±0.1% FS ±1 digit Conductivity:0~200 mS/cm, divided into five ranges, automatically switch measuring range. (0~19.99)μS/cm; (20.0~199.9)μS/cm; Measuring Range (200~1999)μS/cm;(2.00~19.99)mS/cm; (20.0~199.9)mS/cm TDS: (0 ~ 100) g/L; Salinity:(0 ~ 100) ppt EC950 Cond. PC950 Resolution 0.01/0.1/1μS/cm; 0.01/0.1 mS/cm Accuracy ±1.0% FS ±1 digit Temperature (0 ~ 50)°C(Auto. -
Page 7: Instrument Description
4. INSTRUMENT DESCRIPTION LCD display pH measurement interface ① pH measurement ② pH measuring value ③ Temperature measuring value ④ pH electrode slope ⑤ Calibration solution indication icon ⑥ Used data storage ⑦ Temperature compensation icon, MTC-manual temperature compensation ATC-auto. temperature compensation ⑧... -
Page 8: Keypad Functions
TDS measurement interface Salinity measurement interface Salinity factor 0.5 ① TDS measurement ② TDS factor 0.71 pH/Cond. measurement interface mV measurement interface Keypad functions Diagram-1 Keypad operation mode: Short press—Press key and holding time < 2s, buzzer makes a “di” sound. Long press—Press key and holding time >... -
Page 9: Meter Sockets
Short press ⚫ Power supply switch Press key to select measurement mode: ⚫ PH950: pH→mV Short press ⚫ EC950: Cond→TDS→Salt ⚫ PC950: pH→mV→Cond→TDS→Salt→pH/Cond Long press ⚫ Press key to enter temperature regulation mode Long press ⚫ In measurement mode, press key to enter in the calibration mode Short press ⚫... -
Page 10: Display Mode
① BNC socket, connect with pH- or ORP combination electrode. ② RCA socket, connect with temperature sensor (for pH measurement). ① +②: BNC+RCA socket, connect with pH/ATC 3-in-1 combination electrode. ③ Ф4 banana socket, connect with reference electrode. ④ BNC socket, connect with conductivity cell. ⑤... - Page 11 number corresponds to 2 groups measuring value (pH + conductivity). So for this type of meter, actual store data is 200 groups, but storage number will be less than 200. If press key again when storage value is full, icon will flash, see Diagram –5(c) to indicate store memory is already full and need to be deleted for new store value.
-
Page 12: Manuals Adjust Temperature
Manuals adjust temperature In MTC mode, long press key to enter temperature regulation mode. Press key to adjust temperature value. Press and hold the key for fast adjustment. Press key to confirm and return to measurement mode. Install meter with multi-function test bench Before installing After installing Mulit-function test bench... -
Page 13: Ph Measurement
5. PH MEASUREMENT Default Electrodes Information The meter comes with a LabSen 211 pH combination electrode and MP500 temperature probe, which enables the automatic temperature compensation. The LabSen pH electrodes are made with proprietary sensor technologies and premium materials from Switzerland. LabSen 211 pH electrode is designed for high-precision lab and field pH measurement of general water solutions. - Page 14 Technical Specifications of the MP500 Temperature Probe Temperature Range 14 to 230 ˚F (-10 to 110 °C) Body Material Stainless Steel Sensor 30 KΩ thermistor Probe Dimension (Φ5×145) mm Connector Connector and cable length BNC/1m How to use Insert the blue BNC connector of the electrode to the BNC socket of your pH meter while twisting clockwise until it`s locked, plug the RCA connector into the “TEMP”...
-
Page 15: Ph Calibration Related Information
The electrode should avoid testing strong acid and strong alkali solutions, as well as dehydrating media such as absolute ethanol and concentrated sulfuric acid. If testing such solutions, the immersion time should be minimized, and the electrode should be carefully cleaned after use. -
Page 16: Ph Meter Calibration (Take Three-Point Calibration As An Example)
Note: calibration indication icons are example of USA series. Calibration information display 2020-01-18 1. Automatically display electrode slope 16:26:42 measurement interface • Display average slope after two- or three-point calibration • Dose not display slope after one point calibration 2. Display last calibration data in pH submenu clause Calibration intervals Calibration intervals depend on the sample, the probe performance, and the required accuracy. - Page 17 Submerge probe in pH7.00 buffer solution. Stir the solution briefly and allow it to stay in the buffer solution until appears. Press key to make calibration. Rinse pH probe in pure water, allow it to dry by shaking or filter paper. Press key to confirm.
-
Page 18: Custom-Defined Calibration (Take 2.00Ph And 7.30Ph Calibration Solution As Example)
Custom-defined calibration (take 2.00pH and 7.30pH calibration solution as example) 1. Select User in parameter set 1.1, press to return to measurement mode. 2. Long press key to enter calibration mode, as shown in left graph. Rinse pH probe in pure water, allow it to dry by shaking or filter paper. -
Page 19: Self-Diagnostic Information
Notes: (a) The meter can perform 1-2 point custom-defined calibration. When the 1 point calibration is done, press key, the meter exits from calibration mode. This is one-point custom-defined calibration. (b) The meter does not have the function to recognize custom-defined calibration solution. But it requires the error of custom-defined calibration solution ≤1pH, the differential between two calibration solution ≥1pH, otherwise the meter will display self-diagnostic error. -
Page 20: Mv Measurement
Submerge the probe in point Press point calibration pH7.00 solution, press Prsse completed, press calibration key to enter key to enter into key to turn key when calibration measurement mode. on the meter mode icon appears. point calibration Solution completed, press Submerge the probe in Measure pH4.00 solution, press... -
Page 21: Notes For Orp Measurement
index for the oxidation reduction ability of wate solution. Its unit is mV. Notes for ORP measurement ORP measurement does not require calibration. When the user is not sure about ORP probe quality or measuring value, use ORP standard solution to test mV value and see whether ORP probe or meter works properly. -
Page 22: Conductivity Calibration Related Information
Chart -5 Probe constant and measuring range <20 μS/cm Measuring Range 0.5μS/cm~100mS/cm >100mS/cm Conductivity probe K=0.1 cm K=1.0 cm K=10 cm constant Standard solution 84μS/cm 84μS/cm 1413 μS/cm 12.88 mS/cm 111.8 mS/cm Conductivity calibration related information Conductivity calibration solutions The meter uses Standard series and CH series conductivity solution. The meter can recognize the standard solution automatically and perform 1~4 point calibration. -
Page 23: Conductivity Meter Calibration (Take 1413Μs/Cm Calibration As An Example)
Chart -7 Temperature compensation coefficient of certain solutions Solution Temperature compensation coefficient NaCl solution 2.12 %/℃ 5% NaOH solution 1.72 %/℃ Dilute ammonia solution 1.88 %/℃ 10% hydrochloric acid solution 1.32 %/℃ 5% sulfuric acid solution 0.96 %/℃ Avoid contamination of standard solution Conductivity standard solution has no buffer. -
Page 24: Custom-Defined Calibration (Take 10Μs/Cm Standard Solution As An Example)
Custom-defined calibration (take 10μS/cm standard solution as an example) 1. Select User in parameter setting clause 2.2, press key to return to measurement mode. 2. Long press key to enter calibration mode, as shown in left graph. Rinse probe in pure water, allow it to dry by shaking or filter paper. -
Page 25: Solution Measurement
Chart -8 Self-diagnostic information of conductivity measurement mode Self-diagnostic Description Check up 1. Check if conductivity solution is correct. Wrong conductivity calibration 2. Check if the connection between meter and buffer error solution or exceed recognition probe is good range of the meter 3. -
Page 26: Conductivity Probe Maintenance
Relationship among TDS, salinity and conductivity The conversion coefficient between TDS and conductivity is 0.40~1.00 which can be adjusted in parameter setting clause 2.6 Factory default setting is 0.71. The conversion coefficient between salinity and conductivity is 0.5. So the meter only needs to be calibrated in conductivity mode, then switch to TDS and salinity mode. -
Page 27: Parameter Setting
8. PARAMETER SETTING Main menu and submenu Main menu pH submenu Conductivity/TDS submenu Setting submenu Diagram-15 Operation Press key to open main menu→press key to select main menu items→press key to open main menu item (submenu)→press key to select submenu items(parameter)→ press key to open parameter→press key to select parameter items or parameter value→press key to confirm→press... -
Page 28: Content Of Parameter Setting
Content of parameter setting Serial Factory Main menu Parameter setting items Setting content number default pH buffer selection CH-USA-NIST-User Resolution 0.01-0.1 0.01 The last calibration data View Restore factory default No-Yes Cell constant 10-1.0-0.1 CAL solution selection CH-Standard-User Standard The last calibration data View Reference temperature 15~30℃... -
Page 29: Specification
this time the rotating speed is zero. Press key to increase or decrease rotating speed. Press and hold key for fast changing. key operation: long press key for 3 seconds to store rotating speed. At this time stirrer icon turns to , then press key to change rotating speed. -
Page 30: Software Interface
in the meter. Auto-timing data logger will generate a measurement curve in PC-Link software as shown in Diagram-16. Software Interface ① ② ⑤ ④ ③ Diagram-16 Meter serial number Computer connection icon ① ④ Data area Data stored in meter ②... -
Page 31: Recommended Ph Electrodes For Specific Applications
11. RECOMMENDED PH ELECTRODES FOR SPECIFIC APPLICATIONS Application Ideal Apera pH Electrodes to Use General water solutions LabSen 211 Beverage, beer, or wine analysis LabSen 211 Cosmetics and other viscous liquid LabSen 851-S, LabSen 851-H Dairy products (milk, cream, yogurt, mayo, etc.) LabSen 821 High-Temperature liquid LabSen 861... -
Page 32: Warranty
We warrant this instrument to be free from defects in material and workmanship and agree to repair or replace free of charge, at option of APERA INSTRUMENTS(Europe) GmbH, any malfunctioned or damaged product attributable to responsibility of APERA INSTRUMENTS(Europe) GmbH for a period of THREE YEARS (SIX MONTHS for the probe) from the delivery.
Need help?
Do you have a question about the EC950 and is the answer not in the manual?
Questions and answers