
Related Manuals for Apera Instruments SX716


Summary of Contents for Apera Instruments SX716
- Page 1 SX716 Portable DO Meter Instruction Manual APERA INSTRUMENTS, LLC www.aperainst.com - 1 -...
- Page 2 Table of Contents Brief Instruction ....................... - 3 - Technical Specifications....................- 4 - Instructions of the Meter ....................- 5 - LCD Display .......................... - 5 - Keypads ..........................- 6 - The Storage, Recall and Deletion of Measurement’s Information ........... - 6 - DO Measurement ......................
-
Page 3: Brief Instruction
Brief Instruction Thanks for purchasing Apera Instruments SX716 Portable DO Meter (will be called “the meter” in short in the following content). Before using the meter, please read this instruction manual carefully in order to help you properly use and maintain it. On the basis of improving instrument’s performance constantly, we reserve the right of changing the content of this manual and accessories without giving notifications in advanace. -
Page 4: Technical Specifications
membrane cap, which is very convenient to use. Each DO electrode comes with three backup membrane caps. 1.5. Meter’s circuit board adopts SMT film-covering technology to improve meter’s performace reliability. 1.6. Meter’s LCD has clear and bright backlit display. 1.7. IP57 waterproof and dust-proof. Technical Specifications 2.1 Dissolved Oxygen Measuring range... -
Page 5: Instructions Of The Meter
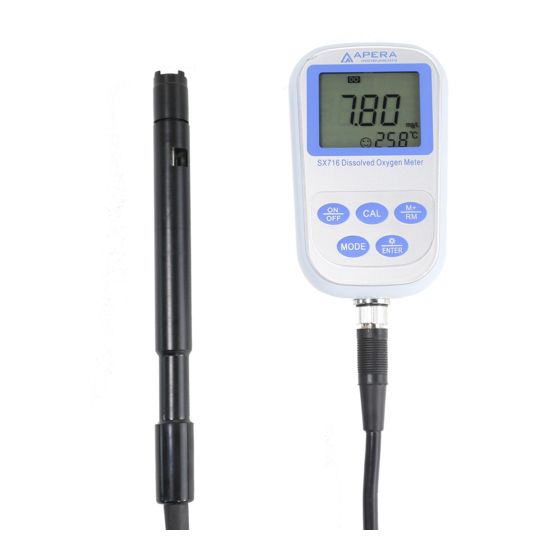
2.3 Working Condition Environment temperature 5 to 35˚C (0.01 grade) ≤85% Environmental humidity IP rating IP57 Dust-proof and waterproof Instructions of the Meter LCD Display ① —— Parameter icon ② —— Measuring value ③ —— Serial number and icon as measuring value to be stored and recalled and indication icon for special states. -
Page 6: Keypads
3.2 Keypads The meter has 5 operation keys in total. — Power on/off 3.2.1. — Calibration key. 3.2.2. (a) When in the measurement mode, press this key to enter calibration mode. (b) When in the parameter setting mode, press this key to change the number or the ON/OFF state. -
Page 7: Do Measurement
the measuring data in turn, long press key to quickly check the stored data; (b) In the recalling mode (there are RM and storage serial number in the lower right corner of the LCD), press key to return to the measuring mode. 3.3.3. -
Page 8: Meter Calibration
1 — DO500 DO electrode 6 — Temperature electrode 2 — Calibration cover cap 7 — Membrane cap 3 — Calibration cover 8 — Cathode (gold slice) 4 — Water stored sponge 9 — Anode 5 — Calibration cover bottom lip 10 —... -
Page 9: Special Notes
take the reading after the smiley face icon shows up. 4.3.2. To measure in static water: Insert DO electrode into water, water surface level should should be higher than the location of the thermistor, the angle for the electrode and water should be 45° to 75°, quickly move the electrode in water (speed>5cm/s), hold 3 to 5 minutes to take the reading after smiley face icon shows 4.3.3. -
Page 10: Parameter Setting
accuracy. 4.4.7. The electrolyte within the electrode can not have any air bubbles (except for the smaller ones), otherwise it will affect the response speed and accuracy. If there are large air bubbles, user should screw out the membrane cap, then add the electrolyte, and then screw up the cap. - Page 11 Auto power off time setting 0-10-20 min Restore to producer setting OFF-On (shut-set) 4.5.2. Resolution selection (P1) (a) Press key and enter P1 mode, see picture (4-2); key to choose resolution: 0.01→0.1; (b) Press (c) Press key to enter the next parameter setting or press to return to the measuring mode.
-
Page 12: Replace The Membrane Cap
4.5.6. Backlight display time setting (P5) (a) Short press key in mode P4 to enter mode P5, see picture (4-6). (b) Press key to choose the auto-off time of backlight: 0 min, 1 min, 3 min or 6 min. The back light display function will be closed if choosing 0 min. -
Page 13: Zero Oxygen Calibration
appear. After injection, should check the electrolyte to see whether there are air bubbles in it. If found there are air bubbles, please carefully knock on the membrane cap to eliminate them. (e) Put membrane cap on the table and put in the electrode vertically, slowly twist in clockwisely, and then twist on tightly. -
Page 14: Salinity Calibration
Barometric pressure compensation (Please see the Chart Ⅲ and Ⅳ. For the procedure of Barometric pressure calibration, please see 4.5.4.). Meter ’s Complete Kit 5.1. Model SX716 DO meter *1 5.2. DO500 DO electrode *1 5.3. DO503 membrane cap (DO electrode use) *3 5.4. -
Page 15: Warranty
We warrant this instrument to be free from defects in material and workmanship and agrees to repair or replace free of charge, at option of APERA INSTRUMENTS, LLC, any malfunctioned or damaged product attributable to responsibility of APERA INSTRUMENTS, LLC for a period of two years from the delivery (a six-month limited warranty applies to electrodes and the electrode’s accesories). -
Page 16: Appendix
Appendix Appendix 1 Meter Parameter Setting Schedule Prompt Mode Parameter Setting Items Code Parameter Mark 0.01/0.1(mg/L and ppm) Resolution selection 0.1, 1(%) Salinity calibration Barometric pressure setting Dissolved ℃ ℉ Temperature unit setting Oxygen Back light display time setting 0-1-3-6min Auto power off time setting 0-10-20min Restore to factory default... -
Page 17: Appendix 3 Content Of Saturated Oxygen At Different Barometric Pressure
Temperature Temperature Temperature ℃ ℃ ℃ mg/L mg/L mg/L 14.64 9.86 7.30 14.22 9.66 7.18 13.82 9.46 7.07 13.44 9.27 6.95 13.09 9.08 6.84 12.74 8.90 6.73 12.42 8.73 6.63 12.11 8.57 6.53 11.81 8.41 6.43 11.53 8.25 6.34 11.26 8.11 6.25 11.01... -
Page 18: Appendix 4 Content Of Oxygen At Different Altitude
100.26 9.97 8.16 6.87 100.40 9.98 8.17 6.88 100.53 9.99 8.18 6.89 100.66 10.00 8.20 6.90 100.80 10.01 8.21 6.91 100.93 10.03 8.22 6.92 101.06 10.04 8.23 6.93 101.20 10.07 8.24 6.94 101.33 10.08 8.25 6.95 101.46 10.09 8.26 6.96 101.60 10.11 8.27... - Page 19 101.3 8.25 7500 2287 77.1 6.28 99.34 8.09 8000 2439 75.63 6.16 1000 97.6 7.95 8500 2591 74.44 6.06 1500 95.87 7.81 9000 2744 72.97 5.94 2000 94.28 7.68 9500 2896 71.64 5.83 2500 92.54 7.54 10000 3049 70.17 5.71 3000 90.95 7.41...
- Page 20 APERA INSTRUMENTS, LLC Address: 6656 Busch Blvd, Columbus Ohio 43229 Tel: 1-614-285-3080 Email: info@aperainst.com Website: www.aperainst.com - 20 -...
Need help?
Do you have a question about the SX716 and is the answer not in the manual?
Questions and answers