
Related Manuals for Apera Instruments PC 8500


Summary of Contents for Apera Instruments PC 8500
- Page 1 PC8500 Portable pH/Conductivity Meter Manual PH 8500 Portable pH Meter EC 8500 Portable Cond. Meter PC 8500 Portable pH/Cond. Meter APERA INSTRUMENTS (Europe) GmbH www.aperainst.de...
-
Page 2: Table Of Contents
Table of Contents 1. Introduction --------------------------------------------------------------------------------------------------------------------------- 2. Specifications ------------------------------------------------------------------------------------------------------------------------ 3. Instrument Description ------------------------------------------------------------------------------------------------------------- 3.1. LCD display---------------------------------------------------------------------------------------------------------------------- 3.2. Keypad functions --------------------------------------------------------------------------------------------------------------- 3.3. Meter socket ---------------------------------------------------------------------------------------------------------------------- 3.4. Display mode---------------------------------------------------------------------------------------------------------------- 3.5. Store, recall and clear readings--------------------------------------------------------------------------------------------- 3.6. Auto. power off-------------------------------------------------------------------------------------------------------- ----- 3.7. Temperature adjustment -------------------------------------------------------------------------------------------------- 4. -
Page 3: Introduction
1. Introduction Thanks for purchasing 8500 series portable pH/Conductivity meter. This meter is a perfect combination of the most advanced electronics technology, sensor technology, and software design, and is the most cost-effective portable pH/Conductivity measuring meter. In order to use and maintain the instrument properly, please read the manual thoroughly before use. In order to improve instrument performance continuously, we reserve the right to change the manual and accessories without giving notice in advance. -
Page 4: Specifications
2. Specifications 2.1. Main specifications Specifications Models Measuring Range (-2.00 ~ 16.00) pH Resolution 0.1/0.01 pH Accuracy ±0.01pH ±1 digit PH8500 Temperature (0 ~ 100) °C (manual or automatic) compensation PC8500 Measuring Range ±1,999mV Resolution ±200 mV:0.1mV;others:1 mV Accuracy ±0.1% F.S ±1 digit Conductivity:0~200 mS/cm,... -
Page 5: Instrument Description
3. Instrument Description 3.1. LCD Display: HOLD ⑰ Diagram-2 (1) — Measuring mode icons (2) — Measurement reading (3) — Timing storage icon. When this icon appears, the meter is in the automatic storage mode (4) — Date and time, or prompts of special display mode (5) —... -
Page 6: Keypad Functions
3.2. Keypad Functions Diagram-3 Keypad 3.2.1. Keypad operations Short press <1.5 seconds , Long press >1.5 seconds. Turn on the meter: press to turn on the meter. Turn off the meter: In the measurement mode, press and hold for 2 seconds to turn off the meter. Notes: In the calibration mode or the parameter set-up mode, pressing is invalid. -
Page 7: Meter Socket
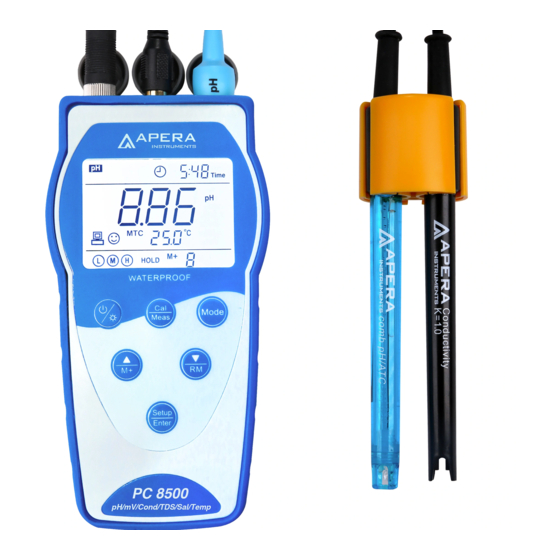
Eight-pin socket (left) — connect EC 8500 Conductivity meter conductivity electrode BNC socket (right) — connect pH electrode or ORP electrode, RCA socket (middle) — connect PC 8500 pH/Conductivity meter temperature probe Eight-pin socket (left) — connect conductivity electrode... -
Page 8: Display Mode
Chart – 3 USB socket Functions Connect to meter Description The meter has USB communication function, connecting the meter to a USB communication computer by USB cable. Computer power supply: connect the meter to a computer by USB cable, Computer or external ... -
Page 9: Auto. Power Off
3.5.3. Recall stored value In the measurement mode, press key to recall the last stored measuring value. See Diagram – 8: display RM icon and storage serial number. Continue pressing key and key to recall successively the stored measuring value. Press and hold key and key to recall the stored measuring value quickly. -
Page 10: Ph Calibration
Chart - 5 Three-point calibration mode USA standard NIST standard Icons Suited range One-point Accuracy 7.00 pH 6.86 pH ≤ ±0.1pH calibration 7.00 pH→4.00 or 1.68pH 6.86 pH→4.01 or 1.68pH Range<7.00pH Two-point calibration 7.00 pH→10.01 or 2.45pH 6.86 pH→9.18 or 12.45pH Range>7.00pH 7.00pH→4.00 or1.68pH Three-point... -
Page 11: Customer-Defined Calibration
4.3.2. The 2 point calibration Press key to enter into the calibration mode, CAL 2 blinks at the top right of LCD, indicating make the 2 point calibration. Rinse pH electrode in pure water, allow it to dry, submerge it in pH4.00 buffer solution, Stir the solution briefly and allow it to stay in the buffer solution until a stable reading is reached. -
Page 12: Sample Test
Notes: (a)For manual temperature compensation (temperature probe didn`t plug in RCA socket), when press key, the temperature value flashes. Press key or key to adjust the temperature value, and then press key, pH measuring value flashes. (b) The meter can perform 1-2 points customer-defined calibration. When the 1 point calibration is done, the meter goes to measurement mode automatically. -
Page 13: Ph Electrode Maintenance
Chart – 6 Self-diagnosis information of pH measurement mode Display Contents Checking Icons 1.Check whether pH buffer solution is correct. 2.Check whether the meter connects the electrode Wrong pH buffer solution or the buffer properly. solution out of range. 3.Check whether the electrode is damaged. Press key when measuring value Press... -
Page 14: Mv Measurement
The sensitive glass bulb at the front of the combination electrode should not come in contact with hard surfaces. Scratches or cracks on the electrode will cause inaccurate readings. Before and after each measurement, wash the electrode with pure water and then throw off the excess water on the electrode. Do not clean the glass bulb with a tissue for it will affect the stability of the electrode potential and increase the response time. -
Page 15: Conductivity Measurement
(a) For inorganic pollutants, submerge the electrode in 0.1mol/L dilute hydrochloric acid for 30 minutes, then wash it in pure water, then submerge it in the soaking solution for 6 hours. (b) For organic or lipid pollutants, clean the platinum surface with detergent, then wash it in pure water, then submerge it in the soaking solution for 6 hours. - Page 16 6.2.2. Calibration intervals (a) The meter is calibrated before leaving the factory and can be used right out of the box. (b) Perform calibration once per month. (c) For high accuracy measurements or large temperature deviations from the reference temperature (25°C), perform calibration per week.
-
Page 17: Conductivity Calibration
6.2.6. Due calibration Pre-set calibration intervals (begin from the date of last calibration) to remind due calibration in a preset period in parameter setting P2.6 (clause 7.4). During due calibration, Er5 icon appears on LCD (see Diagram – 12). The meter cannot continue operation and Er5 icon disappears until the calibration is done, or when select “No”... -
Page 18: Customer-Defined Calibration
Chart – 11 Commonly used TDS conversion factors Conductivity of solution TDS conversion factor 0-100 μS/cm 0.60 100-1,000 μS/cm 0.71 1-10 mS/cm 0.81 10-100 mS/cm 0.94 6.5. Customer-Defined Calibration (take 10.50μS/cm standard solution as an example) 6.5.1 Select CUS per parameter P2.2 (please refer to clause 7.4 for customer-defined solution). The meter enters into Customer-defined calibration mode. -
Page 19: Conductivity Electrode Maintenance
Chart – 12 Self-diagnosis information of conductivity measurement mode Display Contents Checking Icons 1.Check whether conductivity calibration Wrong conductivity calibration solution solution is correct. 2. Check whether the meter connects the or the recognition range of calibration electrode well. solution exceeds standard. 3. -
Page 20: Sub-Menu
7.2 Sub-menu 7.2.1. In P1.0 mode, press key to enter in sub-menu P1.1 of pH parameter setting, then press key to switch among sub-menu: P1.1→P1.2→P1.3→P1.4→P1.5→P1.6, See Diagram–14. 7.2.2. In P2.0 mode, press key to enter in sub-menu P2.1 of conductivity parameter setting, then press key to switch among sub-menu: P2.1→P2.2→P2.3→P2.4→P2.5→P2.6→P2.7→... -
Page 21: Sub-Menu Of Ph Parameter Setting
7.3. Sub-menu of pH parameter setting (press key to switch) P1.1 – Select pH standard solution (USA-NIST-CUS) 1. In measurement mode, press key to enter in P1.0, press enter in P1.1. 2. When press key, USA blinks, press key to select USA→nIS →CUS, press to confirm. -
Page 22: Sub-Menu Of Conductivity Parameter Setting
7.4. Sub-menu of conductivity parameter setting (press key or key to switch) P2.1 – Select electrode constant (1.0-10.0-0.1) 1. In P2.0 mode, press key to enter in P2.1 mode, please refer to the left Diagram. key to select blinking 1.0 → 2. -
Page 23: Sub-Menu Of Basic Parameter Setting
P2.7 – Check the date of the last calibration 1. The date and time of the last calibration shown on top right of LCD, middle number indicates: year 2016. 2. Press key to enter in P2.8 mode, or press key to return to the measurement mode. - Page 24 P3.5. – Adjust time 1. When press key, Hour blinks, then press and Minute blinks. When the number blinks, press key and key to adjust time, then press to confirm. 2. After confirm date, press key to enter in P3.6 mode or press key to return to the measurement mode.
-
Page 25: Usb Communication
8. USB Communication 8.1 Software Requirement The meter uses “PC-Link” software connected to via USB port. The recommended requirement for the computer are: Personal computer (Microsoft Excel 2000 or the version of higher rank) which can operate Windows XP operation system, PC – IBM compatible with XT and CD-ROM driver, USB communication port. 8.2 Software Interface Software interface: see Diagram-15. - Page 26 8.3 Install Software Please follow the steps as below to load PC-Link to the computer: Open “PC-Link” file→double click “Setup” program → click “OK”→ click icons (see Diagram – 16) → click “Continue”→ click “Confirm”. Diagram – 16 8.4. Automatic Connection Port Connect USB cable to the meter and the computer, open PC-Link program, program interface shows on the computer, automatic connection is done after a few seconds.
-
Page 27: Meter Kits
We warrant this instrument to be free from defects in material and workmanship and agrees to repair or replace free of charge, at option of APERA INSTRUMENTS (Europe) GmbH, any malfunctioned or damaged product attributable to responsibility of APERA INSTRUMENTS (Europe) GmbH for a period of three years from the delivery (a six-month limited warranty applies to probes). -
Page 28: Appendix I: Parameter Setting And Factory Restoring Setting
Appendix I: Parameter setting and factory default setting Restore to factory Modes Prompts Parameter setting items Abbreviation Description default setting P1.1 Select pH buffer solution USA-NIST-CUS P1.2 Select resolution 0.01 0.01-0.1 P1.0 Set reading stability P1.3 Normal Normal-High-Low criteria P1.4 Set due calibration No-H00-D00 Check the date of the last... -
Page 29: Appendix Ii: Abbreviation Glossary
Appendix II: Abbreviation Glossary Code and Modes Prompts In English Description abbreviation P1.1 Standard buffers Standard buffer solution P1.2 Resolution Resolution P1.3 Stability criteria Reading stability P1.0 P1.4 Due Calibration Remind due calibration P1.5 P1.6 Factory default setting Factory default setting P2.1 Cell Constant Cell... -
Page 30: Appendix Iii: Self-Diagnosis Information
√ (zero potential >±60mV or slope < 75%) √ √ Enter in pre-set due calibration to remind due calibration APERA INSTRUMENTS (Europe) GmbH Wilhelm-Muthmann-Straße 15 42329 Wuppertal, Germany Tel. +49 202 51988998 Email: info@aperainst.de Website: www.aperainst.de...
Need help?
Do you have a question about the PC 8500 and is the answer not in the manual?
Questions and answers