
Related Manuals for Apera Instruments SX823-B


Summary of Contents for Apera Instruments SX823-B
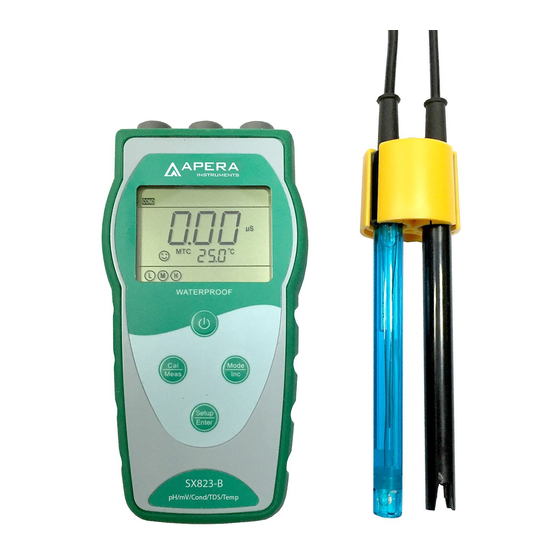
- Page 1 SX823-B pH/Conductivity Portable Meter Instruction Manual APERA INSTRUMENTS, LLC www.aperainst.com v2.1...
-
Page 2: Table Of Contents
1 Brief Introduction ........................3 Basic Features ..........................3 pH Measurement Features ......................3 Conductivity Measurement Features ..................... 3 2 Specifications .......................... 4 Main specifications ........................4 Other specifications ........................4 3 Instrument Description ......................5 LCD Display : ..........................5 Keypad functions .......................... 5 Meter socket ..........................6 Reading Stability Display Mode ..................... 7 Automatic Lock-Up Display Mode ....................7 Automatic Power-off ........................7 Temperature Adjustment ......................7 4 pH Measurement ........................7 Preparation ........................... 7 pH Electrode Information ......................7 Calibration Information ......................... 9 pH Meter Calibration (with an example of three-point calibration) ..........10 Sample Test . -
Page 3: Brief Introduction
Brief Introduction Thanks for purchasing SX823-B pH/Conductivity portable meter. This meter is an outstanding combination of advanced electronics and sensor technology, and software design, and is the most cost-effective portable electrochemical meter designed for industrial and mining enterprises, power plants, water treatment engineering, environmental protection industry, etc., especially ideal for general field use. -
Page 4: Specifications
Specifications 2.1 Main specifications Specifications Range (0.00–14.00) pH Resolution 0.1/0.01 pH Accuracy ±0.01 pH ±1 digit Temperature (0–100)˚C (manual or automatic) compensation Range ±1,000 mV Resolution 1 mV Accuracy ±0.2% F.S ±1 digit Conductivity: 0–200 mS/cm (divided into five ranges): (0.00–19.99) μS/cm;... -
Page 5: Instrument Description
Instrument Description 3.1 LCD Display : HOLD ⑬ Diagram-2 (1) — Parameter mode icons (2) — Measurement reading (3) — Prompts of special display mode (4) — Units of measurement (5) — Temperature units (°C and °F) (6) — Units of pH and conductivity calibration value (7) —... -
Page 6: Meter Socket
● In the parameter setup mode, press this key to select programs 3.3 Meter socket Table - 2 Sockets for Meters Models Photos Description ●BNC socket (right) — connect pH electrode or ORP electrode, SX823-B pH/Conductivity ●RCA socket (middle) — connect meter temperature probe ●Eight-pin socket (left) — connect conductivity electrode... -
Page 7: Reading Stability Display Mode
3.4 Reading Stability Display Mode When the measuring value is stable, smiley icon appears on LCD, see Diagram – 4. If the smiley icon does not appear or flash, please do not get the reading value or complete calibration until the measuring value is stable. - Page 8 sensitivity of the probe. 4.2.2 Technical Specifications of the 201T-F pH Electrode Measurement Range: 0 - 14 pH, 0 - 80˚C (32 – 176˚F) Junction: Single Ceramic Reference Electrode: Ag/AgCl Connector: BNC Size: ø12*160 mm Temperature unit: 30K Thermistor 4.2.3 Electrode Connectors The pH electrode has two connectors: the BNC connector connects the pH probe;...
-
Page 9: Calibration Information
4.3 Calibration Information Table - 3 pH standard buffer solution series pH standard buffer solution series Icons USA series NIST series 4.00 pH 4.01 pH Three-point calibration 7.00 pH 6.86 pH 10.01 pH 9.18 pH 4.3.1 Three-point calibration The instrument can perform 1-3 points calibration. The first point calibration must use 7.00 pH (or 6.86 pH) standard solution, then select other standard solution to perform the second and the third point calibration. -
Page 10: Ph Meter Calibration (With An Example Of Three-Point Calibration)
4.4 pH Meter Calibration (with an example of three-point calibration) 4.4.1. First point calibration (a) Press key to enter into the calibration mode, “CAL 1” blinks at the top right of LCD and “7.00 pH” blinks at the bottom right of LCD, indicating using pH 7.00 buffer solution to make the 1 point calibration. -
Page 11: Sample Test
4.5 Sample Test 4.5.1. Rinse pH electrode in distilled water, dry it, and submerge it in test solution. Stir the solution briefly and allow it to stay in the tested solution until icon appears and stays on LCD. Then get the readings of the measurement. - Page 12 4.5.3 pH Isothermal Measurement Principle According to the pH isothermal measurement principle, the closer the test sample’s temperature is to the calibration solution’s, the higher the accuracy of the measurement. This principle is recommended to follow when conducting tests for the best result. Example: If users were to test samples at 150˚F, we recommend warming up the calibration solutions to the same temperature before performing calibrations in order to get the most accurate readings.
-
Page 13: Mv Value Measurement
acid in distilled water to 1000mL. For serious passivation, submerge the bulb in 4% HF (hydrofluoric acid) for 3-5 seconds, and wash it in distilled water, then submerge it in the soaking solution for 24 hours to renew it. 4.5.5 Clean contaminated glass bulb and junction (please refer to Table-7) Table-7 Clean contaminated glass bulb and junction Contamination Cleaning Solutions... -
Page 14: Conductivity Measurement
Conductivity Measurement: 6.1 Conductivity Electrode Information 6.1.1 Conductivity electrode Model 2301T-S plastic conductivity electrode with constant K=1.0 and built-in temperature sensor, can realize automatic temperature compensation. The electrode housing is POM plastic which is corrosion resistant and impact resistant. When submerge the conductivity electrode in solution, stir the solution briefly to eliminate the air bubbles and improve response time and stability. -
Page 15: Temperature Coefficient
6.2.2 Calibration Frequency (a) The meter is calibrated before leaving the factory and can generally be used right out of the box. (b) Normally perform calibration per month. (c) For high accuracy measurements or large temperature deviation from the reference temperature (25°C), perform calibration per week. -
Page 16: Conductivity Calibration (Take 1413Μs/Cm As An Example)
6.3 Conductivity Calibration (take 1413μS/cm as an example) 6.3.1. Rinse the electrode in distilled water, dry it, rinse it with a little standard solution and submerge it in the same standard solution. Stir the solution briefly and allow it to stay in the solution until a stable reading is reached. -
Page 17: Sample Test
6.5 Sample test 6.5.1. Rinse conductivity electrode in distilled water, allow it to dry, and submerge it in the sample solution. Stir the solution briefly and allow it to stay in the sample solution until a stable reading is reached and icon appears on LCD, then get the reading value, which is the conductivity value of the solution. -
Page 18: Parameter Setting
Parameter setting 7.1 Main menu In the measurement mode, press key to enter in P1.0, then press to switch to main menu: P1.0→P2.0→P3.0. Please refer to diagram – 9. P1.0: pH parameter setting menu, P2.0: Conductivity parameter setting menu, P3.0: Basic parameter setting menu. 7.2 Submenu 7.2.1. - Page 19 7.3 Submenu of pH parameter setting (press key to switch) P1.1. – Select pH standard solution (USA-NIST) 1. In measurement mode, press key to enter in P1.0 mode, then press to enter in P1.1. 2. When press key, USA blinks, press key to select USA→nIS, press to confirm.
- Page 20 P2.3. – Adjust temperature compensation coefficient (0.00-9.99%) 1. Press key, 2.00 blinks, press key to adjust temperature compensation coefficient 0.00 – 9.99, press key to confirm. 2. After confirm the parameter, press key to enter in mode P2.4 or press key to return to the measurement mode.
-
Page 21: Meter Kits
Meter Kits Include Quantity SX823-B portable pH/conductivity meter 1 set 201T-F plastic three-in-on pH electrode 1 pc 2301T-S plastic conductivity electrode 1 pc pH standard buffersolution (4.00 pH /7.00pH/50mL) 1 bottle each Conductivity calibration solution (1413 μS/12.88 mS/50mL) 1 bottle each... -
Page 22: Warranty
10 Warranty We warrant this instrument to be free of defects in parts and workmanship for two years from date of shipment (a six month limited warranty applies to sensors and cables). This warranty does not apply to defects resulting from actions of the user, such as misuse, improper wiring, operation outside of specification, improper maintenance or repair, or unauthorized modification. -
Page 23: Appendix Ii: Abbreviation Glossary
12 Appendix II: Abbreviation Glossary Code and Modes Prompts In English Description abbreviation P1.1 Standard buffers Standard buffer solution P1.2 Resolution Resolution P1.0 Set up reading stability P1.3 Stability criteria criteria P1.4 Factory default setting Factory default setting P2.1 Cell Constant Cell P2.2 Reference temperature... - Page 24 APERA INSTRUMENTS, LLC Address: 6656 Busch Blvd, Columbus Ohio 43229 Tel: 1-614-285-3080 Email: info@aperainst.com Website: www.aperainst.com...
Need help?
Do you have a question about the SX823-B and is the answer not in the manual?
Questions and answers