Table of Contents

Related Manuals for THORLABS PRO8 Series


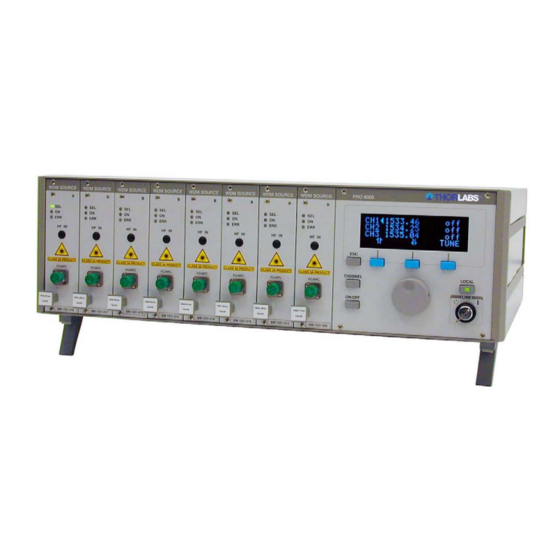
Summary of Contents for THORLABS PRO8 Series
- Page 1 ______________________________________________________________________________________________________ Operation Manual Thorlabs Instrumentation Mainframe PRO8000 PRO8000-4 PRO800 2012 _________________________________________________...
- Page 2 ______________________________________________________________ Version: Date: 26.March 2012 © 2012 Thorlabs _____________________________________________________________________________________________________ © 2012 Thorlabs...
-
Page 3: Table Of Contents
4.3 Software standard IEEE 488.2 4.3.1 Nomenclature 4.3.2 Program and response messages 4.3.3 Data format 4.3.4 Common commands and queries 4.3.5 Module specific commands and queries 4.4 Error messages 4.4.1 Error queue empty 4.4.2 100 ... 199 command error messages _____________________________________________________________________________________________________ © 2012 Thorlabs... - Page 4 4.7.6 Setting the desired measurement mode 4.7.7 Reading the 'ELCH' status 4.7.8 Reading the measured values 4.7.9 Example of an ELCH measurement procedure 4.7.10 Possible ELCH Error sources Maintenance and repair 5.1 General care 5.2 Cleaning _____________________________________________________________________________________________________ © 2012 Thorlabs...
- Page 5 6.1 Line voltage setting 6.2 Internal Fuse Replacement Appendix 7.1 Warranty 7.2 Certifications and compliances 7.3 Technical data 7.4 Thorlabs “End of Life” policy (WEEE) 7.4.1 Waste treatment on your own responsibility 7.4.2 Ecological background 7.5 List of acronyms 7.6 List of figures 7.7 Copyright...
-
Page 6: General Information
We and our international partners are looking forward to hearing from you. In the displays shown by the PRO8 you may find the name PROFILE. PROFILE was the name of the manufacturer before it was acquired by Thorlabs and renamed to Thorlabs. -
Page 7: At A Glance
With the comfortable manual operation and the built in RS232 and IEEE488.2 interface the PRO8 series is the right choice for lab applications as well as for remote controlled test systems. 1.2 Safety ... - Page 8 (see section 6, Service). To guarantee safe operation of the PRO8000 (-4) / PRO800 do not obstruct the ventilation slots beneath the front panel and the fan air outlets at the rear panel. ______________________________________________________________________________________________________ © 2012 Thorlabs...
- Page 9 Parts must not be exchanged with the unit switched on. Dangerous voltages may also be present in the unit when switched off and with power cord removed. Proper discharge of power components is advised. _____________________________________________________________________________________________________ © 2012 Thorlabs...
-
Page 10: Ordering Codes And Accessories
PRO8000 Mainframe for up to 8 modules, up to 2A per slot PRO8000-4 Mainframe for up to 8 modules, up to 4A per slot Modules for the PRO8 series: LDC8xxx Laser diode controllers, 7 types, 100mA to 8A f.s. MLC8xxx 8 channel Laser diode controllers, 8 types, 25mA to 200mA f.s. -
Page 11: Getting Started
Connect the unit to the line with the provided mains cable. Turn the unit on by means of the mains switch. Via the 4mm banana jack of the chassis ground the external optical build-up can be connected to ground potential, if required. _____________________________________________________________________________________________________ © 2012 Thorlabs... -
Page 12: Operating Elements On Front Panel
The mains switch is a key-operated power control switch (ON / STANDBY) to prevent accidental or non-authorized use. Modules The PRO8000 and PRO8000-4 can house up to 8 plug-in modules, the PRO800 two modules. All in- or outputs are accessible directly at the front of the modules. ______________________________________________________________________________________________________ © 2012 Thorlabs... - Page 13 Status display on module front panel This LED is on when the module is selected for input. This LED will light when the module is switched on. This LED will indicate if an error has occurred in the module. _____________________________________________________________________________________________________ © 2012 Thorlabs...
- Page 14 ( ) moved by the blue soft keys. The cursor must point to the left of the value to be changed. Example: 1550.83 A clockwise turn on the tuning knob increases the value and an anti-clockwise turn decreases it. ______________________________________________________________________________________________________ © 2012 Thorlabs...
-
Page 15: Operating Elements On Rear Panel
PRO8000, 230V setting: Fuse Type IEC60127-2/V (5 x 20 mm) This screw only depicts the voltage setting. For changing the voltage range see section 6.1 “Line voltage setting” _____________________________________________________________________________________________________ © 2012 Thorlabs... -
Page 16: First Operation
The PRO8xxx mainframe is ready to use immediately after turning on. The rated accuracy of the plug in modules is reached, however, after a warming-up time. For the individual warming up time of the modules please refer to the manuals of the modules inserted. ______________________________________________________________________________________________________ © 2012 Thorlabs... -
Page 17: Operating The Pro8000 (-4) / Pro800
You see the following screen: THORLABS PRO8000 Power on Self test SW Revision 4.64 Interface 1.31 It shows the actual software revision number and the actual interface revision number. After a few seconds the program enters the main menu screen. _____________________________________________________________________________________________________ © 2012 Thorlabs... -
Page 18: Main Menu
With the cursor leaving the upper or lower edge of the display you can scroll through the whole content of the corresponding screen. With the cursor in the third line, the next line will appear from below when pressing ().Vice versa by pressing the key (). ______________________________________________________________________________________________________ © 2012 Thorlabs... -
Page 19: Selecting A Module
A module is selected for further input by placing the cursor beside the respective channel number. Pressing will lead to the channel menu of the selected module. Please refer to the operation manual of the individual module. _____________________________________________________________________________________________________ © 2012 Thorlabs... -
Page 20: Setup Menu
The higher the value, the longer it takes to actualize the measured values on the screen. This item does not affect the remotely transferred measurement values. (‘Normal’ value =16). . Brings you back to main menu. ______________________________________________________________________________________________________ © 2012 Thorlabs... -
Page 21: Communication With A Pc
IEEE Adr. Baudrate 19200 CHANGE If you use an older PRO8 system it will have a female 9-pin D-SUB connector at the rear panel. You must use then an 1:1 connection cable between PRO8 and PC. _____________________________________________________________________________________________________ © 2012 Thorlabs... - Page 22 5 GND Signal Ground 4 NC 4 DTR Data terminal ready 1 NC 1 RLSD Received line signal detector 6 NC 6 DSR Data set ready 9 NC 9 NC Not connected Figure 3 RS232C connection cable ______________________________________________________________________________________________________ © 2012 Thorlabs...
-
Page 23: Interface Specification
Description: Clears the input buffer and output queue. Resets the parser unit and the execution unit Go to local >L Syntax: " " Description: Switches the PRO8000 into LOCAL mode (manual operation). Previously set values for laser current, laser power, temperature etc. remain valid. _____________________________________________________________________________________________________ © 2012 Thorlabs... -
Page 24: Service Request Emulation
(See chapter 4.5.4, Service request enable register (SRE) on page 44) 4.1.4 Operating commands All operating commands described in the following IEEE 488 section and in the individual module-manuals are valid also for the RS-232C communication! ______________________________________________________________________________________________________ © 2012 Thorlabs... -
Page 25: Hardware Standard Ieee 488.1
(Refer to chapter 3.5, "Setup menu" on page 16) 4.2.1 IEEE 488.1 subsets of the PRO8000 (-4) / PRO800 Function Part set Source Handshake Acceptor Handshake Talker Listener Service Request Remote/Local Parallel Poll Device Clear Device Trigger Electrical Interface _____________________________________________________________________________________________________ © 2012 Thorlabs... -
Page 26: Device Address And String Terminator
The string terminator of the PRO8000 (-4) / PRO800 is preset to <LF><EOI>. This is fixed and cannot be changed. The PRO800 / PRO8000 (-4) itself accepts any combination of <LF> and <EOI> as string terminator. ______________________________________________________________________________________________________ © 2012 Thorlabs... -
Page 27: Starting The Ieee488 Interface
Please refer to the documentation of these components. (Also refer to chapter 4.5.15, "Hints for setting up control programs" on page 47) _____________________________________________________________________________________________________ © 2012 Thorlabs... -
Page 28: Ieee488 Bus Commands
PRO8000 (-4) / PRO800 according to the used driver software and do not have to be explicitly produced in the control program. These functions have also already been implemented to Thorlabs LabView® or LabWindows® drivers. When receiving the IEEE488 bus commands [GET], [LLO], [GTL], [DCL] and [SDC]... - Page 29 IEEE 488 of the device addressed. [GET] Group Execution Trigger Due to interface specification “DT0” (refer to section 4.2.1, “IEEE 488.1 subsets of the PRO8000 (-4) / PRO800” on page 21) the command [GET] is not implemented. _____________________________________________________________________________________________________ © 2012 Thorlabs...
-
Page 30: Software Standard Ieee 488.2
"*IDN?" request the identification (status read query) Response messages Messages from the PRO8000 (-4) / PRO800 to the PC are called response messages. With response messages, measurement values and status information is transferred to the PC. ______________________________________________________________________________________________________ © 2012 Thorlabs... -
Page 31: Data Format
Is a numerical value with sign in integer notation. Examples: 14356789432 (Refer to IEE488.2 (8.7.2)) Numeric response data Type 2 (<NR2>) Is a numerical value with or without sign in floating point notation without exponent. Examples: +1.1 -22.1 14356.789432 (Refer to IEE488.2 (8.7.3)) _____________________________________________________________________________________________________ © 2012 Thorlabs... - Page 32 Numeric response data Type 3 (<NR3>) Is a numerical value with or without sign in floating point notation with exponent with sign . Examples: 1.1E+1 or +1.1E-1 or -22.1E+1 or 143.56789432E+306 (Refer to IEE488.2 (8.7.4)) ______________________________________________________________________________________________________ © 2012 Thorlabs...
-
Page 33: Common Commands And Queries
All set parameters (current, power values etc. remain valid!) *TST? Executes a self test and queries the result [0<LF>] *OPC Operation completed active mode started *OPC? Operation completed query [1<LF>] *WAI Waiting until the last operation is completed _____________________________________________________________________________________________________ © 2012 Thorlabs... - Page 34 Queries the value of the status byte register (STB). [<NR1><LF>] Bit 6 is reset to 0, the other bits kept unchanged. *SAV 0 Immediately saves all set values as default values to be loaded on the next power up ______________________________________________________________________________________________________ © 2012 Thorlabs...
- Page 35 Sets the content of the enable register (BFE, EDE and DESE). (refer to section 4.5, “Status reporting ” on page 39. ":PORT?" Queries the chosen port of a multidevice controller as MLC8xxx or PDA8xxxx. [:PORT <NR1><LF>] _____________________________________________________________________________________________________ © 2012 Thorlabs...
- Page 36 ":SYST:ANSW VALUE" and respond again according to the IEEE488.2 standard. ":TYPE:ID?" Queries information about the selected module Possible answers: ITC8xxx: 159, LDC8xxx: 191, PDA8xxx: 107, TED8xxx: 223, MLC8xxx: 47, WDM-B: 249. (See also operation manuals of the specific modules) ______________________________________________________________________________________________________ © 2012 Thorlabs...
-
Page 37: Module Specific Commands And Queries
Error messages are organized in groups: Error number Error type no errors 100 ... 199 command errors 200 ... 299 execution errors 300 ... 399 system errors 400 ... 499 query errors 1000 ... 9999 module dependent errors _____________________________________________________________________________________________________ © 2012 Thorlabs... -
Page 38: Error Queue Empty
":MODE THH". This parameter is not valid for this command. 104,"Missing parameter" Possible reason: ":ILD:SET". This command requires a numerical parameter. 105,"Invalid separator" Possible reason: ":ILD:SE". This command was not complete. 107,"Empty slot" Possible reason: ":SLOT 3" selected an empty slot. ______________________________________________________________________________________________________ © 2012 Thorlabs... -
Page 39: 200
":ILD:SET 10E+30" sent to the PRO8000 (-4) / PRO800 but this current is much too high. 4.4.4 300 ... 399 system error messages 300,"Hardware error" Possible reason: Service is requested. 301,"Software error" Possible reason: Unfixed bug. Please report to Thorlabs (see section 7.8, ” _____________________________________________________________________________________________________ © 2012 Thorlabs... - Page 40 36 Communication with a PC _________________________________________________________________________________ Addresses”, on page 85.). ______________________________________________________________________________________________________ © 2012 Thorlabs...
- Page 41 Error messages 37 _________________________________________________________________________________ 304,"Update required" Possible reason: You are using a very new module together with older firmware. A firmware update can be made only at factory - please contact Thorlabs return instructions (see chapter 7.8, ” _____________________________________________________________________________________________________ © 2012 Thorlabs...
-
Page 42: 400
More than one query sent to the PRO8000 (-4) / PRO800 before the read command. 420,"Query unterminated" Possible reason: No query sent to the PRO8000 (-4) / PRO800 before the read command. The module dependent error messages are described in the specific module operation manuals. ______________________________________________________________________________________________________ © 2012 Thorlabs... -
Page 43: Status Reporting
This bit indicates an off to on transition in the power supply. So it is high after switching on the device for the first time. User request (not used here) A local control has been activated. Command error A command error occurred. _____________________________________________________________________________________________________ © 2012 Thorlabs... - Page 44 Query error A error occurred trying to query a value. Request control The PRO8000 (-4) / PRO800 is requesting to become the system controller. Operation complete All started operations have been completed. System is in idle mode. ______________________________________________________________________________________________________ © 2012 Thorlabs...
- Page 45 Event Register :STAT:BFR? (Cleared when read) Block Function Enable Register :STAT:BFE <Nr1> :STAT:BFE? Output buffer Register Execution finished or serial poll Service Request Generation Figure 4 The 7 registers ESR, ESE, STB, SRE, BFC, BFR and BFE _____________________________________________________________________________________________________ © 2012 Thorlabs...
- Page 46 From slot 2 From slot 1 Device Error Summary Register :STAT:DESR? Device Error Summary Enable Register :STAT:DESE <Nr1> :STAT:DESE? To Bit 3 “DES” of Status Byte Register Figure 5 The registers DESR, DESE, DEC,DEE and EDE ______________________________________________________________________________________________________ © 2012 Thorlabs...
-
Page 47: Standard Event Status Enable Register (Ese)
DES (Device Error Summary Register Bit) Indicates whether any of the plug-in modules has send an error message through its Device Error Event Register. EAV (Error Available) Shows the error queue not to be empty yet. _____________________________________________________________________________________________________ © 2012 Thorlabs... -
Page 48: Service Request Enable Register (Sre)
Device Error Event Register (see Figure 5). 4.5.6 Device Error Summary Enable Register (DESE) The DESE enables via “AND” functions which module in which slot is allowed to create an error message, i.e. set bit “DES” in the Status Byte Register. ______________________________________________________________________________________________________ © 2012 Thorlabs... -
Page 49: Device Error Condition Register (Dec)
The bits of this register hold the status changes that occurred during operation. So each bit of the BFC sets the according bit of the BFR. The BFR can be read but not set. Reading clears the BFR. _____________________________________________________________________________________________________ © 2012 Thorlabs... -
Page 50: Block Function Enable Register (Bfe)
If the controller does not "listen" to SRQs at all, the service request can be detected by reading the status byte with the command "*STB?". If bit 6 is logical 1, a service request was asserted. ______________________________________________________________________________________________________ © 2012 Thorlabs... -
Page 51: Hints For Setting Up Control Programs
Occurring problems on the bus, or error messages that cannot be ex- plained immediately can be investigated later by analyzing the data transfer file between the PRO800 / PRO8000 (-4) and the control com- puter. The same procedure is useful for the RS 232 communication. _____________________________________________________________________________________________________ © 2012 Thorlabs... -
Page 52: System Reset
System goes into 'ready' state, bit 0 (FIN) of the status byte is set. All 'ELCH' macro functions are discarded. All module outputs are switched off. Set values are reset to the manually entered ones. Very new modules reset these values to default values. ______________________________________________________________________________________________________ © 2012 Thorlabs... -
Page 53: Reset By Device Clear
All set values and module assignments stay unchanged! 4.6.5 Reset by interface clear The IFC is a IEEE bus connection. The PRO8 system does not react on the activation of this line by the control computer. _____________________________________________________________________________________________________ © 2012 Thorlabs... -
Page 54: The Pro8000 (-4) / Pro800 "Elch" - Macro Functions
5. In which mode do you want the system to run: continuous or triggered mode? 6. Which parameter from which module do you want to read out? 7. On which position in the answer-string shall this value stand? ______________________________________________________________________________________________________ © 2012 Thorlabs... - Page 55 (stop value 100 mA) Reading: :ILD:START? :ILD:STOP? 4.7.3.2 Number of steps for the chosen interval Set the desired number of steps for the appropriate start-stop interval: Programming: with 2 n1000 :ELCH:STEPS n Reading: :ELCH:STEPS? _____________________________________________________________________________________________________ © 2012 Thorlabs...
-
Page 56: Cascading Several Elch Runs
PRO8. If the total number of measurement steps exceeds 1001, the overhead will overwrite the values measured at the beginning (ring memory architecture)!. ______________________________________________________________________________________________________ © 2012 Thorlabs... - Page 57 Then the first two measurements would be correct, however the last two of measurement #3 would still be missing. If you want to discard run#1 you should give the command “ :ELCH:RESET 0 ” before starting run #2. This resets the read pointer to position 1. _____________________________________________________________________________________________________ © 2012 Thorlabs...
- Page 58 Run #3 n=1001 Read sequence :ELCH:TRIG? R=1 -> #3 n=1001+1 n=1, n=2 overwritten R=2 -> #3 n=1001+2 R=3 -> #1 n=3 R=4 -> #1 n=4 R=1001 -> #3 n=1001 R=1001+1 missing! R=1001+2 Figure 6 ELCH memory overflow ______________________________________________________________________________________________________ © 2012 Thorlabs...
-
Page 59: Which Values Do You Want To Measure
“ 311: ELCH read value(s) initialization not complete” is given when starting ELCH. The variable parameter always shows up in the first position of the output string and must not be programmed explicitly. In the answer string the values are separated by commas. _____________________________________________________________________________________________________ © 2012 Thorlabs... -
Page 60: Setting The Desired Measurement Mode
If the ELCH function is running in continuous mode at that moment, this command of course triggers a short interruption in the measurement sequence. The command: :ELCH:TRIG? Starts the measurement for the next step and reads the measured value ______________________________________________________________________________________________________ © 2012 Thorlabs... -
Page 61: Reading The 'Elch' Status
You can step through the list of measured values. If you use this command more often than measurement-steps have been defined, you will get the last answer string again and again. Example of an answer string: 7.12345678E-003,6.94673825E-002,1.00453298E+000<LF> With the command: :ELCH:GETALL? _____________________________________________________________________________________________________ © 2012 Thorlabs... - Page 62 The command: :ELCH:RESET? gives you the remaining number of measurement values. :ELCH:RESET 0 resets the internal "ELCH" counters to zero, so that data recorded previously but not read yet are overwritten by the next ELCH run. ______________________________________________________________________________________________________ © 2012 Thorlabs...
-
Page 63: Example Of An Elch Measurement Procedure
ELCH). :LASER ON Switch on the laser Because Thorlabs laser controllers use a soft start function to not endanger the laser diode, you should include a 1-2 second break here, to allow the laser current to stabilize! :ELCH:RESET 0... - Page 64 You can use the command again to retrieve the rest of the data. :ELCH:RUN 0 Stops the ELCH function. ______________________________________________________________________________________________________ © 2012 Thorlabs...
-
Page 65: Possible Elch Error Sources
2 : “ :ILD:MEAS 1 ”; “ :TEMP:MEAS 2 ” “ 312, ELCH was stopped ” You gave a stop order to ELCH An error has occurred in a module (e.g. interlock open) _____________________________________________________________________________________________________ © 2012 Thorlabs... - Page 66 Your retrieved data do not start with the expected first set value: Maybe you had another ELCH run previous and did not read out the old data. Start your ELCH run with the :ELCH:RESET 0 command, to discard previous measured values. ______________________________________________________________________________________________________ © 2012 Thorlabs...
-
Page 67: Maintenance And Repair
253 V. Prior to starting operation check that the line voltage specified on the letter plate matches your local supply voltage. A qualified service person is required to change the operating line voltage. See section 6.1 (Line voltage setting) for instructions. _____________________________________________________________________________________________________ © 2012 Thorlabs... -
Page 68: Exchanging The Mains Fuse
Push back the fuse holder until it is locked in position again. Switch on the PRO8000 (-4) / PRO800. If the unit cannot be switched on even with the correct fuse inserted, please contact Thorlabs (Please refer to chapter 7.8, ” ______________________________________________________________________________________________________ © 2012 Thorlabs... -
Page 69: Repair
The PRO8000 (-4) / PRO8000-4 / PRO800 does not contain any components to be repaired by the user. If any disturbances in function should occur, please contact Thorlabs for return instructions. Please refer chapter 7.8, ” _____________________________________________________________________________________________________ © 2012 Thorlabs... -
Page 70: Installing And Uninstalling Modules
Fix the modules with the appropriate number of screws. Check the function of the modules by switching the PRO8000 (-4) / PRO800 on. The inserted modules must be recognized correctly in the set-up menu. ______________________________________________________________________________________________________ © 2012 Thorlabs... - Page 71 PRO8 mainframe and will be reestablished after power-on, so far the module has not been relocated. If a module is being relocated, it will be recognized after power-on with it’s default settings, i.e., previously made settings will be lost. _____________________________________________________________________________________________________ © 2012 Thorlabs...
-
Page 72: Troubleshooting
Is the module inserted correctly and are all mounting screws tightened? Insert the module in the desired slot and tighten all mounting screws properly. See the individual manual of the module for further troubleshooting. ______________________________________________________________________________________________________ © 2012 Thorlabs... - Page 73 Press “ESC” until you enter the setup menu. Use the keys to select the interface line, press the change button and select RS232 interface. Do you use the correct type of interconnecting cable? Install the appropriate cable. (refer to section 4.1). _____________________________________________________________________________________________________ © 2012 Thorlabs...
- Page 74 Adjust the over sampling rate (OSR) in the setup menu to a lower value. If you don’t find the error source by means of the trouble shooting list or if more modules work erratic please contact Thorlabs for technical support and/or return instructions. (refer section 7.8, “ ______________________________________________________________________________________________________ © 2012 Thorlabs...
- Page 75 Troubleshooting 71 __________________________________________________________________________________ Addresses“ on page 85. _____________________________________________________________________________________________________ © 2012 Thorlabs...
-
Page 76: Service
1 and 2 115V: clamp 1 and 3 230V: clamp 1 and 4 (see Figure 8 Setting the mains voltage) After changing the line voltage, make sure to change also the appropriate line fuse (see section 5.4,). ______________________________________________________________________________________________________ © 2012 Thorlabs... - Page 77 230 - 115 - 100 V Figure 8 Setting the mains voltage Put the cover back on the unit and fasten the plastic parts again. Check whether fuse and replacement fuse are correct and exchange them if necessary. _____________________________________________________________________________________________________ © 2012 Thorlabs...
-
Page 78: Internal Fuse Replacement
5 x 20 mm Figure 9 Internal fuses Name, type and location of the internal fuses are given on adhesive labels Replace the defective fuse, put on the cover and reattach it with the two Allan-key screws. ______________________________________________________________________________________________________ © 2012 Thorlabs... -
Page 79: Appendix
For warranty repairs or service the unit must be sent back to Thorlabs Germany or to a place determined by Thorlabs. The customer will carry the shipping costs back to Thorlabs, in case of warranty repairs Thorlabs will carry the shipping costs back to the customer. -
Page 80: Certifications And Compliances
Compliance demonstrated with various PRO8x series Light Source modules and Electrical modules installed. Emissions, which exceed the levels required by these standards, may occur when this equipment is connected to a test object. Minimum Immunity Test requirement. ______________________________________________________________________________________________________ © 2012 Thorlabs... - Page 81 Additional IEC61010-1/A2:1995 Safety requirements for electrical Compliance equipment for measurement, control, and laboratory use. Equipment Type Test and measuring Safety Class Class 1 (as defined in IEC 61010-1, Annex H) - grounded product _____________________________________________________________________________________________________ © 2012 Thorlabs...
-
Page 82: Technical Data
449 x 147 x 396 mm (3 U, 19") Dimensions PRO8000-4 (WxHxD) 449 x 177 x 456 mm (4 U, 19”) Maximum weight PRO800 < 9 kg Maximum weight PRO8000 < 17 kg Maximum weight PRO8000-4 < 21 kg non condensing ______________________________________________________________________________________________________ © 2012 Thorlabs... - Page 83 IEEE488 (24 pin.) jack or RS232C (9 pin) D-SUB jack Auxiliary jack 9-pin D-Sub. For extensions TRIG IN (max. 5V, TTL) TRIG OUT (max. 5V, TTL) Connectors on the front panel Depending on type of modules used _____________________________________________________________________________________________________ © 2012 Thorlabs...
-
Page 84: Thorlabs "End Of Life" Policy (Weee)
7.4.1 Waste treatment on your own responsibility If you do not return an “end of life” unit to Thorlabs, you must hand it to a company specialized in waste recovery. Do not dispose of the unit in a litter bin or at a public waste disposal site. -
Page 85: Ecological Background
Thorlabs “End of Life” policy (WEEE) 81 __________________________________________________________________________________ 7.4.2 Ecological background It is well known that WEEE pollutes the environment by releasing toxic products during decomposition. The aim of the European RoHS directive is to reduce the content of toxic substances in electronic products in the future. -
Page 86: List Of Acronyms
Line Feed Local Lockout Laser Source Module Numeric Response data of type 1 Numeric Response data of type 2 Numeric Response data of type 3 Message AVailable) Master Summary Status Personal Computer Photo Diode ReQuest Service Message ______________________________________________________________________________________________________ © 2012 Thorlabs... -
Page 87: List Of Figures
Figure 5 The registers DESR, DESE, DEC,DEE and EDE Figure 6 ELCH memory overflow Figure 7 Changing the mains fuse Figure 8 Setting the mains voltage Figure 9 Internal fuses Figure 10 Crossed out “wheelie bin” symbol _____________________________________________________________________________________________________ © 2012 Thorlabs... -
Page 88: Copyright
Please note that the content of this User Manual is neither part of any previous or existing agreement, promise, representation or legal relationship, nor an alteration or amendment thereof. All obligations of Thorlabs GmbH result from the respective contract of sale, which also includes the complete and exclusively applicable warranty regulations. These contractual warranty regulations are neither extended nor limited by the information contained in this User Manual. -
Page 89: Addresses
7.8 Addresses USA, Canada, and South America Thorlabs, Inc. 56 Sparta Avenue Newton, NJ 07860 Tel: 973-579-7227 Fax: 973-300-3600 www.thorlabs.com www.thorlabs.us (West Coast) Email: sales@thorlabs.com Support: techsupport@thorlabs.com Europe UK and Ireland Thorlabs GmbH Thorlabs Ltd. Hans-Böckler-Str. 6 1 Saint Thomas Place, Ely...
Need help?
Do you have a question about the PRO8 Series and is the answer not in the manual?
Questions and answers