Table of Contents
Advertisement
Quick Links
Advertisement
Table of Contents

Related Manuals for THORLABS PD2


Summary of Contents for THORLABS PD2
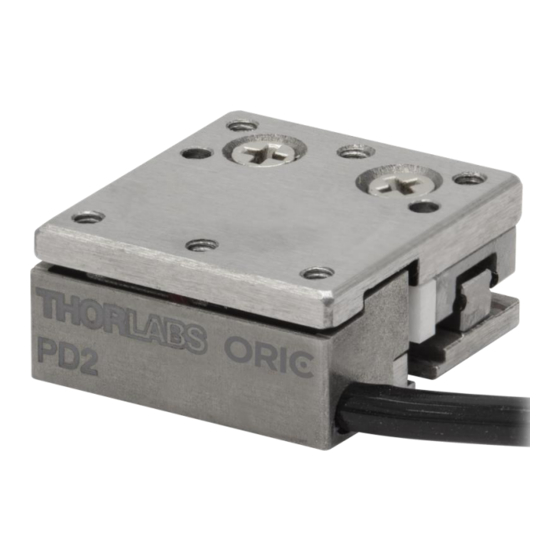
- Page 1 PD2(/M) Piezo Inertia Drive Stage User Guide...
-
Page 3: Table Of Contents
PD2(/M) Piezo Inertia Drive Stage Table of Contents Chapter 1 Safety ......................... 1 Chapter 2 Overview ........................3 Chapter 3 Installation ......................... 6 3.1.1 General ................................6 3.1.2 Setting Up an XY & XYZ Stage Configuration ....................... 9 3.1.3 Mounting Components to the Stage ......................... 14 3.2.1... -
Page 5: Chapter 1 Safety
PD2(/M) Piezo Inertia Drive Stage Chapter 1: Safety Chapter 1 Safety Safety Information For the continuing safety of the operators of this equipment, and the protection of the equipment itself, the operator should take note of the Warnings, Cautions and Notes throughout this manual and, where visible, on the product itself. - Page 6 PD2(/M) Piezo Inertia Drive Stage Chapter 1: Safety General Warnings Warning If this equipment is used in a manner not specified by the manufacturer, the protection provided by the equipment may be impaired. In particular, excessive moisture and/or dust may impair operation.
-
Page 7: Chapter 2 Overview
The PD2(/M) stage has a 5 mm travel range with open-loop operation. When driven by the PDXC Inertial Piezo Controller, the PD2(/M) stage offers continuous long term stepping as well as periodic position and hold mode with 1.5 N clamping/holding force. - Page 8 PD2(/M) Piezo Inertia Drive Stage Chapter 2: Overview Pin Diagram Figure 2 and Table 1 show the pin assignment and the signal definition of the female 15-pin D-Sub connector. Figure 2 Female 15-Pin D-Sub Port Pin Assignment Pin No. Voltage...
- Page 9 8-32 (M4 x 0.7) setscrew. The bottom surface also has six #00 (M1.2) counterbores for connecting a PD2(/M) stage on its top surface. There are also two 00-90 (M1.2 x 0.25) threaded through holes on the top and bottom surfaces for connection to a PD2(/M) stage.
-
Page 10: Chapter 3 Installation
3.1.1 General Mount the PD2(/M) stage on an even surface. The recommended flatness of the mounting surface is ≤5 μm. For applications with large temperature changes, only mount the PD2(/M) stage on a surface that has the same or similar thermal expansion properties as the stage. - Page 11 Chapter 3: Installation PD2(/M) Piezo Inertia Drive Stage Thorlabs offers two kinds of adapters, PD2T(/M) and PD2U(/M), to provide an even surface for attaching a PD2(/M) to an optical post or table, respectively. Connecting with the PD2T(/M) adapter: 1. Firstly mount the PD2T(/M) to an optical post by its center #8-32 (M4) tapped hole. The length of the #8- 32(M4) screw at the top end of the post should not be too long, and the recommend length is 8~10mm.
- Page 12 PD2(/M) Piezo Inertia Drive Stage Chapter 3: Installation Connecting with the PD2U(/M) adapter: 1. First mount the adapter to a breadboard or base plate or table using the center #8 (M4) counterbore. With limited hole depth, a washer cannot be used.
-
Page 13: Setting Up An Xy & Xyz Stage Configuration
To set up an XY-configuration, we recommend using a PD2T(/M) adapter between the two PD2(/M) stages. The PD2U(/M) adapter can also be used, but the total thickness of the system would be larger than if the PD2T(/M) were used. - Page 14 PD2(/M) Piezo Inertia Drive Stage Chapter 3: Installation To set up the recommended XY configuration with two PD2(/M) stages and one PD2T(/M) adapter: 1. Mount the PD2T(/M) adapter on the lower PD2(/M) stage with screws and dowel pins. 2. Rotate the upper stage by 90° relative to the lower one and align it with the PD2T(/M) adapter using dowel pins.
- Page 15 Chapter 3: Installation PD2(/M) Piezo Inertia Drive Stage To set up the XY configuration using two PD2(/M) stages and a PD2U(/M) adapter: 1. Mount the PD2U(/M) adapter on the PD2(/M) stage with screws and pins. 2. Rotate the upper stage by 90° relative to the lower one and align it with the PD2U(/M) adapter using dowel pins.
- Page 16 PD2(/M) Piezo Inertia Drive Stage Chapter 3: Installation To set up the XY configuration using only two PD2(/M) stages connected using two 00-90 (M1.2) screws: 00-90 (M1.2) Slotted Pan Head Screw, 2 mm Long Figure 8 Setting Up an XY Axis Configuration without Adapters...
- Page 17 90 (M1.2) screws on the corners. 2. Align the underside of the vertical PD2(/M) stage and the vertical mounting surface of the PD2Z(/M) adapter using two Ø1 mm, 3 mm long dowel pins, and then secure the stage with two 00-90 (M1.2) screws.
-
Page 18: Mounting Components To The Stage
PD2(/M) Piezo Inertia Drive Stage Chapter 3: Installation 3.1.3 Mounting Components to the Stage Caution Do not exceed the load capacity specified in Chapter 5. The load’s center of mass should be over the platform. Do not use screws and dowel pins that protrude past the maximum hole depth. - Page 19 The PD2T(/M) adapter plate provides a central 8-32(M4 x 0.7) threaded hole and two 00-90 (M1.2 x 0.25) threaded holes for attaching a load to the PD2(/M) stage. The following example shows how to attach the PD2T(/M) adapter to a PD2(/M) stage.
- Page 20 PD2(/M) Piezo Inertia Drive Stage Chapter 3: Installation Thorlabs also offers the PD2U(/M) adapter plate with a central #8 (M4) counterbore and two 00-90 (M1.2 x 0.25) threaded holes. The following example shows how to mount the PD2U(/M) adapter to a PD2(/M) stage.
-
Page 21: General
The stage is shipped with a 1 m (3.3 ft) cable that is terminated in an D-Sub connector. Connect the PD2(/M) stage to the D-Sub terminal on the front panel of the PDXC controller - see the PDXC controller manual for pin- out details. -
Page 22: Using Kim001 Or Kim101 Controllers
KIM001 and KIM101 controller. The display will show “Stage is PD(R)” and the configuration will be changed to drive the PD2(/M) stage. Alternatively, Kinesis software with revision 1.14.18 or higher can be used to switch the configuration by choosing the stage type. See the KIM001 or KIM101 controller manual for additional front panel configuration details. -
Page 23: Chapter 4 Operation
“FOUND PD2 STAGE” automatically after power on. If the display is not for the PD2(/M) stage, which means the output signal is not for PD2(/M) stage, the controller will not drive the stage properly and there is a risk of damage to the stage and/or the controller. - Page 24 – see the manual supplied with the KIM101/KIM001 controller, and the help file supplied with the software for more information. Note The PD2(/M) stage is an open loop device that has been designed to offer relative positioning which can be commanded via the number of steps. Caution If the stage is driven to the end of its travel range, do not drive it further.
-
Page 25: Chapter 5 Specifications
3 It is recommended to set step frequency to 20 kHz for PDXC controller and 2 kHz for KIM001/KIM101 controller to drive the PD2(/M) stage; other step frequencies may result in the stage stopping or reversing direction unexpectedly. -
Page 26: Chapter 6 Frequently Asked Questions
What drivers can I use? The PD2(/M) stage can be driven by a Thorlabs PDXC controller with a firmware revision of 1.27 or higher (indicated when the controller is powered on) and a Thorlabs KIM001/KIM101 controller version must be 2019 or newer (noted on the S/N label) with a firmware revision of 010003 or higher (indicated when the controller is powered on). -
Page 27: Chapter 7 Mechanical Drawings
Chapter 7: Mechanical Drawings PD2(/M) Piezo Inertia Drive Stage Chapter 7 Mechanical Drawings Figure 13 PD2 Imperial Stage Drawing Rev A, August 4, 2022 Page 23... - Page 28 PD2(/M) Piezo Inertia Drive Stage Chapter 7: Mechanical Drawings Figure 14 PD2/M Metric Stage Drawing Page 24 CTN018562-D02...
-
Page 29: Chapter 8 Regulatory
Waste Treatment is Your Own Responsibility If you do not return an “end of life” unit to Thorlabs, you must hand it to a company specialized in waste recovery. Do not dispose of the unit in a litter bin or at a public waste disposal site. -
Page 30: Chapter 9 Declaration Of Conformity
PD2(/M) Piezo Inertia Drive Stage Chapter 9: Declaration of Conformity Chapter 9 Declaration of Conformity Page 26 CTN018562-D02... -
Page 31: Chapter 10 Thorlabs Worldwide Contacts
Chapter 10: Thorlabs Worldwide Contacts PD2(/M) Piezo Inertia Drive Stage Chapter 10 Thorlabs Worldwide Contacts For technical support or sales inquiries, please visit us at for our most up-to-date www.thorlabs.com/contact contact information. USA, Canada, and South America UK and Ireland Thorlabs, Inc. - Page 32 www.thorlabs.com...
Need help?
Do you have a question about the PD2 and is the answer not in the manual?
Questions and answers