
Subscribe to Our Youtube Channel
Related Manuals for Thermo Scientific 1025


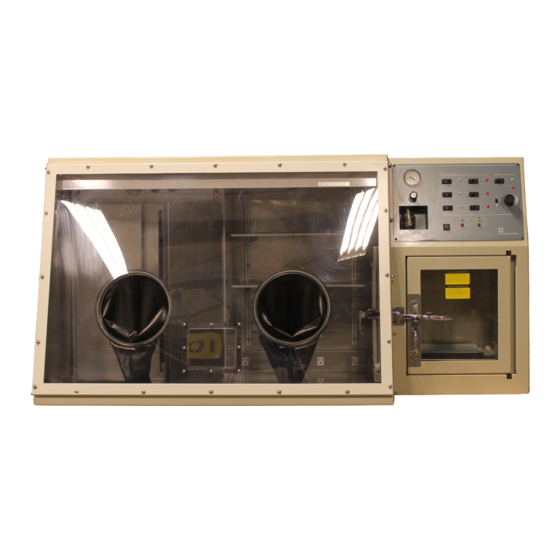
Summary of Contents for Thermo Scientific 1025
- Page 1 Model 1025/1029 Forma Anaerobic System Operating and Maintenance Manual 7011025 Rev. 18 Visit us online to register your warranty www.thermoscientific.com/labwarranty...
- Page 2 41193/IN-4777 10/20/16 Pressure switch from 360057 to 360284 on pg 7-1, update elec schematics 31096/IN-4531 6/4/14 Change 1025-06-6 interior door assembly to 1900594 - pg 5-4, 7-1 29929/IN-4369 7/29/13 Ballast part number from 500033 to 500030, updated schematics 27315/IN-4154 6/7/12...
- Page 3 Material in this manual is for information purposes only. The contents and the product it describes are subject to change without notice. Thermo Scientific makes no representations or warranties with respect to this manual. In no event shall Thermo be held liable for any damages, direct or incidental, arising out of or related to the use of this manual.
- Page 4 European Country, and this product should be disposed of or recycled through them. Further information on Thermo’s compliance with this directive, the recyclers in your country and information on Thermo Scientific products will be available at www.thermoscientific.com. Always use the proper protective equipment (clothing, gloves, goggles, etc.) Always dissipate extreme cold or heat and wear protective clothing.
- Page 5 We can also provide you with a quotation on our Extended Warranty for your Thermo Scientific products. Whatever Thermo Scientific products you need or use, we will be happy to discuss your applications. If you are experiencing technical problems, working together, we will help you locate the problem and, chances are, correct it yourself...over the telephone without a service...
- Page 6 • Repairs to parts or systems resulting from unauthorized unit modifications. • Any labor costs other than that specified during the parts and labor warranty period, which may include additional warranty on CO sensors, blower motors, water jackets, etc. Thermo Scientific Anaerobic System...
-
Page 7: Table Of Contents
Set Incubator Temperature ....... 1-12 Set Overtemp Safety Thermostat ......1-12 Thermo Scientific Anaerobic System... - Page 8 Gas Saving Hints ........3-3 Anaerobic System Thermo Scientific...
- Page 9 Electrical Schematics ........8-1 Section 8 Thermo Scientific Anaerobic System...
-
Page 10: Installation And Start-Up
375 Snapper Hose Clamp (connecting lines) 1 bx 921025 100 Clear Bags, 6” x 6” x12” 1 pr 921032 Size 9 Neoprene Gloves 285812 Plug, 15A 7285812 Instruction Sheet 380519 1/2” Hose x 1/2” FPT Adapter Thermo Scientific Anaerobic System... -
Page 11: Location
1. Select a location for the vacuum pump and secure the pump as illustrated in Figure 1-2. 2. Install the nylon adapter (supplied) on the vacuum connection on the rear plumbing panel. Anaerobic System Thermo Scientific... -
Page 12: Connect The Vacuum Source
SS hose clamps. Refer to Figure 1-1. 5. Plug the line cord into the pump outlet (located on the back of the plumbing panel). Check all connections for leaks. #10 S.S. Hose Clamp Model 1025 Rear Panel Nylon Adapter anaerobic gas vacuum 5 amp... -
Page 13: Connect The Gas Supplies
If a metal line is to be used, the serrated fitting can be removed and the desired 1/8 MPT fitting can be added. Note Gas supplies are connected one way for start-up and another way for normal operation to save gas costs on initial start-up. Anaerobic System Thermo Scientific... -
Page 14: Connection For Start-Up
Connect to Power Plug the system’s line cord into a suitable electrical outlet. See the electrical data plate mounted on the unit for exact electrical specifications. Thermo Scientific Anaerobic System... -
Page 15: Install Equipment
3. Slide the wafers into the correct slots - Charcoal Filter top position = Charcoal filter middle position = Palladium catalyst trace wafer Palladium Catalyst Wafer Bottom position = Desiccant activated wafer absorbed Desiccant Wafer Figure 1-2. Filter and Wafers Anaerobic System Thermo Scientific... -
Page 16: Prepare The Chamber Relief Bubbler
4. Check the vacuum pump by pulling a vacuum on the interchange with both interchange doors closed. 5. Check the vacuum gauge to make sure that the interchange is holding a vacuum. Thermo Scientific Anaerobic System... -
Page 17: Start-Up Procedure
13. Remove the N to the N fitting. 14. Connect the special gas to the appropriate fitting on the back of the unit. Refer to Figure 1-2. Anaerobic System Thermo Scientific... -
Page 18: Automatic Operation Of The Interchange
Both the inner and the outer door must be securely closed during the transfer cycle. The doors should not be reopened until the cycle is completed and the appropriate door indicating light goes out. Thermo Scientific Anaerobic System... - Page 19 2. When the Sequence Complete light comes on, open the inner door and transfer the material to the interchange. 3. Close and secure the inner door, then open the outer door to remove any material. 4. Close and secure the outer door. 1-10 Anaerobic System Thermo Scientific...
-
Page 20: Manual Operation Of The Interchange
Sequence Not Complete indicating lights will not function correctly because of Manual operation. Operating the interchange manually has no effect on the glove chamber. The glove chamber will always have a positive pressure of mixed gas to maintain an anaerobic atmosphere. Thermo Scientific Anaerobic System 1-11... -
Page 21: Initial Settings
When the main temperature control setpoint is changed, the overtemp safety thermostat must be reset to accommodate the change. 1-12 Anaerobic System Thermo Scientific... -
Page 22: Operation
5 amp 5 amp foot switch 10-15 psig min 4 cfm 10-15 psig to 24 in/Hg vacuum pump vacuum pump only 15 amp 9 amp max Figure 2-2. Back Plumbing Panel Thermo Scientific Anaerobic System... -
Page 23: Interchange Vacuum Gauge
The inner and outer door indicator lights continuously tell the operator which door should not be opened at a specific time. The lights help the Indicator Lights operator prevent contamination of the chamber with atmospheric gas by indicating which door is unsafe to open. Anaerobic System Thermo Scientific... -
Page 24: Start Cycle Button
• Equalize Indicator Light - The Equalize indicator light cycles with the equalize solenoid and indicates when glove chamber gas is entering the interchange to equalize the pressure between the glove chamber and the interchange. Thermo Scientific Anaerobic System... -
Page 25: Glove Chamber Negative Pressure Switch
The fan increases the efficiency of the catalyst and Indicating Light desiccant wafers by moving air across them. The green indicator to the right side of the switch lights when the fan is operating. Anaerobic System Thermo Scientific... -
Page 26: Power Switch And Indicator Light
10) around the control knob are for reference only. The source of any overtemp condition must be determined and corrected before normal operation can be resumed under the main temperature control. Refer to Section 1 for instructions on setting the overtemp safety thermostat. Thermo Scientific Anaerobic System... -
Page 27: Disposable Anaerobic Indicator Strips
Open one of the indicator foil pouches and place the strip in the desired location. Refer to the instructions on the indicator strip packaging for proper usage. The strip will start to turn blue at 0.01% O Caution Strips must be kept moist to properly indicate anaerobic condition. Anaerobic System Thermo Scientific... -
Page 28: Maintenance
Armor All® is recommended. This product is available in many discount and department stores. Leak Detection The glove box and interchange should be checked routinely for leaks, especially if the chamber is not in use, or a loss of vacuum is detected in the interchange. Thermo Scientific Anaerobic System... -
Page 29: Checking The Interchange
4. Use two covered wooden strips (1” x 2” x 18”) and a C-clamp to secure the fold. 5. Remove the damaged glove and prepare to install the new glove according to the instructions in Section 2. Anaerobic System Thermo Scientific... -
Page 30: Regenerating The Wafers
For overnight/no entry conditions, increase the pressure in the glove chamber slightly, using the Manual Fill valve. Turn the Manual Fill valve OFF, then turn the gassing system switch OFF. This procedure should be used only when ultra-conservative gas consumption is desired. Thermo Scientific Anaerobic System... - Page 31 Section 3 Maintenance Anaerobic System Thermo Scientific...
- Page 32 Section 3 Maintenance Thermo Scientific Anaerobic System...
-
Page 33: Service
7. Tighten one nut at each of the four corners of the cabinet to serve as guides when docking with the add-on module. 8. Alternately tighten all nuts. This ensures even pressure on the gasket. 9. Allow Silastic to cure overnight before beginning start-up procedure. Thermo Scientific Anaerobic System... -
Page 34: Reassemble The Unit
3. After the temperature has stabilized, recheck the controller calibration, and repeat the procedure if necessary. Do not open the door during stabilization. Note It may take up to four hours for the incubator to stabilize. Anaerobic System Thermo Scientific... -
Page 35: Variable Setpoint Controller Check And Calibration
When using an in-house vacuum system with the anaerobic system, the valve must be mounted with the arrow pointing toward the vacuum source and away from the anaerobic system. This allows positive isolation between the house vacuum and the anaerobic system when vacuum is not required. Thermo Scientific Anaerobic System... -
Page 36: Replace The Temperature Probe
3. Remove the two (2) nuts on the back side of the door latch holding the metal bracket. 4. Remove the temperature probe from the bracket. 5. Disconnect the probe cable wires, noting their configurations. 6. Replace the probe by reversing the above procedure. Anaerobic System Thermo Scientific... -
Page 37: Adjust The Pressure Switches
Moving the plastic jumper from pins 2 and 3 to pins 1 and 2 selects the short Figure 4-1. Interchange Board interchange cycle. 4. Reinstall the side panel and restore power to the cabinet. Thermo Scientific Anaerobic System... -
Page 38: Replace Interchange Door Gaskets
8. Release the vacuum on the interchange by turning the Nitrogen switch on the control panel from Auto to Manual until the vacuum is relieved, then turn back to Auto. The chamber is ready to be returned to operation. Anaerobic System Thermo Scientific... -
Page 39: Replace An Indicator Light
6. Install the new fan motor with airflow blowing down over the wafers. 7. Reinstall the end panel of circulation box with the silicone seal and the four screws. 8. Connect the motor and seal the opening around the wires. Thermo Scientific Anaerobic System... -
Page 40: Troubleshooting
If vacuum gauge rises 1 inch or less, the unit passes the leak test. • If vacuum gauge rises more than 1 inch, refer to ‘Interchange Chamber Leaks - Troubleshooting Chart’. Repeat Steps 4, 5 and 6. Thermo Scientific Anaerobic System... -
Page 41: Leak-Check Anaerobic Glove Chamber
Latch shims or washers can be used (see Figure 2). Test the latch adjustment by pulling a 5” vacuum on the interchange, then verify that the latch is still applying a slight pressure against the door. Anaerobic System Thermo Scientific... -
Page 42: Outer Door Hinge Alignment
20068 - #8-32 x 5/16 SS FPH UC Screw 1025-08-4 Loosen this screw Ext Door Shim to tighten latch Figure 1 1025-06-2 Stub Lever Latch Assembly Lever Latch (Or) Washers Latch Shim Outer Door Figure 2 Adding Shims or Washers... -
Page 43: Outer Door Switch Adjustment
Adjustment (continued) slots in the direction 188005 of the arrow. Latch Bar 1025-10-4 Switch Activator 22052 #8-32 x 3/8 SS Place top of activator Phillips Screw (2) flush with top of door. Use existing 23080 #8 SS... -
Page 44: Inner Door Switch Adjustment
(3) Inspect fitting for defects. Ensure that all fittings are tight. If neces- sary, disassemble fittings and tape threads with Teflon tape. Note Apply only two wraps of tape to each fitting. (4) Replace solenoid. (5) Replace gasket. Follow procedure from Section 4. Thermo Scientific Anaerobic System... -
Page 45: General Troubleshooting Chart
Obstruction in the anaerobic gas solenoid, defective gas pressure switch, or manual purge valve is on. Symptom After completion of a cycle, the sequence incomplete light stays Cause/Solution The inner/outer door switch is defective or needs adjusted. Anaerobic System Thermo Scientific... - Page 46 Relieve vacuum by turning manual purge knob CCW until chamber relief bottle bubbles, then turn knob CW to close purge valve. Toggle Nitrogen switch to Manual until gauge reads zero, then turn back to Auto. Open doors. Thermo Scientific Anaerobic System...
-
Page 47: Specifications
Incubator: ......2.8 cu. ft. Quantity: ... 425 - 100 x 15 mm plates Thermo Scientific Anaerobic System... - Page 48 Export Appliances should be 220V. Load should not exceed 0.5 amp per outlet, or 2 amps total. Electrical Requirements Model 1025 90-130VAC, 1 Phase, 50/ 60Hz, 14.6 FLA @ 120V including vacuum pump Model 1029 180-235VAC, 1 Phase, 50/60Hz, 7 FLA @ 220V including vacuum pump.
-
Page 49: Parts List
Fluorescent lamp 121036 Lift and turn chrome latch 188005 Interchange interior door latch bar 188006 Interchange interior door roller 1900594 Interchange interior door assembly (1025-06-6) 360284 Differential pressure switch 400296 Silicone feather gasket (incubator) 431500 0-30 Hg vacuum gauge 515078... - Page 50 Section 7 Parts List Model 1025 (continued) Stock # Description 285629 Ceramic Fuse, 15 Amp. 3 AB 85632 Panel Fuseholder 285813 Plug 20A, 120V, Hospital Grade 290027 Thermistor 1K, Cable 7ft 360095 SPST Flat Black Rocker Switch 360096 SPDT MOM Blk, Sq. Pushbutton...
- Page 51 Section 8 Electrical Schematics Electrical Schematic Model: 1025 Anaerobic System 1025-70-0-D Rev. 14 Page 1 of 3 Thermo Scientific Anaerobic System...
- Page 52 Section 8 Electrical Schematics Electrical Schematic Model: 1025 Anaerobic System 1025-70-0-D Rev. 14 Page 2 of 3 Anaerobic System Thermo Scientific...
- Page 53 Section 8 Electrical Schematics Electrical Schematic Model: 1025 Anaerobic System 1025-70-0-D Rev. 14 Page 3 of 3 Thermo Scientific Anaerobic System...
- Page 54 Section 8 Electrical Schematics Electrical Schematic Model: 1029 Anaerobic System 1029-70-0-D Rev. 15 Page 1 of 3 Anaerobic System Thermo Scientific...
- Page 55 Section 8 Electrical Schematics Electrical Schematic Model: 1029 Anaerobic System 1029-70-0-D Rev. 15 Page 2 of 3 Thermo Scientific Anaerobic System...
- Page 56 Section 8 Electrical Schematics Electrical Schematic Model: 1029 Anaerobic System 1029-70-0-D Rev. 15 Page 3 of 3 Anaerobic System Thermo Scientific...
- Page 57 Section 9 Warranty Information Thermo Scientific Anaerobic System...
- Page 58 Section 9 Warranty Information Anaerobic System Thermo Scientific...
- Page 59 thermoscientific.com © 2014 Thermo Fisher Scientific Inc. All rights reserved. All trademarks are the property of Thermo Fisher Scientific and its subsidiaries. Specifications, terms and pricing are subject to change. Not all products are available in all countries. Please consult your local sales representative for details.
Need help?
Do you have a question about the 1025 and is the answer not in the manual?
Questions and answers