
Related Manuals for ProLights EclProfile FW IP


Summary of Contents for ProLights EclProfile FW IP
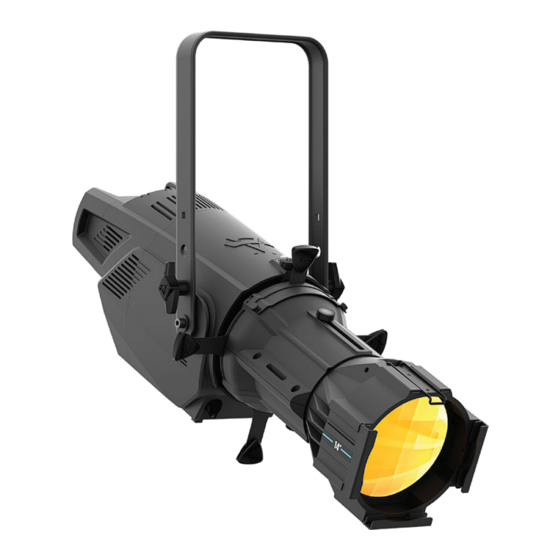
- Page 1 EclProfile FW IP High quality Full White LED ellipsoidal available in Tungsten and Daylight versions USER MANUAL English version REV.01-02/22...
- Page 2 PROLIGHTS product are trademarks OWNED or licensed by Music & Lights S.r.l., its affiliates, and subsidiaries. PROLIGHTS is a registered trademark by Music & Lights S.r.l. All right reserved. Music & Lights – Via A. Olivetti, snc - 04026 - Minturno (LT) ITALY.
-
Page 3: Table Of Contents
ROTATING GOBO ASSEMBLY (CODE ECLPRIPROTGOBO1 - OPTIONAL) ....32 14 - TEST OF IP65 RATING 15 - MAINTENANCE MAINTENANCE AND CLEANING THE PRODUCT............34 REPLACING THE FUSE ....................34 VISUAL CHECK OF PRODUCT HOUSING ..............34 TROUBLESHOOTING ..................... 35 PROLIGHTS - EclProfile FW IP... -
Page 4: Safety Information
• Do not reapply power until repairs have been completed. • Refer any service operation not described in this manual to PROLIGHTS Service team or an authorized PROLIGHTS service center. Installation •... - Page 5 • Warning! Disconnect the fixture from AC mains power and allow to cool for at least 10 minutes before handling. • Only technicians who are authorized by PROLIGHTS or Authorised service partners are permitted to open the fixture. • Users may carry out external cleaning, following the warnings and instructions pro- vided, but any service operation not described in this manual must be referred to a qualified service technician.
- Page 6 2. This device must accept any interference received, including interference that may cause undesired operation. Other approvals • The product meets the safety requirements of the certification procedures of the market in which it is placed and sold. PROLIGHTS - EclProfile FW IP...
-
Page 7: Packaging
• ECLPRPOYO: pole operated aluminium yoke bracket for ECLCTPLUS and ECLFS; • ECLPRIPROTGOBO1BK/WH: rotating gobo assembly for ECL Profile fixtures, black/white; • IPTESTBOX: portable vacuum and pressure tester for ProLights IP fixtures; • SPGM12: 28mm spigot for fixtures, M12 bolt;... -
Page 8: Technical Drawing
2 - TECHNICAL DRAWING Weight: 7.3 kg - 16.09 lbs ECLFWIP without optic Weight: 10.2 kg - 22.48 lbs ECLFWIP with ECLPRL05 Weight: 9.2 kg - 20.28 lbs ECLFWIP with ECLPRL10 PROLIGHTS - EclProfile FW IP... - Page 9 Weight: ECLPRL26: 9.7 kg - 21.38 lbs ECLFWIP with ECLPRL26 Weight: ECLPRL36: 9.4 kg - 20.72 lbs ECLFWIP with ECLPRL36 Weight: ECLPRL50: 9 kg - 19.84 lbs ECLFWIP with ECLPRL50 Weight: 9.1 kg - 20.06 lbs ECLFWIP with ECLPRL70 PROLIGHTS - EclProfile FW IP...
- Page 10 Weight: 11.3 kg - 24.91 lbs ECLFWIP with ECLPRLZ1530 Weight: 11.3 kg - 24.91 bs ECLFWIP with ECLPRLZ2550 Fig. 01 PROLIGHTS - EclProfile FW IP...
-
Page 11: Installation
Do not use any type of clamp that does not completely encircle the structure when fastened. RSR0630A/B RSR0630A/B steel security cable steel security cable C6040 C6002 clamp clamp 213 mm Ø13 mm [8.4 in] [Ø0.5 in] 80 mm [3.1 in] Fig. 02 PROLIGHTS - EclProfile FW IP... -
Page 12: Connection To The Mains Supply
• Connect the power connector into the Mains input socket (100-240 VAC-50/60 Hz). • The product is then ready for its operations and can be controlled through the available input sig- nals on board. • To disconnect power from the product, disconnect the Mains from the socket. PROLIGHTS - EclProfile FW IP... -
Page 13: Product Overview
12. MAIN FUSE HOLDER: replace a burnt-out fuse by one of the same type only (T5A, 250 V); ); 13. POWER IN: for connection to the Mains 100-240V~/50-60Hz; 14. POWER OUT: power output for connection of multiple units in series; 15. GORE VALVE. 11 12 13 Fig. 03 PROLIGHTS - EclProfile FW IP... -
Page 14: Dmx Connection
... . DMX IN DMX OUT DMX IN DMX OUT DMX IN DMX OUT DMX IN DMX OUT DMX512 Controller Fig. 05 - Example 9 DMX channels configuration PROLIGHTS - EclProfile FW IP... -
Page 15: Construction Of The Dmx Termination
2. Reach the addressing menu, then select the DMX ADDRESS settings. 3. Select the address from 1 to 512 using the navigation arrows/buttons and confirm by pressing ENTER. 4. Press Menu to exit and return to the Home screen. PROLIGHTS - EclProfile FW IP... -
Page 16: Control Panel
UP: Browse upwards through the menu list and increases the numeric value displayed. DOWN: Browse downwards through the menu list and decreases the numeric value displayed. ENTER: Used to confirm the current menu or confirm the current function value or option within a menu. PROLIGHTS - EclProfile FW IP... -
Page 17: Menu Structure
Gobo Rot. Reset Reference Abort Transfer Config To transfer the same menu settings of one fixtures Without DMX Addr to all the other in the daisy chain, including or not With DMX Address the dmx address. PROLIGHTS - EclProfile FW IP... - Page 18 View informations about product. TION Hours Lamp Hours Power Cycles Power Consumtion Temperature Fan Speed Gobo Rot. Gobo Rot. RDM Id Version FACTORY Abort To reset the unit to factory default SETTINGS Set Default settings. Values PROLIGHTS - EclProfile FW IP...
-
Page 19: Rdm Functions
0x0082 FACTORY_DEFAULTS 0x0090 SOFTWARE_VERSION_LABEL 0x00c0 BOOT_SOFTWARE_VERSION_ID 0x00c1 BOOT_SOFTWARE_VERSION_LABEL 0x00c2 DMX_PERSONALITY 0x00e0 DMX_PERSONALITY_DESCRIPTION 0x00e1 DMX_START_ADDRESS 0x00f0 SENSOR_DEFINITION 0x0200 SENSOR_VALUE 0x0201 DEVICE_HOURS 0x0400 LAMP_HOURS 0x0401 LAMP_STRIKES 0x0402 DEVICE_POWER_CYCLES 0x0405 IDENTIFY_DEVICE 0x1000 RESET_DEVICE 0x1001 MOTOR_ENABLE 0x8200 MOTOR_RESET 0x8201 PROLIGHTS - EclProfile FW IP... -
Page 20: Shortcuts
"Can't load Pg1" Error "Can't load Pg2" Error "Can't load flash" Error Gobo Rot. "Gobo position lost" Warning Refernce signal at unex- pected position "Gobo ref. disabled" Information Use of reference position automatically disabled after referencing failed PROLIGHTS - EclProfile FW IP... -
Page 21: Dmx Charts
DMX Lost Slave 104 ÷ 105 Gobo Rot. Off 106 ÷ 107 Gobo Rot. On 108 ÷ 109 Gobo Rot. Reset 110 ÷ 111 Reserved 112 ÷ 253 Reset All Channels Control 254 ÷ 255 PROLIGHTS - EclProfile FW IP... - Page 22 DMX Chart with Gobo Rotation enabled Uno Gobo Duo Gobo Standard Gobo DIMMER COARSE DIMMER COARSE DIMMER COARSE GOBO ROT. DIMMER FINE DIMMER FINE GOBO ROT. FINE GOBO ROT. STROBE GOBO ROT. FINE CONTROL GOBO ROT. GOBO ROT. FINE PROLIGHTS - EclProfile FW IP...
- Page 23 Pos 216,56° Pos 219,38° Pos 222,19° Pos 225,00° Pos 227,81° Pos 230,63° Pos 233,44° Pos 236,25° Pos 239,06° Pos 241,88° Pos 244,69° Pos 247,50° Pos 250,31° Pos 253,13° Pos 255,94° Pos 258,75° Pos 261,56° Pos 264,38° PROLIGHTS - EclProfile FW IP...
- Page 24 CW Spin 1,16 rpm CW Spin 0,97 rpm CW Spin 0,79 rpm CW Spin 0,63 rpm CW Spin 0,49 rpm CW Spin 0,36 rpm CW Spin 0,26 rpm CW Spin 0,17 rpm CW Spin 0,10 rpm Stop PROLIGHTS - EclProfile FW IP...
- Page 25 CCW Spin 36,47 rpm CCW Spin 37,63 rpm CCW Spin 38,81 rpm CCW Spin 40,00 rpm GOBO ROTATION FINE All 16bit DMX values are possible, the list 000 ÷ 255 above only shows intermedium value. PROLIGHTS - EclProfile FW IP...
-
Page 26: Accessories Installation
OPTIC (CODE ECLPRL - OPTIONAL) Loosen and remove the two marked knobs of the optic. Mount the desired optic (A) in the middle part. Then insert and tighten the knobs (B) in the holes. Fig. 08 PROLIGHTS - EclProfile FW IP... -
Page 27: Gel Filter Frame (Code Eclprtpg - Optional)
Push the clip (A), located at the top of the optics body, outwards and lift it (B). DETAIL Insert the filter (A) into the marked track (DETAIL) and close the clip (B), always applying an outward push. NOTE: To remove the accessory, reverse the procedure. Fig. 09 PROLIGHTS - EclProfile FW IP... -
Page 28: Gobo Holder (Code Eclprgh - Optional)
• Ø external (OD)= 86 mm (3.4 in) • Ø of image (ID)= 64.5 mm (2.5 in) • Thinckness= 1.1 mm (0.04 Put in place the gobo (2). ATTENTION! Load with mirror surface toward the light source. Please turn! PROLIGHTS - EclProfile FW IP... - Page 29 Loosen the marked screws (A). Then open the slot of the middle part (B). Insert the gobo holder into the slot. The flaps (A) will go into the appropriate size. NOTE: To remove the accessory, reverse the procedure. Fig. 11 PROLIGHTS - EclProfile FW IP...
-
Page 30: Steel Iris Diaphram (Code Eclpriris - Optional)
Loosen the marked screws (A). Then open the slot of the middle part (B). Insert the steel iris diaphram into the slot. The flaps (A) will go into the appropriate size. NOTE: To remove the accessory, reverse the procedure. Fig. 12 PROLIGHTS - EclProfile FW IP... -
Page 31: Soft Edge Filter (Code Eclprsef1 - Optional)
Loosen the marked screws (A). Then open the slot of the middle part (B). Insert the soft edge filter into the slot. The flaps (A) will go into the appropriate size. NOTE: To remove the accessory, reverse the procedure. Fig. 13 PROLIGHTS - EclProfile FW IP... -
Page 32: Soft Focus Diffusion (Code Eclprsmoothf1 - Optional)
Loosen the marked knob (A) and screw (B). Then rotate (C) the middle part and remove it (D). DETAIL Insert the soft focus diffusion (A) by placing the magnets (DETAIL) on the back of the framing system (B) of the middle part. NOTE: To remove the accessory, reverse the procedure. Fig. 14 PROLIGHTS - EclProfile FW IP... -
Page 33: Pole Operated Yoke (Code Eclprpoyo - Optional)
Loosen and remove the marked screws (A). Then remove the bracket (B). DETAIL Mount the Pole Operated Yoke bracke (A) and tighten the screws (DETAIL). NOTE: To remove the accessory, reverse the procedure. Fig. 15 PROLIGHTS - EclProfile FW IP... -
Page 34: Rotating Gobo Assembly (Code Eclpriprotgobo1 - Optional)
Insert the soft edge filter into the slot. The flaps (A) will go into the appropriate size. Then connect the rotating gobo assembly throught the connector (C) into the socket. NOTE: To remove the accessory, reverse the procedure. Fig. 16 PROLIGHTS - EclProfile FW IP... -
Page 35: Test Of Ip65 Rating
Connect the air hose to the IPTESTBOX by inserting the quick-connect fitting into the coupler (2). Insert the threaded end into the threaded valve hole socket (3). For the operating procedure using the instrument, refer to the IPTESTBOX user manual. Fig. 17 PROLIGHTS - EclProfile FW IP... -
Page 36: Maintenance
WARNING: the use of alcohol or any other detergent could damage the lenses. • All other service operations on the product must be carried out by PROLIGHTS, its approved service agents or trained and qualified personnel. -
Page 37: Troubleshooting
• Check if the Fuse is intact and eventually replace it if fault. necessary. • Contact the PROLIGHTS Service or authorized service partner. Do not remove parts and/or covers, or carry out any repairs or service that are not described in... - Page 38 Note...
- Page 40 PROLIGHTS is a trademark of prolights.it Via A.Olivetti snc MUSIC & LIGHTS S.r.l. support@prolights.it 04026 - Minturno (LT) ITALY musiclights.it Tel: +39 0771 72190...
Need help?
Do you have a question about the EclProfile FW IP and is the answer not in the manual?
Questions and answers