
Related Manuals for Medeli DP370


Summary of Contents for Medeli DP370
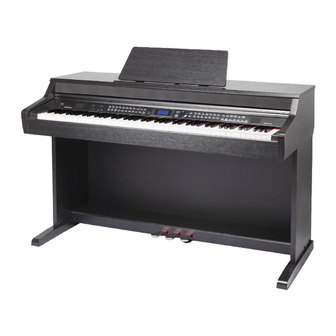
- Page 1 Aw_DP370_Manual_G07_161223.pdf 1 17/1/4 14:34 DIGITAL PIANO Owner’s Manual...
- Page 2 Aw_DP370_Manual_G07_161223.pdf 2 17/1/4 14:34 INFORMATION FOR YOUR SAFETY! THE FCC REGULATION WARNING (for USA) PRECAUTIONS PLEASE READ CAREFULLY BEFORE PROCEEDING This equipment has been tested and found to comply with the limits for a Class B digital device, pursuant to Part 15 of Please keep this manual in a safe place for future reference.
-
Page 3: Table Of Contents
Aw_DP370_Manual_G07_161223.pdf 3 17/1/4 14:34 Contents Panel & Display Description DSP Effect................21 Reverb Type................21 Front Panel................4 Reverb Level................21 LCD Display................4 Chorus Type................21 Rear Panel................5 Chorus Level...............21 Setup MIDI IN................21 MIDI OUT................22 Setup Guide................6 Touch...................22 Connections Language................22 PowerOff................22 Power Jack................9 Connecting a pair of Headphones.........9 Register Memory Connecting an Audio Equipment...........9 Registering the Panel Setting..........23... -
Page 4: Panel & Display Description
Aw_DP370_Manual_G07_161223.pdf 4 17/1/4 14:34 Panel & Display Description Front Panel 1. [VOLUME] Knob When [SHIFT] key pressed SONG MODE: STYLE MODE: Adjust master volume 4. Style button 7. [START/STOP] button 7. [START/STOP] button Enter the style mode Start or stop playing the song Start or stop playing the 2. -
Page 5: Rear Panel
Aw_DP370_Manual_G07_161223.pdf 5 17/1/4 14:34 Panel & Display Description RECORD 20. [USB DEVICE] button When [SHIFT] key pressed When [SHIFT] key released Enter USB DEVICE menu 21. [DEMO] button 21. [SONG] button Enter demo mode and play Enter song mode and play songs 22. -
Page 6: Setup
Aw_DP370_Manual_G07_161223.pdf 6 17/1/4 14:34 Setup This section contains information about setting up your instrument and preparing to play. Please go through this section carefully before turning the power on. Setup Guide Before you proceeding to assemble the stand, get a Philip's screwdriver (not supplied). - Page 7 Aw_DP370_Manual_G07_161223.pdf 7 17/1/4 14:34 Setup A. Put the foot pedal unit (4) in between the left and right leg components (2&3) use 4 pieces of screws (8) (2 on each side) to stable the legs onto the foot pedal unit. (Make sure the direction of the placement is correct before screwing) B.
- Page 8 Aw_DP370_Manual_G07_161223.pdf 8 17/1/4 14:34 Setup D. After the initial set-up, connect pedal cable (6) with the foot pedal to the bottom-panel pedal jack. E. Installation is completed now. Play the piano and enjoy the perfect performance.
-
Page 9: Connections
Aw_DP370_Manual_G07_161223.pdf 9 17/1/4 14:34 Connections Power Jack VOLUME Power Supply 1. Make sure that the piano is turned off. Before you switch the piano on or off , turn down the volume of piano and any connected audio equipments first. 2. -
Page 10: Connecting A Computer
Aw_DP370_Manual_G07_161223.pdf 10 17/1/4 14:34 Connections Connecting a Computer AUX IN AUX OUT MIDI IN MIDI OUT You can use the USB Connector to receive MIDI messages from computer or transmit MIDI messages to computer. You can use a commercially available MIDI interface to connect the piano to the computer via the MIDI connectors. -
Page 11: Adjusting The Master Volume
Aw_DP370_Manual_G07_161223.pdf 11 17/1/4 14:34 Adjusting the Master Volume Rotate the [VOLUME] knob to right, the volume increases and vice versa. Adjusting the Voice Brilliance Slide the [BRILLIANCE] knob to right, the voice sounds brighter and vice versa. You can change the piano brilliance as you wish. Playing the Demo Song The instrument features 5 wonderful demos. -
Page 12: Playing Voices
Aw_DP370_Manual_G07_161223.pdf 12 17/1/4 14:34 Playing Voices The instrument features 600 exceptionally realistic voices. Please refer to Voices List. Playing Voices 1. In idle status, holding down the [SHIFT] button, then press one of the voice direct button to enter the voice mode. LCD will display the name and number of the current voice and highlights “R1”. -
Page 13: Twinova
Aw_DP370_Manual_G07_161223.pdf 13 17/1/4 14:34 Twinova The twinova mode splits the keyboard into two independent areas, which have the same pitch and voice, for the convenience of one-to-one teaching. 1. In idle mode, press [TWINOVA] button to turn on twinova. LCD highlights “TWINOA”. -
Page 14: Accompaniment Sections
Aw_DP370_Manual_G07_161223.pdf 14 17/1/4 14:34 Auto Accompaniment 2. Press [SYNC START] button , and then play a chord in the chord area to start auto accompaniment of all tracks. When you change a chord, the accompaniment automatically changes. Alternatively, press [START/STOP] button to start auto accompani- ment of rhythm track, then play a chord in the chord area. -
Page 15: Accompaniment Volume
Aw_DP370_Manual_G07_161223.pdf 15 17/1/4 14:34 Auto Accompaniment 7. Press the [FILL B] / [FILLDC] / [FILL D] button. A fill-in plays, automatically followed by the Main B/C/D section. 8. Press the [INTRO/ENDING] again will lead it into the Ending Section. When the ending is finished, the auto accompaniment automatically stops. -
Page 16: Tempo
Aw_DP370_Manual_G07_161223.pdf 16 17/1/4 14:34 Auto Accompaniment Multi-finger Multi-finger allows you to play chords in normal fingering. Try playing the 32 chord types in C scale as listed on the right. Note: In full range mode, the entire keyboard will only recognize chords played in normal fingering. -
Page 17: Mixer
Aw_DP370_Manual_G07_161223.pdf 17 17/1/4 14:34 Mixer Mixer function adjusts separately the volume of different tracks. 1. Press the [MIXER] button. Now you have entered the menu of mixer. Press the [MIXER] button repeatedly to select a track to change its volume. 2. -
Page 18: Other Functions
Aw_DP370_Manual_G07_161223.pdf 18 17/1/4 14:34 Other Functions Press [FUNCTION+/-] button to enter function menu. The default option of the menu is "Tune". When you enter the menu next time, you will find the option is the same as last time. Use [FUNCTION+/-] button to select the option to set. -
Page 19: Splitpoint
Aw_DP370_Manual_G07_161223.pdf 19 17/1/4 14:34 Other Functions SplitPoint This function sets the point that separates the entire keyboard to two sections. 1. Press [FUNCTION+/-] button to select SplitPoint menu. LCD displays “SplitPt: xxx”. Use [+/YES]/[-/NO] or data dial to change SplitPoint value. The range of keyspilit: 1~88. 2. -
Page 20: Scale Switch
Aw_DP370_Manual_G07_161223.pdf 20 17/1/4 14:34 Other Functions There are 9 harmony types built into this instrument. Parameter LCD Display Duet Duet Octave Octave Country Duet CtryDuet Trio Trio Block Block 4 Close 1 4Close1 4 Close 2 4Close2 4 Open 4Open 2. -
Page 21: Eq Type
Aw_DP370_Manual_G07_161223.pdf 21 17/1/4 14:34 Other Functions EQ Type EQ function can control the gain of different frequency band. And different gain settings produce different sound field effects. 1. Press [FUNCTION+/-] button to select EQ type menu. LCD displays “EqType: xxx”. Use [+/YES]/[-/NO] or data dial to change EQ type. -
Page 22: Chorus Type
Aw_DP370_Manual_G07_161223.pdf 22 17/1/4 14:34 Other Functions Chorus Type 1. Press [FUNCTION+/-] button to select chorus type menu. LCD displays “ChorusType: xxx”. Use [+/YES]/[-/NO] or data dial to change chorus type. There are 8 chorus types built into this instrument. Parameter LCD Display Chorus 1 Chorus1... -
Page 23: Language
Aw_DP370_Manual_G07_161223.pdf 23 17/1/4 14:34 Other Functions Language This function is used to set the system language. 1. Press [FUNCTION+/-] button to select language menu. LCD displays “Language: xxx”. Use [+/YES]/[-/NO] or data dial to change language: 中文,English 2. The language setting will not be lost after power off. PowerOff This function is used to set the time of automatic shutdown. -
Page 24: Song Recording
Aw_DP370_Manual_G07_161223.pdf 24 17/1/4 14:34 Song Recording With the easy-to-use song recording features, you can record your own keyboard performances as a user song. 10 user songs can be recorded with 6 tracks (1 ACCOMP track, 5 MELODY tracks) each. The accomp track records the accompaniment for a user song, while the melody tracks record melodies for a user song. -
Page 25: Stop Recording
Aw_DP370_Manual_G07_161223.pdf 25 17/1/4 14:34 Song Recording Stop Recording 1. When recording is in process, holding down [SHIFT] button then press the [RECORD] button to stop recording. RECORD 2. When recording is in process, if the memory is full, the recording will stop and save automatically, the LCD displays “RecFull”. -
Page 26: Song
Aw_DP370_Manual_G07_161223.pdf 26 17/1/4 14:34 Song The piano has 130 songs in all, including 10 user songs. Listening to the songs 1. Press the [SONG] button to enter the song mode and it will play all songs circularly. 2. Use the data dial, [+/YES] or [-/NO] button to select a song. 3. -
Page 27: Connecting Usb Flash Drive
Aw_DP370_Manual_G07_161223.pdf 27 17/1/4 14:34 Connecting USB Flash Drive The piano recognizes USB flash drives, sizing from 16M to 32G in the format of FAT16 or FAT32. We recommend to format the USB flash drive on the piano before using. Do not edit the backup files saved in the USB flash drive. USB Flash Drive Operation 1. -
Page 28: Save
Aw_DP370_Manual_G07_161223.pdf 28 17/1/4 14:35 Connecting USB Flash Drive Save 1. Press [USB DEVICE] button to enter USB mode. Then use data dial to select “Save”. 2. Press [+/YES] to enter “Save” sub menu. It includes “SaveSong”, “SaveSty”, “SaveMem”. Use [+/YES], [-/NO]button or data dial to select one. -
Page 29: Delete
Aw_DP370_Manual_G07_161223.pdf 29 17/1/4 14:35 Connecting USB Flash Drive Load Memory 1. Select the menu “LoadMem” and press [+/YES] button, LCD displays the memory files(*.mem) in the MMKD\MEMORY directory of USB Flash Drive. Use the data dial to select the file to load. 2. -
Page 30: Midi
Aw_DP370_Manual_G07_161223.pdf 30 17/1/4 14:35 MIDI By using the MIDI functions you can expand your musical possibilities. This section explains what MIDI is, and what it can do, as well as how you can use MIDI on your instrument. What's MIDI? MIDI (short for Musical Instrument Digital Interface) allows a wide AUX IN AUX OUT... -
Page 31: Troubleshooting
Aw_DP370_Manual_G07_161223.pdf 31 17/1/4 14:35 Troubleshooting Problem Possible Cause and Solution The speakers produce a pop sound This is normal and is no cause for alarm. whenever the power is turned ON or OFF. No sound when the keyboard is played. Make sure the master volume is set to an appropriate level. -
Page 32: Voice List
Aw_DP370_Manual_G07_161223.pdf 32 17/1/4 14:35 Voice List Full Name Celesta 3 Glockenspie Piano Acoustic Grand Piano Glockenspiel 2 Acoustic Grand Piano 2 Music Box Acoustic Grand Piano 3 Music Box 2 Acoustic Grand Piano (wide) Music Box 3 Acoustic Grand Piano (dark) Vibraphone Bright Acoustic Piano Vibraphone 2... - Page 33 Aw_DP370_Manual_G07_161223.pdf 33 17/1/4 14:35 Voice List Ukulele Violin (slow attack) Acoustic Guitar (steel) Viola Acoustic Guitar (steel) 2 Viola 2 12-Strings Guitar Cello Mandolin Cello 2 Mandolin 2 Contrabass Steel Guitar with Body Sound Contrabass 2 Electric Guitar (jazz) Tremolo Strings Electric Guitar (jazz) 2 Tremolo Strings 2 Electric Guitar (pedal steel)
- Page 34 Aw_DP370_Manual_G07_161223.pdf 34 17/1/4 14:35 Voice List Brass Section Recorder 2 Brass Section 2 2 Recorders Brass Section 3 Pan Flute Synth Brass Pan Flute 2 Synth Brass 2 Sweet Pan Flute Synth Brass 3 Blown Bottle Synth Brass 4 Blown Bottle 2 Synth Brass 5 Shakuhachi Synth Brass 6...
- Page 35 Aw_DP370_Manual_G07_161223.pdf 35 17/1/4 14:35 Voice List PWM 4th Warm Air Analog Cymbal Delayed Lead FX 5 (brightness) Ride Cymbal Delayed Lead 2 Smog China Cymbal Fifth Lead FX 6 (goblins) Ride Bell Corrie FX 6 (goblins) 2 Tambourine Quint Choir Bell Splash Cymbal Synth Pad Choir Bell 2...
- Page 36 Aw_DP370_Manual_G07_161223.pdf 36 17/1/4 14:35 Voice List Wind Chime 3 Trumpet Loose Helicopter Trombone & Stereo Strings Car Engine 3 Trombones Loose Car Stop 3 Muted Trumpets Loose Car Pass Club Brass Car Crash Brass & Woodwinds Siren Woodwinds & Strings Train Section Woods Small Jetplane...
-
Page 37: Style List
Aw_DP370_Manual_G07_161223.pdf 37 17/1/4 14:35 Style List Name Sting Latin Rap 1 R&B Ballad 1 Disco 8 BEAT 8Beat Ballad Guitar Ballad Soft Disco 8Beat Piano Ballad Rock 70's Disco 8Beat 1 Piano Pop Club Dance Guitar Pop 1 Soft Ballad Euro Dance 8Beat Hip Hop Natural Ballad... - Page 38 Aw_DP370_Manual_G07_161223.pdf 38 17/1/4 14:35 Style List Bossa Nova Jazz 1 Latin Jazz 2 New Reggae Piano Rock Reggae Dance Blues 1 Paso Doble Piano Beat Lite Bossa Piano Bar Latin Rock Pop 1 Beguine 3 Pop 2 Slow Bolero Ballad 1 Disco Samba Ballad 2 Mambo...
-
Page 39: Song List
Aw_DP370_Manual_G07_161223.pdf 39 17/1/4 14:35 Song List Name LCD Name Red River Valley RedRiver Die Forelle Forelle FOLK & COUNTRY Toccata Toccata Symphony No. 94 "Suprise" No. 94 Carry Me Back To Old Virginny Virginny Polonaise Polonais El Condor Pasa ElCondor Rondeau Rondeau Traumerei... - Page 40 Aw_DP370_Manual_G07_161223.pdf 40 17/1/4 14:35 Song List Basic Tutorial Beyer Piano 15 Beyer15 Basic Tutorial Beyer Piano 18 Beyer18 Cuckoo Cuckoo Basic Tutorial Beyer Piano 21 Beyer21 Basic Tutorial Beyer Piano 29 Beyer29 Butterfly Buterfly Basic Tutorial Beyer Piano 45 Beyer45 Christmas Eve XmasEve Basic Tutorial Beyer Piano 50...
-
Page 41: Chord List
Aw_DP370_Manual_G07_161223.pdf 41 17/1/4 14:35 Chord List Chord name [abbreviation] Normal Voicing (For root C) Chord Display Major [M] 1+3+5 Sixth [6] 1+(3)+5+6 Major seventh [M7] 1+3+(5)+7 Major seventh add sharp eleventh [M7(#11)] 1+(2)+3+#4+(5)+7 CM7(#11) CM7(#11) Major seventh add sharp eleventh (9)] 1+2+3+5 C(9) CM(9) -
Page 42: Midi Implementation Chart
Aw_DP370_Manual_G07_161223.pdf 42 17/1/4 14:35 MIDI Implementation Chart... -
Page 43: Scale Tuning System
Aw_DP370_Manual_G07_161223.pdf 43 17/1/4 14:35 Scale tuning system A tuning system is the system used to define which tones, or pitches, to use when playing music. In other words, it is the choice of number and spacing of frequency values used. The equal temperament (has only one tuning method, and is suitable for keyboard) is the common musical scale used at present, used for the tuning of pianos and other instruments of relatively fixed scale. - Page 44 Aw_DP370_Manual_G07_161223.pdf 44 17/1/4 14:35 DP370_G07...
Need help?
Do you have a question about the DP370 and is the answer not in the manual?
Questions and answers