Table of Contents
Advertisement
Advertisement
Table of Contents

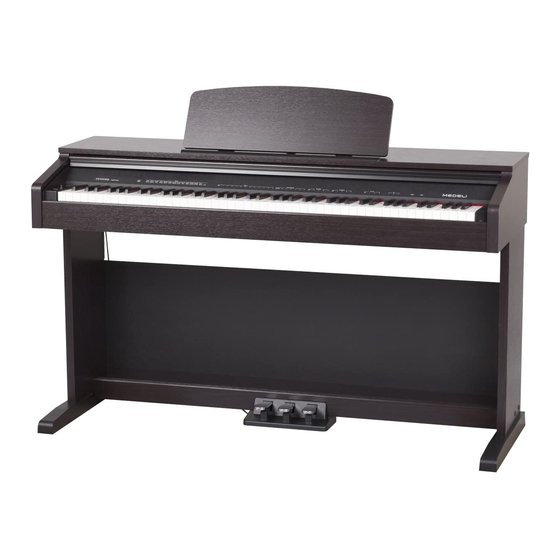
Summary of Contents for Medeli DP250
- Page 1 DIGITAL PIANO...
- Page 2 INFORMATION FOR YOUR SAFETY! THE FCC REGULATION WARNING (for USA) PRECAUTIONS This equipment has been tested and found to comply with the limits for a Class B digital device, pursuant to Part 15 of PLEASE READ CAREFULLY BEFORE PROCEEDING the FCC Rules. These limits are designed to provide reasonable protection Please keep this manual in a safe place for future reference.
-
Page 3: Table Of Contents
Contents Panel Description Front Panel...................................4 Rear Panel..................................5 Setup Part List..................................6 Setup Guide..................................7 Power Supply................................8 Connections Connecting a pair of Headphones..........................9 Connecting an Audio Equipment..........................9 Connecting an MP3/CD..............................9 Connecting a Computer..............................9 Listening to the Demo song ...........................10 Adjusting the Volume ............................10 Playing Voices Selecting a Voice................................10... -
Page 4: Panel Description
Panel Description Front Panel VOICE TEMPO VOICE Piano EPiano Harpsic MBox Marimba PercOr ChurOr2 RockOr Harmnic StStr2 ChoAah SopSax PanFl DEMO Piano 2 EPiano 2 Clavi Vibraph DrawOr ChurOr ReedOr Acordio StStr SynStr SweetTp TenoSax Strings Lower ON/OFF VOLUME FUNCTION VOICE DEMO Key 1. -
Page 5: Rear Panel
Panel Description TEMPO METRONOME REVERB CHORUS TOUCH Strings Lower ON/OFF DEMO BEEP 10. METRONOME Key 13. TOUCH Key Hold down the [ FUNCTION ] button and press the Hold down the [ FUNCTION ] button and press the [ ON/OFF ] key to turn the metronome ON or OFF. key to select different touch response level. -
Page 6: Setup
Setup This section contains information about setting up your instrument and preparing to play. Please go through this section carefully before turning the power on. Part List Piano Cabinet Before you proceeding to assemble the stand, get a Philip's Support Plate screwdriver (not supplied). -
Page 7: Setup Guide
Setup Setup Guide A. Fix and well tighten the left and right side boards [4] & [5] to the Support Plate[2] with Screw CM6*50mm(4pcs) [7] and nut M6 [10] . The screw Cover(4pcs) [8] above Screw CM6*50mm (4pcs) [7]. Nut M6(4) Screw CM6*50mm [7] Screw Cover [8] B. -
Page 8: Power Supply
Setup Power Supply Make sure that the piano is turned off. Before you switch your piano on or off, turn down the volume of piano and any connected audio equipments first. Connect the AC adaptor to the power supply jack. Plug the AC adaptor into an AC outlet. -
Page 9: Connections
Connections Connecting a pair of Headphones A standard pair of stereo headphones can be plugged in here for private practice or late-night playing. Jack1: When a pair of headphones is plugged into the Jack 1, the Headphone Jack 1 sound can be heard from headphones and speakers of the instrument. -
Page 10: Listening To The Demo Song
Listening to the Demo song TOUCH DEMO BEEP While holding down the [ FUNCTION ] button, press DEMO key to start the demo song playing. Press it again to stop playing. The keyboard would be disabled when the demo song is playing. DEMO BEEP Adjusting the Volume... -
Page 11: Playing Two Voice Simultaneously
Playing Voices Playing two Voice Simultaneously You can play two voices synchronously on the keyboard by selecting a VOICE Marimba PercOr ChurOr2 RockOr ChoAah SopSax PanFl VOICE Piano EPiano Harpsic MBox Harmnic StStr2 DEMO Piano 2 EPiano 2 Clavi Vibraph DrawOr ChurOr ReedOr... -
Page 12: Digital Effects
Digital Effects Reverb and Chorus Effect While holding down the [ FUNCTION ] button, press the corresponding METRONOME REVERB CHORUS ON/OFF keys in REVERB and CHORUS effect area to select the voice effect type. Reverb Value: 0: OFF 1: Room REVERB CHORUS 2: Small Hall... -
Page 13: Tempo
Tempo While holding down the [ FUNCTION ] button, press corresponding keys in TEMPO selection area. You can change the tempo by input number or using tap tempo, or press tempo +/- keys to change current tempo. TEMPO METRONOME ON/OFF Notes: 1. -
Page 14: Troubleshooting
Troubleshooting Possible Cause and Solution Problem This is normal and is no cause for alarm. The speakers produce a “pop” sound whenever the power is turned ON or OFF. Make sure the voice volumes are set at appropriate levels. No sound when the keyboard is played. Using a mobile phone in close proximity to the instrument When using a mobile phone, noise is produced. -
Page 15: Midi Implementation List Chart
MIDI Implementation List chart... - Page 16 DP250_G08...


Need help?
Do you have a question about the DP250 and is the answer not in the manual?
Questions and answers