Advertisement
Quick Links
Advertisement

Related Manuals for Medeli DP720


Summary of Contents for Medeli DP720
- Page 1 DP720 DIGITAL PIANO OWNER’S MANUAL...
- Page 2 INFORMATION FOR YOUR SAFETY! THE FCC REGULATION WARNING (for USA) PRECAUTIONS PLEASE READ CAREFULLY BEFORE PROCEEDING This equipment has been tested and found to comply with the limits for a Class B digital device, pursuant to Part 15 of Please keep this manual in a safe place for future reference. the FCC Rules.
- Page 3 Contents Setup String Resonance ...............24 Component Guide..............4 Soft Pedal................24 Freeze.................25 Setup Guide................4 Metronome Beat..............25 Panel & Display Description Fade Time................25 Front Panel................7 MIDI Out Channel...............25 LCD Display................8 Song Looping..............25 Auto Power Off..............25 Connections................9 System Time...............26 Factory Reset..............26 Power Supply..............10 Performance Memory Adjusting the Master Volume...........10 Registering the Panel Settings..........27 Recalling the Memory Settings...........27...
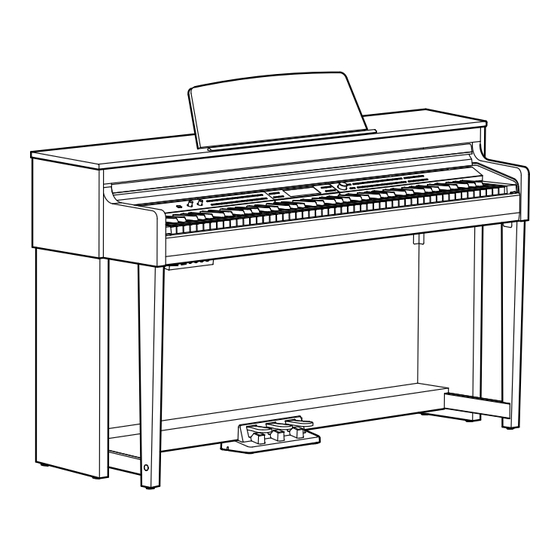
- Page 4 Setup This section contains information about setting up your instrument and preparing to play. Please read through this section carefully before turning the power on. Component Guide Check that all the parts listed below are included before proceeding to the Setup Guide. Setup Guide To assemble the stand, you will need a Phillip's screwdriver (not supplied).
- Page 5 Setup A. Put the “pedal box” between the “left and right stand components.” Use “Screws 6x50PA (4pcs)” to stablize the “left and right stand components” onto to the pedal assembly, then cover with “Screw caps (6pcs)”, as shown in the picture. 11 10 B.
- Page 6 Setup D. Connect the “pedal cable” to the pedal jack at the bottom rear of the Piano. Then connect the power cable to the power jack, and plug the other end into an AC outlet. At this point the Piano is fully assembled and you can turn on the power. AC power adaptor...
- Page 7 Panel & Display Description Front Panel 1. [POWER] Switch 13. [MAIN C] Button Turn the power on or off. In style mode: play the Main pattern C. In song mode: play all songs in a loop. 2. [VOLUME] Knob Adjust the master volume. 14.
- Page 8 Panel & Display Description 26. Data Dial 32. VOICE Select Buttons 37. [LOWER] Button Adjust the parameters. Directly select a preset voice. Press it to turn the Lower function Press a button once to select the first on or off. 27.
- Page 9 Connections 1. USB Jack 4. DC IN Jack Use a standard USB cable to connect the USB jack of the Connect the specified power adaptor. instrument to the USB port of a computer. With USB, you can save a keyboard performance to the computer or use 5.
- Page 10 Power Supply Before connecting the power supply, please set the [POWER] switch to “OFF” and set the master volume level to minimum. Connect the power adaptor to the DC IN jack on the rear panel. Plug the power adaptor into an appropriate AC outlet. Press the [POWER] switch.
- Page 11 Playing the Demos The instrument features several professional demos. Please refer to the Demo List for details. Start playing the demo. Press the [DEMO] button to enter Demo mode and start playing the demos in a continuous loop. The LCD shows the current demo number and name.
- Page 12 Playing the Voices Playing Two Voices Simultaneously The Dual function allows two different voices to be layered together, creating a more full and rich sound. Turn this function on and select a voice for the dual voice "R2". Turn on the dual function. Press the [DUAL] button to turn on the Dual function.
- Page 13 Playing the Voices Lower Split The key that splits the keyboard into the left and right hand areas is called "Lower Split". The default lower split is F#3 (34), however, you can assign it to any other key. Please refer to the Function Menu for details. Notes: 1.
- Page 14 Twinova The Twinova function splits the keyboard into two areas with the same pitch and voice, for the convenience of playing together with a friend or instructor. Turn on the Twinova function. Press the [TWINOVA] button to turn on the function. The default split point is E3.
- Page 15 Auto Accompaniment The auto accompaniment function puts a full backing band at your fingertips. All you have to do is to play chords with your left hand, and the accompaniment will automatically play along, following the chords you play. With auto accompaniment, even a solo performer can enjoy the experience of playing with a full band or orchestra.
- Page 16 Auto Accompaniment Accompaniment Variations Specially created variation patterns can be added into the accompani- ment, making your performance more professional and personalized. INTRO The Intro is the opening section of a song. When the Intro pattern is finished, it will automatically shift to the selected Main section. The length of the Intro section differs depending on the selected style.
- Page 17 Auto Accompaniment Single Finger Single-finger makes it easy to produce major, seventh, minor and minor seventh chords by pressing a minimum number of keys on the auto accompaniment section. Multi-finger Multi-finger allows you to play chords in normal fingering. Try playing the 32 types of C chords listed on the right.
- Page 18 Auto Accompaniment One Touch Setting When One Touch Setting is switched on, you can instantly recall all auto accompaniment related settings including voice selection and digital effects, all with the single touch of a button. Turn on the One Touch Setting function. Press the [O.T.S.] button to turn on the function.
- Page 19 Mixer The Mixer function allows you to separately adjust the volume of each track, so as to keep an appropriate volume balance. Enter the Mixer menu. Press the [MIXER] button to enter the Mixer menu. The LCD shows the current parameter. Select a parameter.
- Page 20 DSP Effect The DSP effects will add ambiance and depth to your performance in a variety of ways. They can be set to simulate sound from a real environment, making your tone more crystal and strong, or even give you distortion for a rougher edge. Experiment with the various effects to find the ones that work best for you.
- Page 21 Harmony The harmony function will automatically add harmony effect to the notes you play in the right hand area, enriching your performance with more harmonic expression. Playing with Harmony Press the [HARMONY] button to turn on the function. The button LED lights up.
- Page 22 Function Menu Enter the function menu. Press the [FUNCTION] button to enter the function menu. The LCD shows the current parameter. Adjust the settings. Use the data dial to select a parameter. Use the [+/YES]/[-/NO] buttons to change the setting of the selected item. Press [+/YES] and [-/NO] at the same time to restore the default setting.
- Page 23 Function Menu Tune This function adjusts the pitch of the entire keyboard in 2-cent incre- ments over a range of ±50 (100 cents). In the function menu, use the data dial to select “TUNE”. Use the [+/YES]/[-/NO] buttons to change the tune value. Octave This function will shift the pitch of the specified voice layer up or down by one octave.
- Page 24 Function Menu Harmony Type In the function menu, use the data dial to select “HARMONY”. Use the [+/Yes]/[-/No] buttons to select a harmony type. Detailed harmony types: Harmony Type LCD Display Duet Duet Trio Trio Octave Octave Country Duet CountryDuet Block Block 4 Close 1...
- Page 25 Function Menu Freeze When Freeze function is in use, the selected parameter setting will remain unchanged when a performance memory is recalled. In the function menu, use the data dial to select “FREEZE”. Use the [+/YES]/[-/NO] buttons to select a parameter. Note: The setting will be usable only when Freeze function is in use.
- Page 26 Function Menu System Time You may want to set the correct system time, as it will appear on files saved to a USB flash drive and other applications. In the function menu, use the data dial to select “YEAR” / “MONTH”...
- Page 27 Performance Memory This function is designed to make your performance easy and efficient. It allows you to save virtually all panel settings to a single performance memory for instant recall. Note: To reset the performance memory to factory default, press and hold both the [STORE] and [M1] buttons, then turn on the power.
- Page 28 Song Recording You can record your performance in two ways: MIDI recording and Audio recording. MIDI Recording In MIDI recording, you can record and save your keyboard performance as a user song on the instrument. You can then play it back and save it to a USB flash drive.
- Page 29 Song Recording Parameter LCD Display Range Record Type Setting Record Type: MIDI, MP3 MIDI Recording Channel 1 Ch1:R1 On, Off MIDI Recording Channel 2 Ch2:R2 On, Off MIDI Recording Channel 3 Ch3:L On, Off MIDI Recording Channel 4 Ch4:MIDI Ch4 On, Off MIDI Recording Channel 5 Ch5:MIDICh5...
- Page 30 Audio Recording Audio recording will record your performance and save it to a USB flash drive as an MP3 file. During recording, the sounds and effects you hear from the instrument will all be recorded. Voice Grand Piano 1 Connect a USB flash drive to the instrument, then wait until the USB indicator appears on the LCD.
- Page 31 Song The instrument features several complete piano songs. Please refer to the Song List for details. Play the Songs Press the [SONG] button to enter Song mode. The LCD shows the current song number and name. Use the data dial or [+/YES]/[-/NO] buttons to select a desired song. Press the [START/STOP] button to start or stop song playback.
- Page 32 Connecting USB Flash Drive The instrument recognizes USB flash drives (32M to 128G) in FAT32 format. It does not support multi-partitioned USB flash drives. We recommend formatting the USB flash drive on the instrument before using. Note: A USB flash drive in FAT32 format supports up to 512 files under its root directory.
- Page 33 MIDI The MIDI function will expand your musical possibilities. What's MIDI? MIDI (short for Musical Instrument Digital Interface) allows a wide variety of electronic musical instruments, computers and other related devices to connect and communicate with one another. MIDI carries event messages that specify notation, pitch and velocity, controls signals for parameters such as volume, vibrato, audio panning, and programs change information to change the voice selections.
- Page 34 Specifications Keyboard & Display Keyboard 88 Graded Hammer-Action Keys Touch Response 6 types, Off Display Multi-functional LCD Voices Polyphony (max.) Voices 750 panel, 13 drum kits Layer Left, Right1, Right2 Split Duo (Twinova) Styles Styles 240 presets Style Control Start / Stop Sync start Sync stop Intro 1 / Ending 1...
- Page 35 Specifications Connections Interaction & Expansion USB MIDI, USB Audio, Bluetooth External Drive USB flash drive (128G max) Microphone Yes (Mic effect:12 types) Phones 2 Standard Stereo Pedals Sustain, Soft, Sostenuto MIDI In, Out USB Audio & MIDI Input Standard Stereo Output Standard Stereo Power Supply...
- Page 36 Voice List Voice Name LCD Name Clavi 1 Clavi 1 Piano Wah Clavi 1 Wah Clavi 1 Acoustic Grand Piano 1 Grand Piano 1 Clavi 2 Clavi 2 Acoustic Grand Piano 2 Grand Piano 2 Wah Clavi 2 Wah Clavi 2 Bright Acoustic Piano (wide) 1 Bright Pno/Wide 1 Massiness Electric Piano...
- Page 37 Voice List Organ 2 Organ 2 Steel Guitar 1 Steel Guitar 1 Organ 3 Organ 3 Jazz Guitar 1 Jazz Guitar 1 Reed Organ 1 Reed Org 1 Clean Guitar 1 Clean Guitar 1 Puff Organ 1 Puff Org 1 Steel Guitar 2 Steel Guitar 2 Dark Drawbar Organ...
- Page 38 Voice List Overdriven Jazzy Guitar Over Jazzy Gt Strings & Brass 2 Strings&Brass 2 Distortion Jazzy Guitar Dist Jazzy Gt Strings & Flute Strings & Flute Dark Overdrive Guitar Dark Over Gt Strings & Oboe Strings & Oboe Bright Overdrive Guitar Bright Over Gt Arco Strings 1 Arco Strings 1...
- Page 39 Voice List Tuba Tuba Bright Brass Section 3 Bright Brass 3 Trumpet 2 Trumpet 2 Synth Brass 3 Synth Brass 3 Trombone 2 Trombone 2 Solo Brass 2 Solo Brass 2 Muted Trumpet 2 Muted Trumpet 2 Soft Brass Section 3 Soft Brass 3 Bright Trombone1 Bright Trombone1...
- Page 40 Voice List Warm Piccolo Warm Piccolo EchoBell 1 EchoBell 1 Slow Piccolo Slow Piccolo SynCalliope Soft 2 SynCaliop Soft 2 Dark Flute Dark Flute Soft Sine 2 Soft Sine 2 Bright Flute Bright Flute Jazz Lead Jazz Lead Chorus Flute Chorus Flute Soft Big Lead 2 Soft Big Lead 2...
- Page 41 Voice List Bright Cry Eyes Bright Cry Eyes New Age&Bowed Pad 1 NewAge&Bow Pd 1 Square Cry Eyes Square Cry Eyes New Age&Bowed Pad 2 NewAge&Bow Pd 2 Soft Stardust 1 Soft Stardust 1 Halo Pad 1 Halo Pad 1 Soft Stardust 2 Soft Stardust 2 Halo&Bowed Pad...
- Page 42 Voice List Bird Tweet 1 Bird Tweet 1 Vibraphone 3 Vibraphone 3 Music Box & Flute Music Box&Flute Horse Gallop Horse Gallop Marimba 1 Marimba 1 Bird Tweet 2 Bird Tweet 2 Xylophone 1 Xylophone 1 Telephone Ring 1 Telephone Ring 1 Steel Drums 2 Steel Drums 2 Telephone Ring 2...
- Page 43 Style List English Name Rock&Roll 1 8BEAT & 16BEAT Rock Shuffle 8Beat Pop 1 Rock&Roll 2 Pop Rock 1 POP & BALLAD 8Beat Rock Sweet Ballad 8Beat Ballad Piano Ballad Pop Jazz BriPop 1 8Beat 1 6-8Ballad 8Beat Pop 2 Unplugged Pop Funk 1 Pop Dance 1...
- Page 44 Style List Hip Hop 1 Orchestra Swing Dangdut House 1 COUNTRY 6/8 Flipper House 2 Ballad Country 1 New Age Pop Dance 2 70's Country Rock Tarantella Down Beat Ballad Country 2 Scottish Progressive House Modern Country 1 Norteno Dubstep Dixie Chicks PIANIST Techno 2...
- Page 45 Song List English Name LCD Name Minuet In D Major Minuet in D Major Inquietude Inquietude FOLK & COUNTRY Red River Valley Red River Valley Italian Polka Italian Polka Troika Troika Moment Musical Moment Musical Oh! Susanna! Oh! Susanna! Prelude In C-Sharp Major Prelude in C-Sharp Maj Wave Of The Danube Wave of Danube...
- Page 46 Chord List...
- Page 47 MIDI Implementation Chart...
- Page 48 DP720_OM05EN...
Need help?
Do you have a question about the DP720 and is the answer not in the manual?
Questions and answers