Table of Contents
Advertisement
Jeep Wrangler
i509-WRA-JK
9" Restyle Installation Manual
˜ Model: Wrangler JK
˜ Model Year: 2011-2018
* The specified vehicles have been tested and have met compatibility specs at the time of testing. Compatibility is
not guaranteed if the manufacturer has made production changes to the listed vehicles above.
Warning: Before you begin wiring, remove the ground wire from the negative
terminal of the battery. Failing to do so can lead to electric shock, injury or damage
to equipment.
Introduction
˜ Congratulations on purchasing the i509-WRA-JK. This installation manual is designed to take you through the
step-by-step installation of the i509-WRA-JK into a 2011-2018 Jeep Wrangler. Please familiarize yourself with
the owners manual and if you still have additional questions please call 1-800-TECH-101.
Note:
˜ Design and specifications are subject to change without notice for improvement.
To Ensure Safe Use, Always Follow These Precautions
˜ The installation of this product requires specialized skills and experience. We recommend that you have the
product installed by an Alpine authorized dealer.
˜ Before you use this product, be sure to carefully read this installation manual and the separate user's manual
so that you can use the product correctly. Alpine Electronics bears no responsibility for problems that arise as
a result of failure to follow the instructions in the manuals.
˜ This manual includes a number of symbols that are intended to help you use the product safely, to prevent
harm to you and others, and to protect against damage to property. These symbols and their meanings are
listed below. Make sure you fully understand these symbols before you begin reading the main text.
Explanations of Injury and Damage That May Result from Incorrect Use
Ignoring the content marked by this indication and using the product incorrectly is
Warning
expected to lead to death or serious injury.
Ignoring the content marked by this indication and using the product incorrectly is only
Caution
expected to lead to injury or property damage.
i509-WRA-JK
Model
Jeep
Wrangler JK
Jeep Wrangler
20220404v1
˜ 1/22
Year
2011 - 2018
Advertisement
Table of Contents

Subscribe to Our Youtube Channel
Related Manuals for Alpine i509-WRA-JK


Summary of Contents for Alpine i509-WRA-JK
- Page 1 ˜ Before you use this product, be sure to carefully read this installation manual and the separate user's manual so that you can use the product correctly. Alpine Electronics bears no responsibility for problems that arise as a result of failure to follow the instructions in the manuals.
- Page 2 The installation and wiring of this product re- wheel, gear shift, or the like; or pose a threat quires specialized skills and experience. Have to passengers. Doing so could lead to an ac- the product installed by an Alpine authorized cident or injury. dealer.
- Page 3 7mm Sockets #2 Phillips Screwdriver 10mm Sockets Extension Ratchet Wire Cutters Air Saw T20 Torx Digital Multimeter Accessory List Installation Kit Parts i509-WRA-JK Radio Dash Bezel Display Power/Key Harness Side Mounting Brackets Microphone Display Mounting Brackets Source Unit HDMI Bracket...
- Page 4 Jeep Wrangler i509-WRA-JK 20220404v1 ˜ 4/22 Accessory List Head Unit Box Parts (i509) i509 Display Unit i509 Source Unit USB Extension Cable AUX/Pre Out Harness GPS Antenna Documents OM QR Card Alpine QRG Navigation Registration Card Direct Camera Adapter Display Cable...
- Page 5 Jeep Wrangler i509-WRA-JK 20220404v1 ˜ 5/22 Programming the iDatalink Maestro Module INSTALL THE WEBLINK PLUG-IN REGISTER A WEBLINK ACCOUNT Go to: Go to: Sign Up and complete the registration process. idatalinkmaestro.com and follow the installation steps. The Maestro module must be programmed specifically for each vehicle A confirmation email will be sent to you requiring validation.
- Page 6 Jeep Wrangler i509-WRA-JK 20220404v1 ˜ 6/22 Component Locations IMPORTANT: Follow the recommended component location shown below. Failure to do so, will result in poor GPS performance. Add-on Microphone iDatalink Maestro Module SiriusXM Tuner (Sold Separately) Jeep SINCE 1941 Jeep GPS Antenna Installation IMPORTANT: Follow the GPS antenna installation procedure shown below.
- Page 7 Jeep Wrangler i509-WRA-JK 20220404v1 ˜ 7/22 Factory Unit Disassembly Process Remove the knee cover panel and extract (2) 7mm DISCONNECT THE BATTERY BEFORE CONTINUING. FAILURE TO DO SO WILL screws located to the right and left sides of the steering wheel column.
- Page 8 The factory dash panel needs to be trimmed to Remove the vents from the radio section on the allow the new i509-WRA-JK bezel to fit into place. OEM dash panel by pressing down on the lock tab Remove the highlighted area by cutting along the and turning right.
- Page 9 Jeep Wrangler i509-WRA-JK 20220404v1 ˜ 9/22 Installation Instructions DISCONNECT THE BATTERY BEFORE CONTINUING. FAILURE TO DO SO WILL Put monitor face down on a soft, scratch free DISABLE MANY FEATURES. surface and attach Display Monitor Brackets using Attach the modified panel using the factory screws.
- Page 10 Jeep Wrangler i509-WRA-JK 20220404v1 ˜ 10/22 Removing the Uconnect® (only for vehicles with factory Uconnect®) Remove the factory climate control panel. It is Disconnect the 24pin OEM connector. clipped on and can be removed with a panel removing tool. Extract the (2) 7mm bolts from Uconnect®...
- Page 11 Jeep Wrangler i509-WRA-JK 20220404v1 ˜ 11/22 Mounting Brackets DISCONNECT THE BATTERY BEFORE CONTINUING. FAILURE TO DO SO WILL DISABLE MANY FEATURES. IMPORTANT: During the research and development of this product it was discovered that mounting tolerance may vary from the vehicle’s trim level to year built. We have added a 1mm tolerance to the mounting brackets to compensate for such variance in mounting tolerance.
- Page 12 Jeep Wrangler i509-WRA-JK 20220404v1 ˜ 12/22 Bezel Wiring Diagram 20 Pin Harness (Connect to i509) 8 Pin Harness 8 Pin Harness...
- Page 13 Jeep Wrangler i509-WRA-JK 20220404v1 ˜ 13/22 i509-WRA-JK Wiring Diagram AMPLIFIED VEHICLES Antenna To Vehicle Connectors WARNING! To Optional To Dash Cam Failure to follow this procedure will Cameras See Page 10 result in no audio from Navigation and Power/Speaker Antenna To OBDII Connector Bluetooth sources.
- Page 14 Apple. Third party adapters may not work iPhone i509-WRA-JK HDMI Usage With An Android Phone To HDMI In Most HDMI devices use copyright protections which means it can’t be output from the Source Unit (a phone would be an example of this).
- Page 15 Jeep Wrangler i509-WRA-JK 20220404v1 ˜ 15/22 i509-WRA-JK Wiring Diagram USB cable 2.4A (Black) To USB ash drive, iPhone or Android smartphone. USB cable 1.5A (Gray) To iPhone or Android smartphone (For charging only). REAR CAMERA To Rear camera FRONT CAMERA...
- Page 16 Jeep Wrangler i509-WRA-JK 20220404v1 ˜ 16/22 Wire Harness Pin Outs Radio Main Cam Aux Data Radio I/O Blue 22AWG Red 22AWG 21 22 Orange 22AWG Black 22AWG Red 20AWG White/Grey 22AWG Blue/White 22AWG 19 20 Orange/White 22AWG Orange/White 22AWG Yellow/Blue 22AWG...
- Page 17 To HCE-TCAM1-WRA This connection goes to the direct video input of the head unit through the adapter. If you do not make this connection there will be no video to your i509-WRA-JK i509 JK Source Unit CAMERA DISPLAY PREOUT EX KEY...
- Page 18 Jeep Wrangler i509-WRA-JK 20220404v1 ˜ 18/22 Connection Of DVR-C320R/C310R (Sold Separately) Hardwiring Cable DVR-C320R/C310R Rear Camera Rear Camera Extension Cable Rear Camera Cable R Cam Dash Cam Data Lin Cable Dash Cam Video In F Cam i509 Source Unit Not Used...
- Page 19 Jeep Wrangler i509-WRA-JK 20220404v1 ˜ 19/22 Steering Wheel Configuration Factory Option Phone Voice Seek Up Volume Up Source Preset Up Volume Down Seek Down Button Press Once Press And Hold Volume Up Volume + None Volume Down Volume - None...
- Page 20 Jeep Wrangler i509-WRA-JK 20220404v1 ˜ 20/22 Setting Up Advanced Camera Features Once in the setup menu (see page 21) select FUNCTION and then CAMERA. Select CAMERA 2 SETUP. The camera 2 input needs to be set to FRONT or SIDE. This will let the Maestro module know the second camera is active and that will enable the CAMERA SETTINGS in the Maestro Setup Menu.
- Page 21 Set Up Guide Turn the vehicle’s Ignition switch to ACC. Turn ON the i509-WRA-JK by pressing any key. To get into the settings the parking brake sequence needs to be done. Engage the parking brake, release the parking brake, and engage the parking brake again.
- Page 22 Jeep Wrangler i509-WRA-JK 20220404v1 ˜ 22/22 Troubleshooting Guide Continued Symptom Possible Cause Remedy Incorrect serial number was used Flash Maestro with correct serial number. when flashing maestro. 4 pin Maestro data cable is Check for proper connection or disconnected or damaged.
- Page 23 33/4 Rama 9 road, Huay Kwang, Bangkok, 10310, Thailand Phone 03-8787-1200 Phone +66 (2) 090 9596 Ohmstrasse 4, 85716 Unterschleissheim, Germany Phone: +49 (0) 89-32 42 640 For contact information on your respective country, please visit www.alpine-europe.com. Designed by ALPS ALPINE Japan 68-41657Z86-A (Y_A5) Model: Music Halo...
- Page 24 You will be informed of product and software updates (if applicable), special promotions, news about Alpine. Merci d’avoir acheté ce produit Alpine. Nous vous invitons à consacrer un moment à la protection de votre achat en enregistrant votre produit dès maintenant à l’adresse suivante : www.alpine-usa.com/registration.
-
Page 25: Table Of Contents
English CONTENTS Displaying Device Information .........17 Function Setup Operating Instructions Apple CarPlay Setup .............18 Adjusting the Media Level ........18 Adjusting the Phone Call Volume ......18 PRECAUTIONS Adjusting the Ringtones and Alerts Level ..18 IMPORTANT INFORMATION ..........7 Adjusting the Notifications and Guidance Level ................18 WARNING Adjusting the Voice Recognition Level ....18... - Page 26 Setting the Phonebook Name Order ....23 About/Software Update iLX-507/iLX-F509/ Setting the Phonebook Calendar .......23 iLX-F511/i509 ..............30 Bluetooth Audio Setup ..........23 Displaying the Product Information....30 Adjusting the Bluetooth Audio Volume ...23 Updating Software Version ........30 Factory Audio Setting ..........23 Dedicated Tuning According to Your Car Setting the OEM SXM ..........23 (Car by Car Update) ..........30 Setting the OEM Media ..........24...
- Page 27 Forced Analog Mode............41 Setting Block Explicit ..........52 About Ballgame Mode Setting Tune Start ............52 (HD Radio™ Mode only) ...........41 Resetting History ............52 Displaying Radio Text (HD Radio™/ Subscribing to SiriusXM by Phone ......53 RBDS FM Radio mode only) ........42 Displaying the System Information ......53 About the Feature Logos ..........42 Receiving Support by Phone ........53 Setting Your Location...........53...
- Page 28 Switching Display Modes ...........61 Installation and Camera Operation (Optional) Connections Rear Camera Operation ..........62 WARNING ............75 Displaying the rear view video while the CAUTION............75 car is in reverse ............62 Precautions ............. 76 Displaying the Camera Image from the Accessory List ..............76 HOME screen ............62 Installation ...............77...
-
Page 29: Operating Instructions
They contain instructions on how to use this Any function that requires your prolonged attention should product in a safe and effective manner. Alpine cannot be only be performed after coming to a complete stop. Always responsible for problems resulting from failure to observe stop the vehicle in a safe location before performing these the instructions in this manual. -
Page 30: Caution
Doing so may cause heat to build up inside and may result Failure to do so may cause personal injury or damage to the in fire. product. Return it to your authorized Alpine dealer or the nearest Alpine Service Center for repairing. USE THIS PRODUCT FOR MOBILE 12V APPLICATIONS. -
Page 31: Notice
If you have problems, do not attempt to repair the unit • Avoid usage or storage in the following locations: yourself. Return it to your Alpine dealer or the nearest Anywhere in the car exposed to direct sunlight or high Alpine Service Station for servicing. - Page 32 • The Bluetooth® word mark and logos are registered trademarks owned by the Bluetooth SIG, Inc. and any use of such marks by ALPS ALPINE Co., LTD. is under license. • The Wi-Fi CERTIFIED™ Logo is a registered trademark of Wi-Fi Alliance®.
-
Page 33: Getting Started
Getting Started Power indicator (HOME) button Displays the HOME screen. Location of Controls The Sound Setup screen is displayed while the HOME screen is displayed. ■ Press and hold this button for at least 2 seconds to turn iLX-507 the power off. (CAM) button Displays the image of Camera2 (Front/Side/Other) or Camera1 (Rear). -
Page 34: Turning Power On Or Off
To cancel Display OFF mode, press and hold Turning Power On or Off (MUTE) button for at least 2 seconds or touch the screen. When the ignition key is turned to ACC or ON, the opening screen will be automatically displayed. •... -
Page 35: Switching Sources
■ Normal mode screen example Switching Sources Press the (HOME) button. The HOME screen is displayed. ■ Enhanced Text mode screen example Touch your desired source icon. • You can change the audio source icon location on the screen. For details, see “Editing HOME screen” (page 29). Selecting an Item in a List To scroll through a list, perform the following operations. -
Page 36: About The Indicator Display
The Settings menu screen is displayed. connection is set to OFF.) Lights up when connecting a separately sold ALPINE KNOB (RUX-H02) via Bluetooth. You can use the RUX-H02 to adjust the volume level and sound quality (Bass Level, etc.) of this unit. For details, refer to the Owner’s Manual of RUX-H02. -
Page 37: Device Setup
Touch the required setting category on the Device Setup upper part of the Settings menu screen, and then touch the setting item. [Device] is selected on the Settings menu screen. Setting categories: ■ Device: See “Device Setup” (page 15) Device Setup Menu screen Function: See “Function Setup”... -
Page 38: Pairing The Bluetooth® Device
Hands Free1: The device is used as the first Device Name or Device Address hands-free phone or Android Auto. Connect or disconnect the selected device. For Hands Free2: The device is used as the second details, see “Connecting the Device Registered in hands-free phone or Android Auto. -
Page 39: Wi-Fi Setup
Wi-Fi Setup Setting the PIN Code [Wi-Fi] is selected on the Device Setup menu screen. You can set the PIN code for connecting with a Bluetooth compatible device. Setting the Wi-Fi Setting item: Bluetooth PIN Code Set to [On] when using Apple CarPlay or Android Auto with Touch [Bluetooth PIN Code]. -
Page 40: Function Setup
Function Setup Adjusting the Phone Call Volume Setting item: [Function] is selected on the Settings menu screen. Phone Calls ■ Setting level: Function Setup Menu screen 1 to 35 (Initial setting: 5) Touch [ ] or [ ] of “Phone Calls” to set the call volume level. -
Page 41: Android Auto Setup
Adjusting the Notifications and Android Auto Setup Guidance Level [Android Auto] is selected on the Function Setup Menu screen. Setting item: Notifications & Guidance Setting level: 1 to 35 (Initial setting: 10) Touch [ ] or [ ] of “Notifications & Guidance” to set the volume level for notifications and guidance. -
Page 42: Setting The Receiving Mode
Setting the Receiving mode USB Setup Receiving mode can be set for FM radio reception. [USB] is selected on the Function Setup Menu screen. Setting item: Receiving mode Setting contents: Hybrid (Initial setting) / Forced Analog Hybrid: Automatically switches to analog reception to reduce noise when there is a large amount of noise due to poor reception. -
Page 43: Ipod Setup
iPod Setup Setting the Auxiliary (AUX) Name [iPod] is selected on the Function Setup Menu screen. Set the display name of an external device. This name is displayed as a source name on the HOME screen or Audio screen. Setting item: AUX Name Setting contents: Off / Auxiliary (Initial setting) / Digital TV... -
Page 44: Hdmi Setup
Adjusting Image Contrast HDMI Setup Setting item: [HDMI] is selected on the Function Setup Menu screen. Contrast Setting contents: -15 to +15 (Initial setting: 0) Setting the HDMI Selector Set to [On] when the optional HDMI Selector is connected. Setting item: HDMI selector Touch [ ] (Off) or [... -
Page 45: Adjusting The Phone Call Volume
Adjusting the Phone Call Volume Bluetooth Audio Setup [Bluetooth Audio] is selected on the Function Setup Menu Setting item: screen. Phone Calls Volume Setting level: 1 to 35 (Initial setting: 5) Touch [ ] or [ ] of “Phone Calls Volume” to set the call volume level. -
Page 46: Setting The Oem Media
Adjusting the OEM SiriusXM Volume • Depending on the iDataLink module, this setting item may not be displayed or the setting contents may differ. Setting item: Volume Adjust Setting the Gauges Setting level: -14 to +14 (Initial setting: 0) The Gauges setting can be changed for the connected iDataLink module. -
Page 47: Dash Cam (Drive Recorder) Setup
Dash Cam (Drive Recorder) Setup Camera Setup [Dash Cam] is selected on the Function Setup Menu screen. [Camera] is selected on the Function Setup Menu screen. Display the Dash Cam Menu Setting the Reverse Camera (Camera 1) Set to [On] when the optional driver recorder is connected. Setting item: Set to [On] when the optional reverse camera is connected. -
Page 48: Camera Guide Setup
Select a guide to adjust by touching [ Camera Guide Setup Touch [ ], [ ], [ ] or [ ] to adjust the You can adjust the camera guide position. position of the guide. Setting item: Touch [Back] or [Close] to complete the Camera Guide Setup adjustment. -
Page 49: Setting Audio Mute On/Off While Backing Up
Adjusting Image Contrast System Setup Setting item: Contrast [System] is selected on the Settings menu screen. Setting contents: ■ -15 to +15 (Initial setting: 0) System Setup Menu screen Setting Audio Mute On/Off while Backing up The audio volume can be muted when the shift gear lever is set to the reverse (R) position. -
Page 50: Language Setup
Language Setup Setting the Home Screen Type [Language (Language)] is selected on the System Setup [Home Screen Type] is selected on the System Setup Menu Menu screen. screen. The Setup menu, feedback information, etc. for this unit can The Home screen can be changed to the Enhanced Text be changed to appear in the selected language. -
Page 51: Adjusting The Minimum Level Of Backlight
Adjusting the Minimum Level of Fuel Type Setting Backlight Set the Fuel type of your car. You can adjust the brightness of the backlight. This function Setting item: could be used, for instance, to change the screen brightness Fuel Type while traveling at night. -
Page 52: About/Software Update Ilx-507/Ilx-F509/ Ilx-F511/I509
You can view the version information of this product. Make note of this information and refer to it whenever you After the confirmation message appears, contact Alpine Tech Support or an Alpine-authorized dealer. touch [OK]. Setting contents: The confirmation screen appears. -
Page 53: Sound Setup
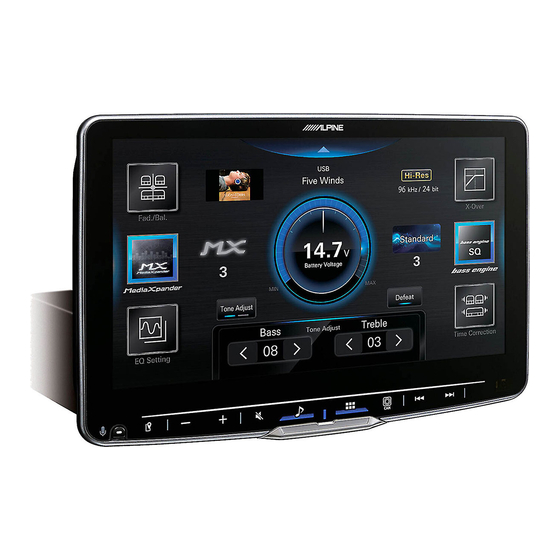
Sound Setup Setting the Media Xpander (MX) [Media Xpander] is selected on the Sound Setup Menu You can set up items related to the sound quality. screen. Media Xpander (MX) makes vocals or instruments sound Touch the upper central area [ ] of the Home distinct regardless of the music source. -
Page 54: Equalizer Presets (Preset Eq)
■ Basic EQ Touch [ ] or [ ] of “Q Factor” to select the bandwidth. Setting contents: Wide (Initial setting) / Medium / Narrow Repeat steps 3 to 7, and adjust all speakers. To store the adjusted setting value, touch and hold [Preset 1], [Preset 2], or [Preset 3] for at least 2 seconds. -
Page 55: Fader/Balance/Rear Speaker/Subwoofer Settings
Fader/Balance/Rear Speaker/ Time Correction Settings Subwoofer Settings [Time Correction] is selected on the Sound Setup Menu screen. [Fad./Bal.] is selected on the Sound Setup Menu screen. Before performing the following procedures, see “About Time Correction” (page 36). Correction mode Fader/Balance Image area Setting item: Setting the Fader/Balance Time Correction... -
Page 56: Crossover Settings (X-Over)
To store the adjusted setting value, touch and Crossover Settings (X-OVER) hold [Preset 1], [Preset 2], or [Preset 3] for at least 2 seconds. Before performing the following procedures, see “About the Crossover” (page 36). • Touch [Flat] to initialize all values. •... -
Page 57: Setting The Subwoofer
• When “Bass” and “Treble” are not displayed, touch [Subw.] to Defeat Setting switch to [Tone Adjust] mode. • Not available when “bass engine” is set. If Defeat is [On], Media Xpander, EQ Setting and "bass engine" functions are turned Off. This disables any settings made for these functions. -
Page 58: About The Crossover
This unit is equipped with an active crossover. The crossover damage to the speakers. limits the frequencies delivered to the outputs. Each For the recommended crossover frequencies of Alpine channel is controlled independently. Thus, each speaker speakers, refer to the respective Owner’s Manual. - Page 59 In other words, giving the front left speaker a time correction value of 5.1 ms makes it seem as if its distance from the listener is the same as the distance to the farthest speaker. Time correction eliminates the differences in the time required for the sound to reach the listening position.
-
Page 60: Apple Carplay (Optional)
Apple CarPlay (Optional) Using Voice Recognition function You can use the Siri function of your iPhone. To use this Apple CarPlay is a smarter, safer way to use your iPhone in function, set the Siri setting of your iPhone to ON. the car. -
Page 61: Android Auto (Optional)
Android Auto (Optional) Using Voice Recognition function You can use the Voice Recognition function of the Android Auto. What is Android Auto Android Auto brings your favorite smartphone apps into Press the button. one place, making it easier for drivers to access their The Voice Recognition mode screen is displayed. -
Page 62: Radio/Hd Radio™/Rbds
HD Radio Technology Radio/HD Radio™/RBDS Station Info. mode: Frequency/Station Name/Artist Name/Song Name The unit can receive HD Radio broadcasting signals based Increases frequency on digital radio broadcast standards, in addition to analog Touch and hold to change the frequency continuously. radio broadcasts using RBDS. -
Page 63: Presetting Stations Manually
Touch [ ], [ ] to change the radio frequency Receiving a Multicast (HD Radio™ up or down respectively. Mode only) In Manual mode, touch and hold to change the frequency continuously. Multicasting is the ability to broadcast multiple program streams over a single FM frequency. -
Page 64: Displaying Radio Text (Hd Radio™/ Rbds Fm Radio Mode Only)
USB Flash drive (Optional) Displaying Radio Text (HD Radio™/ RBDS FM Radio mode only) You can play back music files (MP3/WMA/AAC/FLAC/WAV/ Text messages from a radio station can be displayed. APE), video files (MP4/MOV/FLV/MKV) stored in a USB flash drive on the internal player of this system. Tune in a radio station that transmits text messages. -
Page 65: Playback
Displays the USB Setup Menu screen (page 20) Repeat Play Time Bar (Elapsed time/Total time for playing) Displays the search screen Touch [ ], [ ] or [ ] to select Repeat Play mode. Shuffle mode Repeat mode All files are repeatedly played back. Pause and Play Only the file currently playing is repeatedly File... -
Page 66: Searching For A Desired Song
USB Video Searching for a Desired Song This unit can make various searches using the search The video formats (USB Flash drive) supported by the unit function as shown below. are as follows. Using the Song/Artist/Album/Genre/Folder search mode’s – Supported Container: MP4/MOV/FLV/MKV individual hierarchy, you can narrow down your search as –... -
Page 67: Playback
Playback Repeat Play Press the (HOME) button and select USB Touch [ ], [ ] or [ ] to select Repeat mode. Play mode. The display shows the USB mode screen. All files are repeatedly played back. • When in USB Audio mode, touch [Music] to switch to USB Video mode. -
Page 68: Switching Display Modes
iPod mode on iPhone Switching Display Modes (Optional) You can switch the Display Mode while playing a Video File. Touch the Display Mode button. A separately sold Lightning to USB cable, etc., is required. Each time you touch, the Display Mode is switched. •... -
Page 69: Playback
Playback Searching for a Music File An iPhone can contain thousands of songs. For this reason, Press the (HOME) button and select iPod this unit can make various searches using the search mode. function as shown below. Using the Playlists/Artists/Albums/Podcasts/Audiobooks/ The display shows the iPod mode screen. -
Page 70: Repeat Play
SiriusXM Satellite Radio Repeat Play Operation (Optional) Touch [ ] to select Repeat Play mode. All Tracks All songs are repeatedly played back. SiriusXM Tuner operation: Single Track Only the song currently playing is When an optional SiriusXM SXV300G2 Connected Vehicle repeatedly played back. -
Page 71: Receiving Channels With The Siriusxm Tuner
Preset list Selecting the Channel Displays the preset stations with a short touch. Touch for at least 2 seconds to memorize the current Touch [ CH] or [CH station as a preset station. Channel is switched to the previous or next channel, Album art display and the channel selection screen is displayed, then the selected channel is displayed in the focus position. -
Page 72: Tuning Channels By Category
• The SiriusXM Radio ID does not contain the letters I, O, S, or Tuning Channels by Category • System Information on the Profiles/Setting screen can also be Channels are grouped into categories based on the type of used to view the Radio ID number. See “Displaying the System content heard on the channels. -
Page 73: Replay Function
Replay Function Listening to Related Channels In SiriusXM mode, you can pause, skip track and replay live You can quickly discover other channels that are related to Satellite Radio. the channel you are listening to. Touch [Related]. The Related Content screen appears. •... -
Page 74: Viewing Listening History
Setting the Sports Viewing Listening History Setting item: A list of up to the last 18 channels can be accessed easily. Sports Touch [OFF] or [ON] of “Sports”. Touch [Profiles/Settings]. The Profile screen appears. • The Team Notifications screen is displayed when you touch [TEAMS]. -
Page 75: Subscribing To Siriusxm By Phone
Subscribing to SiriusXM by Phone Banner advisory messages You can make a call to SiriusXM to subscribe if a hands-free If the banner below appears on the channel tile, follow the phone is connected to the unit. instructions. Unavailable: Touch [Profiles/Settings]. The channel that you have requested is not a valid The Profile screen appears. -
Page 76: Hdmi Device (Optional)
HDMI operation screen. • Not all devices with an HDMI output interface can be recognized by this unit. • Use only the Alpine Special HDMI connection cable. Press the (HOME) button to select HDMI. -
Page 77: Switching Display Modes
Alps Alpine reserves the right to change or modify any information or specifications without notice or obligation. • Notice that when you connect an iPhone 6s or later/Android smartphone with installed Android Auto App, the operation screen may differ from this section. -
Page 78: Before Using Bluetooth
Phone Book Before Using Bluetooth You can make a phone call from the Phone Book. Before using the hands-free phone/audio function, the Keypad screen following settings need to be made. Use to type a phone number. Set “Bluetooth” to [On] (page 17). Setup Displays the Phone Setup Menu screen (page 22). -
Page 79: Hanging Up The Telephone
Entering a Phone Number to Make a Call Hanging up the Telephone Touch [Keypad] on the Phone menu. Touch [ ] (End Call). The number input screen (Keypad) appears. The call finishes. Calling Making a phone call using the Phone Menu Making a phone call from the Recent Events list Touch [... -
Page 80: Changing The Voice Output
Touch the phone number. Changing the Voice Output The phone call is started. The voice output for calls is switchable between car • If there are no names in the list beginning with that letter, the speakers and the mobile phone speaker. next letter of the alphabet is searched. -
Page 81: Bluetooth Audio
Bluetooth Audio Playback If a Bluetooth compatible mobile phone, portable player, Press the (HOME) button and select etc. is connected by wireless, you can play back a song Bluetooth Audio mode. (operation is controllable from the unit). The display shows the Bluetooth Audio mode screen. •... -
Page 82: Shuffle Play
Switching the connecting Bluetooth Shuffle Play Device Touch [ ] to select Shuffle Play mode. If multiple Bluetooth devices are registered in this device, you can change the connection among the registered A Group is selected randomly and songs devices. Group in the Group are played back in order. -
Page 83: Auxiliary Device (Optional)
Auxiliary Device (Optional) WARNING It is dangerous for the driver to watch video while driving the vehicle. The driver may be distracted from looking ahead and an accident could occur. Install the unit correctly so that the driver cannot watch video unless the car is stopped and the parking brake is applied. -
Page 84: Camera Operation (Optional)
Camera Operation Displaying the Camera Image from the HOME screen (Optional) Press the (CAM) button. When an optional camera is connected, the view of camera video can be output to the monitor. The Camera view image is displayed. Rear camera, Front camera (or Side camera, etc.) can be Touch the screen when the image from the connected to this unit. -
Page 85: Adjusting The Caution Display Location
Adjusting the Caution Display About the Rear Camera Guide Location To display the guide, set “Guide Display ON/OFF Setting” (page 62) to On. Also, to adjust the guide, see Camera Guide Setup” (page 26). Touch the screen when the image from the camera is displayed. - Page 86 ■ ■ Distance guidance mark When there is a steep upward slope behind The distance guides represent the ground level distance the car (example) from the rear bumper. It is difficult to accurately estimate <Screen> the distance to objects above ground level. In the following example, the distance to A is 0.5 m and the distance to B is 1 m.
-
Page 87: Switching The Image Pattern For The Rear Camera
■ When there is a steep downward slope behind Front Camera Operation the car (example) <Screen> Displaying the Camera Image from the HOME screen Press the (CAM) button. The Camera view image is displayed. Touch the screen when the image from the camera is displayed. -
Page 88: About The Adjustment Of Guide Display On/Off Setting And Adjustment Of Caution Display Location
iDataLink Operation About the adjustment of guide display ON/OFF setting and adjustment of When the unit is connected to the car’s iDataLink module, Caution display location you can transfer and receive data between the car and the unit to check the car’s status, or to make various operations As with the rear camera, the front camera guide display ON/ from the unit. -
Page 89: About Parking Sensor Screen
■ iDataLink Function Screen example Vehicle Information screen example You can check for open doors, check the tire pressure, the ■ Climate screen example battery life, etc. for the vehicle. You can control the temperature inside the vehicle, etc. ■ iDataLink Setup screen example ■... -
Page 90: Factory Media Operation
Parking Sensor Camera interlock screen example Displays the iDataLink Setup Menu screen (page (Rear camera) 23). You can check for obstacles through an interlocked camera • For the basic operations on Factory Media mode, refer to image by connecting a Camera. “USB Audio”... -
Page 91: Dash Cam (Drive Recorder) Operation (Optional)
Operating Dash Cam (Optional) This product uses software that can be updated through a USB flash drive. Download the software from the Alpine Images from Dash Cam can be output to the monitor by website and update the product using the USB flash drive. - Page 92 What is AAC? WMA (USB Flash drive) AAC is the abbreviation for “Advanced Audio Coding, ” Sampling rates: 8 - 48 kHz and is a basic format of audio compression used by Bit rates: 8 - 385 kbps MPEG2 or MPEG4. AAC (USB Flash drive) What is FLAC? FLAC (Free Lossless Audio Codec) is an audio file codec...
-
Page 93: In Case Of Difficulty
(recorded). For example, music CDs use a then consult your authorized Alpine dealer. sampling rate of 44.1 kHz, so the sound is sampled (recorded) 44,100 times per second. The higher the... -
Page 94: If This Message Appears
Audio/Visual Unable to tune stations in the seek mode. • You are in a weak signal area. Unable to use connected USB device. – Make sure the tuner is in Seek mode. • An iPhone that is not supported by the unit is connected. •... -
Page 95: Specifications
USB1 SECTION Specifications USB requirements USB 2.0 Max. Power Consumption MONITOR SECTION 2,400 mA Screen Size 7” (iLX-507) USB Class USB (Mass Storage Class) 9” (iLX-F509) File System FAT16 / 32, exFAT 11” (iLX-F511) Number of Channels 2-Channels (Stereo) 9” (i509) Frequency Response* 5 –... - Page 96 Wi-Fi SECTION Frequency Ranges IEEE 802.11 b/g/n (2.4 GHz) IEEE 802.11 a/n/ac (5 GHz) Channels 1 – 11 ch (2.4 GHz) 149 – 165 ch (5 GHz) Security Protocols WPA3 / WPA2-PSK (TKIP, AES) GENERAL Power Requirement 14.4 V DC (11–16 V allowable) Operating temperature -4°F to +140°F (-20°C to + 60°C)
-
Page 97: Installation And Connections
Installation and Connections DO NOT USE BOLTS OR NUTS IN THE BRAKE OR Before installing or connecting the unit, please read the following and pages 7 to 9 of this manual STEERING SYSTEMS TO MAKE GROUND CONNECTIONS. thoroughly for proper use. Bolts or nuts used for the brake or steering systems (or any other safety-related system), or tanks should NEVER be used for installations or ground connections. -
Page 98: Precautions
If so, please Display unit ..................... 1 contact your authorized Alpine dealer for assistance. Quick Reference Guide ..............1set • Be sure to connect the speaker (–) leads to the speaker (–) terminal. -
Page 99: Installation
■ iLX-F509/iLX-F511 Installation Mounting (iLX-F509/iLX-F511 only) Consult “Position Adjustment and Mounting Dimensions of the Display” (page 78) in advance so that this unit does not obstruct your field of vision or impair driving when mounted. 0 - 30° Caution • Do not block the unit’s fan, thus preventing air circulation. -
Page 100: Mounting The Gps Antenna Inside The Vehicle
Mounting the GPS Antenna inside the Position Adjustment and Mounting vehicle Dimensions of the Display (iLX-F509/iLX-F511 only) Clean the mounting location. The mounting position of this unit’s Display can be adjusted Put on the GPS Antenna mounting plate. (front-back/angle). When mounting the Display, confirm the mounting position and mounting dimensions so that it Mount the GPS Antenna. -
Page 101: Adjusting The Display Position (Ilx-F509/Ilx-F511)
Adjustable Display angle Adjusting the display position (iLX-F509/iLX-F511) 0° -20° 45° Depending on the vehicle, the front-back display position differs. To adjust the front-back position, set the slider to the forward position. Default setting: Back position Remove 4 hexagon bolts from both sides of the unit. -
Page 102: Installation Example Using The Original Mounting Bracket
Installation example using the Adjust the up-down position of the Original Mounting Bracket Display unit (iLX-F509/iLX-F511) Adjust the up-down position of the display according to the Mount the original mounting bracket to the mounting position on the vehicle before mounting the unit using the supplied screws. -
Page 103: Install The Display Unit (Ilx-F509/Ilx-F511)
-60 mm CAUTION Do not adjust the display angle when the display unit is not fixed to the slider of the main unit using 4 screws (M5×8). Doing so may not turn power on. Sheet Rear Mount the Power Plate. (2×50 mm) Attach the Cover Rear to the rear of the Power Plate (Included) -
Page 104: Connections
Connections Connection 1 Antenna To SiriusXM Tuner MIC IN Microphone (included) STEERING REMOTE To steering remote control interface HDMI-REMO-OUT To HDMI Selector Interface (Brown) AUX-REMO-OUT To AUX device (TV Tuner, etc.) (Gray) REMOTE cable SUBW Power cable To input terminal of amplifier FRONT OUT when adding an external amplifier... -
Page 105: Connection 2
To steering remote control interface. GPS Antenna Receptacle For details about connections, consult your nearest Connect to GPS antenna (Included). Alpine dealer. AUX Input Connector HDMI-REM-OUT Lead (Brown) Input lead for AUX audio signal. Connect this lead to the remote input lead of your HDMI Selector Interface. - Page 106 We strongly recommend that the installation be performed by a trained, authorized Right Front (–) Speaker Output Lead (Gray/Black) Alpine dealer. Right Front (+) Speaker Output Lead (Gray) Right Rear (–) Speaker Output Lead (Violet/Black)
-
Page 107: If An Acc Power Supply Is Not Available
• Connect the ground lead securely to a bare metal spot (remove any paint, dirt or grease if necessary) of the car chassis. • If you add an optional noise suppressor, connect it as far away from the unit as possible. Your Alpine dealer carries various noise suppressors, contact them for further information. -
Page 108: System Example
System Example Connection of an iPhone ■ When connecting to an iPhone with a Lightning connector iPhone with a Lightning connector (sold separately) USB Connector 2.4A (Black) Lightning to USB Cable KCU-471i (sold separately) • Do not leave an iPhone in a vehicle for a long time. Heat and humidity may damage the iPhone, and you may not be able to play it again. - Page 109 Connection of an HDMI Device (iPhone with a Lightning connector) HDMI input connector Lightning Digital AV Adapter (Apple Inc., products) (sold separately) HDMI extension cable (sold separately) Lightning to USB Cable iPhone with a Lightning USB connector 2.4A (Black) KCU-471i (sold separately) connector (sold separately) Connection of an HDMI Device (Android device) HDMI input connector...
- Page 110 Connection of an HDMI Device (using HDMI SELECTOR INTERFACE) HDMI input connector REM Connector HDMI connection cable REMOCON IN MHL device (Brown/White) (sold separately) HDMI OUT HDMI-REMO-OUT (Brown) HDMI SELECTOR ■ INTERFACE MHL connection kit KCU-610MH KCX-630HD (sold separately) (sold separately) Micro USB conversion cable USB POWER HDMI IN 2...
- Page 111 Connection of an External Device To Video Output terminal (Yellow) AUX Input Connector External Device (sold separately) (Red) (White) To Audio Output terminal AV/RCA Interface Cable (4-pole mini AV plug to RCA Extension Cable (sold separately) 3-RCA) (sold separately) • You can change the name of an external device. For details, refer to “Setting the Auxiliary (AUX) Name” in the OWNER’S MANUAL.
- Page 112 Connection of a Camera Rear Camera (sold separately) REAR CAMERA Camera extension cable (included with direct rearview camera) Front or Side Camera (sold separately) CAMERA cable FRONT CAMERA Camera extension cable (included with direct frontview camera) CAMERA Connector Power Supply Connector Power cable Reverse Connect to the plus side of the car’s reverse lamp.
-
Page 113: Limited Warranty
To prevent lost packages, it is recommended to use a carrier that provides a tracking service. This Limited Warranty is provided by ALPINE ELECTRONICS OF AMERICA, INC., whose principal office is at 1500 Atlantic Blvd, Auburn Hills, MI 48326, U.S.A. - Page 114 20 cm ou plus entre le radiateur et le corps humain. Don’t forget to take a moment to protect your purchase by registering your product now at the following address: www.alpine-usa.com/registration. N’oubliez pas de consacrer un moment à la protection de votre achat en enregistrant votre produit dès maintenant à l’adresse suivante : www.alpine-usa.com/registration.
Need help?
Do you have a question about the i509-WRA-JK and is the answer not in the manual?
Questions and answers