Advertisement
Quick Links
Baby Trend, Inc.
13048 Valley Blvd.
Fontana CA 92335
1-800-328-7363
(8:00 a.m. ~ 4:30 p.m. PST)
www.babytrend.com
PY75XXXA_B_C_2L_040622.1_HB
Read all instructions BEFORE assembly and USE of product.
KEEP INSTRUCTIONS FOR FUTURE USE.
Lea todas las instrucciones ANTES de armar y USAR el
producto. CONSERVE LAS INSTRUCCIONES PARA USO FUTURO.
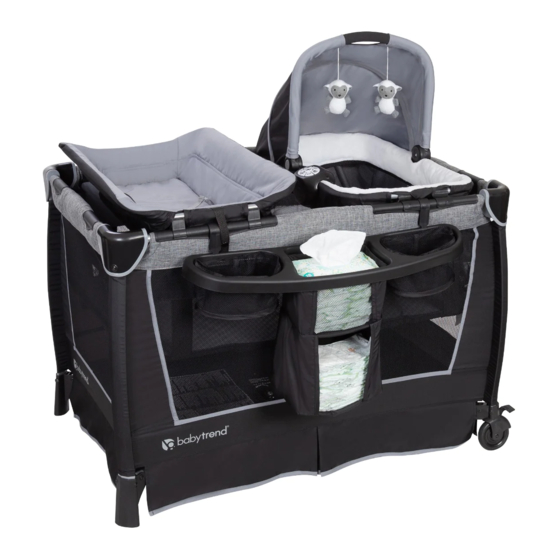
Simply Smart™ Nursery Center
Retreat Twins Nursery Center
Instruction Manual
Manual de Instrucciones
PY75XXXA/XXXB/XXXC
Advertisement

Related Manuals for BABYTREND Simply Smart PY75 A Series


Summary of Contents for BABYTREND Simply Smart PY75 A Series
- Page 1 Lea todas las instrucciones ANTES de armar y USAR el producto. CONSERVE LAS INSTRUCCIONES PARA USO FUTURO. Simply Smart™ Nursery Center Retreat Twins Nursery Center Instruction Manual PY75XXXA/XXXB/XXXC Manual de Instrucciones Baby Trend, Inc. 1-800-328-7363 13048 Valley Blvd. (8:00 a.m. ~ 4:30 p.m. PST) www.babytrend.com Fontana CA 92335 PY75XXXA_B_C_2L_040622.1_HB...
- Page 2 Customer Service Department can be contacted at 1 (800) 328-7363 Monday through Friday between 8:00 a.m. and 4:30 p.m. (PST). Return Authorizations are required prior to returning product(s) to Baby Trend®. Please visit http://babytrend.com/pages/ limited-warranty for complete warranty details. GARANTIA NO DEVUELVA SU PRODUCTO A LA TIENDA.
- Page 3 WARNING WARNING WARNING: Strangulation Hazard: Playard Warnings Playard Warnings WARNING: NEVER LEAVE INFANT IN PRODUCT WITH SIDES DOWN. Infant NEVER LEAVE INFANT IN PRODUCT WITH SIDES DOWN. Infant Failure to follow these warnings and the Failure to follow these warnings and the may roll into space between pad and loose mesh side may roll into space between pad and loose mesh side instructions could result in serious injury or death.
- Page 4 ADVERTENCIA WARNING • ALWAYS ensure that the playard, changing table, and • ALWAYS ensure that the playard, changing table, and Advertencias de Corralito: Advertencias de Corralito: ADVERTENCIA: the Rock-A-Bye Bassinet are safe by checking regularly, the Rock-A-Bye Bassinet are safe by checking regularly, La inobservancia de las La inobservancia de las before placing the child in it, check that every part is...
- Page 5 ADVERTENCIA ADVERTENCIA • NUNCA use bolsas de plástico para transporte u • NUNCA use bolsas de plástico para transporte u ADVERTENCIA: Vea el piso del parque Vea el piso del parque otras envolturas plásticas para cubrir el colchón no otras envolturas plásticas para cubrir el colchón no para bebés y las barras laterales para mensajes de para bebés y las barras laterales para mensajes de diseñadas o comercializadas para ese fin.
- Page 6 MAINTENANCE MANTENIMIENTO ASSEMBLY ENSAMBLAR IMPORTANT ! MAINTENANCE AND CLEANING To ensure safe operation of your product, To ensure safe operation of your product, INSTRUCTIONS: please follow these instructions carefully. Please keep these please follow these instructions carefully. Please keep these Use only household mild soap and warm instructions for future reference.
- Page 7 PARTS PIÈCES PARTS PIÈCES Check the parts list on the back cover to make sure you have all the parts for this model before assembling the playard. Revise la lista de piezas en la contraportada para asegurarse de que tiene todas las piezas para este modelo antes de armar el corralito.
- Page 8 ASSEMBLY ENSAMBLAR ASSEMBLY ENSAMBLAR TO ASSEMBLE PLAYARD • Las barandillas superiores deben estar completamente erguidas antes ARMADO DEL CORRALITO de bajar el centro. Levante una barandilla por vez, coloque una mano a cada lado de la barandilla y levante fuertemente. No jale del medio, donde se ubica el mecanismo de liberación del sujetador central.
- Page 9 Customer barandillas superiores empujándolas Service Center at 1-800-328-7363 or visit suavemente hacia abajo para us online at www.babytrend.com. confirmar que estén rígidas y aseguradas en su lugar antes de usar el • Introduzca las correas de gancho y bucle producto (Fig.
- Page 10 Playard floor or the Bassinet and set the 1-800-328-7363 o visítenos en www. mattress aside. babytrend.com. DO NOT unlock top rails yet, center of floor handle must be raised before top rails Rotate before lifting will unlock.
- Page 11 ASSEMBLY ENSAMBLAR ASSEMBLY ENSAMBLAR • Locate the rail latch release in the • Secure the hook and loop fasteners center and bottom side of each rail. by feeding them through the loops Tube Center latch Squeeze the lever with two hands Tube on the end of the mattress then fold Sujetador central...
- Page 12 WARNING WARNING ACCESSORIES • NEVER leave the large bassinet in place when child is in • NEVER leave the large bassinet in place when child is in playard. playard. Bassinet & Cradles Warnings: Bassinet & Cradles Warnings: • NEVER place a child under the large bassinet. •...
- Page 13 ADVERTENCIA ADVERTENCIA ACCESSORIOS • Coloque a un solo niño por vez en la cuna. • Coloque a un solo niño por vez en la cuna. • NUNCA coloque al niño debajo de la cuna. • NUNCA coloque al niño debajo de la cuna. Advertencias de la cuna de tamaño completo Advertencias de la cuna de tamaño completo : : •...
- Page 14 ASSEMBLY ENSAMBLAR ASSEMBLY ENSAMBLAR TO ASSEMBLE LARGE BASSINET • Position the Bassinet over and down into the fully assembled CÓMO ARMAR LA CUNA GRANDE Playard. Secure in place by pushing down firmly on each plastic support clip until all are snapped into place (Fig. 12). •...
- Page 15 ASSEMBLY ENSAMBLAR ASSEMBLY ENSAMBLAR TO REMOVE LARGE BASSINET TO ASSEMBLE CHANGING TABLE PARA QUITAR LA CUNA GRAND ARMADO DEL ORGANIZADOR PARA PADRES ATTENTION: Playard and large bassinet must be fully assembled and • Remove Mattress from Bassinet. securely locked before installing or using the changing table feature (See To Disconnect opposing Mattress Assemble Playard and large bassinet section.
- Page 16 ADVERTENCIA WARNING ACCESSORIES ACCESSORIOS Changing Table: Changing Table: El Cambiador: El Cambiador: WARNING FALL HAZARD: ADVERTENCIA: PELIGRO Children have Children have suffered serious injuries after falling from changing tables. suffered serious injuries after falling from changing tables. DE CAÍDA: Los niños han sufrido lesiones graves Los niños han sufrido lesiones graves Falls can happen quickly.
- Page 17 ASSEMBLY ENSAMBLAR ASSEMBLY ENSAMBLAR ASSEMBLY ASAMBLEA ASSEMBLEE ASSEMBLY ASAMBLEA ASSEMBLEE • Lay the changing table cover on a flat surface with the back side facing up. Locate the 2 Curved Connector Bars (Fig. 14a). Insert the Curved Connector Bars into the backside of the Changing Table covering (Fig.
- Page 18 ASSEMBLY ENSAMBLAR ASSEMBLY ENSAMBLAR ASSEMBLY ASAMBLEA ASSEMBLEE ASSEMBLY ASAMBLEA ASSEMBLEE TO SECURE THE CHANGING TABLE TO THE PLAYARD • Ubique los 4 ganchos/ PARA SUJETAR EL CAMBIADOR AL CORRALITO sujetadores en el cambiador (Fig. 15a). IMPORTANT! IMPORTANT! When the changing table is on the upper When the changing table is on the upper •...
- Page 19 ASSEMBLY ENSAMBLAR ASSEMBLY ENSAMBLAR ASSEMBLY ASAMBLEA ASSEMBLEE ASSEMBLY ASAMBLEA ASSEMBLEE TO USE CHANGING TABLE RESTRAINT SYSTEM TO REMOVE CHANGING TABLE PARA USAR EL SISTEMA DE RESTRICCIÓN DEL CAMBIADOR PARA RETIRAR EL CAMBIADOR • Place child on changing table, make • Unsnap from the playard (Fig. 17a). sure hand and arms are clear of Locate all 4 clip/fasteners on the the restraint.
- Page 20 ASSEMBLY ENSAMBLAR ASSEMBLY ENSAMBLAR ASSEMBLY ASAMBLEA ASSEMBLEE ASSEMBLY ASAMBLEA ASSEMBLEE PARENT ORGANIZER ASSEMBLY • Organizador para los padres: Ponga ARMADO DEL ORGANIZADOR PARA PADRES cada gancho en posición cual este alado de la parte posterior del organizador. Precione firmamente el gancho asia abajo dentro de la renura asta que se encaje en su lugar (Fig.
- Page 21 ADVERTENCIA WARNING ACCESSORIES ACCESSORIOS Warnings for Toy Accessories including Toybar / Mobile / Warnings for Toy Accessories including Toybar / Mobile / Advertencias Accesorios de juguete, incluyendo Barra Advertencias Accesorios de juguete, incluyendo Barra Canopy with toys: Canopy with toys: de juguetes / Móvil / Cubierta con juguetes: de juguetes / Móvil / Cubierta con juguetes: WARNING:...
-
Page 22: Fall Hazard
ROCK-A-BYE BASSINET WARNING SET UP PORTABLE ROCK-A-BYE BASSINET ARMADO DEL PORTÁTIL ROCK-A-BYE CUNA WARNING: Failure to follow these warnings and Failure to follow these warnings and the instructions could result in serious injury or death. the instructions could result in serious injury or death. FALL HAZARD: To prevent falls, stop using the To prevent falls, stop using the... - Page 23 WARNING WARNING WARNING: • NEVER store the Rock-A-Bye bassinet in the playard while in use. NEVER leave child unattended. NEVER leave child unattended. • The large bassinet must be fully assembled and installed before using. SUFFOCATION HAZARD: Infant carrier Infant carrier •...
- Page 24 ADVERTENCIA ADVERTENCIA ADVERTENCIA: ADVERTENCIA: La inobservancia de las La inobservancia de las NUNCA deje al niño solo. NUNCA deje al niño solo. advertencias e instrucciones podría causar lesiones graves o advertencias e instrucciones podría causar lesiones graves o PELIGRO DE ASFIXIA: la muerte.
- Page 25 ADVERTENCIA ASSEMBLY ENSAMBLAR ATTENTION: • NUNCA use bolsas de plástico para transporte u otras envolturas plásticas Playard and large bassinet must be fully assembled and securely locked before installing or using the Portable Rock-a-Bye bassinet para cubrir el colchón no diseñadas o comercializadas para ese fin. feature.
- Page 26 ASSEMBLY ENSAMBLAR ASSEMBLY ENSAMBLAR ASSEMBLY ASAMBLEA ASSEMBLEE • Pull the flaps of the fabric over the • To insert the Rock-A-Bye Bassinet Bars: Bar housing as shown in the diagram Open the 4 foot extensions on both (Fig. 19b). Bars (Fig. 20a). NOTE: Ensure that the fabric opening wraps completely around the Bar •...
- Page 27 ASSEMBLY ENSAMBLAR ASSEMBLY ENSAMBLAR Carry Position • Alinee los pernos de ajuste con los • To raise the handle, push both Posición de transporte agujeros para insertar las Barras en buttons on each side of the handle las arandelas (Fig. 20c). Asegúrese with your fingers while pulling it de que los pernos queden forward (Fig.
- Page 28 ASSEMBLY ENSAMBLAR ASSEMBLY ENSAMBLAR ROCKER FUNCTION TO SECURE THE PORTABLE ROCK-A-BYE BASSINET FUNCIÓN DE MECEDORA PARA SUJETAR LA PORTÁTIL ROCK-A-BYE IMPORTANT! • Turn the bassinet over and close the When the Rock-A-Bye Bassinet is on When the Rock-A-Bye Bassinet is on the upper position, it must be secured to the playard frame by the upper position, it must be secured to the playard frame by 4 peg legs (Fig.
- Page 29 ASSEMBLY ENSAMBLAR ASSEMBLY ENSAMBLAR TO FOLD REMOVABLE ROCK-A-BYE BASSINET • Secure the two snaps on the strap down onto the Playard (Fig. 23c). PARA PLEGAR LA CUNA DESMONTABLE ROCK-A-BYE • Sujete los dos broches de la correa al If eqquipped: you may install 2 Rock-A-Bye Corralito (Fig.
- Page 30 OPERATION FUNCIONAMIENTO OPERATION FUNCIONAMIENTO MUSIC CENTER • The Music Center is designed to be CENTRO MUSICAL attached to the playard’s/bassinet’s long rail (Fig 25). • El Centro musical está diseñado para sujetarse a banda larga del corralito/ camita (Fig 25). *With Vibration *Without Vibration *Con Vibración...
- Page 31 OPERATION FUNCIONAMIENTO OPERATION FUNCIONAMIENTO These 2 buttons control the unit’s volume. Estos 2 botones de control de volumen de la unidad. VIBRATION: To use the VIBRATION, press down VIBRATION button once to activate the speed, press again for faster speed. Press it again to reduce the speed.
- Page 32 OTHER OTRO OTHER OTRO FCC Statement Declaración de la FCC Este dispositivo cumple con las normas de la Parte 15 de la Comisión Federal de This device complies with Part 15 of the FCC rules. Operation is subject to the following two conditions: Comunicaciones (FCC).
Need help?
Do you have a question about the Simply Smart PY75 A Series and is the answer not in the manual?
Questions and answers