Advertisement
Quick Links
WARRANTY
DO NOT RETURN YOUR PRODUCT TO THE STORE. PLEASE CONTACT
BABY TREND® FOR REPLACEMENT PARTS, SERVICE AND REPAIR.
The Baby Trend® warranty covers workmanship defects within 1 year of purchase. Any
product which has been subjected to misuse, abuse, abnormal use, excessive wear and
tear, improper assembly, negligence, environmental exposure, alteration or accident, or has
had its serial number altered or removed invalidates all claims against the manufacturer. Any
damage to property during installation is the sole responsibility of the end user.
Customer Service Department can be contacted at 1 (800) 328-7363 Monday through Friday
between 8:00 a.m. and 4:30 p.m. (PST). Return Authorizations are required prior to returning
product(s) to Baby Trend®. Please visit http://babytrend.com/pages/limited-warranty
for complete warranty details.
GARANTIA
NO DEVUELVA SU PRODUCTO A LA TIENDA. POR FAVOR CONTACTE A
BABY TREND® PARA PIEZAS DE REPUESTO, SERVICIO Y REPARACION.
La garantía de Baby Trend® cubre defectos de fábrica por 1 año después de la compra.
Cualquier producto que haya sido sometido a uso inadecuado, abuso, uso anormal,
desgaste excesivo, montaje incorrecto, negligencia, exposición ambiental, alteración o
accidente, o cuyo número de serie haya sido alterado o removido, anula todos los reclamos
contra el fabricante. Cualquier daño a la propiedad durante la instalación es la exclusiva
responsabilidad del usuario final. El Departamento de Servicio al Cliente está disponible
llamando al 1 (800) 328-7363, de lunes a viernes de 8:00 a. m. a 4:30 p. m. (PST). Se
requiere una Autorización de Devolución antes de poder devolver el o los productos a
Baby Trend®. Visite http://babytrend.com/pages/limited-warranty
para conocer todos los detalles de la garantía.
GARANTIE
NE PAS RETOURNER VOTRE PRODUIT AU MAGASIN. VEUILLEZ CONTACTER BABY
TREND® POUR DES PIÈCES DE RECHANGE, ENTRETIEN ET RÉPARATION.
La garantie Baby Trend® couvre les défauts de fabrication dans l'année qui suit l'achat. Tout
produit ayant fait l'objet d'une mauvaise utilisation, d'un abus, d'une utilisation anormale,
d'une usure excessive, d'un assemblage incorrect, d'une négligence, d'une exposition à
l'environnement, d'une modification ou d'un accident, ou dont le numéro de série a été
modifié ou retiré, annule toute réclamation contre le fabricant. Tout dommage matériel
pendant l'installation est de la seule responsabilité de l'utilisateur final. Le service à la
clientèle peut être contacté au 1 (800) 328-7363 du lundi au vendredi entre 8h00 et 16h30
(PST). Une autorisation de retour est requise avant de renvoyer le(s) produit(s) à
Baby Trend®. Veuillez visiter http://babytrend.com/pages/limited-warranty
pour obtenir tous les détails concernant la garantie.
www.babytrend.com
Baby Trend, Inc.
13048 Valley Blvd.
Fontana CA 92335
1-800-328-7363
(8:00am ~ 4:30pm PST)
www.babytrend.com
Read all instructions BEFORE assembly and USE of product.
KEEP INSTRUCTIONS FOR FUTURE USE.
Lea todas las instrucciones ANTES de armar y USAR el producto.
CONSERVE LAS INSTRUCCIONES PARA USO FUTURO.
Lisez toutes les instructions du manuel AVANT l'assemblage
ou L'UTILISATION de ce produit. CONSERVEZ CES
INSTRUCTIONS POUR RÉFÉRENCE ULTÉRIEURE.
TS44XXXD
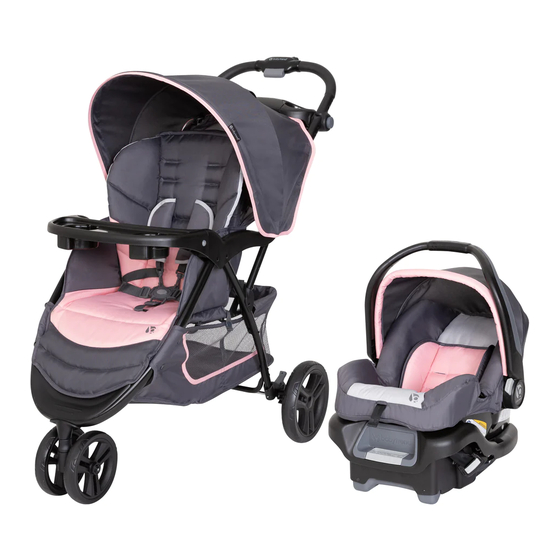
EZ Ride Plus Travel System
Instruction Manual
Manual de Instrucciones
Manuel d'instruction
™
with EZ-Lift
35 PLUS
infant car seat
TS44XXXD_3L_101421
Advertisement

Subscribe to Our Youtube Channel
Related Manuals for BABYTREND EZ Ride Plus TS44 D Series


Summary of Contents for BABYTREND EZ Ride Plus TS44 D Series
- Page 1 Customer Service Department can be contacted at 1 (800) 328-7363 Monday through Friday INSTRUCTIONS POUR RÉFÉRENCE ULTÉRIEURE. between 8:00 a.m. and 4:30 p.m. (PST). Return Authorizations are required prior to returning product(s) to Baby Trend®. Please visit http://babytrend.com/pages/limited-warranty for complete warranty details. GARANTIA NO DEVUELVA SU PRODUCTO A LA TIENDA.
- Page 2 WARNING ADVERTENCIA WARNING: ADVERTENCIA: Please follow all of these Por favor, siga todas estas instructions to ensure the safety of your child. Keep instrucciones para garantizar la seguridad de su hijo. these instructions for future reference. Conserve estas instrucciones para referencia futura. ADVERTENCIA: WARNING: El incumplimiento de...
- Page 3 AVERTISSEMENT AVERTISSEMENT : Prière de suivre toutes ces instructions afin d’assurer la sécurité de votre enfant. Conserver ces instructions pour consultation future. AVERTISSEMENT : ® BABY TREND CUSTOMER SERVICE Négliger d’observer ces directives pourrait entraîner de sérieuses The Customer Service Department can be contacted blessures ou même la mort.
- Page 4 PARTS PIEZAS PIÈCES ASSEMBLY MONTAJE ASSEMBLAGE Check that you have all the parts for this model before assembling the stroller. IMPORTANT! Verifique que tenga todas las piezas para este modelo antes de montar el carrito. To ensure safe operation of your stroller, Vérifiez que vous avez bien toutes les pièces pour ce modèle avant de monter la poussette.
- Page 5 ASSEMBLY MONTAJE ASSEMBLAGE ASSEMBLY MONTAJE ASSEMBLAGE • “Remove and discard” the cap on The front wheels, rear wheels, child tray, and parent tray MUST be installed the front wheel hub. prior to use. NOTE: May require to grip the cap Antes del uso SE DEBEN instalar las ruedas delanteras, las ruedas traseras,...
- Page 6 ASSEMBLY MONTAJE ASSEMBLAGE ASSEMBLY MONTAJE ASSEMBLAGE REAR WHEELS • To attach the front wheels, lean the stroller back so that it rests on the RUEDAS TRASERAS handle with the front and rear legs ROUES ARRIÈRE pointing upward. Position the front wheels over the front leg tubes so •...
- Page 7 ASSEMBLY MONTAJE ASSEMBLAGE ASSEMBLY MONTAJE ASSEMBLAGE CHILD TRAY NOTE: Check that the snap button BANDEJA PARA NIÑOS comes through and securely in place “underside” (Fig. 3c). PLATEAU POUR ENFANT “Parte inferior” “Dessous” NOTA: Verifique que el botón a presión • To attach the child tray: push atraviese por completo y de manera the angled side of the tray onto segura (Fig.
- Page 8 ASSEMBLY MONTAJE ASSEMBLAGE ASSEMBLY MONTAJE ASSEMBLAGE CANOPY • To open the canopy: push forward on the front edge of the canopy CUBIERTA (Fig. 4c). To use the visor flip outward AUVENT (Fig. 4d). • To install the canopy, slide the •...
- Page 9 ASSEMBLY MONTAJE ASSEMBLAGE ASSEMBLY MONTAJE ASSEMBLAGE MOBILE PHONE POSITIONING PARENT TRAY AVERTISSEMENT: Il faut faire attention BANDEJA PARA TELÉFONOS MÓVILES DE LOS PADRES. en pliant la poussette pour éviter de l'endommager. PORTE-TÉLÉPHONE MOBILE POUR LE POSITIONNEMENT- Assurez-vous que tous les accessoires, les DU PLATEAU PARENT téléphones portables, les sacs à...
- Page 10 ASSEMBLY MONTAJE ASSEMBLAGE ASSEMBLY MONTAJE ASSEMBLAGE • Avant de fixer le plateau : • Pair the straps and insert Face au plateau avec le côté into the tray slots (Fig. 5d). de l’arc proéminent vers l’auvent. Localisez les six sangles de fixation (Fig.
- Page 11 ASSEMBLY MONTAJE ASSEMBLAGE ASSEMBLY MONTAJE ASSEMBLAGE MULTI-POSITION HANDLE • Mobile phone positioner: Align MANIJA AJUSTABLE mobile phone to the clip and insert it through the grips. Make sure to push POIGNEE RÉGLABLE the phone all the way down into the positioner (Fig.
- Page 12 ASSEMBLY MONTAJE ASSEMBLAGE ASSEMBLY MONTAJE ASSEMBLAGE BRAKES El carrito podría requerir un leve movimiento hacia delante o hacia atrás FRENOS para alinear los dientes del freno con el FREINS piñón del freno de cada rueda (Fig. 8). NOTA: Verifique que el carrito no se WARNING: mueva y que ambos frenos estén Always set brakes when the...
- Page 13 SAFETY SEGURIDAD SÉCURITÉ SAFETY SEGURIDAD SÉCURITÉ TO SECURE THE CHILD • Snap the side of seat pad onto the inner PARA SUJETAR AL NIÑO sides of the frame (Fig. 9a). Repeat for the other side. POUR ATTACHER L’ENFANT • The shoulder straps of the 5-point WARNING: harness have 3 attachment positions.
- Page 14 SAFETY SEGURIDAD SÉCURITÉ SAFETY SEGURIDAD SÉCURITÉ • Coloque cuidadosamente al niño en el asiento del cochecito y pase • Feed the shoulder strap through the harness spread slots. You can el arnés de seguridad por la cintura del niño y por encima de los access these slots from the rear of the seat underneath the fabric.
- Page 15 SAFETY SEGURIDAD SÉCURITÉ SAFETY SEGURIDAD SÉCURITÉ SEAT BACK POSITION • To recline the seat press the clip ends POSICIÓN DEL RESPALDO together to release and pull down. To place seat into an upright position, POSITION DU DOSSIER press the clip ends together while holding the end of strap.
- Page 16 INFANT SILLITA PARA SIÈGE D’AUTO INFANT SILLITA PARA SIÈGE D’AUTO CAR SEAT EL AUTOMÓVIL POUR BÉBÉ CAR SEAT EL AUTOMÓVIL POUR BÉBÉ INFANT CAR SEAT ATTACHMENT CS01 EZ-Lift, CS02 EZ-Lift PLUS and ADJUNTO DE LA SILLITA PARA EL AUTOMÓVIL CS03 EZ-Lift PRO Infant Car Seats CAR SEATS MODULE CONNECTION FIXATION DU SIÈGE D’AUTO POUR BÉBÉ...
- Page 17 INFANT SILLITA PARA SIÈGE D’AUTO INFANT SILLITA PARA SIÈGE D’AUTO CAR SEAT EL AUTOMÓVIL POUR BÉBÉ CAR SEAT EL AUTOMÓVIL POUR BÉBÉ • Align the car seat module to the inner frame connectors Carefully lower REMOVING THE CAR SEAT: into the stroller to latch in the car seat. Press down firmly for the click. RETIRADA DE LA SILLA DE AUTO: ALWAYS ensure that the car seat is properly connected and locked onto RETRAIT DU SIÈGE AUTO:...
- Page 18 INFANT SILLITA PARA SIÈGE D’AUTO INFANT SILLITA PARA SIÈGE D’AUTO CAR SEAT EL AUTOMÓVIL POUR BÉBÉ CAR SEAT EL AUTOMÓVIL POUR BÉBÉ OTHER COMPATIBLE CAR SEATS OTROS • Coloque el asiento del carrito en la posición completamente ASIENTOS DE COCHE COMPATIBLES reclinada (Fig.
- Page 19 INFANT SILLITA PARA SIÈGE D’AUTO INFANT SILLITA PARA SIÈGE D’AUTO CAR SEAT EL AUTOMÓVIL POUR BÉBÉ CAR SEAT EL AUTOMÓVIL POUR BÉBÉ Removing the car seat from the child tray: • To remove the Infant Car Seat, squeeze the release Retirada de la silla de auto de la bandeja para niños: handle located at the Retrait du siège auto du plateau enfant:...
- Page 20 FOLD / PLEGAR / PLIER / FOLD / PLEGAR / PLIER / UNFOLD DESPLEGAR DÉPLIER UNFOLD DESPLEGAR DÉPLIER TO FOLD STROLLER • To fold the stroller slide the thumb PARA PLEGAR EL CARRITO trigger to the left and squeeze the pull trigger while pushing forward on the POUR PLIER LA POUSSETTE handle (Fig.
- Page 21 FOLD / PLEGAR / PLIER / MAINTENANCE MANTENIMIENTO ENTRETIEN UNFOLD DESPLEGAR DÉPLIER TO UNFOLD STROLLER SEAT PAD POUR DÉPLIER LA POUSSETTE ALMOHADILLA DEL ASIENTO PARA DESPLEGAR EL CARRITO GARNITURE DE SIÈGE CAUTION: • To clean the seat pad, use only mild household soap or detergent Do not allow and warm water on a sponge or clean cloth.
- Page 22 MAINTENANCE MANTENIMIENTO ENTRETIEN MAINTENANCE MANTENIMIENTO ENTRETIEN FRONT WHEEL - MAINTENANCE CANOPY / PARENT TRAY - MAINTENANCE RUEDA DELANTERA - MANTENIMIENTO CUBIERTA / BANDEJA PARA PADRES - MANTENIMIENTO ROUE AVANT - D’ENTRETIEN AUVENT / PLATEAU DU PARENT - D’ENTRETIEN • If replacing the front wheel, press the pin •...
- Page 23 Copyright © 2021, Baby Trend Inc., All Rights Reserved. Todos los derechos reservados. Tous droits réservés. Copyright © 2021, Baby Trend Inc., All Rights Reserved. Todos los derechos reservados. Tous droits réservés.
Need help?
Do you have a question about the EZ Ride Plus TS44 D Series and is the answer not in the manual?
Questions and answers