Advertisement
Quick Links
WARRANTY
DO NOT RETURN YOUR PRODUCT TO THE STORE. PLEASE CONTACT
BABY TREND® FOR REPLACEMENT PARTS, SERVICE AND REPAIR.
The Baby Trend® warranty covers workmanship defects within 1 year of purchase. Any
product which has been subjected to misuse, abuse, abnormal use, excessive wear and
tear, improper assembly, negligence, environmental exposure, alteration or accident, or has
had its serial number altered or removed invalidates all claims against the manufacturer. Any
damage to property during installation is the sole responsibility of the end user.
Customer Service Department can be contacted at customerservice@babytrend.com.
Return Authorizations are required prior to returning product(s) to Baby Trend®. Please visit
http://babytrend.com/pages/limited-warranty
for complete warranty details.
NO DEVUELVA SU PRODUCTO A LA TIENDA. POR FAVOR CONTACTE A
BABY TREND® PARA PIEZAS DE REPUESTO, SERVICIO Y REPARACION.
La garantía de Baby Trend® cubre defectos de fábrica por 1 año después de la compra.
Cualquier producto que haya sido sometido a uso inadecuado, abuso, uso anormal,
desgaste excesivo, montaje incorrecto, negligencia, exposición ambiental, alteración o
accidente, o cuyo número de serie haya sido alterado o removido, anula todos los reclamos
contra el fabricante. Cualquier daño a la propiedad durante la instalación es la exclusiva
responsabilidad del usuario final. El Departamento de Servicio al Cliente está disponible
llamando al customerservice@babytrend.com. Se requiere una Autorización de Devolución
antes de poder devolver el o los productos a
Baby Trend®. Visite http://babytrend.com/pages/limited-warranty
para conocer todos los detalles de la garantía.
www.babytrend.com
Baby Trend, Inc.
13048 Valley Blvd.
Fontana CA 92335
GARANTIA
www.babytrend.com
IMPORTANT! – READ CAREFULLY AND KEEP FOR FUTURE
REFERENCE
¡IMPORTANTE!: LEA DETENIDAMENTE Y GUARDE PARA
FUTURAS CONSULTAS
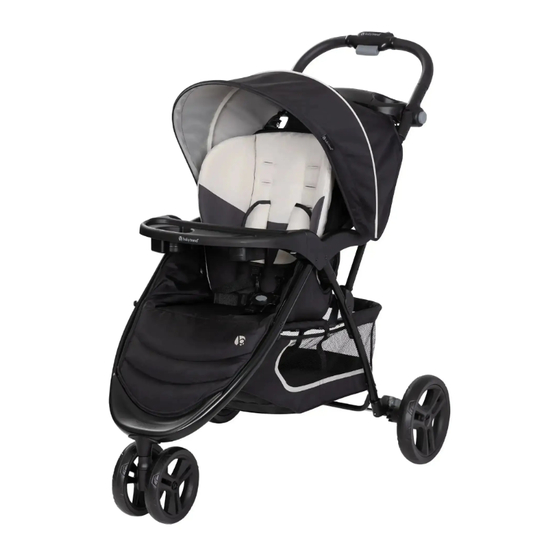
EZ RIDE STROLLER
ST44XXXBM
Instruction Manual
Manual de Instrucciones
ST44XXXBM_2L_090524
Advertisement

Related Manuals for BABYTREND EZ RIDE


Summary of Contents for BABYTREND EZ RIDE
- Page 1 Cualquier daño a la propiedad durante la instalación es la exclusiva responsabilidad del usuario final. El Departamento de Servicio al Cliente está disponible llamando al customerservice@babytrend.com. Se requiere una Autorización de Devolución antes de poder devolver el o los productos a Baby Trend®.
- Page 2 WARNING WARNING WARNING: WARNING: The parking devices shall be Please follow all of these engaged when placing and removing children from the instructions to ensure the safety of your child. Keep instructions for future reference. stroller. WARNING: WARNING: Failure to follow these instructions Any load attached to the handle and/or on the back of the backrest and/or the sides could result in serious injury or death.
- Page 3 WARNING ADVERTENCIA ADVERTENCIA: CAUTION: • This single stroller is designed for one child only. Use with Por favor, siga todas more than one child may cause the unbalance condition which can injure/ estas instrucciones para garantizar la seguridad de harm your child. su hijo.
- Page 4 ADVERTENCIA ADVERTENCIA ADVERTENCIA: • PRECAUCIÓN: Este carrito está diseñado para un niño solamente. El Este producto no es uso con más de un niño podría provocar inestabilidad y lesionar o dañar adecuado para correr o patinar. a su hijo. ADVERTENCIA: •...
- Page 5 PARTS PIEZAS Check that you have all the parts for this model before assembling the stroller. Verifique que tenga todas las piezas para este modelo antes de montar el carrito. Stroller Child Tray Parent Tray Carrito Bandeja para niños Bandeja para padres Canopy Front Wheel Rear Axle...
- Page 6 ASSEMBLY MONTAJE ASSEMBLY MONTAJE IMPORTANT ! The front wheels, rear wheels, child tray, and parent tray MUST To ensure safe operation of your installed prior to use. product, please follow these instructions carefully. Please Antes del uso instalar las ruedas delanteras, las ruedas SE DEBEN keep these instructions for future reference.
- Page 7 ASSEMBLY MONTAJE ASSEMBLY MONTAJE • To attach the front wheels, lean the REAR WHEELS stroller back so that it rests on the handle RUEDAS TRASERAS with the front and rear legs pointing upward. Position the front wheels over Attach the rear axle assembly and wheels as follows: the front leg tubes so that the hole in the Coloque el montaje del eje trasero y las ruedas de la siguiente manera: housing lines up and will slide onto the...
- Page 8 ASSEMBLY MONTAJE ASSEMBLY MONTAJE To attach the child tray • To access the child seat: Push one release and lift up the tray WARNING: simultaneously (Fig. 3b). Either The child’s tray is not a restraint device: side of the child tray will lift and always secure your child with the seat harness.
- Page 9 ASSEMBLY MONTAJE ASSEMBLY MONTAJE PARENT TRAY MULTI-POSITION HANDLE BANDEJA PARA PADRES MANIJA AJUSTABLE WARNING: • To adjust the handle, press the Do not place hot liquids or more buttons to move the handle up or than 3 pounds in the parent tray. Serious burns or down to a comfort position for the user unstable conditions could result.
- Page 10 ASSEMBLY MONTAJE ASSEMBLY MONTAJE CANOPY • To remove the canopy, press the release tab on the inside of the stroller CUBIERTA frame (Fig. 6c). Pull the canopy out (Fig. 6d). Repeat for the other side. • To install the canopy, slide the male ends of the canopy into the female •...
- Page 11 ASSEMBLY MONTAJE ASSEMBLY MONTAJE BRAKES • Enganche las pestañas con botones a presión de la dosel (Fig. 7a) a la barra FRENOS de metal negra debajo de la bandeja para padres. WARNING: Always set brakes when the • Enganche los botones para asegurar la stroller is not being pushed so that the stroller will not dosel (Fig.
- Page 12 SAFETY SEGURIDAD SAFETY SEGURIDAD TO SECURE THE CHILD • Feed the shoulder strap through the PARA SUJETAR AL NIÑO harness spread slots. You can access these slots from the rear of the seat WARNING: underneath the fabric. Feed shoulder Avoid serious injury from falling strap through appropriate slot and or sliding out.
- Page 13 SAFETY SEGURIDAD SAFETY SEGURIDAD SEAT BACK POSITION Center Clasp • Push Button on Center Clasp, the four Presilla central POSICIÓN DEL RESPALDO Harness Buckles will pop free (Fig. 11). WARNING: The upright position should be • Presione el botón en la presilla central used only for a child that is at least 6 months old.
- Page 14 FOLD / PLEGAR / FOLD / PLEGAR / UNFOLD DESPLEGAR UNFOLD DESPLEGAR TO FOLD STROLLER • Una vez que el carrito comience a plegarse, levántelo ligeramente y PARA PLEGAR EL CARRITO suelte la manija y empuje el manubrio WARNING: hacia delante hasta que el carrito esté Care must be taken when folding plegado (Fig.
- Page 15 MAINTENANCE MANTENIMIENTO FOLD / PLEGAR / UNFOLD DESPLEGAR TO UNFOLD STROLLER FRONT WHEEL - MAINTENANCE PARA DESPLEGAR EL CARRITO RUEDA DELANTERA - MANTENIMIENTO CAUTION: • If replacing the front wheel, press the Do not allow pin located behind the wheel hub. Pull children near stroller while the wheel out from the hub (Fig.
- Page 16 The Customer Service Department can be contacted • Check your stroller for loose screws, worn parts, torn material or at customerservice@babytrend.com. Return Authorizations stitching on a regular basis. Replace or repair parts as needed. are required prior to returning product(s) to Baby Trend®.
Need help?
Do you have a question about the EZ RIDE and is the answer not in the manual?
Questions and answers