Table of Contents
Advertisement
Quick Links
Wet/Dry/Shampoo
Vacuum
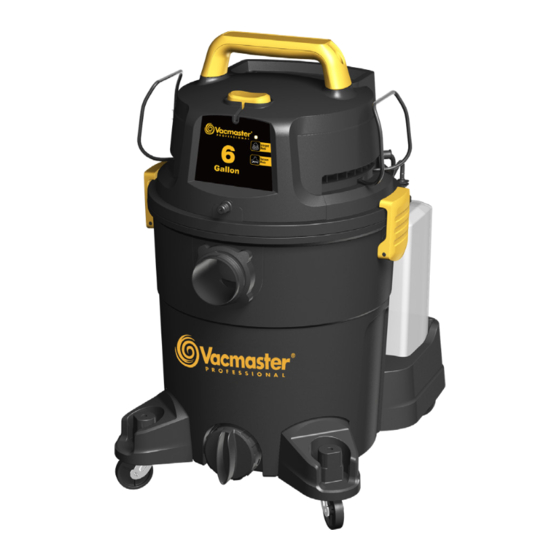
Operator's Manual
6 Gallon
Model No.
VK609PFR 0201
FOR YOUR SAFETY
Read and understand this manual before use.
Keep this manual for future reference.
Distributed By
Replacement Filters &
Suzhou Cleva Electric Appliance Co., Ltd.
Accessories available at:
NO.8 Ting Rong Street
215122 Suzhou - China
www.amazon.com.
Advertisement
Table of Contents

Related Manuals for Vacmaster VK609PFR 0201


Summary of Contents for Vacmaster VK609PFR 0201
- Page 1 Wet/Dry/Shampoo Vacuum Operator’s Manual 6 Gallon Model No. VK609PFR 0201 FOR YOUR SAFETY Read and understand this manual before use. Keep this manual for future reference. Distributed By Replacement Filters & Suzhou Cleva Electric Appliance Co., Ltd. Accessories available at: NO.8 Ting Rong Street...
-
Page 2: Table Of Contents
Changing the Battery........................Troubleshooting..........................Exploded View..........................Parts List............................® Thank you for purchasing this Vacmaster wet/dry shampoo vacuum cleaner. Feel confident ® that with Vacmaster you are obtaining a high-quality product engineered for optimal performance. This vacuum is capable of picking up liquids and dry materials. -
Page 3: Warranty
WARRANTY ® We take pride in producing a high quality, durable product. This Vacmaster product carries a limited two (2) year warranty against defects in workmanship and materials from date of purchase under normal household use. If product is to be used for commercial, industrial, or rental use, a 90 day limited warranty will apply. -
Page 4: Important Safety Instructions
IMPORTANT SAFETY INSTRUCTIONS READ AND UNDERSTAND ALL INSTRUCTIONS BEFORE USING THIS VACUUM. Read and understand this operator’s manual and all labels on the vacuum cleaner before operating. Safety is a combination of common sense, staying alert and knowing how your vacuum works. - Page 5 CAUTION: To reduce the risk of injury from moving parts - Unplug before servicing. WARNING: To reduce the risk of electric shock - Unplug before cleaning or servicing. FCC COMPLIANCE This device complies with part 15 of the FCC Rules. Operation is subject to the following two conditions: •...
-
Page 6: Double Insulation Instructions
DOUBLE INSULATION INSTRUCTIONS This Wet/Dry Shampoo Vacuum is double insulated, eliminating the need for a separate grounding system. Use only identical replacements parts. Read the instructions for Servicing Double- Insulated Wet/Dry Shampoo Vacuums before servicing. Use this vacuum as described in this manual. -
Page 7: Extension Cords
EXTENSION CORDS When using an extension cord with your Wet/Dry Shampoo Vacuum refer to the following table to determine the required A.W.G. wire size. Before using the cleaner make sure the power cord and extension cord are in good working condition. Make repairs or replacements before using the vacuum cleaner. -
Page 8: Unpacking & Checking Carton Contents
UNPACKING & CHECKING CARTON CONTENTS Remove all contents from the box. Remove the power head and take out any contents inside the collection tank. Check each item against the carton contents list. Carton Contents List: Description ..…………..……….…..Qty. Vacuum Assembly…..……….…..Handle.......... - Page 9 ACCESSORIES A choice of accessories and attachments are supplied with this product. Refer to below descriptions for their functions. Illustration Description Function Handheld Shampoo For cleaning sofas, chairs, stairs, and car Nozzle interiors. Carpet Shampoo Used without brush holder for cleaning carpets. Nozzle Used with brush holder for cleaning hard floors.
-
Page 10: General Assembly Instructions
GENERAL ASSEMBLY INSTRUCTIONS A Philips head screw driver is required. ① WARNING: DO NOT PLUG THE POWER CORD INTO A POWER OUTLET. MAKE SURE THE PLUG IS DISCONNECTED BEFORE ASSEMBLING THE WET/DRY SHAMPOO VACUUM. TO REDUCE THE RISK OF ELECTRIC SHOCK, DO NOT EXPOSE TO RAIN. UNPACKING YOUR WET/DRY SHAMPOO VACUUM &... - Page 11 9. Optional: For improved dust filtration, fit the dust bag flange onto the inlet port, taking care not to damage the bag (Fig. 9). NOTE: The dust collection bag is for dry pick-up only. 10. For wet vacuum cleaning, remove the cartridge filter, and install the supplied foam wet filter. See page 20 for the foam wet filter installation instructions (Fig.
-
Page 12: Dry Vacuum Operation
DRY VACUUM OPERATION DRY VACUUMING WARNING: BE SURE TO READ, UNDERSTAND, AND APPLY INFORMATION ENTITLED “IMPORTANT SAFETY INSTRUCTIONS”. DO NOT VACUUM IN AREAS WITH FLAMMABLE GASES, VAPORS, OR EXPLOSIVE DUSTS IN THE AIR. FLAMMABLE GASES OR VAPORS INCLUDE BUT ARE NOT LIMITED TO: LIGHTER FLUID, SOLVENT TYPE CLEANERS, OIL-BASED PAINTS, GASOLINE, ALCOHOL, OR AEROSOL SPRAYS. -
Page 13: Liquid Vacuum Operation
5. Place the power head back on the collection tank and secure it in place using the latches (Fig. 6). OPERATING INSTRUCTIONS: DRY VACUUMING 6. Insert the locking end of the hose into the vacuum port on the collection tank and lock into place (Fig. - Page 14 GUN POWDER. TO REDUCE THE RISK OF HEALTH HAZARDS FROM VAPORS OR DUST, DO NOT VACUUM TOXIC MATERIALS. WARNING: DO NOT PLUG THE POWER CORD INTO A POWER OUTLET. MAKE SURE THE PLUG IS DISCONNECTED BEFORE CHANGING THE FILTERS. 1. Verify that the power cord is disconnected from the outlet. Make sure that the collection tank is clean and free of dust and dirt (Fig.
-
Page 15: Carpet/Upholstery Operation
CARPET/UPHOLSTERY CLEANING OPERATION ② ③ WARNING: DO NOT RUN THE VACUUM IN DETERGENT MODE WITHOUT SOLUTION IN THE CLEANING SOLUTION TANK. WARNING: USE ONLY MANUFACTURER RECOMMENDED CLEANING SOLUTION WITH THIS VACUUM CLEANER. WARNING: DO NOT REPLACE FURNITURE UNTIL THE CARPET IS COMPLETELY DRY! - Page 16 CAUTION: BEFORE YOU USE THIS PRODUCT TO SHAMPOO CLEAN AN AREA, TEST YOUR WET/DRY SHAMPOO VACUUM AND THE CLEANING SOLUTION ON A SMALL HIDDEN AREA FOR COLORFASTNESS. IF THE COLOR IS AFFECTED, DO NOT USE. CAUTION: THE CLEANING SOLUTION CONTAINS A CHEMICAL SOLUTION. AVOID PROLONGED CONTACT AS SOME INDIVIDUALS MAY EXPERIENCE SKIN AND EYE IRRITATION.
- Page 17 9. To clean sofas, chairs, stairs, and car interiors, connect the handheld shampoo nozzle onto the remote-control handle (Fig. 14). NOTE: When cleaning the headliner of your car, rotate the air flow regulation counter-clockwise to decrease the suction power if the suction power is high. NOTE: If there is dirt or debris accumulated in the handheld shampoo nozzle, press the release button and remove the cover from the nozzle for cleaning (Fig.
-
Page 18: Maintenance
MAINTENANCE EMPTYING THE COLLECTION TANK WARNING: ALWAYS DISCONNECT THE PLUG FROM THE POWER OUTLET BEFORE REMOVING THE POWER HEAD FROM COLLECTION TANK. 1. Verify that the power cord is disconnected from the outlet (Fig. 1). 2. Press down the yellow latch on the cleaning solution delivery tube and unplug the delivery tube from the vacuum. -
Page 19: Installing & Cleaning Cartridge Filter
INSTALLING & CLEANING CARTRIDGE FILTER INSTALLING CARTRIDGE FILTER 1. Verify that the power cord is disconnected from the outlet (Fig. 1). 2. Remove the power head and place in an upside-down position. 3. Install the cartridge filter over the filter cage making sure the cage is completely covered (Fig. 2 &... -
Page 20: Installing & Cleaning Foam Wet Filter
INSTALLING & CLEANING FOAM WET FILTER INSTALLING FOAM WET FILTER 1. Verify that the power cord is disconnected from the outlet (Fig. 1). 2. Remove the power head and place in an upside-down position. Follow instructions to remove the cartridge filter on page 19. 3. -
Page 21: Cleaning & Replacing Exhaust Filter
CLEANING & REPLACING EXHAUST FILTER 1. Verify that the power cord is disconnected from the outlet (Fig. 1). 2. Unlock the exhaust filter door by lifting the locking tab upwards to the release. Pull the door out (Fig. 2). 3. Remove the exhaust filter from the vacuum and clean by gently tapping or brushing off dirt. For optimal performance it is recommended to replace the old filter with a new filter regularly (Fig. -
Page 22: Troubleshooting
TROUBLESHOOTING WARNING: TO REDUCE THE RISK OF ELECTRIC SHOCK, UNPLUG BEFORE TROUBLESHOOTING. PROBLEM POSSIBLE CAUSE SOLUTION Unplug and check the power cord. If damaged, have it Faulty power cord, switch, or motor. repaired by a professional or call customer service. Check the power supply, cord, No power supply. - Page 23 PROBLEM POSSIBLE CAUSE SOLUTION Use manufacturer’s cleaning solution or high-quality low- Foam is leaking from the Incorrect cleaning solution or foaming liquid carpet cleaning outlet on the power head. incorrect mix ratio is used. solution. Ensure the cleaning solution is mixed with water at the correct ratio.
-
Page 24: Exploded View
EXPLODED VIEW... -
Page 25: Parts List
PARTS LIST Part Part Number Description Quantity 551657101 Handle Assembly 551657102 Hose Storage Rack Power Head Assembly 551005103 Float 551437105 Filter Cage 551324103 Exhaust Filter Door 551121122 Exhaust Filter Assembly 551661102 Latch Assembly Collection Tank 551661104 Vacuum Port Assembly 551002110 Drain Cap Assembly 551617105 Vacuum Base...
Need help?
Do you have a question about the VK609PFR 0201 and is the answer not in the manual?
Questions and answers