Table of Contents
Advertisement
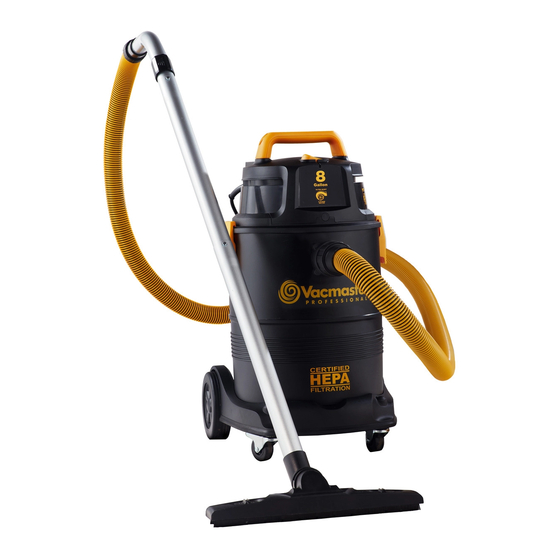
Certified HEPA
Vacuum
Operator's Manual
8 Gallon
Model No.
VK811PH
FOR YOUR SAFETY
Read and understand this manual before use.
Keep this manual for future reference.
Distributed By
Cleva North America, Inc.
Replacement Filters &
601 Regent Park Court
Accessories available at:
Greenville, SC 29607
Vacmaster.com
Advertisement
Table of Contents

Summary of Contents for Vacmaster VK811PH
- Page 1 Certified HEPA Vacuum Operator’s Manual 8 Gallon Model No. VK811PH FOR YOUR SAFETY Read and understand this manual before use. Keep this manual for future reference. Distributed By Cleva North America, Inc. Replacement Filters & 601 Regent Park Court Accessories available at: Greenville, SC 29607 Vacmaster.com...
-
Page 2: Table Of Contents
FOR YOUR SAFETY: CAREFULLY READ AND UNDERSTAND ALL INSTRUCTIONS. WARRANTY Your new Vacmaster vacuum is a high quality, durable product. All parts used in the manufacturing of this vacuum have passed rigid quality control standards prior to assembly. The vacuum motor is warrantied for three (3) years from the date of purchase as shown on your receipt. -
Page 3: Safety Instructions & Warnings
• To reduce the risk of falls, use extra care when cleaning on stairs. • When using for HEPA EPA RRP cleanup tasks, use only certified Vacmaster HEPA filter. • Even when used with a HEPA filter, extremely small particles may pass through the filter; always wear appropriate protective safety equipment. -
Page 4: Double Insulation Instructions
DOUBLE INSULATION INSTRUCTIONS This vacuum is double-insulated, eliminating the need for a separate grounding system. Use only identical replacements parts. Read the instructions for Servicing Double-Insulated Wet/Dry Vacs before servicing. Use this vacuum as described in this manual. Observe the following warnings that appear on the motor housing of your vacuum. -
Page 5: Unpacking & Checking Carton Contents
UNPACKING & CHECKING CARTON CONTENTS Remove all contents from the box. Remove the power head and take out any contents inside the collection tank. Check each item against the carton contents list. Carton Contents List: Key Description ..…………..……….…..Qty. Vac Assembly.......... HEPA Material Exhaust Filter.... -
Page 6: General Assembly Instructions
GENERAL ASSEMBLY INSTRUCTIONS A Philips head screw driver is required. WARNING: DO NOT PLUG POWER CORD INTO POWER OUTLET; MAKE SURE PLUG IS DISCONNECTED BEFORE ASSEMBLING THE WET/DRY VAC. This HEPA vacuum is supplied with a certified HEPA filter that has been tested by an independent lab to IEST-RP-CC001 that meets the EPA's definition of a HEPA vacuum (must be capable of trapping 99.97% of particles down to 0.3 microns in diameter). -
Page 7: Dry Vacuum Operation
3. Lift the power head off the collection tank. (fig. 3) 4. Remove the contents from inside the collection tank. Make sure you have all contents as listed on page 5. (fig. 4) 5. Turn the collection tank upside down and insert the two caster feet into the front slots on the base. Apply downward pressure to each caster. - Page 8 WARNING: BE SURE TO READ, UNDERSTAND, AND APPLY, INFORMATION ENTITLED ‘SAFETY INSTRUCTIONS & WARNINGS’. DO NOT VACUUM IN AREAS WITH FLAMMABLE GASES, VAPORS, OR EXPLOSIVE DUSTS IN THE AIR. FLAMMABLE GASES OR VAPORS INCLUDE BUT ARE NOT LIMITED TO: LIGHTER FLUID, SOLVENT TYPE CLEANERS, OIL-BASED PAINTS, GASOLINE, ALCOHOL, OR AEROSOL SPRAYS.
-
Page 9: Liquid Vacuum Operation
LIQUID VACUUM OPERATION LIQUID VACUUMING WARNING: BE SURE TO READ, UNDERSTAND, AND APPLY, INFORMATION ENTITLED ‘SAFETY INSTRUCTIONS & WARNINGS’. DO NOT VACUUM IN AREAS WITH FLAMMABLE GASES, VAPORS, OR EXPLOSIVE DUSTS IN THE AIR. FLAMMABLE GASES OR VAPORS INCLUDE BUT ARE NOT LIMITED TO: LIGHTER FLUID, SOLVENT TYPE CLEANERS, OIL- BASED PAINTS, GASOLINE, ALCOHOL, OR AEROSOL SPRAYS. -
Page 10: Maintenance
its maximum capacity. You will notice an increase in motor speed. When this happens, turn off the machine, disconnect from power supply, and drain the liquid into a suitable receptacle or drain. To continue vacuuming, refit the collection tank with the drain cap. After wet vacuuming, turn the machine off and remove plug from power supply. -
Page 11: Installing Hepa Filter & Pre-Filter
INSTALLING HEPA FILTER & PRE-FILTER Installing HEPA Filter & Pre-Filter 1. Verify that the power cord is disconnected from the outlet. (fig. 1) 2. Remove power head and place in upside down position. 3. Install the HEPA filter over the filter cage with the flat end of the filter towards the power head. Carefully push filter in until it stops against the power head. -
Page 12: Installing & Cleaning Foam Wet Filter
INSTALLING & CLEANING FOAM WET FILTER Installing Foam Wet Filter 1. Verify that the power cord is disconnected from the outlet. (fig. 1) 2. Remove power head and place in upside down position. Follow instructions to remove cloth filter. 3. Carefully slide foam wet filter down over the filter cage making sure the cage is completely covered. -
Page 13: Troubleshooting
TROUBLESHOOTING WARNING: TO REDUCE THE RISK OF ELECTRIC SHOCK, UNPLUG BEFORE TROUBLESHOOTING. Symptom Possible Causes Corrective Action Vacuum will not operate 1) No power supply. 1) Check power supply – cord, breakers, fuses. 2) Faulty power cord. 2) Unplug and check the power cord. -
Page 14: Exploded View
EXPLODED VIEW... -
Page 15: Parts List
PARTS LIST Part Part Number Description Quantity 551267101 Handle Assembly Power Head Assembly 551022105 Float Filter Cage VKHF002 HEPA Cartridge Filter 551022107 HEPA Lid Seal Ring 551022108 HEPA Nut 551022109 Microfiber Pre-Filter 551017120 Caster Assembly 551022123 Wheel Assembly 551018107 Base Assembly 551017119 Wheel Axle Collection Tank...


Need help?
Do you have a question about the VK811PH and is the answer not in the manual?
Questions and answers