
Subscribe to Our Youtube Channel
Related Manuals for Electrolux OKF5C70X


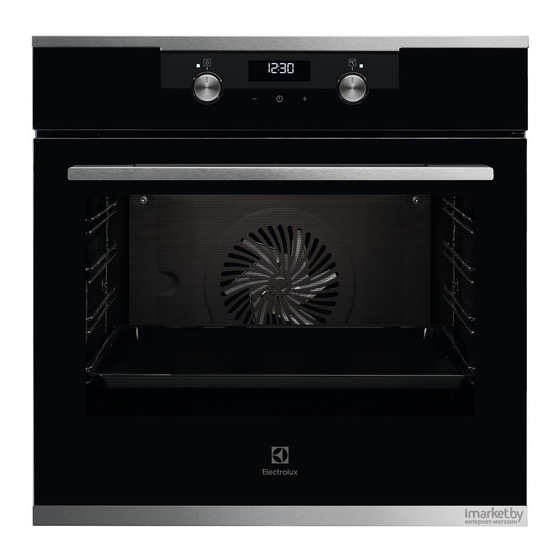
Summary of Contents for Electrolux OKF5C70X
- Page 1 OKF5C70X Oven User Manual Get the most out of your appliance For quick access to manuals, how-to guides, support and more through our photo registration visit electrolux.com/register...
-
Page 2: Table Of Contents
14. ENERGY EFFICIENCY.................. 31 WE’RE THINKING OF YOU Thank you for purchasing an Electrolux appliance. You’ve chosen a product that brings with it decades of professional experience and innovation. Ingenious and stylish, it has been designed with you in mind. So whenever you use it, you can be safe in the knowledge that you’ll get great results every time. -
Page 3: Safety Information
ENGLISH SAFETY INFORMATION Before the installation and use of the appliance, carefully read the supplied instructions. The manufacturer is not responsible for any injuries or damage that are the result of incorrect installation or usage. Always keep the instructions in a safe and accessible location for future reference. -
Page 4: Safety Instructions
WARNING: The appliance and its accessible parts • become hot during use. Care should be taken to avoid touching heating elements. Always use oven gloves to remove or put in • accessories or ovenware. Before carrying out any maintenance, disconnect the •... - Page 5 ENGLISH • Do not use multi-plug adapters and extension cables. Cabinet minimum 600 (600) mm • Make sure not to cause damage to height (Cabinet un‐ the mains plug and to the mains der the worktop cable. Should the mains cable need to minimum height) be replaced, this must be carried out Cabinet width...
- Page 6 • Be careful when you open the and moisture can build up behind a appliance door while the appliance is closed furniture panel and cause in operation. Hot air can release. subsequent damage to the appliance, • Do not operate the appliance with wet the housing unit or the floor.
-
Page 7: Product Description
ENGLISH 2.6 Service • Disconnect the appliance from the mains supply. • To repair the appliance contact the • Cut off the mains electrical cable Authorised Service Centre. close to the appliance and dispose of • Use original spare parts only. •... -
Page 8: Control Panel
4. CONTROL PANEL 4.1 Buttons Sensor field / Button Function Description MINUS To set the time. CLOCK To set a clock function. PLUS To set the time. 4.2 Display A. Clock functions B. Timer C. Clock function 5. BEFORE FIRST USE Refer to "Care and cleaning"... -
Page 9: Clock Functions
ENGLISH 6.3 Heating functions Oven func‐ Application tion Oven func‐ Application tion This function is de‐ signed to save energy The oven is off. during cooking. For the Moist Baking cooking instructions re‐ Off position fer to "Hints and tips" chapter, Moist Baking. - Page 10 Clock function Application To set when the appliance deactivates. TIME DELAY To combine DURATION and END function. MINUTE MIND‐ To set countdown time. This function has no effect on the operation of the appliance. You can set the MINUTE MINDER at any time, also when the appliance is off.
-
Page 11: Using The Accessories
ENGLISH 7.7 Cancelling the clock 2. Press to set the necessary functions time. The Minute Minder starts automatically after 5 seconds. 1. Press the again and again until 3. When the set time ends, an acoustic the necessary function indicator signal sounds. -
Page 12: Additional Functions
Wire shelf and deep pan together: The high rim around the wire Place the wire shelf and the deep pan shelf is a special device to together on the telescopic runner. prevent the cookware from slipping. Deep pan: Put the deep pan on the telescopic runners. - Page 13 ENGLISH need to change the temperature setting if Trays in the oven can twist during an unequal browning occurs. The baking. When the trays become cold differences equalize during baking. again, the distortions disappear. 10.3 Tips on baking Baking results Possible cause Remedy The bottom of the cake...
- Page 14 BAKING IN TINS (°C) (min) Madeira True Fan Cooking 140 - 160 70 - 90 cake / Fruit cakes Cheesecake Conventional Cook‐ 170 - 190 60 - 90 CAKES / PASTRIES / CAKES / PASTRIES / BREADS BREADS Use the third shelf position.
- Page 15 ENGLISH CAKES / PASTRIES / BREADS Preheat the empty oven. Use the function: Conventional Cooking. Use a baking tray. (°C) (min) Swiss roll 180 - 200 10 - 20 Rye bread: first: 230 then: 160 - 180 30 - 60 Buttered almond 190 - 210 20 - 30...
- Page 16 BISCUITS Use the third shelf position. (°C) (min) Short pastry biscuits True Fan Cooking 150 - 160 10 - 20 Rolls, preheat the True Fan Cooking 160 10 - 25 empty oven Biscuits made of True Fan Cooking 150 - 160...
- Page 17 ENGLISH 10.6 Multilevel Baking Use the baking trays. Use the function: True Fan Cooking. CAKES / PASTRIES (°C) (min) 2 positions Cream puffs / 160 - 180 25 - 45 1 / 4 Eclairs, preheat the empty oven Dry streusel cake 150 - 160 30 - 45 1 / 4...
- Page 18 10.8 Roasting Baste meat joints with their own juice several times during roasting. Use the first shelf position. BEEF (°C) (min) Pot roast 1 - 1.5 kg Conventional 120 - 150 Cooking Roast beef or fillet, per cm of...
- Page 19 ENGLISH VEAL Use the function: Turbo Grilling. (kg) (°C) (min) Roast veal 160 - 180 90 - 120 Veal knuckle 1.5 - 2 160 - 180 120 - 150 LAMB Use the function: Turbo Grilling. (kg) (°C) (min) Lamb leg / Roast 1 - 1.5 150 - 170 100 - 120...
- Page 20 POULTRY Use the function: Turbo Grilling. (kg) (°C) (min) Poultry, portions 0.2 - 0.25 each 200 - 220 30 - 50 Chicken, half 0.4 - 0.5 each 190 - 210 35 - 50 Chicken, poulard 1 - 1.5 190 - 210...
- Page 21 ENGLISH PIZZA PIZZA Use the first shelf position. Preheat the empty oven before cooking. (°C) (min) Use the second shelf position. Vegetable 160 - 180 50 - 60 (°C) (min) Unleavened 230 - 250 10 - 20 PIZZA bread Puff pastry 160 - 180 45 - 55 flan...
- Page 22 GRILL Use the function: Grill (°C) (min) (min) 1st side 2nd side Veal loin 210 - 230 30 - 40 30 - 40 Lamb saddle 210 - 230 25 - 35 20 - 25 Whole fish, 0.5 210 - 230...
- Page 23 ENGLISH 10.12 Defrost the oven cavity. Put the food in a deep dish and set it on top of the plate inside Remove the food packaging and put the the oven. Remove the shelf supports if food on a plate. necessary.
- Page 24 10.14 Dehydrating - True Fan Cooking SOFT FRUIT Cover trays with grease proof paper or baking parchment. For a better result, stop the oven halfway through the drying time, open the door (min) and let it cool down for one night to Cooking time complete the drying.
- Page 25 ENGLISH Ramekins Pizza pan Baking dish Flan base tin Ceramic Dark, non-reflective Dark, non-reflective 8 cm diame‐ Dark, non-reflective 28 cm diameter 26 cm diameter ter, 5 cm 28 cm diameter height 10.16 Moist Baking For the best results follow suggestions listed in the table below.
- Page 26 (°C) (min) Macaroons, 24 baking tray or dripping 35 - 45 pieces Muffins, 12 baking tray or dripping 35 - 45 pieces Savory pastry, baking tray or dripping 35 - 45 20 pieces Short crust bis‐ baking tray or dripping...
- Page 27 ENGLISH BAKING ON ONE LEVEL. Biscuits Use the third shelf position. (°C) (min) Short bread / Pastry True Fan Cooking 25 - 40 strips Short bread / Pastry Conventional Cooking 160 20 - 30 strips, preheat the empty oven Small cakes, 20 per tray, True Fan Cooking 20 - 35 preheat the empty oven...
-
Page 28: Care And Cleaning
GRILL Preheat the empty oven for 5 minutes. Grill with the maximum temperature setting. (min) Toast Grill 1 - 3 Beef steak, turn halfway Grill 24 - 30 through 11. CARE AND CLEANING WARNING! Refer to Safety chapters. 11.1 Notes on cleaning Clean the front of the oven with a soft cloth with warm water and a mild cleaning agent. - Page 29 ENGLISH 11.2 Removing the shelf 4. When the oven cools down, clean the cavity with a wet soft cloth. supports Spots or discolouration of the catalytic coating have no effect on Catalytic To clean the oven, remove the shelf cleaning. supports.
-
Page 30: Troubleshooting
11.5 Replacing the lamp WARNING! Risk of electric shock. The lamp can be hot. 1. Turn off the oven. Wait until the oven is cooled down. 2. Disconnect the oven from the mains. 3. Put a cloth on the bottom of the 9. -
Page 31: Technical Data
ENGLISH Problem Possible cause Remedy The oven does not heat The fuse is blown. Make sure that the fuse is the cause of the malfunc‐ tion. If the fuse is blown again and again, contact a qualified electrician. The lamp does not oper‐ The lamp is defective. - Page 32 Residual heat Keep food warm When the cooking duration is longer than Choose the lowest possible temperature 30 minutes, reduce the oven temperature setting to use residual heat and keep a to minimum 3 - 10 minutes before the meal warm.
- Page 33 ENGLISH...
- Page 34 www.electrolux.com...
- Page 35 ENGLISH...
- Page 36 www.electrolux.com/shop...
Need help?
Do you have a question about the OKF5C70X and is the answer not in the manual?
Questions and answers