Table of Contents
Advertisement
Quick Links
Advertisement
Table of Contents

Subscribe to Our Youtube Channel
Related Manuals for Electrolux OKD5C51V


Summary of Contents for Electrolux OKD5C51V
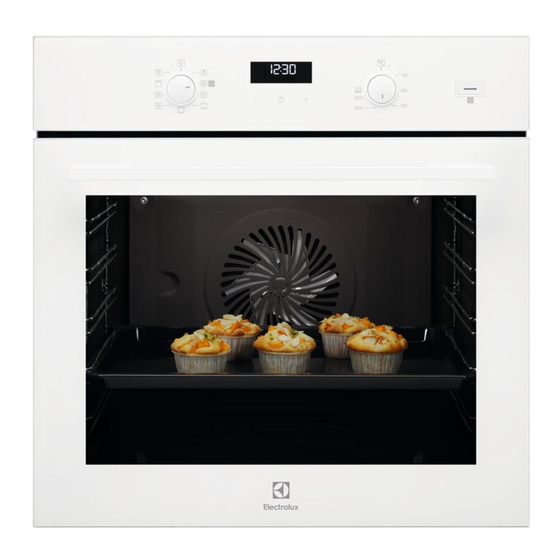
- Page 1 OKD5C51V OKD5C51X OKD5C51Z Oven User Manual...
-
Page 2: Table Of Contents
14. ENERGY EFFICIENCY.................. 35 WE’RE THINKING OF YOU Thank you for purchasing an Electrolux appliance. You’ve chosen a product that brings with it decades of professional experience and innovation. Ingenious and stylish, it has been designed with you in mind. So whenever you use it, you can be safe in the knowledge that you’ll get great results every time. -
Page 3: Safety Information
ENGLISH SAFETY INFORMATION Before the installation and use of the appliance, carefully read the supplied instructions. The manufacturer is not responsible for any injuries or damages that are the result of incorrect installation or usage. Always keep the instructions in a safe and accessible location for future reference. -
Page 4: Safety Instructions
Always use oven gloves to remove or put in • accessories or ovenware. Before carrying out any maintenance, disconnect the • appliance from the power supply. Ensure that the appliance is switched off before • replacing the lamp to avoid the possibility of electric shock. - Page 5 ENGLISH electrical ratings of the mains power • Deactivate the appliance after each supply. use. • Always use a correctly installed • Be careful when you open the shockproof socket. appliance door while the appliance is • Do not use multi-plug adapters and in operation.
- Page 6 • Do not clean the catalytic enamel (if the appliance is in operation. Heat applicable) with any kind of detergent. and moisture can build up behind a 2.5 Internal lighting closed furniture panel and cause...
-
Page 7: Product Description
ENGLISH 3. PRODUCT DESCRIPTION 3.1 General overview Control panel Knob for the heating functions Power lamp / symbol Display Control knob (for the temperature) Temperature indicator / symbol Plus Steam Socket for the core temperature sensor Heating element Lamp Shelf support, removable Cavity embossment Shelf positions 3.2 Accessories... -
Page 8: Control Panel
For shelves and trays. Telescopic runners 4. CONTROL PANEL 4.1 Buttons Sensor field / Button Function Description MINUS To set the time. CLOCK To set a clock function. PLUS To set the time. PLUS STEAM To turn on the True Fan Cooking PLUS function. -
Page 9: Daily Use
ENGLISH 6. DAILY USE WARNING! Oven func‐ Application Refer to Safety chapters. tion 6.1 Retractable knobs To bake and roast food on one shelf position. To use the appliance press the knob. Conventional The knob comes out. Cooking 6.2 Setting a heating function (Top / Bottom Heat) 1. - Page 10 The maximum capacity of the cavity embossment is 250 ml. Oven func‐ Application Fill the cavity embossment with water tion only when the oven is cold. To roast larger meat CAUTION! joints or poultry with Do not refill the cavity bones on one shelf po‐...
-
Page 11: Clock Functions
ENGLISH 7. CLOCK FUNCTIONS 7.1 Clock functions table Clock function Application TIME OF DAY To set, change or check the time of day. DURATION To set how long the appliance operates. To set when the appliance deactivates. TIME DELAY To combine DURATION and END function. MINUTE MIND‐... -
Page 12: Using The Accessories
Appliance turns on automatically later on, The Minute Minder starts automatically works for the set DURATION time and after 5 seconds. stops at the set END time. At the set time 3. When the set time ends, an acoustic an acoustic signal sounds. - Page 13 ENGLISH Food category: casserole 1. Place half of the ingredients in a baking dish. 2. Insert the tip of the core temperature sensor exactly in the centre of the casserole. The core temperature sensor should be stabilized in one place during baking. Use a solid ingredient to achieve that.
- Page 14 6. Set the oven function and the oven temperature. When the dish is at the set core temperature, an acoustic signal sounds for 2 minutes. Press any button to stop the signal. 7. Deactivate the appliance. 8. Remove the plug of the core temperature sensor from the socket.
-
Page 15: Additional Functions
ENGLISH Put the wire shelf on the telescopic Wire shelf and deep pan together: runners so that the feet point Place the wire shelf and the deep pan downwards. together on the telescopic runner. The high rim around the wire shelf is a special device to prevent the cookware from slipping. - Page 16 10.2 True Fan Cooking PLUS Cakes / pastries / breads Preheat the empty oven for 5 minutes. Use the baking tray. Use the second shelf position. Food Water in the cavity Temperature (°C) Time (min) embossment (ml) Cookies, scones,...
- Page 17 ENGLISH • You can extend baking times by 10 – 15 minutes if you bake cakes on more Food Tempera‐ Time than one shelf position. ture (°C) (min) • Cakes and pastries at different Roast beef 50 - 60 heights do not always brown equally. There is no need to change the Chicken 60 - 80...
- Page 18 10.5 Baking on one level: Baking in tins Food Function Temperature Time (min) Shelf position (°C) Ring cake / True Fan 150 - 160 50 - 70 Brioche Cooking Madeira cake / True Fan 140 - 160 70 - 90...
- Page 19 ENGLISH Food Function Tempera‐ Time Shelf po‐ ture (°C) (min) sition Fruit flans made with short True Fan Cooking 160 - 170 40 - 80 pastry Yeast cakes with delicate Top / Bottom 40 - 80 160 - 180 toppings (e.g. quark, cream, Heat custard) 1) Preheat the oven.
- Page 20 Food Function Temperature Time (min) Shelf position (°C) Vegetables au Turbo Grilling 160 - 170 15 - 30 gratin Baguettes top‐ True Fan Cook‐ 160 - 170 15 - 30 ped with mel‐ ted cheese Sweet bakes Top / Bottom...
- Page 21 ENGLISH Food Accessories Temperature Shelf po‐ Time (min) (°C) sition Shashlik, 0.5 baking tray or dripping 35 - 45 Cookies, 16 baking tray or dripping 40 - 50 pieces Macaroons, 24 baking tray or dripping 35 - 45 pieces Muffins, 12 baking tray or dripping 35 - 45 pieces...
- Page 22 Food Temperature Time (min) Shelf position (°C) 2 positions 3 positions Biscuits made 160 - 170 25 - 40 1 / 4 with sponge mixture Biscuits made 80 - 100 130 - 170 1 / 4 with egg white,...
- Page 23 ENGLISH Food Temperature (°C) Time (min) Shelf position Piroggen (Russian 15 - 25 180 - 200 version of calzone) 1) Preheat the oven. 2) Use a deep pan. 10.10 Roasting To keep meat more succulent: • roast lean meat in the roasting tin with Use heat-resistant ovenware.
- Page 24 Food Quantity Function Tempera‐ Time (min) Shelf posi‐ (kg) ture (°C) tion Pork knuckle 0.75 - 1 Turbo Grill‐ 150 - 170 90 - 120 (precooked) Veal Food Quantity Function Tempera‐ Time (min) Shelf posi‐ (kg) ture (°C) tion Roast veal Turbo Grill‐...
- Page 25 ENGLISH Food Quantity Function Tempera‐ Time (min) Shelf posi‐ (kg) ture (°C) tion Duck 1.5 - 2 Turbo Grill‐ 180 - 200 80 - 100 Goose 3.5 - 5 Turbo Grill‐ 160 - 180 120 - 180 Turkey 2.5 - 3.5 Turbo Grill‐...
- Page 26 Food Temperature (°C) Time (min) Shelf position Pizza, frozen 200 - 220 15 - 25 Pizza American, 190 - 210 20 - 25 frozen Pizza, chilled 210 - 230 13 - 25 Pizza Snacks, fro‐ 180 - 200 15 - 30...
- Page 27 ENGLISH Food Quantity Defrosting Further de‐ Comments (kg) time (min) frosting time (min) Cream 2 x 0.2 80 - 100 10 - 15 Whip the cream when still slight‐ ly frozen in places. Gateau 10.15 Preserving - Bottom Heat • The jars cannot touch each other. •...
- Page 28 10.16 Drying - True Fan For a better result, stop the oven halfway through the drying time, open the door Cooking and let it cool down for one night to complete the drying. Cover trays with grease proof paper or baking parchment.
- Page 29 ENGLISH Pork Food core temperature (°C) Less Medium More Chop (saddle), Smoked pork loin, Smoked loin poached Veal Food core temperature (°C) Less Medium More Roast veal Knuckle of veal Mutton / lamb Food core temperature (°C) Less Medium More Leg of mutton Saddle of mutton Leg of lamb,...
- Page 30 Casseroles - Precooked vege‐ Food core temperature (°C) tables Less Medium More Zucchini Casserole, Broccoli Casserole, Fennel Casserole Casseroles - Savoury Food core temperature (°C) Less Medium More Cannelloni, Lasagne, Pasta bake Casseroles - Sweet Food core temperature (°C)
-
Page 31: Care And Cleaning
ENGLISH Food Function Temperature (°C) Time (min) Short bread / Pastry True Fan Cooking 25 - 40 stripes Short bread / Pastry Top / Bottom Heat 20 - 30 stripes Small cakes (20 per tray) True Fan Cooking 20 - 35 Small cakes (20 per tray) Top / Bottom Heat 20 - 30 1) Preheat the oven. - Page 32 If you have nonstick accessories, do not clean them using aggressive agents, sharp-edged objects or a dishwasher. It can cause damage to the nonstick coating. Clean the moisture from the cavity after each use. 11.2 Cleaning the cavity Install the removed accessories in the embossment opposite sequence.
-
Page 33: Troubleshooting
ENGLISH Install the smaller panel first, then the larger and the door. One of the hinge-arms (normally the right one) is free to move. Make sure, that both hinge-arms are in the same position (approximately 70° angle). 3. Close the oven door to the first WARNING! opening position (approximately 70°... - Page 34 12.1 What to do if... Problem Possible cause Remedy The oven does not heat The oven is deactivated. Activate the oven. The oven does not heat The clock is not set. Set the clock. The oven does not heat...
-
Page 35: Technical Data
ENGLISH Problem Possible cause Remedy The water comes out of There is too much water in Deactivate the oven and the cavity embossment. the cavity embossment. make sure that the appli‐ ance is cold. Wipe the wa‐ ter with a cloth or sponge. Add the correct amount of water to the cavity em‐... - Page 36 Cooking with fan Moist Baking When possible, use the cooking Function designed to save energy during functions with fan to save energy. cooking. Keep food warm Choose the lowest possible temperature setting to use residual heat and keep a meal warm.
- Page 37 ENGLISH...
- Page 38 www.electrolux.com...
- Page 39 ENGLISH...
- Page 40 www.electrolux.com/shop...
Need help?
Do you have a question about the OKD5C51V and is the answer not in the manual?
Questions and answers