Table of Contents
Advertisement
Quick Links
Advertisement
Table of Contents

Subscribe to Our Youtube Channel
Related Manuals for CyberView RP-K617


Summary of Contents for CyberView RP-K617
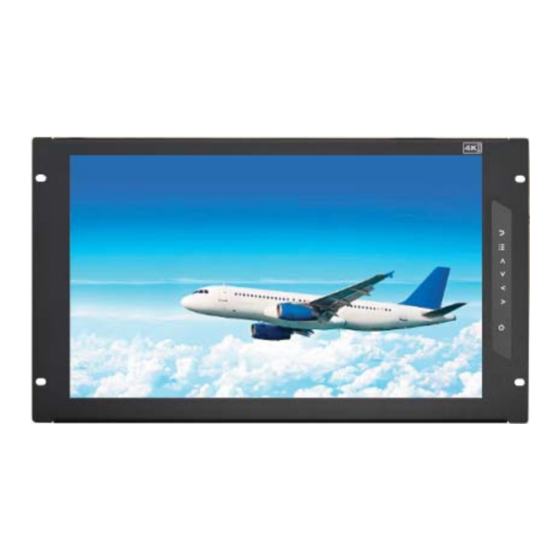
- Page 1 KVM switch and rackmount screen technology User Manual 17” 4K 3840 x 2160 LCD RP-K617 6U Rackmount Display Panel Options : - SDI / MCS - Touchscreen / DC power - MIL-type or lockable connector Designed and manufactured by Austin Hughes...
- Page 3 Legal Information First English printing, July 2018 Information in this document has been carefully checked for accuracy; however, no guarantee is given to the correctness of the contents. The information in this document is subject to change without notice. We are not liable for any injury or loss that results from the use of this equipment.
-
Page 4: Table Of Contents
Contents < Part. 1 > RP-K617 Package Content Structure Diagram & Dimension P.1 - 2 Installation Specifi cations / OSD / Remote Controller < Part. 2 > Product Specifi cations P.4 - 5 On-screen Display Operation ( OSD ) P.6 - 8 Picture In Picture ( PIP ) / Picture By Picture ( PBP ) P.9 - 10... - Page 5 Before Installation ■ It is very important to mount the equipment in a suitable cabinet or on a stable surface. ■ Make sure the place has a good ventilation, is out of direct sunlight, away from sources of excessive dust, dirt, heat, water, moisture and vibration. Unpacking The equipment comes with the standard parts shown in package content.
-
Page 6: Part. 1 > Rp-K617
< Part 1 > < 1.1 > Package Content RP-K617 unit X 1 - 6ft DP cable X 1 - Power adapter X 1 - Power cord X 1 < 1.2 > Structure Diagram Front view Power adapter Rear view... - Page 7 < 1.2 > Dimension RP-K617 Front View Side View UNIT : mm Bottom View 1mm = 0.03937 inch Product Dimension Packing Dimension Gross Model (W x D x H) (W x D x H) Weight Weight 480 x 48 x 266 mm 529 x 124 x 451 mm 4.2 kg...
-
Page 8: Installation
< 1.3 > Installation Step ■ Mount the display panel with M6 screw set. ■ M6 screw x 4 pcs required ( Left & right side ). M6 screw sets are not provided. Step ■ Fix the LCD into the rack. -
Page 9: Product Specifi Cations
< Part 2 > < 2.1 > Product Specifi cations RP-K617 Native Resolution 3840 x 2160 Panel Panel Size ( diagonal ) 17.3-inch TFT color LCD Brightness ( cd/m² ) Contrast Ratio ( typ. ) 1000:1 Colors 16.7 M, 8-bit... - Page 10 Environmental Operating Temperature 0 to 55°C degree Conditions Humidity 20~90%, non-condensing Altitude 16,000 ft Storage / Non-operating Temperature -20 to 60°C degree Humidity 5~90%, non-condensing Altitude 40,000 ft Shock 10G acceleration (11ms duration) Vibration 5~500Hz 1G RMS random Physical Product ( W x D x H ) 480 x 48 x 266 mm Specifi...
- Page 11 < 2.2 > On-screen Display Operation ( OSD ) RP-K617 Membrane Switch Function Turn the monitor on or off Display the OSD menu Act as an Enter key to select screen setting options Scroll through menu options and adjust the displayed control...
-
Page 12: On-Screen Display Operation ( Osd )
< 2.3 > On-screen Display Operation ( OSD ) Picture Brightness : Adjust the screen brightness Contrast : Adjust the difference between the image background ( black level ) and the foreground ( white level ) Black level : Adjust background black level of the screen : Screen in power saving mode Position Picture size : Adjust the image size... - Page 13 < 2.3 > On-screen Display Operation ( OSD ) RP-K617 Reset Reset : Return the adjustment back to factory setting PIP mode : Enter into PIP / PBP setting - PIP MODE / PBP 2WIN ( Main screen + 1 sub screen ) /...
-
Page 14: Picture In Picture ( Pip ) / Picture By Picture ( Pbp )
< 2.3 > How to Use Picture In Picture ( PIP ) / Picture By Picture ( PBP ) < 2.3.1 > Picture in Picture ( PIP ) Mode Display the Sub screen in the Main screen. OSD Menu → MISC → PIP Mode → Large / Small / OFF Main screen Sub screen Position... - Page 15 RP-K617 < 2.3.2 > Picture By Picture ( PBP ) Mode Display the Sub screen next to the Main screen. OSD Menu → MISC → PIP Mode → PBP Main screen Sub screen Size LCD Monitor Main / Sub screen...
- Page 16 Austin Hughes’ SDI input is an ideal solution for the broadcast- grade video and high resolution CCTV market. Designed for use with CyberView displays, a SDI input module can support up to 1080p @60Hz resolution without using additional space or power and it comes standard with a 2-year warranty.
-
Page 17: Part. 3 > Options
LCD displays cascade together via CAT 5/6 cable, and daisy chain up to 1,000 meters. Designed for use with CyberView LCD displays, Austin Hughes provides a MCS input module without using additional space or power and it comes standard with a 2-year warranty. - Page 18 < 3.3 > Options : Touchscreen & driver K17" USB Touchscreen Specifi cation Model e-Resistive K17TPC-10 Multi-touch Technology Projected Capacitive 5-Wire Resistive Touch Point 10 point touch standard Single ( special requirement available ) Input Type Finger or Capacitive Stylus Finger or Stylus Resolution 4096 x 4096...
- Page 19 < 3.3 > Options : Touchscreen & driver RP-K617 K17TPC-10 Driver Connect the USB cable from the USB port on the LCD to a computer. The touch screen supports easy Plug-and-Play operations. There is no need to install additional drivers on the computer.
-
Page 20: Mil-Type Or Lockable Connector
< 3.5 > Options : MIL-type or Lockable Connector Input Part no. MIL Standard MIL - type MS3470W8-33P MIL - DTL - 26482 DC Power Connector ( Male ) MS3470W14-15P MIL - DTL - 26482 ( Male ) There are several additional MIL DC and VGA connector types with varying design characteristics to meet cost considerations and to provide users with the most design fl...
Need help?
Do you have a question about the RP-K617 and is the answer not in the manual?
Questions and answers