
Related Manuals for Eneo ICB-62M0550MAA


Summary of Contents for Eneo ICB-62M0550MAA
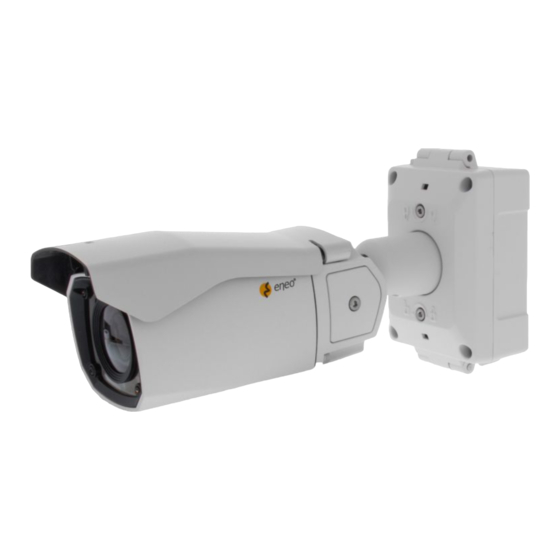
- Page 1 User Manual 1/2.8” Network Camera, 1920x1080, Day&Night, DOL-WDR, 5.0-50mm, Infrared, IP67 ICB-62M0550MAA...
-
Page 3: Safety Precaution
MEGA-PIXEL NETWORK CAMERA Safety Precaution To prevent electric shocks and risk of fire hazards, do NOT use other than specific power source. CAUTION: TO REDUCE THE RISK OF ELECTRIC SHOCK, DO NOT REMOVE COVER (OR BACK). NO USER SERVICEABLE PARTS INSIDE. REFER SERVICING TO QUALIFIED SERVICE PERSONNEL. - Page 4 MEGA-PIXEL NETWORK CAMERA Safety Precaution NOTICE • The image used in this instruction manual are processed to help comprehension and may differ from actual video of the camera. • Avoid installing areas where has shock or vibration which results in the problems. •...
-
Page 5: Table Of Contents
MEGA-PIXEL NETWORK CAMERA Contents Safety Precaution ....03~04p Contents ....... 05p . -
Page 6: Features
MEGA-PIXEL NETWORK CAMERA Features • Full-HD 2.16Mega Pixel, NETWORK CAMERA, 1920x1080(30/25p) • The best low light performance with SONY’s STARVIS sensor • ONVIF Conformance • ONVIF Event Mapping • Zero configuration • Cross Web Browsing (IE, Edge, Safari, Firefox, Chrome) •... -
Page 7: Composition
MEGA-PIXEL NETWORK CAMERA Composition Plastic Anchor: Sunshield 6 x 30mm (4pcs) Mounting Screw: 4 x 30mm (4pcs) Cable tie (2pcs) Torque Wrench: 3mm (1pc) Camera unit Hinge pin (1pc) Operating Mounting RJ45 Easy Cap Cable fixation plate Grommet (2pcs) Instruction Template for Grommets with Fixing screw... -
Page 8: Part Names
MEGA-PIXEL NETWORK CAMERA Part Names JUNCTION BOX TOP SUNSHIELD JUNCTION BOX BASE BRACKET BODY CASE DUAL WINDOW Hinge Pin 2x Lock/Unlock Screw 2x Water drain [ Inside of Opening Cover ] Micro SD MEMORY SD Card Slot IP Reset (Default) : pressing for 5~8 secondsresets RESET all parameters to original factory settings. -
Page 9: Installation Instructions
MEGA-PIXEL NETWORK CAMERA Installation Instructions CAUTION • Cover Opening Alarm and External Alarm Input : Cover Opening(Sabotage) Alarm and External Alarm Input are electrically tied together internally. Alarm contact types, N.O or N.C are selectable by the Alarm Input Selection Jumper and the selection types should be matched with Alarm Type in setup menu. - Page 10 MEGA-PIXEL NETWORK CAMERA Installation Instructions • Using Grommet : Tear off the cocks of grommets properly and pull up the grommet so that sealing can wrap the cable properly as illustrated. If it doesn’t wrap the cable properly, it could cause the water leakage problem. •...
- Page 11 MEGA-PIXEL NETWORK CAMERA Installation Instructions ● Connections to Alarm connectors ALRAM AUDIO 3 4 5 3. ALARM-IN 4. ALARM-OUT 5. GND Install the mount onto a strong structure. Prepare the Junction box base and the accessaries for installation. ① Locate the mounting template at the installation position and drill the wall if needed.
- Page 12 MEGA-PIXEL NETWORK CAMERA Installation Instructions ④ Hook up the I/O wires and Network cable to the connectors. Network cable can be connected to either RJ-45 connector or LSA connectors. ● Connections to LSA connectors TIA/EIA 568A TIA/EIA 568B 1. Green-White 1.
- Page 13 MEGA-PIXEL NETWORK CAMERA Installation Instructions ⑥ Assemble the Junction box top to the Junction box base using a hinge pin. Hinge can be inserted at either side for convinience. ⑦ Connects the Power/Ethernet cables from camera. Hinge pin Junction Box Top ⑧...
- Page 14 MEGA-PIXEL NETWORK CAMERA Installation Instructions ⑩ Set the camera’s orientation and tighten the Lock/Unlock screws using hex wrench. ⑪ Open the Opening cover to insert the Micro SD memory. ⑫ After all the setting, close the Opening cover and tighten it. ⑬...
- Page 15 MEGA-PIXEL NETWORK CAMERA Installation Instructions Pan & Tilt adjustments • Unlock the screw on the camera bracket through using the hex wrench supplied. • Set the camera’s viewing angle then lock the screw on the bracket. 1) Pan limit: Pan is limited to +/- 90°. 2) Tilt limit: Tilt is limited to 0°(2°) min ~ 90°...
- Page 16 MEGA-PIXEL NETWORK CAMERA Installation Instructions Sunshield Assembling • After all adjustments, assemble the sunsheild with the camera unit as illustrated. ① Cover the sunsheild to the camera unit. ② Slide foward to straight the camera front case. ③ Push down the front part of sunshield until clicking sound. Make sure the sunshield is fixed with camera.
-
Page 17: Specifications
MEGA-PIXEL NETWORK CAMERA Specifications NTSC ITEM Imaging Sensor 1/2.8" Sony 2.16 Mega pixel RGB STARVIS CMOS Sensor Effective Pixels 1945(H) x 1097(V) approx. 2.13M pixels Sensitivity 0.001Lux @F1.6(@40IRE, LED Off) Scanning mode Progressive Scan S/N Ratio 50dB Automatic: Min. 1/25,000 sec ~ Max. 1/25 sec Shutter Speed Manual: Min. - Page 18 MEGA-PIXEL NETWORK CAMERA Specifications Login Authority Administrator, Operator, Guest Security Multi User Authority, IP Filtering, HTTPS, Video Stream, Export/Import Network Time Sync. Synchronize Computer/NTP Server, Manual Software Reset Restart, Reset, Factory Default Auto Recovery Backup, Restore Remote Upgrade Using Web Browser Protocol TCP/IP, UDP, IPv4/v6, HTTP, HTTPS, FTP, UPnP, RTP, RTSP, RTCP, DHCP, ARP, Zeroconf, Bonjour, SNMP...
-
Page 19: Operating Instructions
MEGA-PIXEL NETWORK CAMERA Operating Instructions Setup Menu table Category Menu Configuration Player Control Pause, Snapshot, Record Display (Window Fit, Full Screen, Custom) LIVE VIEW Video Stream Stream1, Stream2, Stream3 Protocol HTTPS, HTTP, TCP, UDP PTZ Control Zoom, Focus, Push AF PLAYBACK Event Search, Timeline Search, Timeline Bar Information... - Page 20 MEGA-PIXEL NETWORK CAMERA Operating Instructions Record Record Overwrite when storage is full, Continuous record setting Schedule Recycling Recycling Time Setting Storage Format, Remove, Storage server Event Triggers Motion, Tamper, System, Manual, Network, Timer, Day/Night Actions Record, E-Mail, FTP, Video Boost, SETUP Notification Server Rules...
- Page 21 IP addresses. The network camera‘s default IP address is: 192.168.1.10. 5. Right clicking the device name in the eneo Scan Device tool will bring up the context menu. Use the ‘Open Device Web Site’ option to access the camera.
-
Page 22: Full Menu Setup
MEGA-PIXEL NETWORK CAMERA Full Menu Setup 1. LIVE VIEW Enter the live view menu on the Web Viewer. ■ Web Viewer description XXX-XXXXXXXXX A) Menu button : Click the button to show or hide the setup menu bar. B) Model name : Show a camera model name connected. C) Select Language : Set the web viewer language English, Deutsch or French. - Page 23 MEGA-PIXEL NETWORK CAMERA Full Menu Setup ■ Display ④ Window Fit : Resizes the live view display to fit along with the display window size. ⑤ Full Screen: Resizes the live view display to fit to the monitor resolution. ESC key returns to the previous view.
-
Page 24: Playback
MEGA-PIXEL NETWORK CAMERA Full Menu Setup 2. PLAYBACK 0:00:00 ■ Event Search Playback display using the event list. • Press the input bar to pop up EVENT DATE & TIME window and select the event TYPE. • Click SEARCH button to show up EVENT LIST. •... -
Page 25: Setup
MEGA-PIXEL NETWORK CAMERA Full Menu Setup 3. SETUP Enter the setup menu on the Web Viewer. 3-1. Information Shows the overall information about the system such as Model name, MAC address, IP address, Zeroconf, IP address, Hardware version, Firmware version, Server time, Running time, CPU usage, Inbound/Outbound Bandwidth and Open source list. - Page 26 MEGA-PIXEL NETWORK CAMERA Full Menu Setup 3-2-2. Stream XXXXxXXXX 4000 Stream1, 2, 3 ● > COMPRESSION : H.265(+) and H.264(+) are available in all stream but MJPEG is available in Stream 3 only. • H.265+, H.264+ : Enables to process video data smartly according to users demand and lowering overallbandwidth, and reduce the storage burden.
- Page 27 MEGA-PIXEL NETWORK CAMERA Full Menu Setup > GOP SIZE: GOP (Group of Picture) defines the number of Intra-coded pictures (I frame) & Predictive-coded pictures(P frame) in H.264. I frame is a complete image while P frame is the predictive image data which can lower the image data dramatically between frames. GOP SIZE stands for the number of P frames between I frames.
- Page 28 MEGA-PIXEL NETWORK CAMERA Full Menu Setup 3-2-3. Smart Video Stream ● ROI(Region Of Interest) > Enables to process video data smartly according to users demand. > Available to deliver high quality and frame rate on interested region while less quality and frame rate video on non-interested region.
- Page 29 MEGA-PIXEL NETWORK CAMERA Full Menu Setup > How to set Region of Interest: 1) Mark ENABLE checkbox to enable ROI function. 2) Click the mouse right button on the video viewer, select "Create ROI area" menu and Drag the ROI area. 3) After drag, enter a Name, select Quality and save.
- Page 30 MEGA-PIXEL NETWORK CAMERA Full Menu Setup 3-2-4. Image 2016-10-06 09:50:35 CAM1...
- Page 31 MEGA-PIXEL NETWORK CAMERA Full Menu Setup Basic ● > BRIGHTNESS: Adjusts the overall brightness of the scene. Increasing the value increases the brightness. > CONTRAST: Adjusts the contrast of the scene. Increasing the value increases the contrast. > SATURATION: Adjusts the color richness of the scene. Increasing the value increases the color richness.
- Page 32 MEGA-PIXEL NETWORK CAMERA Full Menu Setup > ENABLE ZOOM&FOCUS OSD : Applies to Built-in Motor driven V/F lens or AF models only Enables display of the Zoom Ratio & Focusing Mode (displays top-right). > MODE : Allows you to select when the ZOOM&FOCUS OSD is displayed. •...
- Page 33 MEGA-PIXEL NETWORK CAMERA Full Menu Setup > SHUTTER : (Available only in MANUAL mode) Sets the shutter to a fixed value. > MAX. SHUTTER : (Available only in AUTOMATIC mode) Sets the maximum exposure time to limit long exposure at night or in low-light scenes. >...
- Page 34 MEGA-PIXEL NETWORK CAMERA Full Menu Setup > SPEED : Adjusts the zoom control speed. Increasing the value increases the speed. > LENS LOCKING : Allows locking of the lens control to prevent undesirable operation. • OFF : Disables the locking feature allowing lens operation at any time. •...
- Page 35 MEGA-PIXEL NETWORK CAMERA Full Menu Setup Day & Night ● > MODE : Selects how to control the day/night feature. • DAY : Disables the switching day/night filter and fixes it to DAY only. • NIGHT : Disables the switching day/night filter and fixes it to NIGHT only. •...
- Page 36 MEGA-PIXEL NETWORK CAMERA Full Menu Setup ● (DOL HDR, Digital Overlap High Dynamic Range) > WDR : Improves the visibility and the dynamic range for the high contrast scene temporally with multi scan images > DWDR: Improves the visibility by compensating dark area spatially. ●...
- Page 37 MEGA-PIXEL NETWORK CAMERA Full Menu Setup ● (Dynamic Digital Noise Reduction) > 3DNR : • MODE: ON reduces the noise by cancelling the spatial & temporal components in 3 dimensional a way. • LEVEL: Determines the strength of the noise reduction. Higher values reduce more noise but can also lead to a ghosting effect.
- Page 38 MEGA-PIXEL NETWORK CAMERA Full Menu Setup VerticalView ● > MODE : ON displays the video in vertical view format, 16:9->9:16 for narrow streets, corridors or hallways. > ROTATION : Determines the orientation to rotate. Mode : On Rotation : 90 degree...
- Page 39 MEGA-PIXEL NETWORK CAMERA Full Menu Setup 3-2-5. Privacy Mask Mark ENABLE checkbox to activate the privacy masks. > COLOR : Select the color to mask at each privacy area. > NAME : Input the individual name for each privacy mask. To set the privacy mask (up to 8 privacy areas) : 1) Mark ENABLE checkbox.
- Page 40 MEGA-PIXEL NETWORK CAMERA Full Menu Setup 3-2-6. Digital Zoom > Mark ENABLE checkbox to activate the digital zoom. > LEVEL selects the fixed digital zoom ratio. X1.0 is not digital zoomed.
-
Page 41: Record
MEGA-PIXEL NETWORK CAMERA Full Menu Setup 3-3. Record 3-3-1. Record > Mark OVERWRITE WHEN STORAGE IS FULL checkbox to allow the storage to be overwritten. > CONTINUOUS RECORD SETTING : Mark ENABLE checkbox to activate the continuous recording into the storage. >... - Page 42 MEGA-PIXEL NETWORK CAMERA Full Menu Setup 3-3-3. Recycling > Mark ENABLE RECYCLING checkbox to delete recorded video data in storage when certain time is passed. For example, if Recycling Time is set to 2 Months 1Day 0Hour, all the video data that passed 2 Months 1Day 0Hour will be deleted. >...
- Page 43 MEGA-PIXEL NETWORK CAMERA Full Menu Setup 3-3-4. Storage > FORMAT : Formats the storage. Backup the data before formatting the storage if necessary. > REMOVE : Helps removing the storage safely. [ NOTE ] Common Internet File System (CIFS) is a remote file access protocol that forms the basis for Windows file sharing, network printing, and various other network services.
-
Page 44: Event
MEGA-PIXEL NETWORK CAMERA Full Menu Setup 3-4. Event 3-4-1. Triggers EVENT TRIGGERS menu defines and sets the parameters for the various event sources. [ Important NOTE ] Once the event is generated, the camera can record the video into the storage, output the alarm signal, email the event, send the video clip to FTP, boost the video frame rate, move to PTZ preset or send the event to the notification server. -
Page 45: System
MEGA-PIXEL NETWORK CAMERA Full Menu Setup To set the motion detection area (up to 4 include-types and 4 exclude-types) : 1) Mark ENABLE checkbox. 2) In the video window, place the mouse cursor where you would like to make a detection window and click&drag the right button. - Page 46 MEGA-PIXEL NETWORK CAMERA Full Menu Setup Manual : ● Enables to user to set the event trigger optionally. > Mark ENABLE checkbox to enable the manual trigger icons on the live view menu. > DWELL TIME : Sets the time for the event once triggered by the manual trigger on the live view menu.
- Page 47 MEGA-PIXEL NETWORK CAMERA Full Menu Setup Timer ● Mark ENABLE checkbox to trigger the event as defined Timer Interval. (Hour/Minute/Second) Day / Night ● Mark ENABLE checkbox to trigger the event when Day/Night is switched. > MODE : Select the mode, Day->Night or Night->Day. >...
- Page 48 MEGA-PIXEL NETWORK CAMERA Full Menu Setup 3-5-2. Actions EVENT ACTIONS menu defines and sets the parameters for how to treat the various event sources. Record ● > Mark ENABLE checkbox to enable recording into the built-in storage when the event occurs.
- Page 49 MEGA-PIXEL NETWORK CAMERA Full Menu Setup > Mark USE MAIL SERVER checkbox to set the mailing server. • MAIL SERVER : Enter the host name or IP addresses for the mail servers. If a host name is used, a valid DNS server must be specified in the Network-Basic settings. •...
- Page 50 MEGA-PIXEL NETWORK CAMERA Full Menu Setup ● FTP notification will save files on the specified FTP server. > Mark ENABLE checkbox to set the FTP server. • SERVER : Enter the IP address or host name of the specific FTP server. •...
- Page 51 MEGA-PIXEL NETWORK CAMERA Full Menu Setup > JPEG SETTING : Configures JPEG for the FTP server. • PRE-EVENT : Sets the time & the frame rate for JPEG images to be sent to FTP before the event. • POST-EVENT : Sets the time & the frame rate for JPEG images to be sent to FTP after the event.
- Page 52 MEGA-PIXEL NETWORK CAMERA Full Menu Setup Notification Server ● > Mark ENABLE checkbox to notify the event to the notification server when it occurs. • TYPE : Selects the network protocol to connect the notification server. • SERVER URL : Input the server URL of the notification sever. To enable the audio when the event occurs, copy the URL at SETUP>AUDIO and paste it on the server URL like http://x.x.x.x/setup/audio/audio.php •...
- Page 53 MEGA-PIXEL NETWORK CAMERA Full Menu Setup 3-4-3. Rules EVENT RULES menu defines and sets the parameters for what to do for the various event sources. Event Processing ● Event process lists have to be generated and can be edited for what to do when the event occurs.
- Page 54 MEGA-PIXEL NETWORK CAMERA Full Menu Setup > FTP : Mark the checkbox to use FTP as set in SETUP>EVENT>ACTIONS>FTP when the selected event occurs. > VIDEO BOOST : Select the video stream to be boosted up. Video boost is disabled if RECORD is enabled. [ NOTE ] >...
- Page 55 MEGA-PIXEL NETWORK CAMERA Full Menu Setup ONVIF Mapping ● Onvif mapping is provided to map the various events generated by this camera, but not defined by Onvif, to assign them to Onvif events for the Onvif compatible VMSes or NVRs. Two mappings for Motion and Alarm In are provided to be mapped and can be used by editing them.
- Page 56 MEGA-PIXEL NETWORK CAMERA Full Menu Setup 3-5. System 3-5-1. Security Users ● Manages the user accounts by names, groups and authorities. > USERS : Can be added, edited or deleted.
- Page 57 MEGA-PIXEL NETWORK CAMERA Full Menu Setup HTTPS ● Selects the CONNECTION MODE. > HTTP : Transfers data without encryption. Supports a URL that only starts with "HTTP: " > HTTPS : Transfer data with encryption by Hypertext Transfer Protocol over SSL protocol. Supports a URL that only starts with "HTTPS: "...
- Page 58 MEGA-PIXEL NETWORK CAMERA Full Menu Setup To add a subnet of network addresses, these must be added in CIDR [ NOTE ] (Classless Inter-Domain Routing) notation. For example: entering 192.168.1.0/24 will add all the addresses in the range 192.168.1.1 to 192.168.1.254. Contact your network administrator for more detail.
- Page 59 MEGA-PIXEL NETWORK CAMERA Full Menu Setup 3-5-2. Date & Time Current Time ● Shows the current date and time. Clicking SAVE tap updates and saves the date and time with the selected time in NEW TIME. New Time ● Select one of the following server times. >...
- Page 60 MEGA-PIXEL NETWORK CAMERA Full Menu Setup 3-5-3. Network TCP/IP ● > IPv4 ADDRESS : • OBTAIN IP ADRESS VIA DHCP : Gets the IP address assigned by the DHCP (Dynamic Host Configuration Protocol) server. • STATUS : ‘Allocated’ shows that the IP address is obtained from the DHCP. •...
- Page 61 MEGA-PIXEL NETWORK CAMERA Full Menu Setup...
- Page 62 MEGA-PIXEL NETWORK CAMERA Full Menu Setup > PORT : • HTTP PORT : Use a port number in the range 1024-65535. Default is 80. • HTTPS PORT : Use a port number in the range 1024-65535. Default is 443. • RTSP PORT : Use a port number in the range 1024-65535. Default is 554. >...
- Page 63 MEGA-PIXEL NETWORK CAMERA Full Menu Setup ● > START PORT & END PORT : RTP port range defines the range of the ports from which ports of the video/audio are automatically selected. This feature is useful if the camera is connected to a NAT router with manually configured port mapping. Limit the range of the ports permitted for RTP unicast/multicast by entering START PORT and END PORT.
- Page 64 MEGA-PIXEL NETWORK CAMERA Full Menu Setup UPnP ● UPnP is enabled by default so that the network camera can be automatically detected by operating systems and clients that support this protocol. > FRIENDLY NAME : Enter the name up to 32 alphanumeric characters like Model Name-MAC address.
- Page 65 MEGA-PIXEL NETWORK CAMERA Full Menu Setup 3-5-4. Language 4 languages are available to select from English, Deutsch (German), Français (French), and 한국어 (Korean). 3-5-5. Maintenance Maintain ● > RESTART : Restarts the camera without changing any settings. > RESET : Restarts and loads the factory settings but does not change IP address and PTZ settings.
- Page 66 MEGA-PIXEL NETWORK CAMERA Full Menu Setup Upgrade ● Bring the firmware file to the drop box or click the drop box to browse for the firmware file, and then click the UPGRADE button. Do not disconnect the power or network cable during firmware UPGRADE. [ CAUTION ] Setup Export ●...
-
Page 67: Eyes Principle
MEGA-PIXEL NETWORK CAMERA Full Menu Setup 4. 4 EYES PRINCIPLE > Four Eyes Principle Setting : • Mark ENABLE checkbox to enable 4 EYES PRINCIPLE function. Only Administrators(user authority) are authorized to ENABLE/DISABLE 4 EYES PRINCIPLE function. Two individual administrators who have Playback authority, should approve in order to playback recorded data on Micro SD card for data security. - Page 68 MEGA-PIXEL NETWORK CAMERA Full Menu Setup 2) Mark ENABLE/DISABLE checkbox to ON/OFF 4 EYES PRINCIPLE function(Default: OFF). "Save" button should be pressed after ENABLE/DISABLE checkbox. Only Administrators are authorized to ENABLE/DISABLE 4 EYES PRINCIPLE function. 3) Press Approval #1 and activate(approval) in 4 EYES PRINCIPLE menu. If it is LOG OUT, Approval #1(#2) becomes inactivated(disapproval) so it shouldn't be LOG OUT.
- Page 69 MEGA-PIXEL NETWORK CAMERA Full Menu Setup 4) Open NEW Web browser and LOGIN with newly added User account. Press Approval #2 and activate(approval) in 4 EYES PRINCIPLE menu. 5) Once Approval #1(#2) is complete, check the recorded video in PLAYBACK menu. 0:00:00...
-
Page 70: Troubleshooting
MEGA-PIXEL NETWORK CAMERA Troubleshooting If you suspect a problem is being caused by incorrect configuration or some other minor problem, consult the troubleshooting guide below. Upgrading the Firmware Firmware is software that determines the functionality of the network camera. One of your first actions when troubleshooting a problem should be to check the current firmware. - Page 71 MEGA-PIXEL NETWORK CAMERA Troubleshooting Poor image quality. Increased lighting can often improve image quality. Check that there is sufficient lighting at the monitored location. Check all image and lighting settings. Rolling dark bands or flickering Try adjusting the Exposure Control setting under AE in image.
- Page 75 VIDEOR E. Hartig GmbH Exclusive distribution through specialised trade channels only. VIDEOR E. Hartig GmbH Carl-Zeiss-Straße 8 63322 Rödermark/Germany Tel. +49 (0) 6074 / 888-0 Technical changes reserved Fax +49 (0) 6074 / 888-100 www.videor.com...
Need help?
Do you have a question about the ICB-62M0550MAA and is the answer not in the manual?
Questions and answers