Table of Contents
Advertisement
Quick Links
Advertisement
Table of Contents

Related Manuals for Grizzly H8234


Summary of Contents for Grizzly H8234
- Page 1 COPYRIGHT © AUGUST, 2007 BY GRIZZLY INDUSTRIAL, INC. Warning: no portion of this manual may be reproduced in any shape or form Without the Written approval of grizzly industrial, inc. #TS9831 PRINTeD IN CHINA ReVISeD JULY, 2008 (TR)
-
Page 3: Safety Instructions For Pneumatic Tools
Keep work area well lighted. Model H8234 28° Framing Nailer safety indicates an imminently hazardous situation which, if not avoided, Will result in death or serious injury. - Page 4 24. be aWare of hose location When tools. Hoses can easily become risK a tripping hazard when laid across the floor or spread out in a disorga- nized fashion. recommended alloW untrained using pneumatic Model H8234 28° Framing Nailer...
-
Page 5: Additional Safety Instructions For Nailers
5. checK valve: Do not use a check valve or any other fitting that allows air to remain in the tool. Model H8234 28° Framing Nailer 6. hose usage: Make sure your air hose is designed for the tool in use, is in good condition, and is long enough to reach your work without stretching. - Page 6 Model H8234 28° Framing Nailer...
-
Page 7: Contact Info
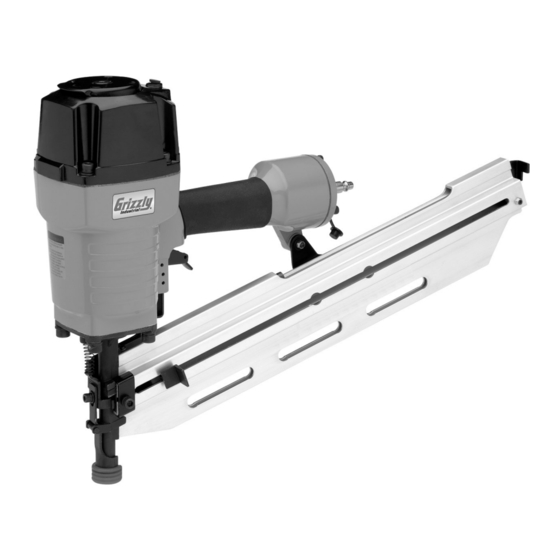
We are proud to offer the Grizzly Model H8234 28° Framing Nailer. This model is part of a growing Grizzly family of fine pneumatic tools. When used according to the guidelines set forth in this manual, you can expect years of trouble-free, enjoyable operation and proof of Grizzly’s commit-... - Page 8 After you open the nailer box, you should find the following. model h8234 inventory (figure 1) a. 28° Framing Nailer ... 1 b. Safety Goggles ... 1 c. Oil ... 1 d. Hex Wrench Set (3–6mm) ... 1 e.
-
Page 9: Compressed Air System
The Model H8234 is designed to be oper- ated at 80-110 PSI using clean, dry, regu- lated, compressed air. do not exceed the 120 psi maximum operating pres- sure for your model. Before using your new nailer, regulate the air pressure to find the optimum setting within the specified operating range. - Page 10 — If you find that the safety nose mechanism properly, check the lubrication of its sliding components. do not attempt to modify or bypass the safety nose mechanism to make the nailer fire without pushing the safety nose down. Model H8234 28° Framing Nailer depressing...
- Page 11 3. Sliding magazine pusher back and engaging catch lever. 3. Insert a strip of nails, pointed-end down, into the magazine as shown in figure 4. Model H8234 28° Framing Nailer operations " Shank Diameter ⁄ " figure 4. Loading nails into magazine.
-
Page 12: Adjusting Depth
6. Loosening cap screw for depth 4. Re-tighten the cap screw, then connect the nailer to the air supply and test the nail depth. 5. Repeat steps 2–4, if necessary, until the nail depth is satisfactory. Cap Screw adjustment. Model H8234 28° Framing Nailer... -
Page 13: Clearing Jammed Nails
3. Remove the nail stick from the maga- zine. 4. Locate the opening in the underside of the nailer safety nose (see figure 7). Model H8234 28° Framing Nailer Nose Opening figure 7. Nose opening for clearing a jammed nail. -
Page 14: Replacing Pistons/O- Rings
Under heavy use, a piston, piston shaft, or O-ring may wear out. Replacement is quick and easy. Contact Grizzly Customer Service at (800) 523-4777 to obtain the Piston Repair Kit (Part Number PH8234092), or the complete O-Ring Repair Kit (Part Number PH8234093). - Page 15 Stock up with extra bottles to avoid costly downtime. Model H8234 28° Framing Nailer g8114— g8115— g8116— Multi-purpose red rubber air hose is flex- ible and abrasion resistant.
-
Page 16: Cleaning And Lubrication
Standard pneumatic tool oil has been included with your new Grizzly nailer to help maintain its useful life. Place two to six drops of oil in the nailer air inlet (as shown in figure 12) before every use, or after 2 hours of continuous use. - Page 17 Model H8234 28° Framing Nailer...
- Page 18 PH8234091 AIR QUICK CONNECT CAP PH8234092 PISTON REPAIR KIT PH8234093 O-RING REPAIR KIT PH8234094 CARRYING CASE PH8234095 SAFETY GOGGLES PAW03M HEX WRENCH 3MM PAW04M HEX WRENCH 4MM PAW05M HEX WRENCH 5MM PAW06M HEX WRENCH 6MM Model H8234 28° Framing Nailer...
-
Page 19: Troubleshooting
Nailer does not fire. 1. Nailer is not lubricated. 2. Nail is jammed in magazine or 3. Piston shaft is damaged. 4. Air pressure too low. Model H8234 28° Framing Nailer ing are damaged. from moving freely in maga- zine. -
Page 20: Warranty And Returns
Warranty and returns Grizzly Industrial, Inc. warrants every product it sells for a period of 1 year to the original purchaser from the date of purchase. This warranty does not apply to defects due directly or indirectly to misuse, abuse, negligence, accidents, repairs or alterations or lack of mainte- nance.
Need help?
Do you have a question about the H8234 and is the answer not in the manual?
Questions and answers