Table of Contents
Advertisement
Advertisement
Table of Contents

Related Manuals for Technogym RUN ARTIS DBK0EQ Series


Summary of Contents for Technogym RUN ARTIS DBK0EQ Series
-
Page 1: User Manual
RUN ARTIS ® USER MANUAL... -
Page 2: Table Of Contents
CONTENTS User manual ....................1 Place of usage ..................21 Contents ..................... 2 Moving the product .................22 Important safety instruction ..............3 Levelling the product ................23 Personal safety ..................5 Electrical connection ................24 Identification of the manufacturer and the product ......7 Other connections ................... -
Page 3: Important Safety Instruction
Any other use is to be considered improper and therefore dangerous. Do not use attachments not recommended by Technogym. Never operate the equipment if it has a damaged cord or plug, if it is not working properly, if it has been dropped or damaged, or dropped into water. In this case, contact the Technogym Technical Support service. - Page 4 IMPORTANT SAFETY INSTRUCTION Keep the cord away from heated surfaces. Keep hands and feet away from moving parts. Never drop or insert any object into any opening. To disconnect power, turn all controls to the off position, then remove the plug from the outlet. SAVE THESE INSTRUCTIONS Warnings Do not connect a device with load exceeding 7A.
-
Page 5: Personal Safety
Do not attempt any maintenance work on the product other than the operations described in the user manual. The installation, maintenance and setting operations must be carried out by qualified Technogym staff or persons authorised by Technogym. The electrical system must conform to the standards and legal requirements in the country of use. - Page 6 Technogym’s written authorisation or for failure on your part to use, operate and maintain the product as set out in this User Manual.
-
Page 7: Identification Of The Manufacturer And The Product
The values stated in the illustration are purely indicative; refer to the label attached to the product or the data in the “Technical characteristics” section for the correct information. Technogym S.p.A. via Calcinaro 2861, Cesena (FC) Made in Italy RUN ARTIS... -
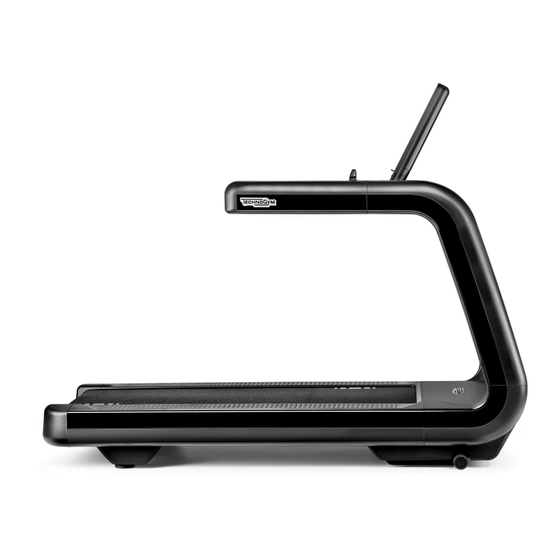
Page 8: Description Of The Product
Display (A). It allows you to view and control information, settings and contents both for workouts and for entertainment. The tablet-style touch screen interface allows you to include the contents offered by the Technogym App Store. Input for TGS key (B). The device reads the training data on the TGS key and memorises the exercise results. - Page 9 DESCRIPTION OF THE PRODUCT Treadmill (H). Antistatic and vibration-dampened running surface. Side supports (L). For stability when getting on and off the equipment or if the user loses his/her balance; they can be held when walking with long strides. The luminous signal applied to the left support turns on at the beginning of the exercise to signal that the product is being used and the treadmill is moving;...
-
Page 10: Using The Product
USING THE PRODUCT Run is to be used solely for its intended purpose, i.e. to simulate walking and running. Any other use of the equipment is to be considered improper and therefore dangerous. Step on the running surface from the rear; keep your gaze forward and place your feet on the footrests. - Page 11 USING THE EQUIPMENT At a speed of about 6-7 km/h, the fast walking becomes a gentle run, with gradually lengthening steps. Increase the speed gradually as you feel more sure and stable. Warnings Any distractions in the area around the equipment may cause the user to lose his/her balance.
-
Page 12: Using The Heart Rate Monitor
USING THE HEART RATE MONITOR The product can monitor the heart rate in two different ways: using the device built into the handgrip (hand sensor); it is activated when the handgrip is held over the sensors; using a device equipped with heart rate transmitter. Should you have any doubts about the accuracy of the readings, contact the Technical Support Service. - Page 13 USING THE HEART RATE MONITOR The table shows the optimum heart rate levels in relation to age and the goal to be achieved. Theoretical maximum heart rate (100%) is calculated on the basis of age using the formula: max H.R. = 220 - age. To read the graph, simply find your age on the horizontal axis and scan up the vertical until you reach the 60%, 70% and 90% values.
-
Page 14: Technical Characteristics
TECHNICAL CHARACTERISTICS Model code DBK0EQ... DBK0AQ... Power supply 200-240 Vac 50/60 Hz 100-240 Vac 50/60 Hz Motor peak power 5800 W (7.8 Hp) 5800 W (7.8 Hp) Weight of the product 215 kg (474 lb) 215 kg (474 lb) Maximum user weight 220 kg (485 lb) 220 kg (485 lb) Speed 100 Vac power supply... - Page 15 TECHNICAL CHARACTERISTICS 2060 mm 885 mm (81") (35") RUN ARTIS...
-
Page 16: Safety Devices
SAFETY DEVICES Fixed guard (A). Guards against access to the inside of the product. STOP button (B). Allows you to stop movement of the rotating belt without using the controls. Emergency switch (C). Consists of a cord with a clip to attach to your clothing as shown in the illustration. Ensure the clip has a good grip on the clothing, enough to trigger the emergency switch. - Page 17 SAFETY DEVICES After finishing working out, put the emergency switch peg back into its slot, as shown in the illustration. RUN ARTIS...
- Page 18 SAFETY DEVICES Main switch (D). Turns the product power supply voltage on and off. Circuit breaker (E). Protects the electrical components of the product. When power surges, the protection device opens, thus preventing damage to the electronics inside. To access the circuit breaker, open panel (F): insert your fingers into the holes and pull. The label (G) which can be attached to the power supply cable states the electrical specifications for the cable.
- Page 19 SAFETY DEVICES Marking on the treadmill belt (H) The marking on the two sides of the treadmill belt indicates if the treadmill is moving. In motion light (L) The luminous red signal located on the left support shows that the treadmill is moving.
-
Page 20: Switching On And Off
SWITCHING ON AND OFF Turn on the product by pressing the switch to the I position (ON). Warning When switching the product on, the rotating belt may move slightly. Turn off the product by pressing the main switch to the “0” position (OFF). Only turn the product off, after exercising, when it is in stand-by. -
Page 21: Place Of Usage
PLACE OF USAGE In order to ensure that activities with the products are easy and risk-free for people, the area in which they take place must meet a number of specific requirements. In particular, when deciding where to install the product, make sure that the location satisfies the following requirements. Temperature of between +10°C and +25°C. -
Page 22: Moving The Product
MOVING THE PRODUCT The product has two fixed front wheels. To move the equipment, lift it up slightly, as shown in the illustration, and push it forwards and backwards. To make it easier to move the equipment, we recommend adjusting the belt to its highest gradient. -
Page 23: Levelling The Product
LEVELLING THE PRODUCT The product must be level for proper operation. The product is levelled by adjusting the rear foot on the side shown in the illustration. Loosen the locknut (B). Tighten or loosen the screw (A) until the frame is in a stable position. Tighten the lock nut (B) after adjusting. -
Page 24: Electrical Connection
ELECTRICAL CONNECTION Before connecting the product to the mains power supply, ensure that the electrical system specifications comply with current regulations. Check the specifications of the mains power supply on the product’s identification label. Open the panel (A) to reach the label and connector: put a put your fingers in the specific holes and pull. Plug the power cable into the product socket first and then into the wall socket. - Page 25 ELECTRICAL CONNECTION The power supply socket must be grounded . If not, an earth connection must be installed by a qualified electrician before connecting the equipment to the electricity mains. The product must be earthed. If it malfunctions or breaks down, earthing provides a path of least resistance for electric current to reduce the risk of electric shock.
-
Page 26: Other Connections
OTHER CONNECTIONS A - Antenna cable jack B - Ethernet jack C - HDMI jack To reach the jacks, open the panel (D): put your fingers in the specific holes and pull. Use an RF coaxial cable to connect the antenna with an F-type connector for the product. The wall socket for the antenna cable must be located in a position where the plug can be inserted and removed with ease. -
Page 27: Routine Maintenance
Replace defective or worn components immediately, or remove the product from service. If used for medical purposes, disinfect the hand sensors each time the equipment is used. For maintenance actions not described in this manual, call in the Technogym Technical Service. RUN ARTIS... - Page 28 Warnings The routine maintenance, adjustment and lubrication jobs must be performed by the Technogym Technical Support Service. Before servicing, turn off the product by moving the switch to the 0 position and take the power plug out of the socket.
- Page 29 If the light flashes during standby, the running surface material is beginning to show signs of wear. If, during standby, the light flashes intermittently with groups of flashes, you must contact the Technogym Technical Support service for maintenance to be carried out on the materials.
-
Page 30: Aligning The Treadmill
ALIGNING THE TREADMILL When the equipment is running the treadmill must be centrally aligned in relation to the frame; if the treadmill tends to move either to the right or left, or if it is not centrally positioned, it needs aligning. Alignment must be performed with the equipment running. -
Page 31: Troubleshooting
Check whether there is power at the socket by plugging in another Mains power failure. appliance that you know works. Power supply cable damaged. Contact the Technogym Technical Support Service. The product is not turning ON The power supply cable is not correctly inserted. Check the connection. -
Page 32: Technical Assistance
Via Calcinaro 2861, 47521 Cesena Italy on-site servicing tel: +39 0547 56047 supply of original spare parts. http://www.technogym.com/Support When you contact the Technogym Technical Support Service you must give the following information: Product model (A) Date of purchase Serial number (B) Technogym S.p.A. -
Page 33: Storing The Product
Following measures implemented by the member states of the European Union, private citizens resident in the EC can take their used electrical and electronic equipment to authorised collection centres for disposal. If the product is used commercially, contact your reseller or Technogym Customer Service in your country to arrange collection and disposal of the electrical or electronic waste. - Page 34 Run_Artis_en_AA 0SM01148...
Need help?
Do you have a question about the RUN ARTIS DBK0EQ Series and is the answer not in the manual?
Questions and answers
how do i connect it to wifi