Table of Contents
Advertisement
Quick Links
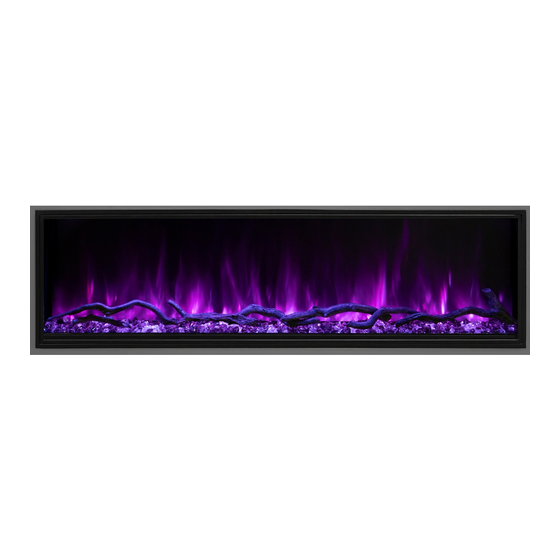
Landscape Pro Slim Electric Fireplace
Model#
Read and understand this entire owner's manual, including all safety
WARNING
information, before plugging in or using this product. Failure to do so could
result in fire, electric shock, or serious personal injury.
Keep this owner's manual for future reference. If you sell or give this
CAUTION
product away, make sure this manual accompanies this product.
AFFIX SERIAL NUMBER LABEL
HERE FOR FUTURE REFERENCE
LPS-4414V2
LPS-8014V2
OWNERS MANUAL
Rated: 120VAC 60Hz 5,000 BTUs
LPS-5614V2
LPS-9614V2
LPS-6814V2
07-00012 REV A
V2
Advertisement
Table of Contents

Related Manuals for Modern Flames Landscape Pro Slim LPS-4414V2


Summary of Contents for Modern Flames Landscape Pro Slim LPS-4414V2
- Page 1 Landscape Pro Slim Electric Fireplace Model# LPS-4414V2 LPS-5614V2 LPS-6814V2 LPS-8014V2 LPS-9614V2 OWNERS MANUAL Rated: 120VAC 60Hz 5,000 BTUs Read and understand this entire owner’s manual, including all safety WARNING information, before plugging in or using this product. Failure to do so could result in fire, electric shock, or serious personal injury.
-
Page 2: Important Safety Information
IMPORTANT SAFETY INFORMATION! WARNING When using electrical appliances, basic precautions should always be followed to reduce the risk of fire, electric shock, and injury to persons, including the following: 1. Read all Instructions before installing or using the heater. 2. This heater is hot when in use. To avoid burns, do not let bare skin touch hot surfaces. Keep combustible materials, such as furniture, pillows, bedding, papers, clothes, etc. -
Page 3: Consignes Importantes
CONSIGNES IMPORTANTES ATTENTION Lors de l'utilisation d'appareils électriques, des précautions de base doivent toujours être suivies pour réduire les risques d'incendie, d'électrocution et de blessures, notamment les suivantes : 1. Lisez toutes les instructions avant d'installer ou d'utiliser le radiateur. 2. - Page 4 USER INSTRUCTIONS POWER DATA LPS-4414V2 LPS-5614V2 LPS-6814V2 LPS-8014V2 LPS-9614V2 Volts/HZ Amps AC 120Vs AC 120V AC 120V AC 120V AC 120V 60Hz 13 Amp 60Hz 13 Amp 60Hz 13 Amp 60Hz 13 Amp 60Hz 13 Amp Heater AC 120V 1465W AC 120V 1465W AC 120V 1465W AC 120V 1465W...
-
Page 5: Product Guide
PRODUCT GUIDE ⁄ " Model Viewing Area Firebox Dimensions Framing Dimensions LPS-4414V2 ⁄ " W x 13 ⁄ " H ⁄ " W x 23 ⁄ " H x 5 ⁄ " D ⁄ " W x 24 ¹⁄ " H x 6" D 1111mm W x 356mm H 1124mm W x 603mm H x 141mm D 1130mm W x 613mm H x 152mm D... -
Page 6: Parts And Hardware
PARTS and HARDWARE (1) L-Metal Mounting (1) Canyon (1) Fireplace (1) Owners Manual Bracket Set (1) Remote Driftwood Logs Set (1) Front Glass (1) Battery Tool (1) CR2025 Battery (1) Suction Cup (1) Trim Wall Mount Smoke Clear (1) Touch Control Acrylic Crystals Pkg Acrylic Stones Pkg (Sold Separately) - Page 7 INSTALLATION Due to the many different materials used on different walls, it is highly recommended that you consult your local builder before you install this fireplace. Remove all parts and hardware from the carton and place them on a clean, soft, dry surface. Check the parts list to make sure nothing is missing.
-
Page 8: Built-In Installation
BUILT-IN INSTALLATION Fully Recessed Installation (Single Sided) 1. This installation is optimized for a 2x6 framed wall. Prepare the framed opening according to the framing dimensions chart (pg 4). *Provide appropriate dedicated circuit for hardwire install at the top right of framed opening. - Page 9 BUILT-IN INSTALLATION Partial Recessed Installation 1. This installation is optimized for a 2x4 framed wall. Prepare the framed opening according to the framing dimensions chart on page 4. *Provide appropriate dedicated circuit for hardwire install at the top right of framed opening.
- Page 10 LOG SETS #1 LOG #2 LOG #3 LOG #5 LOG #4 LOG #6 LOG #8 LOG #7 LOG #11 LOG #10 LOG #12 LOG #15 LOG #9 LOG #13 LOG #16 LOG #14 LOG LANDSCAPE PRO SLIM – LOG SET SIZES 44 –...
-
Page 11: Log Placement
LOG PLACEMENT LANDSCAPE PRO SLIM – LOG PLACEMENT 44" – 56" – 68" – 80" – 96" LPS 44" – Set contains 6 logs LPS 56" – Set contains 8 logs LPS 68" – Set contains 10 logs LPS 80" – Set contains 12 logs LPS 96"... - Page 12 INSTALLING MEDIA AND FRONT GLASS 1. Remove screws from top of glass bracket. Use the small suc- tion cup provided in the hardware kit to lean glass towards the front. Then lift glass up and away. Place glass in soft, safe area.
-
Page 13: Remote Control Operation
. If the fireplace is on, this button will act as a Home reset and bring all colors back to the default Modern Flames' signature color. This will cycle the heater between high, Heat low and off . -
Page 14: Setting Controls
SETTING CONTROLS Manual Controls Toggle Switch: The fireplace has a main toggle switch located next to the manual controls. The fireplace has manual controls located next to the The toggle switch is in front of the glass on toggle switch, in front of the glass on the top right the top right side of the viewing area. - Page 15 SETTING CONTROLS NOTE: When silent mode is selected, a tone will still -AP Mode: While the fireplace is ON, long press be present for performing system functions such the Preset Color button for 6 seconds. Two audible as remote pairing or Wi-Fi pairing. beeping tones will sound and then only the FLAME LIGHTS and nothing else will turn to white and Placing in Wi-Fi Paring Mode:...
-
Page 16: Wifi Remote
WIFI REMOTE Sync This is a synchronization selector, used to synchronize the current color on the color wheel to all of the zones (Flame/Ember Bed/Downlight). Grayed out SYNC is when synchronization is “OFF”. Green SYNC is when synchronization is “ON”. Color Wheel This is the color adjustment wheel for all zones. - Page 17 Same as remote control blue monochrome fade cycle. PRESET MENU > Seven Color Demo Same as remote control, 7 color jump > Modern Flames Original cycles: R->G->B->RG->RB->GB->RGB. Modern Flames Orange (Static). > Three Color Demo Same as remote control, 3 color jump >...
- Page 18 WIFI REMOTE Timer Pressing the timer button will pop up a sub-menu with 10 options to choose from: 0.5-1-2-3-4-5-6-7-8 hours-cancel. Once the selected time has elapsed, the fireplace will turn off. (default) Ambience Setting The Ambience Setting button will open up a second window where customizations can be performed, including temperature scale setting (C/F), Weekly/Heat program-...
- Page 19 WIFI REMOTE Power Turn On Cancel Heat Level HEAT PROGRAM SUB MENU CONTINUED > Power Sets fireplace status (no heat) OFF/ON. > Heat Level High Sets Heat Level: OFF/LOW/HIGH. Cancel > Temperature Temperature Level for the heater to turn on if the ambient temperature falls below the set temperature (High Heat).
- Page 20 WIFI REMOTE > Mode Color Mode color: In the Static mode, only one color can be selected. After clicking the color symbol, you can change to addition- al colors. When using the Jump/Gradient feature, 8 colors can be programmed by clicking “+”...
- Page 21 WIFI INITIAL LOG-IN Search for and install the “MODERN FLAMES” app from Google Play or Apple App store or scan the QR code. STEP STEP > After download & installed Login to Modern Flames app. > App example...
-
Page 22: Wifi Pairing
WIFI PAIRING STEP STEP > Once opened and logged in > SELECT FIREPLACE From HOME page, Select series of fireplace that will be From the home page, select the add “+” pairing too and follow instructions. symbol. - Page 23 WIFI REMOTE STEP STEP > Ensure fireplace is ON > WiFi Information Using the fireplace manual touch controls, If pairing via Wi-Fi you must use 2.4 GHz turn ON the fireplace. Wi-Fi, and must have information filled out to move to next step.
- Page 24 WIFI REMOTE STEP STEP > Wi-Fi Pairing confirmed > Place fireplace in pairing mode EZ pairing mode is confirmed with a Once fireplace is “ON”, place fireplace in single audible beeping tone is heard Wi-Fi pairing mode following the instruc- and all the lights begin to blink rapidly tions for pairing mode on the APP.
- Page 25 WIFI REMOTE STEP STEP > PAIRING > DEVICE PAIRED SUCCESSFULLY Device & APP should now begin to pair. Depending on Wi-Fi this can take up the NOTE: Do not turn off or disconnect the entire 2 minutes to pair, or it may need to fireplace from power while pairing the Wi-Fi be repeated more than once, if the signal or performing updates.
-
Page 26: Maintenance
MAINTENANCE... -
Page 27: Troubleshooting
TROUBLE SHOOTING PROBLEM POSSIBLE CAUSE CORRECTIVE ACTION A. Breaker tripped or circuit has no power A. Reset breaker, test circuit for power, check power switch B. Internal component is frozen and needs Nothing comes on to be reset B. Turn power off at the main breaker for 60 seconds. Turn power back on. -
Page 28: Frequently Asked Questions
Q. How do I reset the unit? A. Turn power off at the breaker for 1 minute. Q. How do I install the Optional Wall Control and Wi-Fi App? A. Optional wall control & Wi-Fi app instructions available for download on Modern Flames’ website... -
Page 29: Fcc Caution
FCC CAUTION This device complies with part 15 of the FCC Rules. Operation is subject to the following two conditions: (1) this device may not cause harmful interference, and (2) this device must accept any interference received, including interference that may cause undesired operation. Any changes or modifications not expressly approved by the party responsible for compliance could void the user's authority to operate the equipment. - Page 30 OUR STAFF IS READY TO PROVIDE ASSISTANCE Copyright © 2022 RPG Brands (Modern Flames). All rights reserved. Products and specifications subject to change without notice. The product images shown are for illustration purposes only and may not be an exact representation of the product.
Need help?
Do you have a question about the Landscape Pro Slim LPS-4414V2 and is the answer not in the manual?
Questions and answers