Table of Contents
Advertisement
Quick Links
Advertisement
Table of Contents

Summary of Contents for Viqua UVMax IHS12-D4
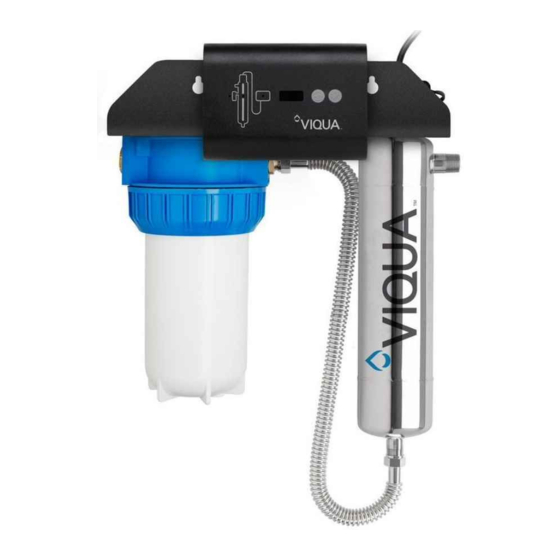
- Page 1 IHS10-D4, IHS12-D4, IHS22-D4 Powered by 425 Clair Rd. W, Guelph, Ontario, Canada N1L 1R1 t. (+1) 519.763.1032 • tf. (+1) 800.265.7246 (US and Canada only) t. (+31) 73 747 0144 (Europe only) • f. (+1) 519.763.5069 e-mail: info@viqua.com www.viqua.com 520166-R_RevAD...
- Page 2 • VIQUA replacement lamps undergo rigorous performance testing and strict quality control processes to ensure that the safety and performance certifications of the original equipment are not compromised. So, you can see that it's simply not worth the risk! Insist on genuine VIQUA replacement lamps.
-
Page 3: Safety Information
Safety Information Section 1 Safety Information These are the original instructions. Please read this entire manual before operating this equipment. Pay attention to all danger, warning, and caution statements in this manual. Failure to do so could result in serious personal injury or damage to the equipment. -
Page 4: Water Chemistry
Safety Information WA R N I N G • During extended periods of no water flow, the water in your chamber can become very hot (Approx. 60 °C) and potentially lead to scalding. It is recommended to run your water until this hot water has been purged from your chamber. Do not allow water to contact your skin during this time. To eliminate this condition, a temperature management valve can be installed at the outlet of your UV system. -
Page 5: General Information
General Information your UV disinfection system. These water quality parameters can be tested by your local dealer, or by most private analytical laboratories. Proper pre-treatment is essential for the UV disinfection system to operate as intended. Section 2 General Information Figure 1 System Components Item Description... -
Page 6: Dimensions And Layout
General Information 2.1 Dimensions and Layout Hot water pipe Cold water pipe Main Water Shut Off Optional By-Pass Assembly Optional Water Softener MIN 4” from bottom of unit for clearance for filter changes Figure 2 System - Dimension and Layout Item Description Function... -
Page 7: Installation
Installation Section 3 Installation 3.1 Installing UV System C A U T I O N Electronic controller must be connected to a Ground Fault Protected Circuit (GFCI) receptacle. Ensure green ground wire ring terminal is securely fastened to ground stud on UV chamber. Prerequisites: •... -
Page 8: Disinfection Procedure
Installation • Connect the green ground • Align connection pins with • Connect power. wire and red strain relief wire the lamp connector by • Open all faucets and turn on to the chamber using the rotating the ring clamp. water supply. -
Page 9: Maintenance
Maintenance 30 mins • Remove the sump housings • Remove cartridges and pour • Reinstall the housings. • Open all faucets and turn on using sump wrench. 2 cups of household bleach the cold water supply solution into the sump followed by hot water (if housings. - Page 10 Maintenance 4.1 Replacing UV Lamp N O T I C E Do not use water during replacement of UV lamp. Lamp replacement is a quick and simple procedure requiring no special tools. The UV lamp must be replaced after 9000 hours of continuous operation (approximately one year) in order to ensure adequate disinfection.
- Page 11 Maintenance 4.2 Cleaning and Replacing Quartz Sleeve Note: Minerals in the water slowly form a coating on the quartz sleeve. This coating must be removed because it reduces the amount of UV light reaching the water, thereby reducing disinfection performance. If the sleeve can not be cleaned, it must be replaced.
-
Page 12: Replacing Cartridges
Maintenance 4.3 Replacing Cartridges C A U T I O N The sump housings will be heavy. It is recommended to change the filter cartridges regularly, approximately 3-4 times per year depending on water quality and usage. A gradual drop in water pressure after the filtration device is an indication that the pre-filter cartridges are nearing the end of their useful life. -
Page 13: Section 5 Operation
Operation Section 5 Operation 5.1 Controller Figure 3 Controller Buttons and Display Feature Description Function Lamp timer Counts down from 365 days to show time for annual lamp replacement. display Lamp timer reset After installing a new lamp, press and hold for five seconds to reset Lamp timer to 365. Press to silence audible alarm. -
Page 14: Troubleshooting
Troubleshooting Section 6 Troubleshooting Symptom Possible Cause Possible Solution GFCI and/or breaker tripped Reset GFCI and/or breaker No power Transient voltage surge suppressor (TVSS) damaged Replace TVSS Controller damaged Replace controller and use a TVSS Clean and dry lamp pins and lamp plug, check unit for leaks Connection between lamp and lamp plug is wet GFCI or breaker repeatedly or condensation... -
Page 15: Specifications
Specifications Section 7 Specifications IHS12-D4 IHS22-D4 IHS10-D4 Operating Parameters Maximum operating pressure 100 PSI (689 kPa) 100 PSI (689 kPa) 100 PSI (689 kPa) Minimum operating pressure 4 PSI (27.5 kPa) 4 PSI (27.5 kPa) 4 PSI (27.5 kPa) Maximum ambient air temperature 122 ºF (50 ºC) 122 ºF (50 ºC) 122 ºF (50 ºC) -
Page 16: Section 8 Manufacturer's Warranty
VIQUA warrants the electrical (controller) and hardware components to be free from defects in material and workmanship for a period of three (3) years from the date of purchase. During this time, VIQUA will repair or replace, at its option, any defective parts covered by the warranty. - Page 17 425 Clair Rd. W, Guelph, Ontario, Canada N1L 1R1 t. (+1) 519.763.1032 • tf. (+1) 800.265.7246 (US and Canada only) t. (+31) 73 747 0144 (Europe only) • f. (+1) 519.763.5069 e-mail: info@viqua.com www.viqua.com...


Need help?
Do you have a question about the UVMax IHS12-D4 and is the answer not in the manual?
Questions and answers