Table of Contents
Advertisement
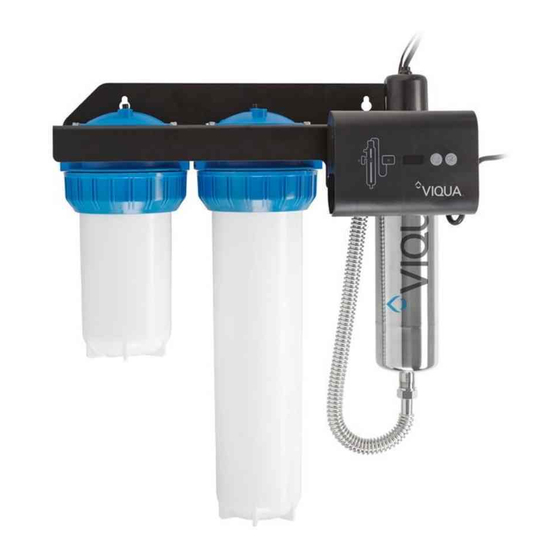
OWNER'S MANUAL
Date of installation:
Installed by:
Installer phone #:
Serial #:
(Found on label on side of Power supply)
425 Clair Rd. W, Guelph, Ontario, Canada N1L 1R1
t. (+1) 519.763.1032 • tf. 1.800.265.7246 (US and Canada only) • t. +31 73 747 0144 (Europe only)
f. (+1) 519.763.5069 • e-mail: info@viqua.com
Model IHS12-D4
IHS12-D4/2
IHS22-E4
IHS22-E4/2
IHS22-D4
IHS22-D4/2
PURIFY WATER
99.99% FREE
OF BACTERIA
AND VIRUSES!
Congratulations. By purchasing
this system, you have taken the
first step in ensuring safe drinking
water for your whole home.
KEY INFORMATION YOU SHOULD KNOW:
•
This product is for indoor use only.
Keep all components clean and dry.
•
Clean the sleeve regularly for optimum performance
www.viqua.com
520166-R-RevH
Advertisement
Table of Contents

Related Manuals for Viqua IHS12-D4/2


Summary of Contents for Viqua IHS12-D4/2
- Page 1 (Found on label on side of Power supply) 425 Clair Rd. W, Guelph, Ontario, Canada N1L 1R1 t. (+1) 519.763.1032 • tf. 1.800.265.7246 (US and Canada only) • t. +31 73 747 0144 (Europe only) f. (+1) 519.763.5069 • e-mail: info@viqua.com www.viqua.com 520166-R-RevH...
- Page 2 Potential Safety Measures Hazard UV Exposure Never illuminate UV Lamp outside of the UV Chamber. Never look directly at illuminated UV Lamp, even when using protective gear. Always use protective gear, including gloves and UV safety glasses. If accidental exposure occurs, immediately cool affected area and consult physician. Electrical Shock Disconnect power to system before performing any maintenance or repair.
-
Page 3: Safety Instructions
SAFETY INSTRUCTIONS GROUNDING This product must be grounded. If it should malfunction or breakdown, grounding provides a path of least resistance for electric current to reduce the risk of electrical shock. This system is equipped with a cord having an equipment-grounding conductor and a grounding plug. -
Page 4: Table Of Contents
TABLE OF CONTENTS Overview Specifications Components Dimensions and layout Installation Installing the UV system Disinfecting the water lines Operation Control panel Troubleshooting Maintenance Sleeve cleaning and lamp replacement Warranty... -
Page 5: Overview
SPECIFICATIONS IHS22-D4 Specifications IHS12-D4 IHS22-E4 IHS22-D4/2 IHS12-D4/2 IHS22-E4/2 Operating Parameters Maximum operating pressure 100 PSI (689 kPa) 100 PSI (689 kPa) 100 PSI (689 kPa) Minimum operating pressure 4 PSI (27.5 kPa) 4 PSI (27.5 kPa) 4 PSI (27.5 kPa... -
Page 6: Components
COMPONENTS For replacement components, please contact your installer (listed on the front of this manual) or contact VIQUA directly for a referral: 1 800 265 7246 (North America), 519 763 1032, or info@viqua.com. Components Part Part Number Power supply mounting bracket... - Page 7 COMPONENTS IHS12-D4 IHS22-E4 IHS22-D4 Components IHS12-D4/2 IHS22-E4/2 IHS22-D4/2 Part Part Part Part Number Number Number Lamp 602805 602806 602805 (includes O-rings) O-ring Sleeve bolt 602665 602666 602665 Sleeve (includes 602732 602733 602732 O-rings) UV Chamber (includes Chamber and Ring clamp).
-
Page 8: Dimensions And Layout
DIMENSIONS AND LAYOUT HOT WATER PIPE COLD WATER PIPE Main Water Shut Off Optional By-Pass Assembly Optional Water Softener MIN 4” from bottom of unit for clearance for filter changes Main water shut-off valve. Shut-off valve: Allows for ease of maintenance of whole home UV disinfection system. Bypass shut-off valve: Bypass line and valve are optional. -
Page 9: Installation
INSTALLING THE UV SYSTEM Determine appropriate indoor location Outlet must be of the system, referring to Dimensions protected by a and Layout drawing. Ensure adequate Ground Fault clearance above chamber to allow for Circuit Interrupter removal of the lamp and sleeve. Make (GFCI). - Page 10 Let water flow to one faucet or other water Insert Lamp/ outlet, then close the outlet and check for sleeve assembly leaks. and screw into chamber. Proceed to Disinfecting The Water Lines. Caution: Over tightening will break the sleeve. Align connections by rotating ring clamp to push lamp plug onto...
-
Page 11: Disinfecting The Water Lines
DISINFECTING THE WATER LINES UV systems disinfect the water using ultraviolet light, treating the water as it passes through the system. When there is a risk that water downstream of the UV system has been contaminated, it is critical that these water lines be chemically disinfected. Disinfection of the water lines is therefore required after initial system installation and following any period of time during which the system is inoperative, whether due to an alarm condition, a power failure, or for any other reason. - Page 12 Go to a water outlet and allow the cold Install filter water to flow until you can smell bleach, cartriges then stop the flow. Allow hot water (if present) to flow until you can smell bleach, then stop the flow. Repeat procedure at all water outlets.
-
Page 13: Operation
CONTROL PANEL Buttons and Display Lamp timer Counts down from 365 days to show time for annual lamp replacement. display Lamp timer After installing a new lamp, press and hold for five seconds to reset Lamp timer to reset 365. Mute Press to silence audible alarm. -
Page 14: Troubleshooting
Filter cartridge not centered Remove sump, check for cartridge damage, re-assemble ensuring cartridge is centered If further assistance is required, please contact your local dealer or VIQUA Technical Assistance at 1-800-265-7246 or at technicalsupport@viqua.com. -
Page 15: Maintenance
SLEEVE CLEANING & LAMP REPLACEMENT Sleeve Cleaning: Minerals in the water slowly form a coating on the sleeve. This coating must be removed because it reduces the amount of UV light reaching the water, thereby reducing purification performance. Please clean the sleeve regulary (3-4 times per year, or more often depending on water quality). When only cleaning is required, follow instructions and re-install the current lamp. - Page 16 WARNING – Always shut-off water flow and release water pressure before servicing. Strain relief wires should remain connected. Shut off water supply to system Hold by Relieve pressure sleeve bolt in the filter by to remove depressing lamp/sleeve pressure assembly. release button on filter head For sleeve cleaning only:...
- Page 17 Screw lamp into sleeve hand-tight. Caution: Over tightening will break the sleeve. Lamp Sleeve bolt Make sure lamp/sleeve assembly is centered. Caution: Over tightening will break the sleeve. Remove o-rings and sleeve bolt from sleeve. Reinstall sleeve bolt with 2 new o-rings.
- Page 18 Align connections by rotating ring clamp to push lamp plug onto end of lamp. ring clamp Push safety Check for leaks. cap into place. If lamp was replaced: Press and hold Lamp timer reset button for 5 seconds. Display should read 365.
- Page 19 CARTRIDGE REPLACEMENT It is recommended to change the filter cartridges regularly, approximately 3-4 times per year depending on water quality and usage. A gradual drop in water pressure after the filtration device is an indication that the pre-filter cartridges are nearing the end of their useful life. Discard the used cartridges and clean the sump housing.
-
Page 20: Warranty
One-Year Limited Warranty for Lamps, Sleeves and UV Sensors VIQUA warrants lamps, sleeves and UV sensors to be free from defects in material and workmanship for a period of one (1) year from the date of purchase. During this time, VIQUA will repair or replace, at its option, any defective parts covered by the warranty. Your dealer will process your claim and advise whether the defective item needs to be returned for failure analysis. - Page 21 Printed in Canada. Copyright ©2014, VIQUA – a Trojan Technologies Business, Guelph, Ontario, Canada.
Need help?
Do you have a question about the IHS12-D4/2 and is the answer not in the manual?
Questions and answers