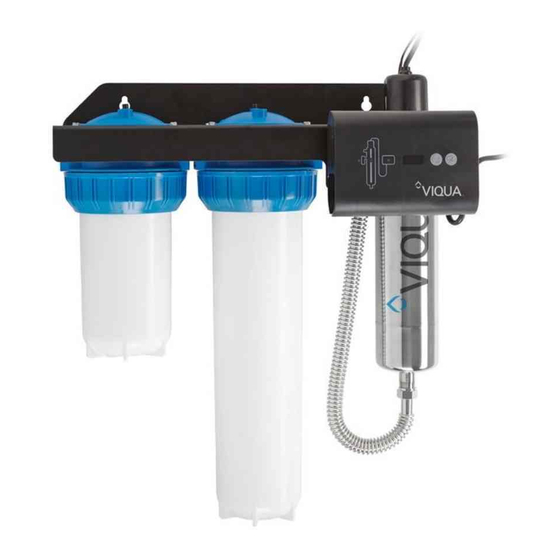
Viqua IHS12-D4 Owner's Manual
Hide thumbs
Also See for IHS12-D4:
- Owner's manual (25 pages) ,
- Owner's manual (21 pages) ,
- Owner's manual (18 pages)
Table of Contents
Advertisement
Quick Links
Advertisement
Table of Contents

Summary of Contents for Viqua IHS12-D4
- Page 1 Owner’s Manual Models: IHS12-D4, IHS22-D4, IHS22-E4 Powered by 425 Clair Rd. W, Guelph, Ontario, Canada N1L 1R1 t. (+1) 519.763.1032 • tf. (+1) 800.265.7246 (US and Canada only) t. (+31) 73 747 0144 (Europe only) • f. (+1) 519.763.5069 e-mail: info@viqua.com www.viqua.com...
- Page 2 • VIQUA replacement lamps undergo rigorous performance testing and strict quality control processes to ensure that the safety and performance certifications of the original equipment are not compromised. So, you can see that it's simply not worth the risk! Insist on genuine VIQUA replacement lamps.
-
Page 3: Safety Information
Safety Information Section 1 Safety Information These are the original instructions. Please read this entire manual before operating this equipment. Pay attention to all danger, warning, and caution statements in this manual. Failure to do so could result in serious personal injury or damage to the equipment. -
Page 4: Water Chemistry
Safety Information WA R N I N G • During extended periods of no water flow, the water in your chamber can become very hot (Approx. 60 °C) and potentially lead to scalding. It is recommended to run your water until this hot water has been purged from your chamber. Do not allow water to contact your skin during this time. To eliminate this condition, a temperature management valve can be installed at the outlet of your UV system. -
Page 5: General Information
O-ring OR40-50 Used on all systems. Bracket Lamp cord Safety cap 603000 Used on all systems. 602636 (120V) IHS12-D4, IHS22-D4, IHS22-E4 602637 (230V) IHS12-D4/2, IHS22-D4/2, IHS22-E4/2 Power cord 260013 (Australian) IHS12-D4/2A, IHS22-D4/2A, IHS22-E4/2A 260012 (UK) IHS12-D4/2B, IHS22-D4/2B, IHS22-E4/2B Controller (includes Controller mounting bracket, 650713-007 Used on all systems. -
Page 6: Dimensions And Layout
Description Part Number UV System O-ring Used on all systems. Sleeve bolt 602665 Used on all systems. 602732 IHS12-D4, IHS22-D4 Sleeve (includes O-rings) 602733 IHS22-E4 UV Chamber (includes Chamber and Ring Used on all systems. clamp). Carbon filter C2-02 Used on all systems. -
Page 7: Installation
Installation Section 3 Installation 3.1 Installing UV System C A U T I O N Electronic controller must be connected to a Ground Fault Protected Circuit (GFCI) receptacle. Ensure green ground wire ring terminal is securely fastened to ground stud on UV chamber. Prerequisites: •... -
Page 8: Disinfection Procedure
Installation Ground and strain relief Locking wires Screw Ground • Attach ground and strain • Insert the safety cap. relief wires from the lamp • Restore power. plug to the ground lug on the • Open all faucets and turn on chamber. - Page 9 Installation 30 mins • Remove the sump housings • Remove cartridges and pour • Reinstall the housings. • Open all faucets and turn on using sump wrench. 2 cups of household bleach the cold water supply solution into the sump followed by hot water (if housings.
-
Page 10: Maintenance
Maintenance Section 4 Maintenance WA R N I N G • Always disconnect power before performing any work on the disinfection system. • Always shut-off water flow and release water pressure before servicing. • Regularly inspect your disinfection system to ensure that the power indicators are on and no alarms are present. •... - Page 11 Maintenance • Insert the safety cap. • Insert and secure the lamp/ • Align connections by rotating • Restore power. sleeve assembly. ring clamp and install the • If new lamp was inserted, lamp plug. press and hold lamp timer Note: Over tightening will reset button for 5 seconds.
-
Page 12: Replacing Cartridges
Maintenance 4.3 Replacing Cartridges C A U T I O N The sump housings will be heavy. It is recommended to change the filter cartridges regularly, approximately 3-4 times per year depending on water quality and usage. A gradual drop in water pressure after the filtration device is an indication that the pre-filter cartridges are nearing the end of their useful life. -
Page 13: Operation
Operation Section 5 Operation 5.1 Controller Figure 3 Controller Buttons and Display Feature Description Function Lamp timer display Counts down from 365 days to show time for annual lamp replacement. Lamp timer reset After installing a new lamp, press and hold for five seconds to reset Lamp timer to 365. Press to silence audible alarm. -
Page 14: Specifications
O-ring is fitted properly, then reinstall Leak detected at filters Remove sump, check for cartridge damage, re-assemble Filter cartridge not centered ensuring cartridge is centered Section 7 Specifications IHS12-D4 IHS22-E4 IHS22-D4 Operating Parameters Maximum operating pressure 100 PSI (689 kPa) 100 PSI (689 kPa) -
Page 15: Section 8 Manufacturer's Warranty
VIQUA warrants the electrical (controller) and hardware components to be free from defects in material and workmanship for a period of three (3) years from the date of purchase. During this time, VIQUA will repair or replace, at its option, any defective parts covered by the warranty. - Page 16 425 Clair Rd. W, Guelph, Ontario, Canada N1L 1R1 t. (+1) 519.763.1032 • tf. (+1) 800.265.7246 (US and Canada only) t. (+31) 73 747 0144 (Europe only) • f. (+1) 519.763.5069 e-mail: info@viqua.com www.viqua.com...


Need help?
Do you have a question about the IHS12-D4 and is the answer not in the manual?
Questions and answers