
Related Manuals for Extech Instruments DPC42


Summary of Contents for Extech Instruments DPC42
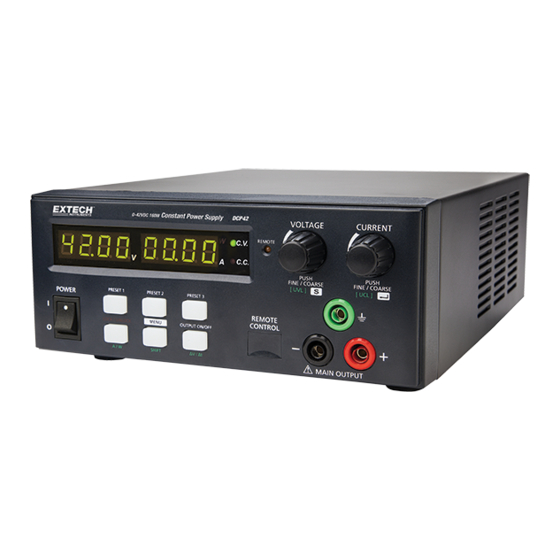
- Page 1 USER GUIDE Model DCP42 160W Laboratory Grade Constant Power, Switching Mode Power Supply ...
-
Page 2: Table Of Contents
Table of Contents 1. INTRODUCTION AND FEATURES 4 2. SAFETY 5 3. POWER SUPPLY DESCRIPTION 6 4. CONTROL MODES 7 4.1 Normal Mode 7 4.2 Preset Mode 7 4.3 Set Mode 7 4.3.1 Setting the ΔV/Δt value 4.3.2 Activating the Remote Control Mode 4.3.3 Deactivating the Remote Control Mode 4.3.4 Factory Default Reset 5. OPERATION 9 5.1 Powering the Supply 9 5.2 Switching the Power Supply ON and Self‐Test Information 9 5.3 Using the Control knobs 9 5.4 Connecting the Power Supply and running a Test 9 5.5 Keypad Lockout function 9 5.6 Manual Output ON/OFF ... - Page 3 6.1 ΔV/Δt Function 10 6.1.2 Setting the DC generator voltage level 6.1.2 Setting the Δt 6.1.3 Generating Ramp‐Up or Ramp‐Down DC output cycles 6.2 Function A/B/C Waveform Generator 11 6.2.1 Set FUNC (A/B/C): 6.2.2 Generating Wave Form 6.3 Upper Voltage and Current Limits 12 6.4 Remote Sensing 12 6.4.1 Connection 6.4.2 Disconnection 6.5 Remote Control Operation 13 6.5.1 REMOTE CONTROL – METHOD 1: Using two external DC voltage sources 13 6.5.2 REMOTE CONTROL – METHOD 2: Using two 0 to 5K Ohm variable resistors 13 6.5.3 Remote Control Output ON/OFF 7. PC SOFTWARE PROGRAM 14 8. AUTOMATIC OUTPUT STEP PROGRAMS 14 8.1 External Timed Program Window 15 8.2 Output ON/OFF function 15 ...
-
Page 4: Introduction And Features
1. Introduction and Features Thank you for selecting the Extech DCP42 Switching Mode Power Supply. This newly re‐designed laboratory grade power supply differs from a conventional power supply in that it can calculate and change the voltage and current limit points according to the available maximum power. Therefore the maximum limits of the voltage and current are changeable according to the rated power. A conventional power supply has only a set maximum voltage and current such that all of the operating V & A must fall within these limits. The DCP42 offers cost saving and space saving advantages as one constant‐power power supply can do the work of several conventional power supplies. The DCP42 is highly efficient, incorporates upgraded SMPS circuitry with small form factor, benefits from an automatic cross‐over for CC and CV, has three (3) Voltage/Current presets, and can be remote controlled. The DCP42 is perfect for solving a variety of loading conditions and applications. Features include the following: Dual action (Course/Fine) tuning provides smooth, accurate, and quick setting of Voltage/Current Setting, changing, and verifying the current limit level is convenient and can be performed without output pole spiking The Remote Control feature permits output ON/OFF and Voltage/Current adjustments without the need to touch the front panel of the power supply The USB port offers PC connectivity for programming and running ramp/soak cycles with 20 programmable sets of Voltage/Current and varying test durations (up to 999 cycles) The DC ramp and waveform generator can either be panel set or set by the supplied software which previews the final waveform. Applications and industries where the DCP42 can be employed include laboratory, telecommunications, production testing, field testing, DC network powering, and more Three (3) user programmable Voltage/Current settings offer quick recall of frequently used test settings. This device is shipped fully tested and calibrated and, with proper use, will provide years of reliable service. Please visit our website (www.extech.com) to check for the latest version of this User Guide, Product Updates, and Customer Support. ... -
Page 5: Safety
2. Safety This manual contains important safety and operation instructions for correct use of the power supply. Read through the manual and pay special attention to the markings and labels of this unit and equipment to be connected. Pay special attention to these two types of notices used in this manual: WARNING : Failure to observe this warning may cause injury to persons and damage to power supply or connected equipment. CAUTION : Failure to observe this warning may result in damage to equipment and improper functioning of the power supply. WARNING Do not use this power supply near water Do not operate or touch this power supply with wet hands Do not open the casing of the power supply when it is connected to ac mains Refer all servicing to qualified service personnel only Before replacing the AC fuse, determine the cause and clear up the cause first Replace the AC fuse with the same type and rating as the original fuse The maximum output voltage of the DCP42 exceeds 60VDC, avoid touching the metal contact parts at the output terminals CAUTION Use a grounded 3 pin AC source This unit is intended for indoor use only Do not operate or place this unit in a humid, dusty location Do not operate this unit in direct sunlight or near any heat source Before plugging into local AC mains, check the rating label at the back of the unit Do not block any ventilation openings of the unit This unit must be used within the specified rating; regular excessive continuous loading may ... -
Page 6: Power Supply Description
3. Power Supply Description (1) LED panel meter display with CC/CV/W Indictor (2) Remote Control Indicator (Remote Control/ USB mode) (3) Output Voltage Control Knob (4) Output Current Control Knob (5) Power ON/OFF Switch (6) 6 button Keypad (with illumination): ‐ Preset Keyd 1, 2 & 3 ‐ Menu Key (Shift Key) ‐ Lock/ Unlock Key (A/W meter Key) ‐ Output ON/OFF (ΔV/Δt Key) (7) Output Safety Jacks (Rated 10A) (8) USB Remote Control port (For access to computer to run cyclical operation with programmable voltage, current, period time and cycle) (9) Remote Sensing Terminal Warning! Shorting the remote sensing terminal or connecting the sensing terminal with the polarity reversed will damage the power supply (10) Remote Control Terminal (11) AC Inlet socket (with fuse holder) DCP42‐en‐GB_V1.5 12/14 ... -
Page 7: Control Modes
4. Control Modes There are four control modes for the power supply: NORMAL, PRESET, SET, and REMOTE CONTROL modes. The power supply is factory preset to Normal Mode with maximum current level CC. 4.1 Normal Mode This is the factory default mode; the power supply output Voltage and Current are controlled by the dual action gain knobs. Push the knobs to toggle the coarse and fine tuning, notice the subtle changes in brightness of the related LED. Adjust the knobs to the desired values using coarse and then fine tuning. To check the preset current level, turn the Current Knob lightly in any direction. The display will resume its normal brightness after a few seconds to re‐affirm the adjustment. 4.2 Preset Mode There are three preset outputs P1/ P2/ P3 available. Press the Preset button (1, 2, or 3) to enter the preset mode (the button’s light will switch ON). The preset values are factory set as shown in the table below and are retained even after the unit has been powered down. The user can change these output settings using the voltage and current knobs. Recall No. Output Voltage Output Current P1 5V Maximum P2 13.8V Maximum P3 40V Maximum 4.3 Set Mode Enter the Set Mode by pushing and holding the MENU button for 3 seconds. In the Set Mode the user can adjust the ΔV/Δt value, access the remote Control mode, or perform a Factory Reset recall function. Note: If no selection is made after 10 seconds the power supply defaults to its prior settings. ... -
Page 8: Activating The Remote Control Mode
4.3.2 Activating the Remote Control Mode a. Press and hold the MENU button for 3 seconds. b. Turn the Voltage control knob until the panel meter displays “rC Set” as shown below and then press the Voltage control knob to confirm entry into the remote control mode. c. Turn the Current control knob to select remote YES or NO. d. Press the Voltage control knob to confirm and to return to the Set menu. e. Press the Menu button to exit the Set menu. f. Details of the remote control mode are located in the dedicate Remote Control section later in this guide. Note: After activating the Remote Control Mode, all function keys located on the front panel will be locked (the Lock/Unlock button light switches ON). 4.3.3 Deactivating the Remote Control Mode a. Press the Lock/Unlock button to unlock all of the function keys b. Repeat steps a to c in the ‘Activating the Remote Control Mode’ section above and set Remote Control to NO and then press the voltage control knob. 4.3.4 Factory Default Reset a. Press and hold the MENU button for 3 seconds. b. Turn the Voltage control knob until the panel meter displays “FACS SEt” as shown below and then press the Voltage control knob to confirm entry into the Factory Reset mode. c. Turn the Current control knob to select Yes or No. d. Press the Voltage control knob to confirm and to return to the Set menu. e. Press the Menu button to exit the Set menu. f. The Power Supply will reboot and revert to its Factory Default settings. DCP42‐en‐GB_V1.5 12/14 ... -
Page 9: Operation
5. Operation Note: The DCP42 Total Output Voltage Range is 42VDC and the Total Rated Current is 0 to 10ADC 5.1 Powering the Supply Check the rating label of the power supply and ensure that it complies with the AC mains voltage that is to be used. Connect the power supply to the AC Mains using the provided power cord. 5.2 Switching the Power Supply ON and Self‐Test Information The power supply will perform a series of self‐tests when it is switched ON. The LED and other indicators on the front panel will illuminate in sequence. When the cooling fan is being checked, a high speed wind sound can be heard. After the self‐tests, the CV, V and A LED indicators are lit and the unit displays voltage and 0.0 current. To find the CC current level, turn the current control knob one click in either direction. The current display returns to 0.0 after a few seconds. 5.3 Using the Control knobs The rotary encoder control knobs have fine and coarse tuning with ‘clicking’ movement. Push the knobs to toggle between coarse and fine tuning, notice the subtle changes in brightness of the related LED. Adjust the knobs to the desired values by using coarse and then fine tuning. The display will resume its normal brightness after few seconds to confirm an adjustment. 5.4 Connecting the Power Supply and running a Test Connect the equipment under test to the power supply. Red (+) is connected to the positive polarity input of the equipment and Black (‐) is connected to the negative polarity input of the equipment. Switch ON the power supply first; the panel meter & green CV Indicator should illuminate. Next, switch ON the equipment under test; the panel meter & green CV Indicator should remain lit in green. Testing can now begin. When finished, switch OFF the equipment under test first and then switch off the power supply. 5.5 Keypad Lockout function Press LOCK/UNLOCK to lock or unlock all of the function buttons and control knobs on the front panel. The LOCK/UNLOCK button light switches ON when the push‐buttons are locked. 5.6 Manual Output ON/OFF Press OUTPUT ON/OFF button to manually set the output ON or OFF. The OUTPUT ON/OFF button light switches ON when the output is ON. 5.7 Ammeter/Wattmeter Selection With the output ON and all presets OFF, press SHIFT and then press PRESET. Press the SHIFT button again and then press the LOCK/UNLOCK button to change from Ammeter mode to Wattmeter mode. To change back to Ammeter mode from Wattmeter mode, press the SHIFT button and then ... -
Page 10: Supplemental Functions
6. Supplemental Functions 6.1 ΔV/Δt Function There are 3 DC voltage generator settings (A, B, and C). Preset 1 = A Preset 2 = B Preset 3 = C ΔV a‐b (from voltage level A to voltage level B). Δt a‐b (time in seconds from voltage level A to level B, this transit time is adjustable from 0 to 20 seconds) 6.1.2 Setting the DC generator voltage level There are 3 generator voltage levels presets (A, B, and C). Press the Preset button 1, 2 and 3 and adjust the voltage to the desired value. 6.1.2 Setting the Δt There are 6 sets of Δt available , turning the Voltage control knob cycles through the following sequence: AB →BA →AC →CA →BC →CB Using the AB setting as an example, turn the Voltage control knob until A‐b appears on the voltmeter display and then turn the Current control knob to set to desired transit time Δt (5 seconds for example). 6.1.3 Generating Ramp‐Up or Ramp‐Down DC output cycles Ramp up generator example: Set A = 5V; B = 10V; Δt a‐b = 5 seconds Connect a suitable load to the output and turn ON the output by pressing the “OUTPUT ON/OFF” button; note the output LED indicator. Push “Preset 1” and note the output voltage of 5V. Press “Preset 2” and note that the output voltage rises to 10V in 5 seconds showing a ramp up voltage (the output will remain at 10V). Pressing “Preset 1” will now generate a ramp down voltage from 10V to 5V in 5 seconds and will remain at the 5V level. Note: The final output voltage level will be the last voltage level generated. DCP42‐en‐GB_V1.5 12/14 ... -
Page 11: Function A/B/C Waveform Generator
6.2 Function A/B/C Waveform Generator Preset 1 = A Preset 2 = B Preset 3 = C FUNC (A/B/C) sets the duration (from 0 to 600 seconds) that the voltage generator remains ON at the specified output voltage level before moving to another voltage level. 6.2.1 Set FUNC (A/B/C): 1. Enter the ΔV/Δt setting first (Refer to the Set Mode section 4.3.) 2. Turn the Voltage control knob to select the desired function and then turn the Current control knob to set the time period (0 to 600 seconds) for the chosen voltage level. 3. Pressing the Current control knob toggles coarse and fine tuning of the time period. 4. To generate waveforms, the Func A/B/C button is used in conjunction with ΔV/Δt button (the time period from one voltage level to another voltage level) 5. Using the above functions simultaneously, 3 reversible pairs (AB & BA, BC & CB, AC & CA) can be used to generate waveforms. Example 1: Pulse waveform with 3sec at 10V and 1sec at 5V. Set A (Preset 1) = 5V, set B (Preset 2) = 10V Set Func A = 1 second by turning the Current control knob Func B = 3 seconds using the same procedure as above Set Δt a‐b = 0 , Set Δt b‐a = 0 6.2.2 Generating Wave Form To generate the waveform push SHIFT and then press the ΔV/Δt button The waveform will repeat cyclically until the SHIFT button and then the ΔV/Δt button is pressed. Example 2: Triangle waveform Set A = 5V, B = 10 V Set Δt a‐b = 3 seconds, Set Δt b‐a = 3 seconds Set Func. A = 3 seconds, Set Func. B = 3 seconds Note: The waveform generator can be operated via the remote programming software (with waveform preview and graphical datalogging output presentation features). Details are provided in the section 4 titled ‘PC Software Program’. Please verify that the Preset keys are both lit and that one is flashing. The flashing light will jump ... -
Page 12: Upper Voltage And Current Limits
6.3 Upper Voltage and Current Limits When the voltage or current at the output terminal exceeds the maximum allowable limits, the output will automatically switch OFF. This additional protection feature is necessary for a power supply with such a wide range of voltage and current capabilities. To set the UVL: 1. To set the UVL: Press the SHIFT button and then press the Voltage control knob. The voltmeter will show the current limit setting and the Ammeter will show Suul. 2. Turn the Voltage control knob to the desired limit value. Press SHIFT to confirm and to return to normal operation. 3. To set the UCL, press SHIFT and then press the Current control knob. The Ammeter will show the current limit setting and the Voltmeter will show SUCL. 4. Turn the Current control knob to the desired limit value. Press SHIFT to confirm and to return to normal operation. Note: The UVL and UCL settings default to the maximum output value. 6.4 Remote Sensing Note: Observe warnings displayed by the Power Supply, an incorrect disconnection sequence will damage the Power Supply Warnings: Never short the Remote Sensing Terminal and always disconnect the Remote Sensing Terminal first. 6.4.1 Connection 1. First complete the power connections between power supply and equipment. 2. Check and ensure that the power connections are secure. 3. Make connections between Remote Sensing and equipment. Warning!: Never short the Remote Sensing Terminal and never connect the Remote Sensing Terminal in reverse polarity The diagram below shows the connections for Remote Sensing, Power output, and Equipment. The remote sensing wire should be AT LEAST 22AWG wire size. 6.4.2 Disconnection Warning! Incorrect disconnect sequences will damage the power supply 1. First disconnect the remote sensing connections. 2. Then disconnect the power connections between the power supply and equipment. DCP42‐en‐GB_V1.5 12/14 ... -
Page 13: Remote Control Operation
6.5 Remote Control Operation There are two methods for remotely controlling current and voltage adjustments. Current must be controlled for both methods otherwise the unit will default to CC mode. 6.5.1 REMOTE CONTROL – METHOD 1: Using two external DC voltage sources Remote Socket Pin Assignment for external variable voltage source PIN FUNCTIONS REMARKS 1 Internal DC +5V Lower than 50mA 2 Voltage adjust 0 to 5V 3 Current adjust 0 to 5V 4 Ground 5 Output OFF Short to ground 6 N.A. 7 N.A. 8 N.A. Check the output voltage range of the power supply by varying the external voltage source. Short circuit the main output with 14AWG wire to check the CC setting on the display while varying the external voltage source. 6.5.2 REMOTE CONTROL – METHOD 2: Using two 0 to 5K Ohm variable resistors ... -
Page 14: Remote Control Output On/Off
6.5.3 Remote Control Output ON/OFF Remote output ON/OFF control can be activated in any of the modes Normal, Preset, Set, and Remote. Review the conditions below: By default, Pin 5 is open and the output is ON. Shorting Pin 5 to Pin 4 (ground) switches the output OFF. When the output is OFF, the C.V. & C.C. LEDs will flash. The present output voltage and current setting will be shown on the panel meter. The user can adjust the output using the voltage & current control knob to the desired value when the output is OFF. Remark: Use only the 8‐pin remote plug provided and connect with 22AWG wires. See diagram below. Note: Pin numbers are marked on the black area of the socket 7. PC Software Program This meter has the capability to connect to and communicate with a PC. To install and use the software, please refer to the instructions provided on the supplied CD‐ROM and/or the instructions provided in the HELP Utility within the software program. Check the software download page of the website www.extech.com for the latest version of the PC software and its operating system compatibility. 8. Automatic Output Step Programs To use the Automatic Output Step utility the user must first become familiar with the PC ... -
Page 15: External Timed Program Window
8.1 External Timed Program Window Clear Table: Delete all data in the Display Table and prepare for new data entry. Run (Stop): To run and stop the Timed Program. Running Cycle: Enter the number of desired running cycles here. The numerical range for cycling is 0‐999. Note that the maximum cycles can be set to ‘infinite’ when “0”cycles is entered. The External Timed Program allows the user to set the output either ON or OFF by selecting the boxes in the last column. 8.2 Output ON/OFF function Output ON Ticked: Output is ON for that step Output ON Un‐ticked: Output is OFF for that step. 8.3 Automatic Timed Output Operation 1. Clear old data in the table by clicking [Clear Table]. 2. Enter data in the table using 'Up‐Down‐Left‐Right' keys on PC keyboard for new locations. 3. Data that exceed the rated voltage and current will not be accepted. 4. Voltages that exceed the UVL (Upper Voltage Limit) will not be accepted. 5. If retrieved or entered, data that exceed the preset Upper or Lower Limit setting for voltage / current / time periods will switch to red in color and will not be accepted. 6. When the running time period of any step is set to zero minutes and zero seconds, this step becomes the terminating step and the cycle will end at this step. In the above example there are 4 steps each with a 2 second time period, if step 3 is set to zero minutes & seconds, the program will only cycle step 1 and 2 and will not go to step 4. 7. Enter the number of desired running cycles. 8. Click [Run] to run the External Time Program. The External Timed Program feature allows the user to set the output either ON or OFF by selecting the boxes in the last column. DCP42‐en‐GB_V1.5 12/14 ... -
Page 16: Appendix - Additional Operational Examples
9. Appendix – Additional Operational Examples Examples of Func A/B/C and Wave Form Generator Features These examples are continued from Examples 1 and 2 in Section 6.2 earlier in this guide. Example 3 ‐ Irregular waveform Set A= 5V, B= 10 V Set Δt a‐b = 1 second, Set Δt b‐a = 2 seconds Set Func. A = 3 seconds, Set Func.B = 3 seconds Example 4 ‐ Irregular waveform Set A= 5V, B= 10 V Set Δt a‐b = 2 second, Set Δt b‐a = 2 seconds Set Func. A = 2 seconds, Set Func.B = 6 seconds Example 5 ‐ Irregular waveform Set A= 5V, B= 10 V Set Δt a‐b = 2 second, Set Δt b‐a = 0 seconds Set Func. A = 4 seconds, Set Func.B = 3 seconds Example 6 ‐ Irregular waveform Set A = 5V, B = 10 V Set Δt a‐b = 4 second, Set Δt b‐a = 4 seconds Set Func. A = 2 seconds, Set Func .B = 2 seconds DCP42‐en‐GB_V1.5 12/14 ... -
Page 17: Specifications
10. Specifications Output Variable Output Voltage (Limited to O/P 160W) 0 ‐ 42VDC Variable Output Current (Limited to O/P 160W) 0 ‐ 10A Nominal Output Power (42V / 3.8A) 160W Preset Outputs Preset 1 (P1) Voltage: 5V ±0.2V, Current: 10A ±0.2A Preset 2 (P2) Voltage: 13.8V ±0.2V, Current: 10A ±0.2A Preset 3 (P3) Voltage: 20V ±0.2V, Current: 4.0A ±0.2A Voltage Regulation Load (0‐100% Rated Current) ≤50mV Line (90‐264VAC Variation) ≤10mV Current Regulation Load (10‐90% Rated Voltage) ≤50mA Line (90‐264VAC Variation) ≤10mA Ripple & Noise Ripple & Noise (RMS) Voltage ≤8mVrms Ripple & Noise (peak‐peak) Voltage ≤80mVp‐p Current Ripple & Noise (peak‐peak) ≤50mA Meter Type & Accuracy Voltage Meter 4 Digit LED Display ±(0.1% +5 counts) Current Meter 4 Digit LED Display ±(0.1% +5 counts) Resolution Output Voltage Resolution 0.02V Output Current Resolution 0.01A Setting Accuracy Output Voltage ±(0.2% +0.05) Output Current ±(0.2% +0.05) Output Rise & Fall Time Output T‐ON (50% Load Current) ≤80ms Output T‐ON (100% Load Current) ≤1200ms Output T‐OFF (50% Load Current) ≤90ms Output T‐OFF (100% Load Current) ≤50ms Power Operation Input Voltage Range 90 –264VAC Operation Input Voltage Frequency Range 45‐65Hz~ No Load Input Current (230Vac / 100Vac): ≤220mA Full Load Input Current (230Vac / 100Vac): ≤1.0A / 2.3A ... - Page 18 Switching Frequency 45‐55 KHz~ Tracking Over Voltage Protections O/P 0‐10V: Set Voltage+ (1.0 ±0.3V) O/P 10‐42V: 105‐125% of set voltage Power Factor Control Power factor correction: >0.91 at optimal load Cooling Method Natural Convection Leakage Current ≤2mA Protections Adjustable upper voltage limit, Adjustable upper current limit, Short Circuit, Overload, Over Temperature , Tracking OVP Input Fuse T3.15AL250V Safety & EMC Safety Standard CE: EN 61010 Withstanding Voltage I/P‐O/P: 3.0KVac, I/P‐F/G: 1.5KVac, O/P‐F/G: 0.5KVac Insulation Resistance I/P‐O/P, I/P‐F/G, O/P‐F/G : 100Mohm @500Vdc EMC CE: EN55011 Harmonics Current Emission EN 61000‐3‐2 Voltage Fluctuations & Flicker EN 61000‐3‐3 EMC Immunity EN 61000‐6‐1 Environmental Working Temperature 0 to +40°C (32 to +104°F) Working Humidity 10‐80% RH Non‐condensing Storage Temperature and Humidity ‐15 to +70°C (5 to 158°F) 10‐85% RH Non‐condensing Pollution Degree Class 2 General Case Material Polycarbonate Front Panel and Electro‐Galvanized Steel Enclosure Case Protection IP20 Connection Dia. 4.0mm Safety Jack x3 (Output Positive, Negative and Function Ground) Dimensions (WxHxD) 200 x 90 x 250 mm (7.9 x 3.6 x 10 inch) Weight 2.5 kg (5.5 lb) DCP42‐en‐GB_V1.5 12/14 ...
-
Page 19: Troubleshooting
11. Troubleshooting OUP: Over Voltage Protection This unit has a built‐in tracking over voltage protection feature. In the event of output voltage becoming greater than the set value (see specified range from specifications table), protection will be triggered and the output power will be cut off and OUP warning appears as below. To reset the warning, switch off the unit and remove all loading. Switch the unit back on again and it should resume normal operation. If this problem persists, please contact the customer care department or the point of purchase. OTP: Over Temperature Protection There is a thermo sensor inside the unit to monitor and prevent the unit from unduly heating internally. When an OTP error occurs, there is no output and the following warning will appear on the LED display. When this warning appears, switch off the unit and remove all loading. Check the load and output setting. Allow the unit to cool for at least 30 minutes. Check to see if any ventilation holes are blocked, also check that there is sufficient clearance around the power supply. Listen carefully for the short wind sound emanating from the cooling fan when the unit is switched ON again. If the wind sound is not detected, the fan may be faulty; do not use the power supply in this case, contact the customer care department or the agent from the point of purchase. OCP: Over Current Protection Normally the overload protection is sustained by the CC constant current mode. When the CC mode fails and goes undetected, serious damage to the test piece or load may occur. The OCP is used to minimize the extent of damage to the loads in the event of power supply failure. Switch off the power supply as soon as this warning is seen (as shown below). To reset this warning, remove all loading and press the OUTPUT ON/OFF button. Switch the unit back on again and double check with caution. If this problem persists, please contact the customer care department or consult with the agent at the point of purchase. Copyright © 2014 FLIR Systems, Inc. All rights reserved including the right of reproduction in whole or in part in any form www.extech.com DCP42‐en‐GB_V1.5 12/14 ...
Need help?
Do you have a question about the DPC42 and is the answer not in the manual?
Questions and answers