Advertisement
Quick Links
Instruction Manual
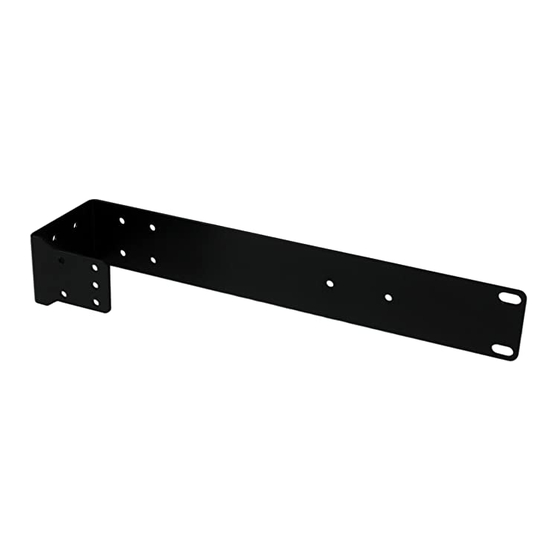
1U Rack Mount Brackets for the SV841DUSBI KVM Switch
841RACKBRKT
DE: Bedienungsanleitung - de.startech.com
FR: Guide de l'utilisateur - fr.startech.com
ES: Guía del usuario - es.startech.com
IT: Guida per l'uso - it.startech.com
NL: Gebruiksaanwijzing - nl.startech.com
PT: Guia do usuário - pt.startech.com
Packaging Contents
• 1 x Long Bracket
• 2 x Short Brackets
• 6 x M5 Rack Screws
• 8 x M4x8 Screws
• 6 x M4x8 Thumb Screws
• 1 x Instruction Manual
Installation
Single Unit Installation
1. Attach a Short Bracket to one side of the switch and the Long
Bracket to the opposite side as shown, using the included M4
Screws.
Note: The short bracket can be installed on either side to suit your
preference.
For the most up-to-date information, please visit: www.startech.com
2. Attach the assembly to your rack using the M5 Rack Screws.
Two-Across Installation
1. Attach a Short Bracket to the far side of each switch and the
Long Bracket in between as shown, using the included M4
Thumb Screws and Regular Screws.
2. Attach the assembly to your rack using the M5 Rack Screws.
*actual product may vary from photos
Manual Revision: 01/08/2015
Advertisement

Related Manuals for StarTech.com 841RACKBRKT


Summary of Contents for StarTech.com 841RACKBRKT
- Page 1 Bracket to the opposite side as shown, using the included M4 Screws. Note: The short bracket can be installed on either side to suit your 2. Attach the assembly to your rack using the M5 Rack Screws. preference. For the most up-to-date information, please visit: www.startech.com Manual Revision: 01/08/2015...
- Page 2 This manual may make reference to trademarks, registered trademarks, and other protected names and/or symbols of third-party companies not related in any way to StarTech.com. Where they occur these references are for illustrative purposes only and do not represent an endorsement of a product or service by StarTech.com, or an endorsement of the product(s) to which this manual applies by the third-party company in question.
Need help?
Do you have a question about the 841RACKBRKT and is the answer not in the manual?
Questions and answers