Advertisement
Instruction Manual
Hinged Vented Server Rack Blanking Panel
RKPNLHV2U
RKPNLHV4U
RKPNLHV6U
DE: Bedienungsanleitung - de.startech.com
FR: Guide de l'utilisateur - fr.startech.com
ES: Guía del usuario - es.startech.com
IT: Guida per l'uso - it.startech.com
NL: Gebruiksaanwijzing - nl.startech.com
PT: Guia do usuário - pt.startech.com
Packaging Contents
RKPNLHV2U
• 1 x 2U Hinged Vented Rack Blanking Panel
• 2 x 5/8" #10-32 UNF Screws
• 2 x #10-32 UNF Cage Nuts
RKPNLHV4U
• 1 x 4U Hinged Vented Rack Blanking Panel
• 2 x 5/8" #10-32 UNF Screws
• 2 x #10-32 UNF Cage Nuts
RKPNLHV6U
• 1 x 6U Hinged Vented Rack Blanking Panel
• 4 x 5/8" #10-32 UNF Screws
• 4 x #10-32 UNF cage nuts
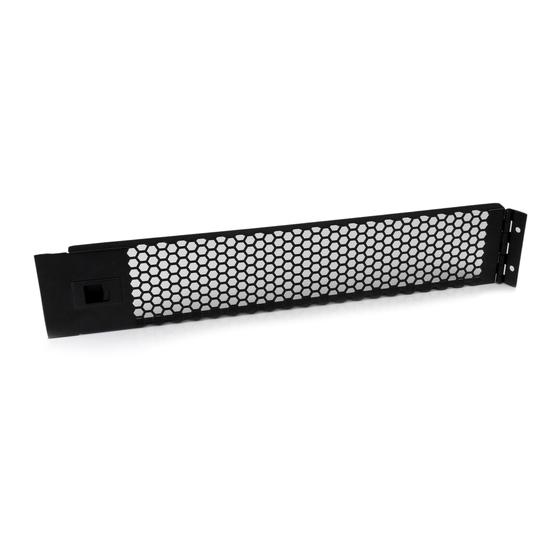
Product Overview
RKPNLHVxU
Latch
For the most up-to-date information, please visit: www.startech.com
Installation
1. Determine the 2U, 4U, or 6U space in your rack where the
Blanking Panel will be mounted and on which side that you would
like the hinge to be on.
2. Insert the provided #10-32 UNF Cage Nuts into either the left or
the right post of your rack.
3. Align the Blanking Panel with the installed cage nuts and secure
into place using the provided 5/8" #10-32 UNF Screws.
4. To open the panel, slide the latch inward and pull the panel
toward you.
Mounting Points
Specifications
RKPNLHV2U
Hinge
*actual product may vary from photos
U Height
Frame Type
Mounting Options
External Dimensions
(WxDxH)
Product Weight
2U
Steel
Front Mount
18.98 x 0.59 x 3.47 in
(482 x 15 x 88.1 mm)
0.75 lb (340 g)
Manual Revision: 06/12/2015
Advertisement
Table of Contents

Subscribe to Our Youtube Channel
Related Manuals for StarTech.com RKPNLHV2U


Summary of Contents for StarTech.com RKPNLHV2U
- Page 1 Front Mount External Dimensions 18.98 x 0.59 x 3.47 in (WxDxH) (482 x 15 x 88.1 mm) Product Weight 0.75 lb (340 g) *actual product may vary from photos For the most up-to-date information, please visit: www.startech.com Manual Revision: 06/12/2015...
- Page 2 This manual may make reference to trademarks, registered trademarks, and other protected names and/or symbols of third-party companies not related in any way to StarTech.com. Where they occur these references are for illustrative purposes only and do not represent an endorsement of a product or service by StarTech.com, or an endorsement of the product(s) to which this manual applies by the third-party company in question.
Need help?
Do you have a question about the RKPNLHV2U and is the answer not in the manual?
Questions and answers