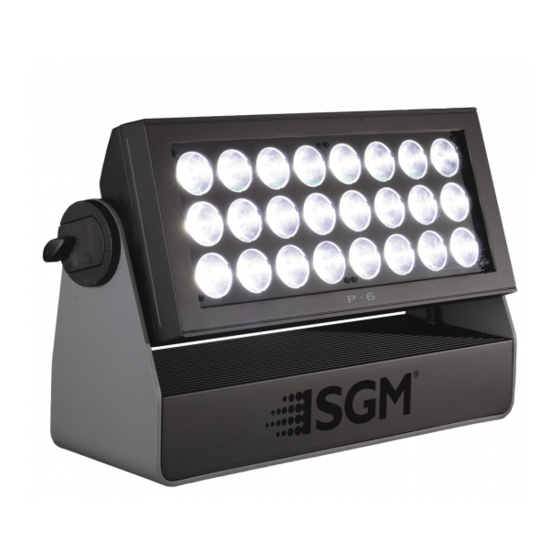
SGM P-6 User Manual
Hide thumbs
Also See for P-6:
- User manual (39 pages) ,
- Maintenance manual (3 pages) ,
- User manual (24 pages)
Summary of Contents for SGM P-6
- Page 1 USER MANUAL Distributor: Phone: 407-857-8770 Fax: 407-857-8771 Email: sales@techni-lux.com www.techni-lux.com...
- Page 2 The SGM logo, the SGM name, and all other trademarks in this document pertaining to SGM services or SGM products owned or licensed by SGM, its affiliates and subsidiaries.
-
Page 3: Table Of Contents
Contents Safety information ........................4 Overview ..........................5 Preparing for installation ......................6 Installing / rigging the P-6 ......................6 Tilt Lock ..........................7 Connecting AC power ........................7 Configuring the device .......................8 Connecting to a DMX control device ....................8 Configuring the device for DMX control ..................9 Using standalone operation ......................10... -
Page 4: Safety Information
Read the safety precautions in this section before installing, powering, or operating this product. SGM luminaries are intended for professional use only. They are not suitable for household use. Les luminaires SGM sont impropre à l’usage domestique. Uniquement à usage professionnel. -
Page 5: Overview
Overview The P-6 is an RGBW LED luminaire with high output, designed for multiple applications, including applications where wireless oper- ation is essential. P-6 features: • Powerful all-in-one 475 W light fixture with 6 individually controllable segments, weighing around 12 kg. -
Page 6: Preparing For Installation
Never carry the fixture by connected cables or wires; use the handle. Installing / rigging the P-6 The P-6 may be installed in any orientation and it might take up to 3 omega brackets per Omega bracket fixture. Always use omega brackets to rig the fixture and lock the bracket with the 1/4-turn fasteners. -
Page 7: Tilt Lock
Do not connect the fixture to an electrical dimmer system, as doing so may cause damage. After connecting the P-6 to power, run the on-board test by selecting TEST → AUTOMATED TEST in the menu to ensure that the fixture and each LED are functioning correctly. Please see “Control Menu” on page 13. -
Page 8: Configuring The Device
Configuring the device The P-6 can be set up by using the control panel and OLED multi-line display at the top of the fixture’s head or through RDM. The OLED display is the human interface of the fixture, as it displays the current status and menu of the fixture. The display panel can be used to configure individual fixture settings, check the fixture’s wireless status, confirm the firmware version, and read error... -
Page 9: Configuring The Device For Dmx Control
To disconnect the fixture from the currently paired wireless transmitter, go to SETTINGS → WIRELESS DMX → LOG OFF. Signal priority The P-6 can be paired to an active wireless transmitter as soon as it is connected to a cabled DMX. The fixture will prioritize cabled DMX over wireless DMX. -
Page 10: Using Standalone Operation
For independent control, each P-6 must have a DMX start address set. For example, if the first P-6 is set to 6ch CTC DMX mode with a start DMX address of 113, the following P-6 in the DMX chain should be set to a DMX address of 119. As the first fixture uses the prior 6 DMX channels, including channel 113, the next available channel is 119 (113+6=119 >>... -
Page 11: Setting A Static Color Manually
RDM device label set to = Fixture type name • Internal program reset Effects The P-6 is a luminaire with 24 high-power RGBW 24W LEDs, divided in 6 individually controllable segments, which generates wide-ranging color effects and pixel-mapping combinations for creative lighting designs. Pixel 2 Pixel 1... -
Page 12: Control Menu
Info Product Type Displays product type Firmware Version Displays installed firmware version Serial Number Displays SGM serial# RDM ID Displays RDM ID. (Unique RDM ID for identification ) DMX View Up to 504 DMX addresses Displays received DMX levels Temperatures... -
Page 13: Rdm
Supported RDM functions The P-6 features support for various RDM functions. RDM (Remote Device Management) is a protocol enhancement to USITT DMX512 that allows bi-directional communication between the fixtures and the controller over a standard DMX line. This protocol will allow configuration, status monitoring, and management. -
Page 14: Accessories
To get to know all the available P-6 accessories, visit www.sgmlight.com or contact your local SGM dealer. Barndoors The P-6 features 4-way and 8-way barndoors. The barndoors are designed and intended to be mounted on the fixture without the use of any tools. -
Page 15: Maintenance
To maintain adequate cooling, fans must be cleaned periodically. Whenever necessary, clean the P-6 using a soft cloth dampened with a solution of water and a mild detergent. Do not use products that contain solvents, abrasives, or caustic agents for cleaning, as they can cause damage to both hardware, cables, and connectors. -
Page 16: Fixtures And Accessories
Fixtures and accessories The P-6 can be used with a variety of accessories. Contact your local SGM dealer to get the latest pricing and news about available accessories. Please note: the listed below are subject to change without notice. Ordering information P-6, Std, BL.................................. -
Page 17: User Notes
User Notes ________________________________________________________________________________________________________ ________________________________________________________________________________________________________ ________________________________________________________________________________________________________ ________________________________________________________________________________________________________ ________________________________________________________________________________________________________ ________________________________________________________________________________________________________ ________________________________________________________________________________________________________ ________________________________________________________________________________________________________ ________________________________________________________________________________________________________ ________________________________________________________________________________________________________ ________________________________________________________________________________________________________ ________________________________________________________________________________________________________ ________________________________________________________________________________________________________ ________________________________________________________________________________________________________ ________________________________________________________________________________________________________ ________________________________________________________________________________________________________ ________________________________________________________________________________________________________ ________________________________________________________________________________________________________ ________________________________________________________________________________________________________ ________________________________________________________________________________________________________ ________________________________________________________________________________________________________ ________________________________________________________________________________________________________ ________________________________________________________________________________________________________ ________________________________________________________________________________________________________ ________________________________________________________________________________________________________ ________________________________________________________________________________________________________ ________________________________________________________________________________________________________ ________________________________________________________________________________________________________ ________________________________________________________________________________________________________ ________________________________________________________________________________________________________ ________________________________________________________________________________________________________ ________________________________________________________________________________________________________ ________________________________________________________________________________________________________ ________________________________________________________________________________________________________ ________________________________________________________________________________________________________ ________________________________________________________________________________________________________ ________________________________________________________________________________________________________ ________________________________________________________________________________________________________ ________________________________________________________________________________________________________ ________________________________________________________________________________________________________ ________________________________________________________________________________________________________... - Page 18 SGM Light A/S Sommervej 23 8210 Aarhus V Tel: +45 70 20 74 00 info@sgmlight.com www.sgmlight.com...


Need help?
Do you have a question about the P-6 and is the answer not in the manual?
Questions and answers