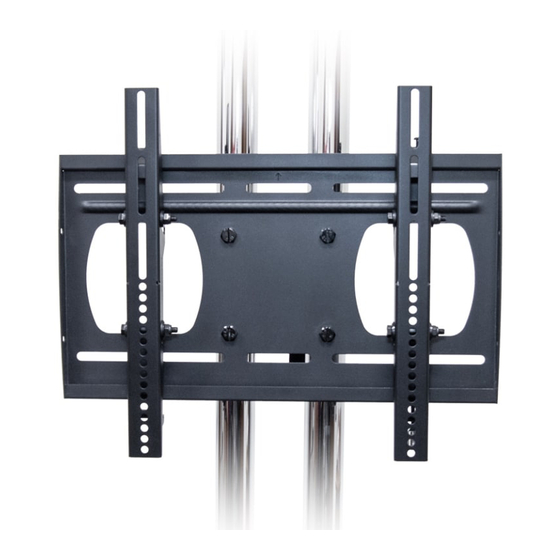
Summary of Contents for Premier Mounts PTDM2
- Page 1 PTDM2 Installation Guide www.mounts.com | North America 800.368.9700 | International +1-714-632-7100 1321 S. State College Blvd., Fullerton, CA 92831 USA...
-
Page 2: Included Components
PTDM2 Maximum Flat Panel Weight: 100 lb. / 45.35 kg. Installation Guide Included components Wall Plate Mounting Bracket (Qty 1) (Qty 2) 5/16” Flat Washers Universal Spacers Lock-it Barrel Thread Depth Indicator Universal Washers (Qty 4) (Qty 8) (Qty 1) -
Page 3: Wood Stud Installation
Installation Guide Installation Guide Introduction Directional Mounting Arrow The Directional Mounting Arrow stamped into the top of the PTDM2 wall mount indicates which edge is the top. Mounting Safety Two people are recommended for the installation of this mount. Wood Stud Installation... - Page 4 PTDM2 Installation Guide 1) Place the wall plate against the wall in the desired viewing location. 2) Adjust the wall plate to align the mount slots in the wall plate with the center of the wall studs. 3) Level the wall plate.
- Page 5 PTDM2 Installation Guide 1) Place the wall plate against the wall and align it with the pilot hole. 2) Insert one (1) 5/16” x 3” lag bolt and one (1) 5/16” washer into the upper right mounting hole and tighten using a socket wrench and 1/2”...
- Page 6 PTDM2 Installation Guide Drill a “pilot hole” in the center of each of the marks with a power drill and a 1/4” drill bit. Only use 1/4” drill bit when drilling the pilot holes. 1) Insert one (1) 5/16” x 3” lag bolt and one (1) 5/16”...
-
Page 7: Concrete Wall Installation
PTDM2 Installation Guide Concrete Wall Installation Two people are recommended for this step; one person to level the wall plate and another person mark the mounting locations. Drill 4 pilot holes of each mark using a drill and 3/8” masonry drill bit. Drill 3 inches deep. - Page 8 PTDM2 Installation Guide 1) Insert the Finned anchors into each hole. 2) Lightly tap each Finned anchors into place with a hammer. Finned Anchor 1) Insert one (1) 5/16” x 3” lag bolt and one (1) 5/16” washer into each pilot holes.
-
Page 9: Selecting The Mounting Hardware
PTDM2 Installation Guide Selecting the Mounting Hardware 1) Insert a small straw or toothpick into the threaded inserts found on the back of the flat-panel. 2) Use a pencil to mark the depth of the threaded insert on the small straw or toothpick. -
Page 10: Universal Washer Installation
PTDM2 Installation Guide Universal Washer Installation Premier Mounts’ Universal Washers are designed to accommodate the various M4, M5, M6 and M8 hole M5, M6 sizes required by flat panels. Do not place excessive pressure on the back of the flat panel, as this may damage your flat panel. -
Page 11: Attaching The Mounting Bracket To The Flat Panel
PTDM2 Installation Guide Lock-it™ Security Barrel Installation (Optional) Optional security configurations include: - PCB-CSL1 (sold separately) - Padlock (Combination or Keyed; commercially Mounting Tab available) 1) Remove the locking screw from the mounting bracket. 2) Place the locking screw into and through the security barrel (see illustration below). -
Page 12: Attaching The Flat Panel To The Wall Plate
PTDM2 Installation Guide Attaching the Flat Panel to the Wall Plate This section requires two people. Do not release your flat panel until you are certain that top and bottom hooks of both mounting brackets are securely seated on the upper and lower mounting rails of the wall panel. - Page 13 PTDM2 Installation Guide Ultilizing the Security Barrel Your PTDM2 Mount includes one (1) Security Barrel which can provide additional theft deterrence for your flat panel. PCB-CSL1 Security Cable 1) Thread the cable through the hole on the security barrel. 2) Attach the PCB-CSL1 locking mechanism and secure it using the supplied key.
- Page 14 PTDM2 Installation Guide Optional Floor Stands TL BASE TS BASE BW BASE PSD-DPAB Optional Pole Adapters PSD-HDCA (Single Display Adatpter) PSD-SPA (Single Display Adatpter) EB BASE C EB BASE Optional Poles T40 (40” Tubes) PSD-DPB (Double Display Back to T60 (60” Tubes) Back Adatpter) T72 (72”...
- Page 15 PTDM2 Installation Guide Optional NTP Pipes See next page for ceiling mount options. NTP pipe size options: PWH-10B (10 inch black) PWH-10W (10 inch white) PWH-12B (12 inch black) PWH-12W (12 inch white) PWH-18B (18 inch black) PWH-18W (18 inch white)
- Page 16 PTDM2 Installation Guide Optional Ceiling Mounts I-Beam PP-ITC48C (4 inch-8 inch I-Beam) PP-ITC1016C (10 inch-16 inch I-Beam) Vaulted Unistrut PP-UA (1.5 inch coupler fitting) PP-TL PP-UA2 (2 inch coupler fitting) Solid PP-5 (1.5 inch coupler fitting) PP-5A (1.5 inch coupler with cable access holes)
- Page 17 What Premier Mounts Will Do At the sole option of Premier Mounts, Premier Mounts will repair or replace any product or product part that is defective. If Premier Mounts chooses to replace a defective product or part, a replacement product or part will be shipped to you at no charge, but you must pay any related labor costs.


Need help?
Do you have a question about the PTDM2 and is the answer not in the manual?
Questions and answers