Table of Contents
Advertisement
Quick Links
Advertisement
Table of Contents

Related Manuals for BZB Gear BG-UPTZ-ND12X


Summary of Contents for BZB Gear BG-UPTZ-ND12X
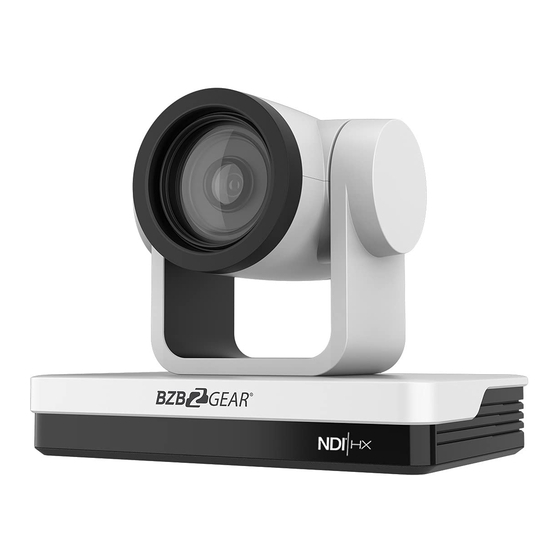
- Page 1 BG-UPTZ-ND12X BG-UPTZ-ND20X BG-UPTZ-ND30X Full HD NDI PTZ Camera User Manual...
- Page 2 Attention Improper handling may damage the product structure and result in mechanical failure. Please note the following tips: Do not move the camera by grabbing the head. Move the camera by holding the bottom with one or both hands. Please do not rotate the lens and holder manually regardless of camera being powered on or off;...
- Page 3 This manual includes details on the proper installation and operation of this PTZ camera. Please read this manual carefully before installation and use. 1. Caution 1.1 Avoid product damage caused by heavy pressure, strong vibration or immersion during transportation, storage and installation.
-
Page 4: Table Of Contents
Content 1. Camera Installation ............................2 1.1 Camera Introduction ..........................2 1.2 Interfaces and Connection ........................3 1.3 Mounting Brackets ........................... 3 2. Product Overview .............................. 7 2.1 Dimensions .............................. 7 2.2 Accessories .............................. 8 2.3 RS-232 Interface ............................8 2.5 Rotary DIP Switch ........................... -
Page 5: Camera Installation
to implement VLANs. VLANs provide the ability to divide and segment Network bandwidth to optimize streaming without sacrificing quality of the stream or possible streaming interruptions from other devices connecting to the network. If you are having issues with streaming smoothly, this may be caused by Network traffic and a lack of bandwidth on the LAN. -
Page 6: Interfaces And Connection
1.2 Interfaces and Connection Figure 1.3 Wiring Diagram After powering on and self-starting, the camera will automatically return to the preset (0) position once it’s pre-set. The default address for the IR remote control is 1#. If restored to factory defaults, note that the remote control default address will be restored to 1#. 1.3 Mounting Brackets Notes: Ceiling or wall mounting brackets should only be installed on sturdy walls rated to support mounted objects. - Page 7 1) Wall Mounting:...
- Page 9 2) Ceiling Mounting...
-
Page 10: Product Overview
2. Product Overview 2.1 Dimensions Figure 2.2 Product Dimension... -
Page 11: Accessories
2.2 Accessories Standard Accessories Optional Accessories Power adapter Ceiling Mount IR Remote Control Wall Mount RS232 Cable User Manual USB3.0 Cable 2.3 RS-232 Interface 1) RS-232 Interface Definition Connection to PC or Camera Controller Camera WindowsDB-9 1.DTR 1.DCD 2.DSR 2.RXD 3.TXD 3.TXD 4.GND... -
Page 12: Rotary Dip Switch
3) RS232 (DB9) Port Definition Definition Port Data Carrier Detect Receive Data Transmit Data Data Terminal Ready System Ground Data Set Ready Request to Send Clear to Send Ring Indicator 4) VISCA networking as shown below: Camera cascade connection Camera 1 Camera 2 1.DTR 1.DTR... -
Page 13: Main Features
2.6 Main Features The BG-UPTZ-ND Series is packed with functions, superior performance, and multiple video output interfaces. Featuring advanced ISP processing algorithms, they offer vivid and high-resolution video with a strong sense of depth and fantastic color rendition. It supports H.264/H.265 encoding which makes motion video more fluent and clearer under low bandwidth conditions. - Page 14 1920×1080P30,1280×720P30,1024×576P30,960×540P30,800×448P30,720×480P30,640×360P3 0, 640×480P30,320×176P30 Sub-Stream: YUY2/NV12: 640×360P30,640×480P30,320×176P30 MJPEG/H.264/H.265: 1920×1080P30,1280×720P30, 1024×576P30,960×540P30,800×448P30,720×480P30,640×360P30, 640×480P30,320×176P30 View Angle 72.5°(W) 55.8° (W) 65.1°(W) 6.3°(T) 3.2°(T) 2.34°(T) F1.8 – F2.4 F1.6 – F4.7 F1.5~ F3.0 Digital Zoom Minimum 0.5Lux (F1.8, AGC ON) Illumination 2D & 3D DNR White Balance Auto / Manual/ One Push/ Specify color temperature (range: 2400k-7100k) Focus/Aperture/ Auto/Manual/One Push Focus...
-
Page 15: Remote Control
Tilt Control Speed 0.1- 30°/sec Preset Speed Pan: 60°/sec, Tilt: 30°/sec Preset Number 255 presets (10 presets via remote control) Other Parameter Stored Temperature -10℃~+60℃ Storage Humidity 20%~95% Working Temperature -10℃~+50℃ Working Humidity 20%~80% Dimension 178mmX115.5mmX150.9mm Weight 1.38KG Attachment Package 12V/1.5A Power supply, RS232 control cable, IR Remote Control, User Manual Optional Accessories Ceiling / wall mount (additional cost) -
Page 16: Keys Introduction For Ir Remote Control
3.2 Keys Introduction for IR Remote Control 1). In this manual, “press the key” means a click rather than a long-press, and a special note will be given if a long- press for more than one second is required. 2). When a key-combination is required, do it in sequence. For example, 【*】+【#】+【F1】 means press “【*】” first and then press “【#】”... - Page 17 5. Set and Clear Presets Set Preset: press 【SET PRESET】 button, and then press the number key 0-9 to set preset positions. Note: 10 presets via remote control. Call Preset: Press a number key 0-9 directly to call a preset position. Clear Preset: press 【CLEAR PRESET】...
-
Page 18: Menu Introduction
9. Key Combination 1) 【#】+【#】+【#】: Clear all presets 2) 【*】+【#】+【6】: Restore factory defaults 3) 【*】+【#】+【3】: Menu set to Chinese 4) 【*】+【#】+【4】: Menu set to English 5) 【*】+【#】+【9】: Flip switch 6) 【*】+【#】+Auto: Enter aging mode 7) 【#】+【*】+Auto: Exit aging mode 8) 【*】+【#】+Manual: Restore the default username, password, and IP address 9) 【#】+【#】+【0】: Switch the video format to 1080P60... - Page 19 2). Menu Tree...
-
Page 20: Network Configuration
4. Network Configuration 4. Network Connection 4.1 Connection Mode Direct connection: Connect the camera directly to the computer by using an ethernet cable. Internet connection mode: Connect the camera and computer to a router or switch and access via the local area network (LAN). Note: Ensure power and network connections are secured to prevent video issues caused by poor connection quality. -
Page 21: Web Browser Login
For the following steps refer to the diagram below. Click on the bubble for “Use the following IP address” In the IP address field enter a non-conflicting IP address on the same subnet as the camera. If there is another device with the same IP address you will not be able to connect. -
Page 22: Streaming
4.3 Streaming 1). Video Stream Capture Configurations -> Video Configure-> Video Encode Configure the parameters according to the network environment. Note: stream name live/av0 (live/ XXX) For example: The default IP address of the camera is 192.168.5.163. The way to obtain the RTSP video stream is as below rtsp://192.168.5.163:554/live/av0(av0 main stream)... -
Page 23: Serial Port Communication And Control
Push RTMP stream to public network server, the stream camera must be on the public network, otherwise it will fail to connect to server. Host address: server address, which can be either a domain name or an IP address Host port: server default port number Stream name: live/test (live/ XXX) Username and password: the username and password set by the server, or leave it empty Access URL:rtmp://host domain name: host port/live/xxx... -
Page 24: Visca Protocol Control Command
5.2 VISCA Protocol Control Command Command Function Command packet Note AddressSet Broadcast 88 30 0p FF p:Address setting IF_Clear Broadcast 88 01 00 01 FF I/F Clear CommandCancel 8x 21 FF 8x 01 04 00 02 FF CAM_Power Power ON/OFF 8x 01 04 00 03 FF Stop 8x 01 04 07 00 FF... - Page 25 Command Function Command packet Note Manual 8x 01 04 39 03 FF Manual Control mode Shutter priority 8x 01 04 39 0A FF Shutter Priority Automatic Exposure mode Iris priority 8x 01 04 39 0B FF Iris Priority Automatic Exposure mode Bright 8x 01 04 39 0D FF Bright mode...
- Page 26 Command Function Command packet Note Corresponds to 0 to 9 on the Remote 8x 01 04 3F 01 pq FF Commander Recall 8x 01 04 3F 02 pq FF 8x 01 04 61 02 FF CAM_LR_Reverse Image Flip Horizontal ON/OFF 8x 01 04 61 03 FF 8x 01 04 66 02 FF CAM_PictureFlip...
-
Page 27: Visca Protocol Inquiry Command
5.3 VISCA Protocol Inquiry Command Command Command Packet Return Packet Note y0 50 02 FF CAM_PowerInq 8x 09 04 00 FF y0 50 03 FF Off (Standby) CAM_ZoomPosInq 8x 09 04 47 FF y0 50 0p 0q 0r 0s FF pqrs: Zoom Position y0 50 02 FF Auto Focus... - Page 28 CAM_IDInq 8x 09 04 22 FF y0 50 0p FF p: Gamma ID y0 50 02 FF IR_ReceiveInq 8x 09 06 08 FF y0 50 03 FF y0 07 7D 01 04 00 FF Power ON/OFF y0 07 7D 01 04 07 FF Zoom tele/wide y0 07 7D 01 04 38 FF AF ON/OFF...
-
Page 29: Pelco-D Protocol Command List
5.4 Pelco-D protocol command list Function Byte1 Byte2 Byte3 Byte4 Byte5 Byte6 Byte7 0xFF Address 0x00 0x08 Pan Speed Tilt Speed Down 0xFF Address 0x00 0x10 Pan Speed Tilt Speed Left 0xFF Address 0x00 0x04 Pan Speed Tilt Speed Right 0xFF Address 0x00... -
Page 30: Maintenance And Troubleshooting
6. Maintenance and Troubleshooting 6.1 Maintenance 1) Power off the camera and disconnect the power adapter if it’s not in use for long periods of time. 2) Use a soft cloth or tissue to clean the camera cover. 3) Wipe it with a soft, dry cloth when cleaning the camera lens. Wipe it gently with a mild detergent if needed. Do not use strong or corrosive detergents to avoid scratching the lens and affecting the video quality. -
Page 31: Warranty
7. Warranty BZBGEAR wants to assure you peace of mind. All BZBGEAR cameras and camera-related products include our Stress-Free Three-Year Warranty. For complete warranty information, please visit BZBGEAR.com/warranty. For questions, please call 1.888.499.9906 or email support@bzbgear.com. 8. Mission Statement BZBGEAR manifests from the competitive nature of the audiovisual industry to innovate while keeping the customer in mind.
Need help?
Do you have a question about the BG-UPTZ-ND12X and is the answer not in the manual?
Questions and answers